With Jotform Enterprise, you can create a fully branded experience by customizing your organization’s theme. From colors and logos to layouts and fonts, you can align your forms, admin dashboard, and user portals with your company’s identity. This helps you maintain a consistent look and feel across your organization while providing a professional experience for your team and users.
Accessing Organization Customization
Before you start branding your Jotform Enterprise account, you need to access the organization customization settings. This section guides you to the location where you can manage all aspects of your organization’s theme, including logos, colors, workspace layout, login screens, and error pages. Here’s the quick way to do it:
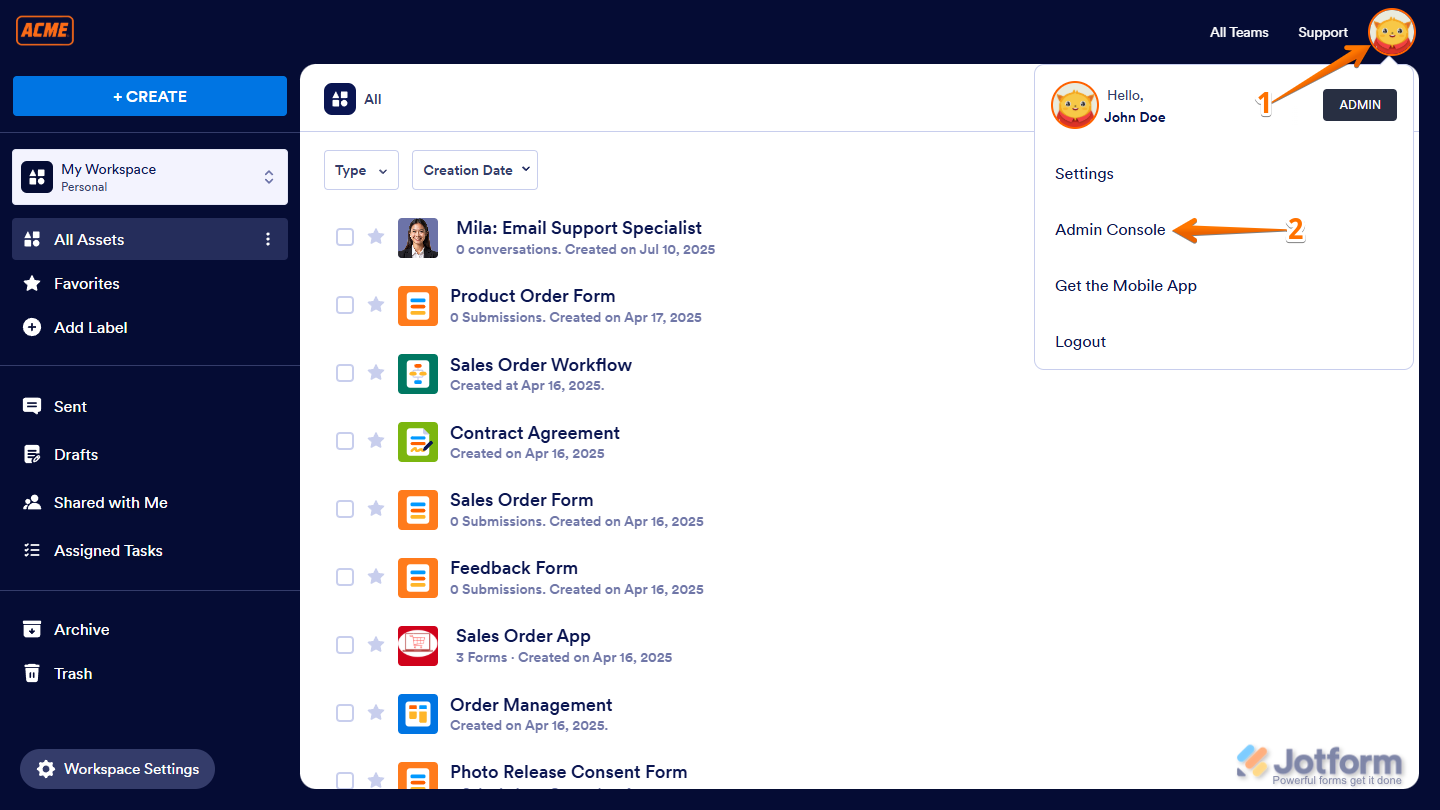
- On your Workspace page, click on your Avatar/Profile picture on the top-right side of the screen.
- Then, in the menu that comes up, click on Admin Console.
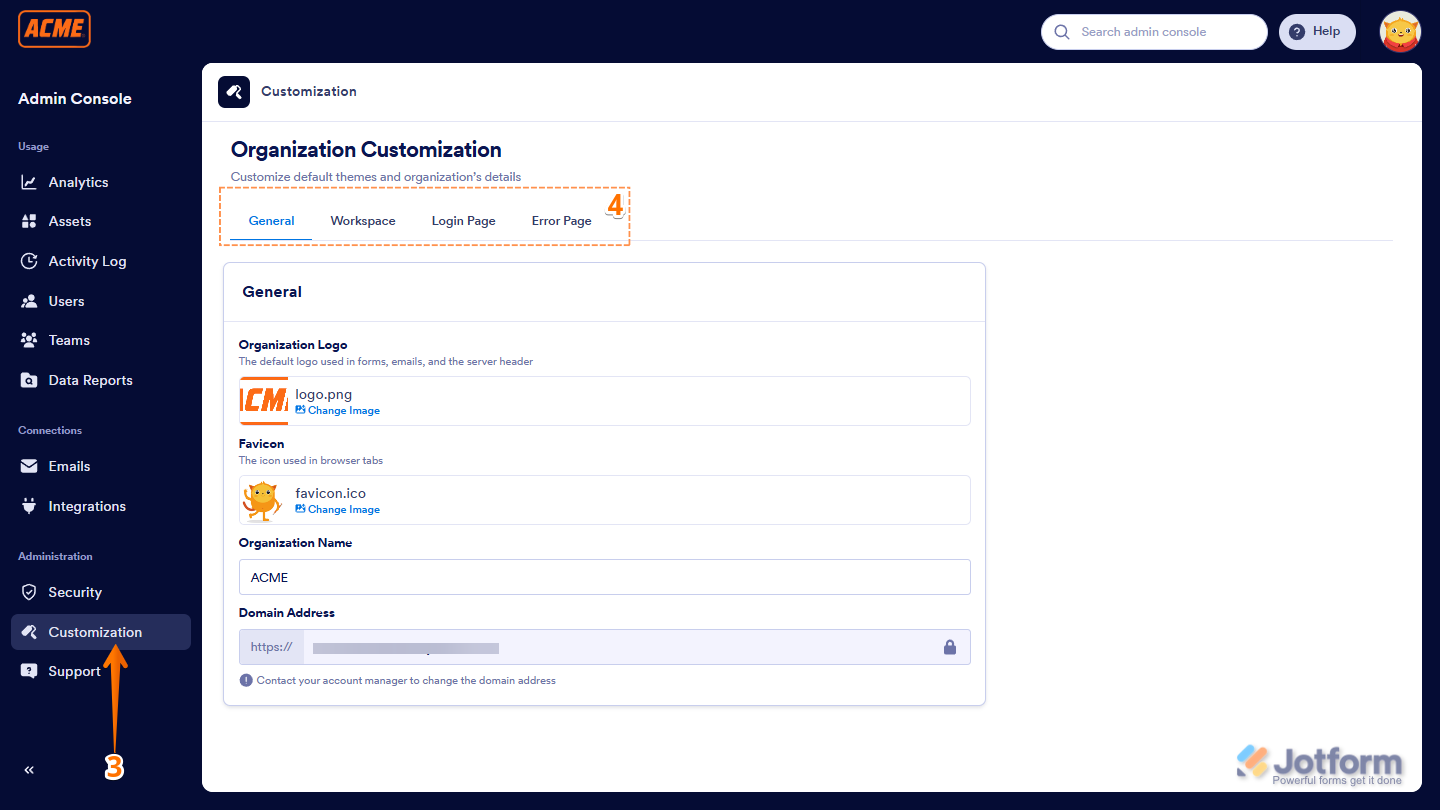
- Next, in the menu on the left side of the Admin Console page, click on Customization.
- Now, you’ll see the following tabs:
- General — Update your organization name, logo, and primary colors
- Workspace — Brand the dashboard your team works in
- Login Page — Personalize the login screen for users
- Error Page — Add your branding even on error messages.
Let’s go through each tab in detail below:
General
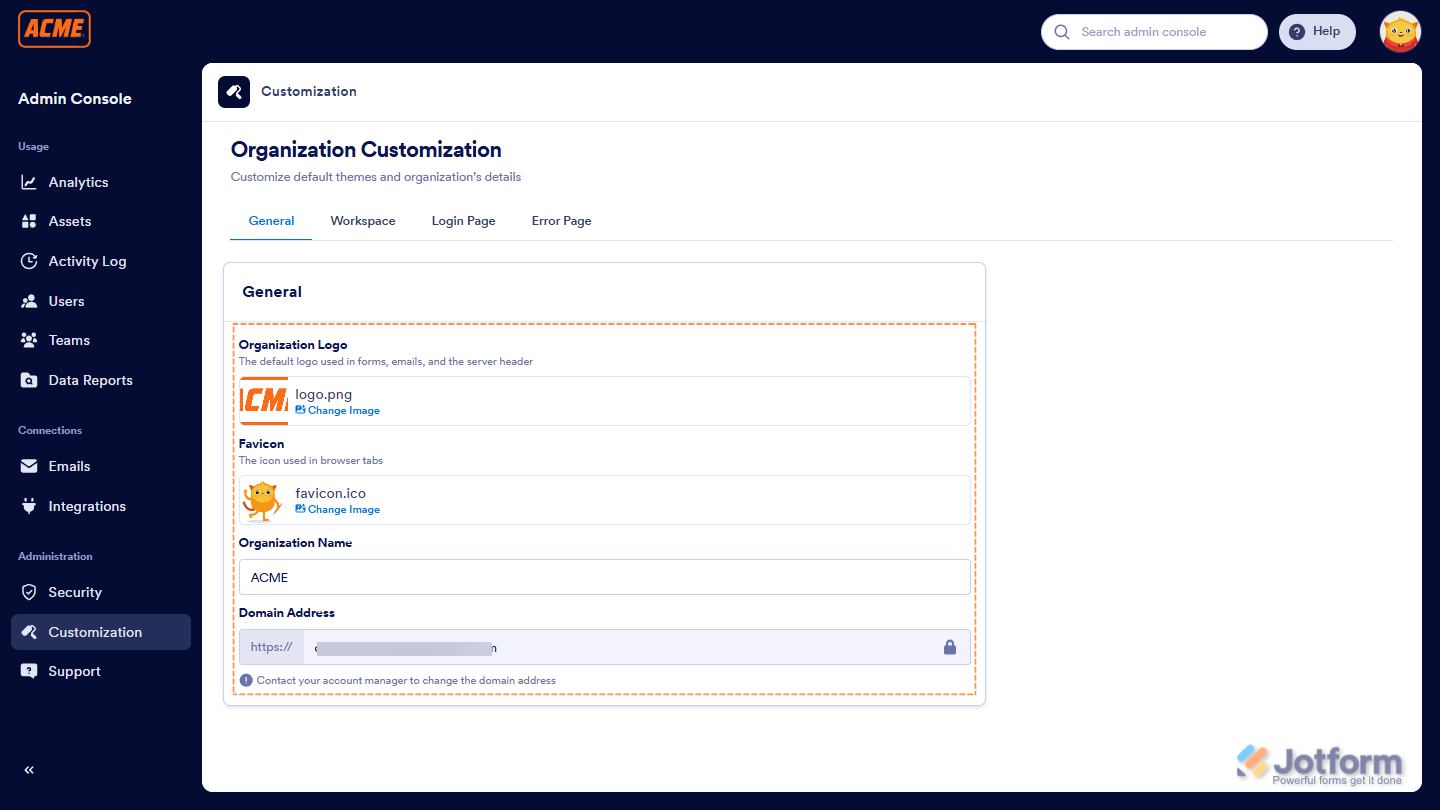
The General tab is where you set the foundation of your organization’s branding in Jotform Enterprise. Here, you can add your company’s logo and favicon, define your official name, and set up a custom domain. These settings ensure your forms, dashboards, and portals reflect your brand at every touchpoint.
- Domain Address — Set up your custom domain so your users can access forms and portals through a branded URL.
- Organization Logo — Upload your company’s logo to display on forms, dashboards, and portals for a branded look.
- Favicon — Add a small icon that will appear in the browser tab when someone opens your forms or portals.
- Organization Name — Enter the official name of your company or team. It will appear across your Jotform Enterprise environment.
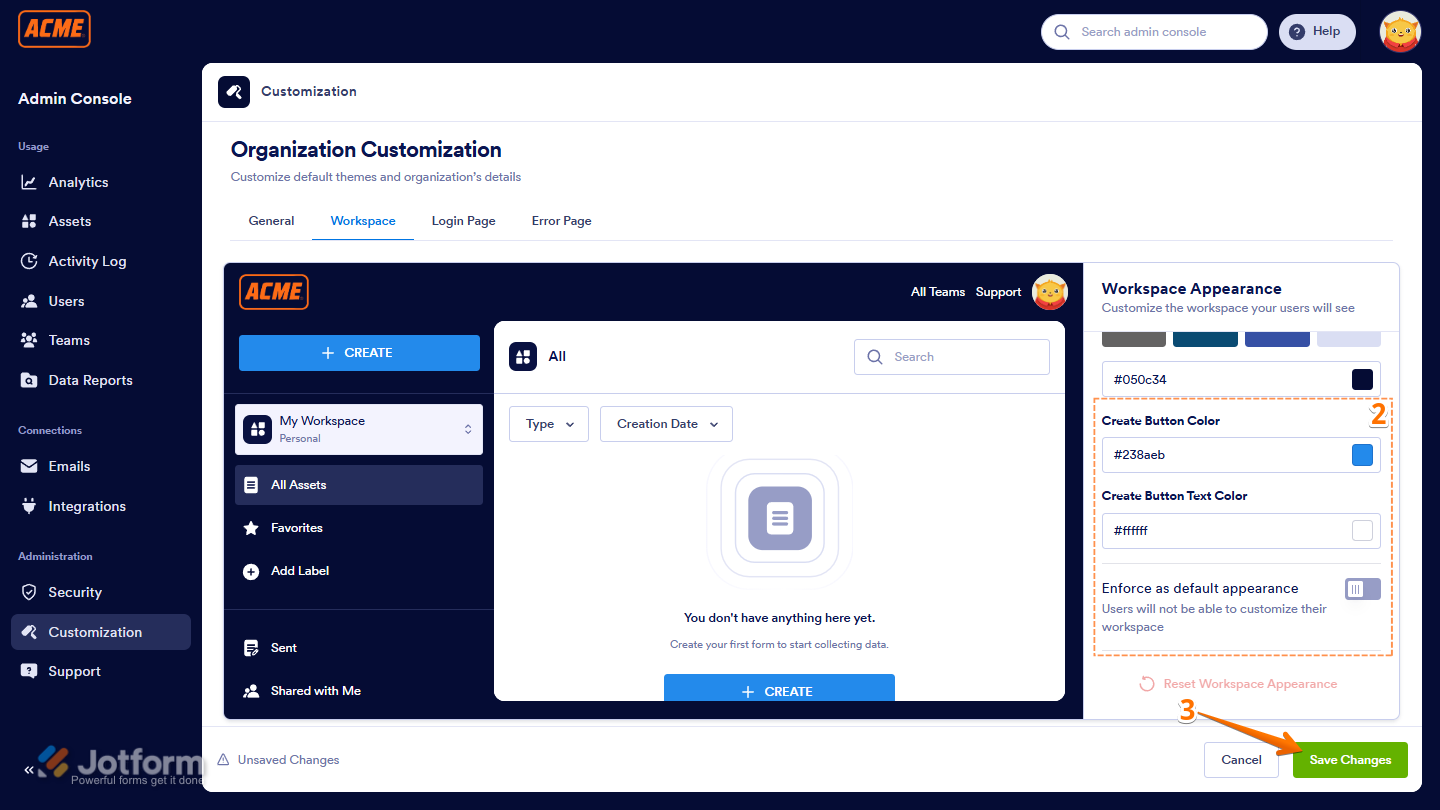
Workspace
The Workspace tab lets you design the look and feel of your team’s working environment. By customizing backgrounds, button styles, and enforcing a consistent appearance, you can create a workspace that feels both professional and aligned with your brand. Here’s how to do it:
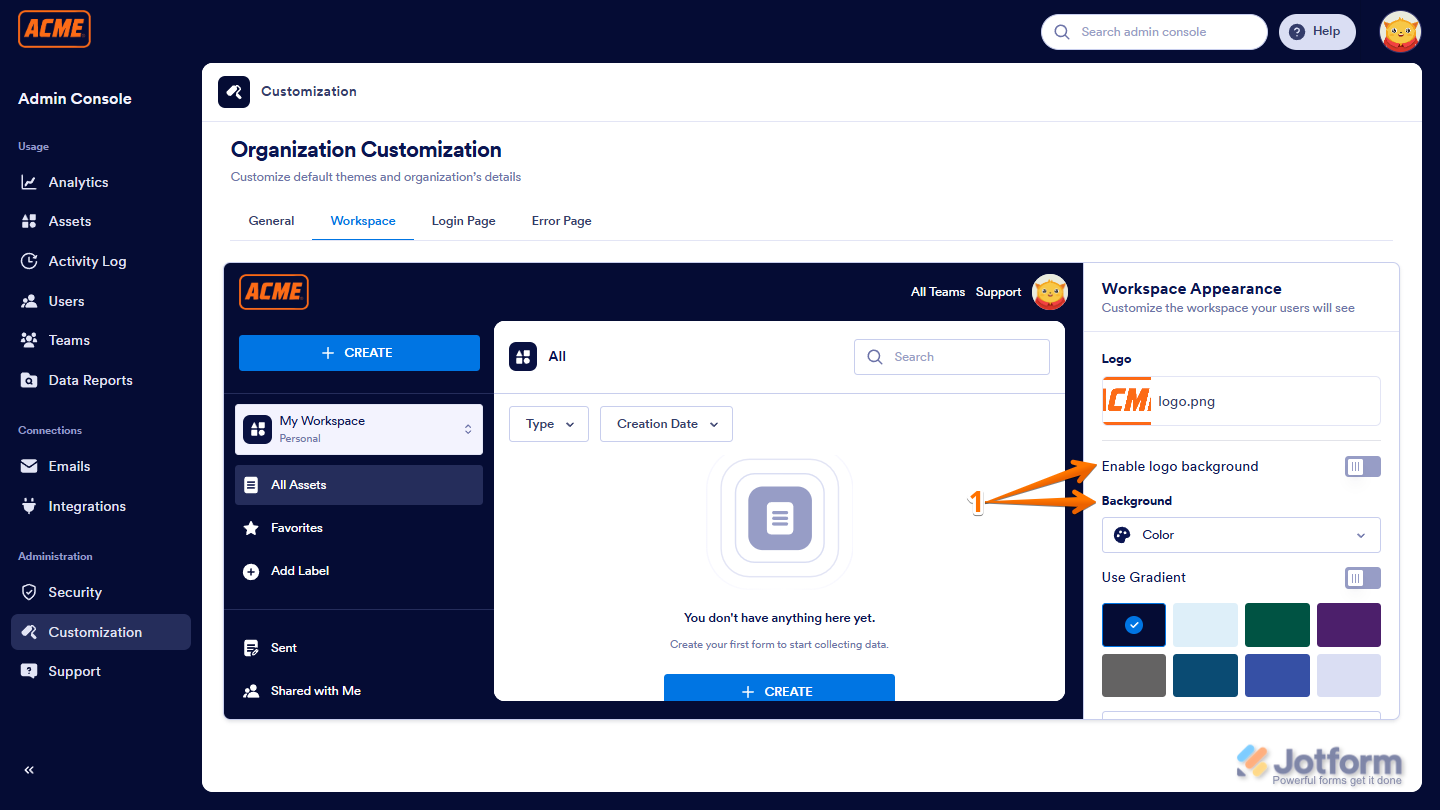
- Under the Workspace tab, in the Workspace Appearance section on the right, configure these things:
- Enable Logo Background — Toggle on to show your organization’s logo in the workspace background.
- Background — Choose a solid color or upload an image to personalize the workspace backdrop.
- Then, scroll down to the bottom and continue to set up these settings:
- Create Button Color — Define the color of the Create button to match your brand palette.
- Create Button Text Color — Adjust the button’s text color for better readability and style.
- Enforce as Default Appearance — Apply your chosen workspace theme to all users by default.
- Once everything’s set, click on Save Changes and you’re all set.
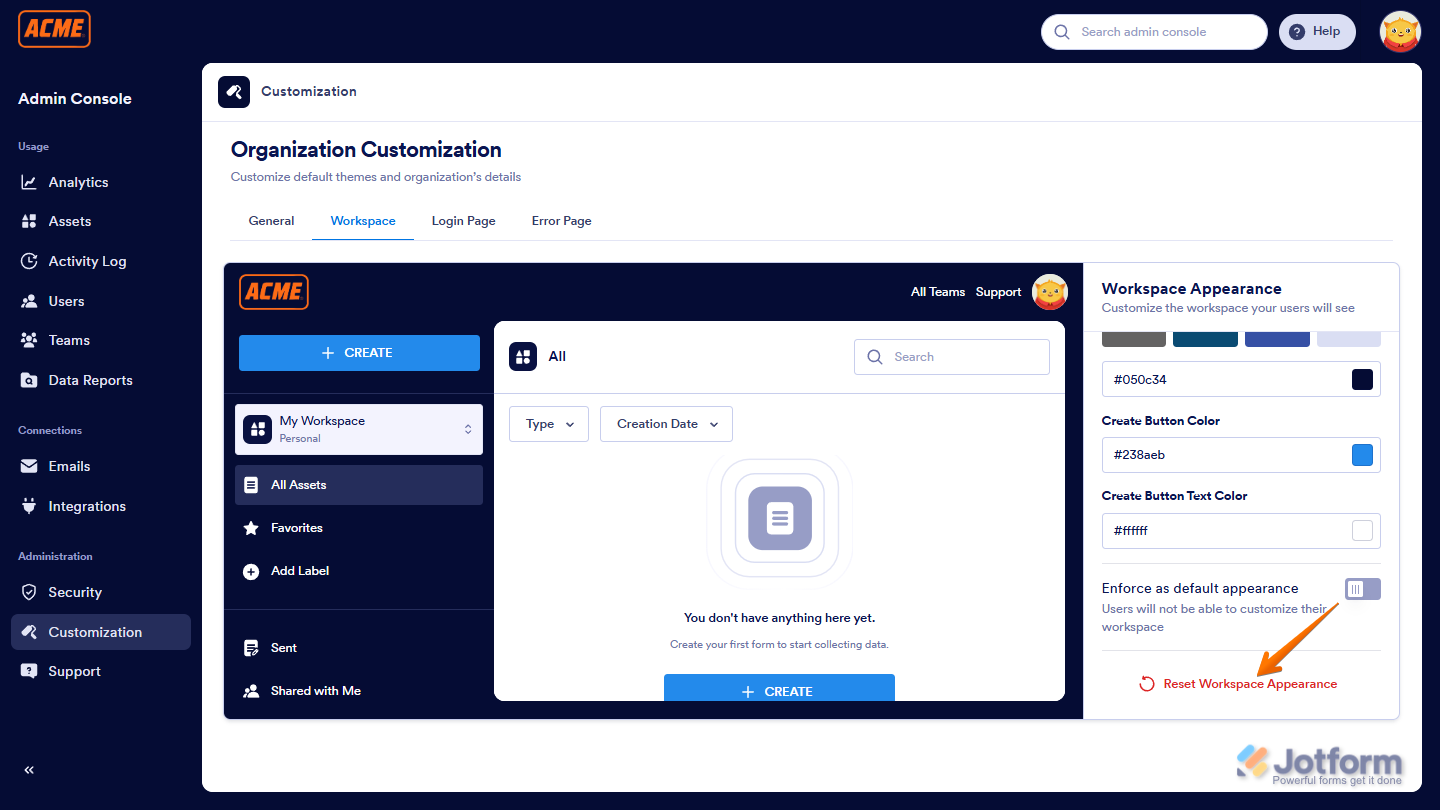
If needed, click on Reset Workspace Appearance to restore the default layout and design.
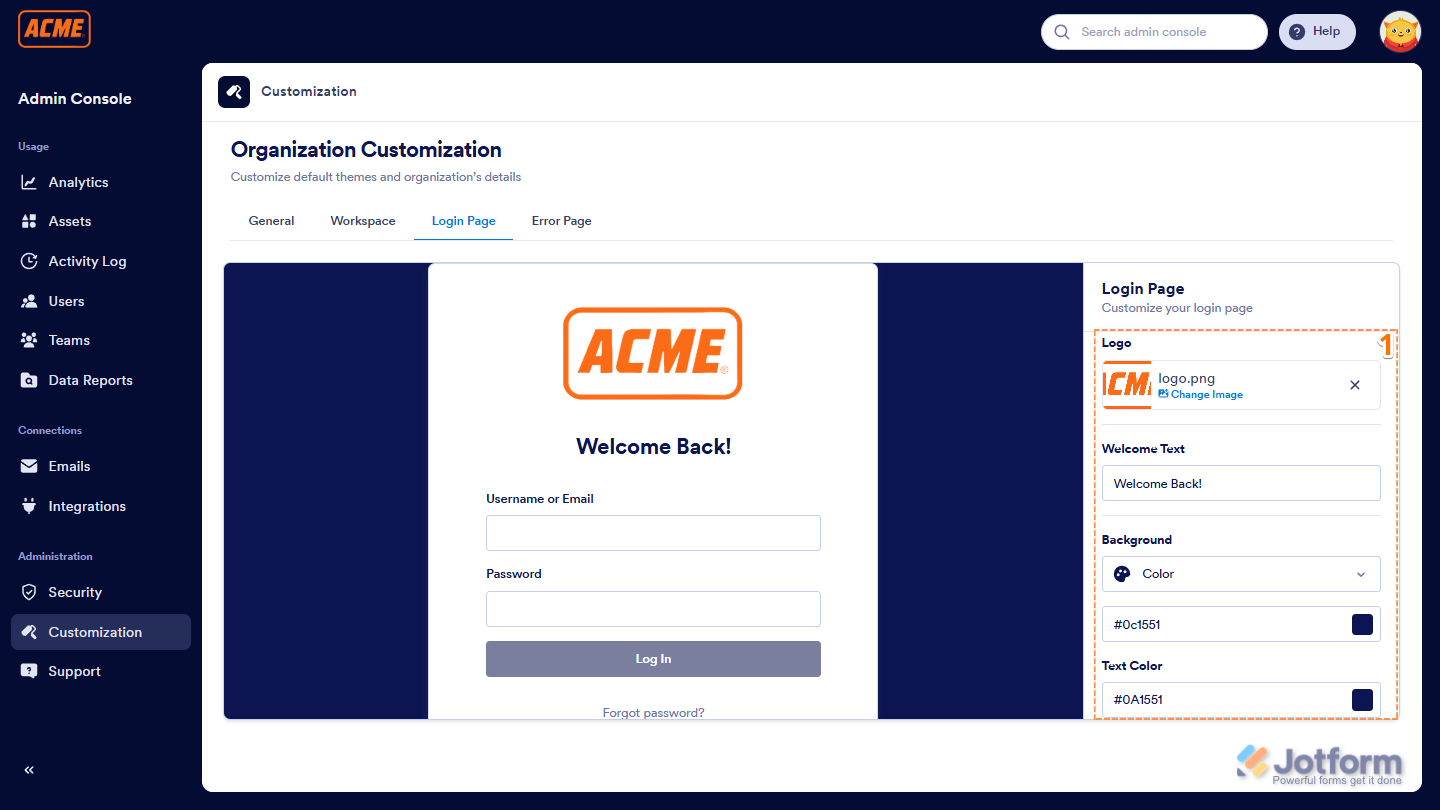
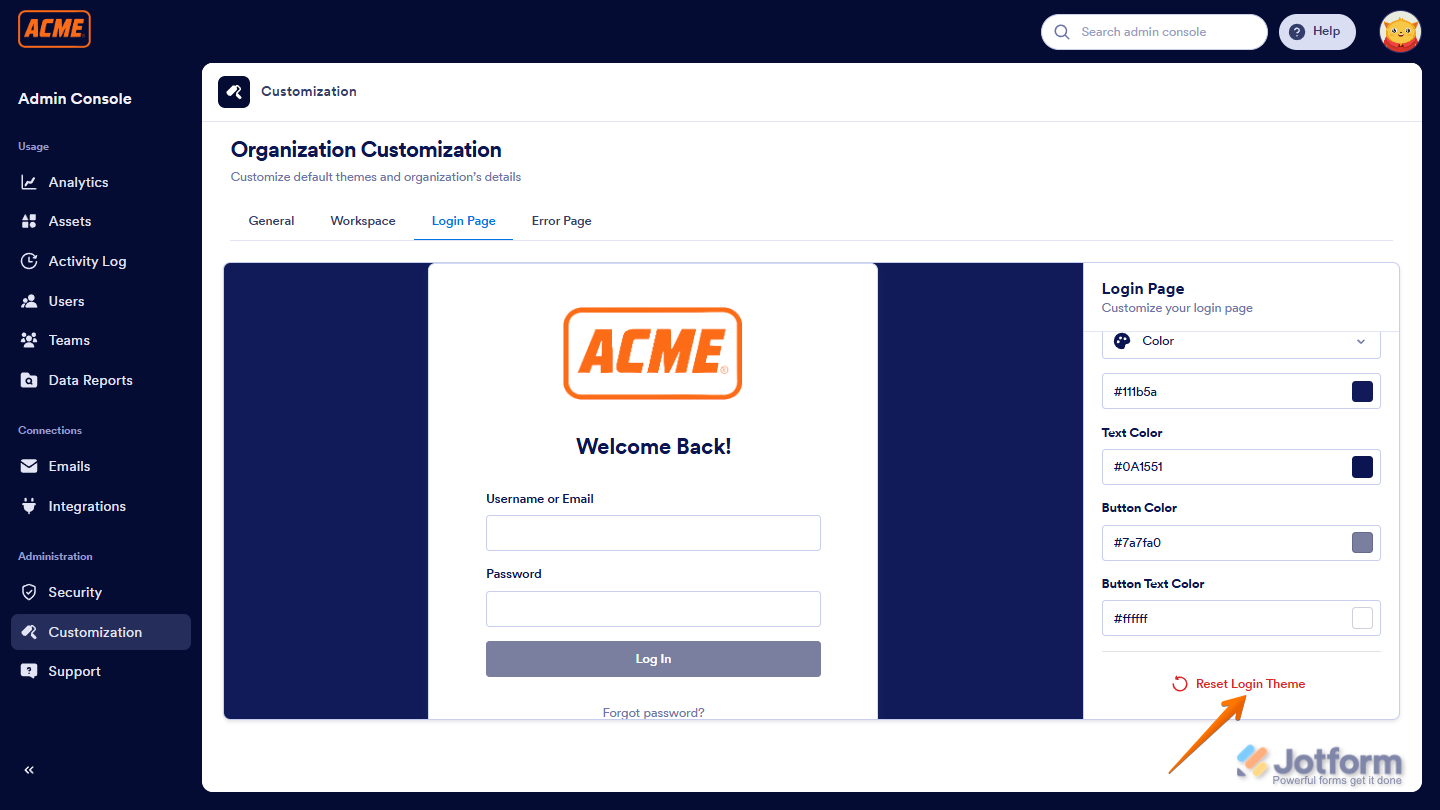
Login Page
The Login Page tab lets you customize the first impression users see when signing in. By setting your logo, welcome message, and color scheme, you ensure a branded and cohesive experience from the moment users access your Jotform Enterprise account. This is how it’s done:
- Under the Login Page tab, in the Login Page section on the right, configure these things:
- Logo — Display your organization’s logo on the login page for brand recognition.
- Welcome Text — Add a personalized message to greet users when they log in.
- Background — Choose a color, gradient, image or image URL for the login page background.
- Text Color — Adjust the color of text to match your brand and improve readability.
- Then, scroll down to the bottom and continue to set up these settings:
- Button Color — Set the color of the login button to align with your brand palette.
- Button Text Color — Customize the text color on the login button for better visibility.
- Once you’re done, click on Save Changes and you’re good to go.
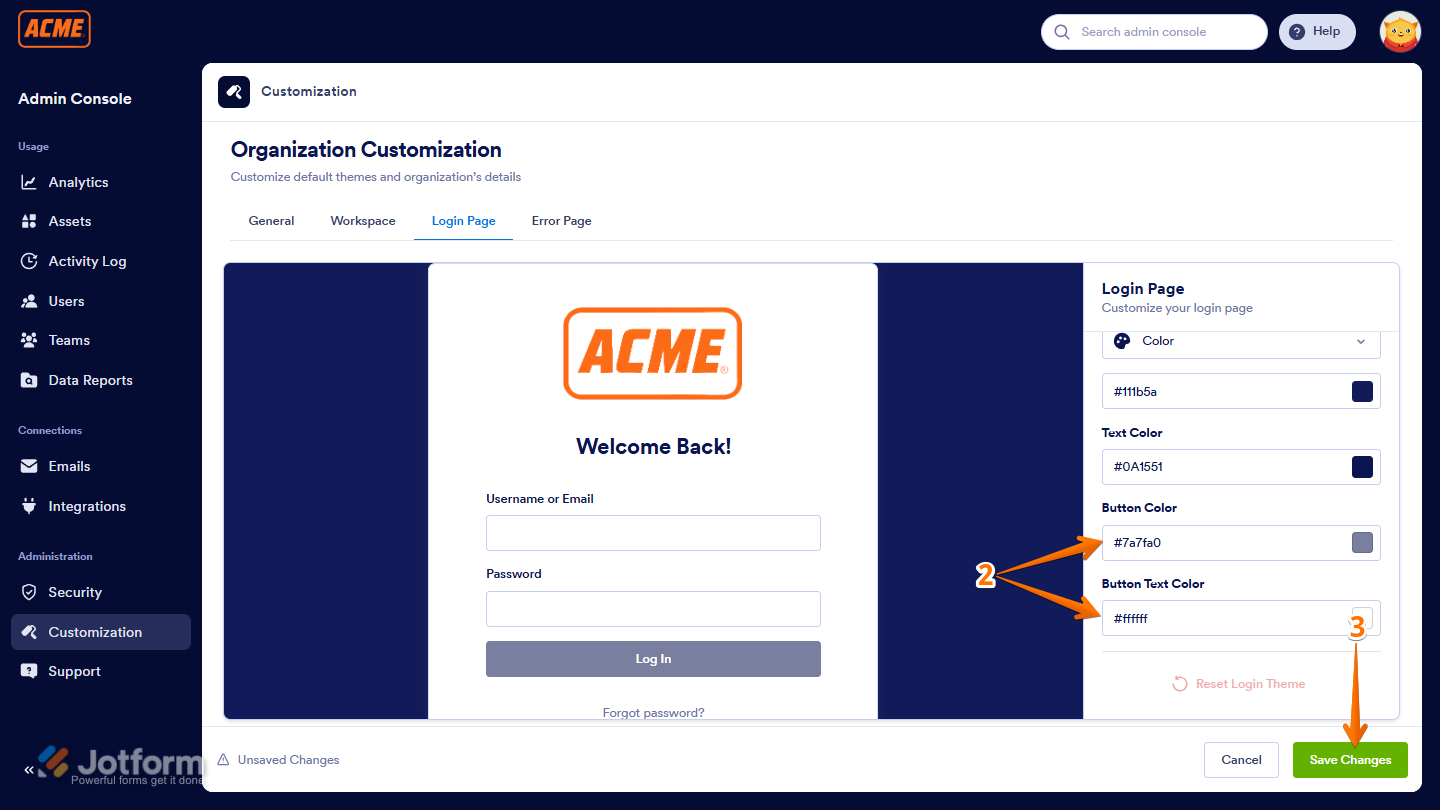
You can use Reset Login Theme to bring the login screen back to its original look and settings.
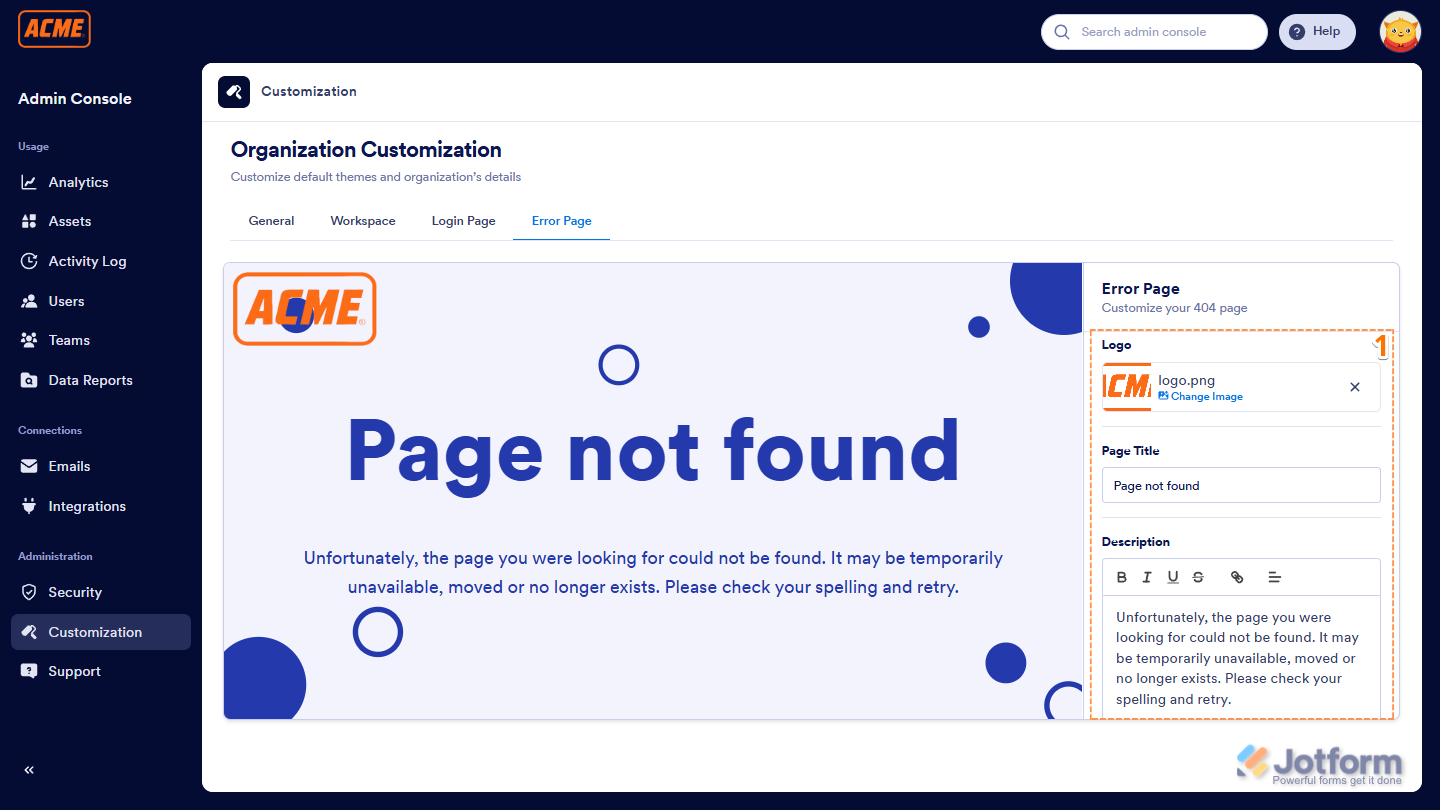
Error Page
The Error Page tab lets you customize how users experience errors within your Jotform Enterprise account. By branding your error page with logos, colors, and helpful text, you maintain a professional and consistent look, even when something goes wrong. Here’s how to set it up:
- Under the Error Page tab, in the Error Page section on the right, configure these things:
- Logo — Display your organization’s logo on the error page for brand consistency.
- Page Title — Customize the title that appears at the top of the error page.
- Description — Add a message explaining the error or guiding users on what to do next.
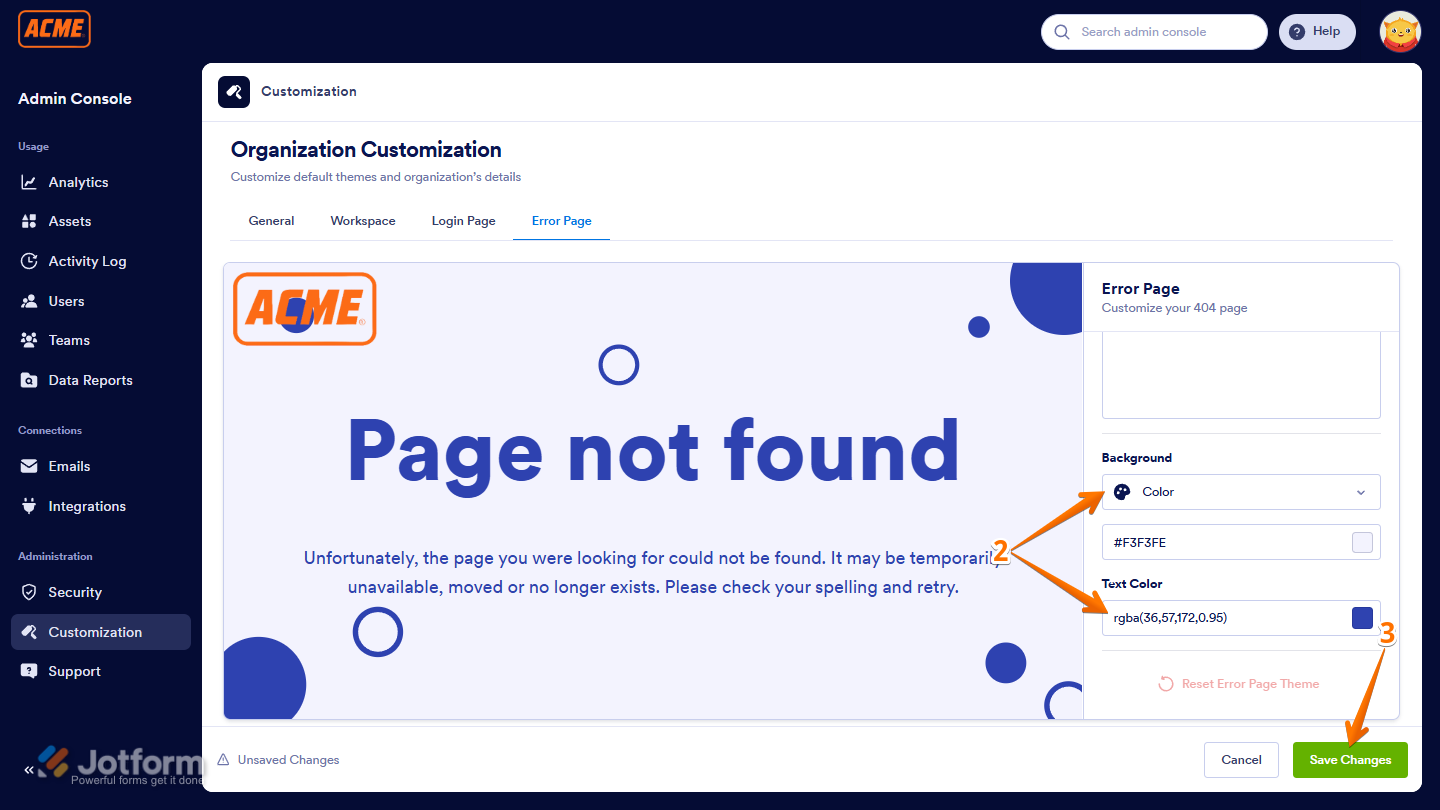
- Then, scroll down to the bottom and continue to set up these settings:
- Background — Choose a color, gradient, image or image URL to match your brand.
- Text Color — Set the color of the page text for readability and style.
- Once your changes are complete, click on Save Changes and you’re done.
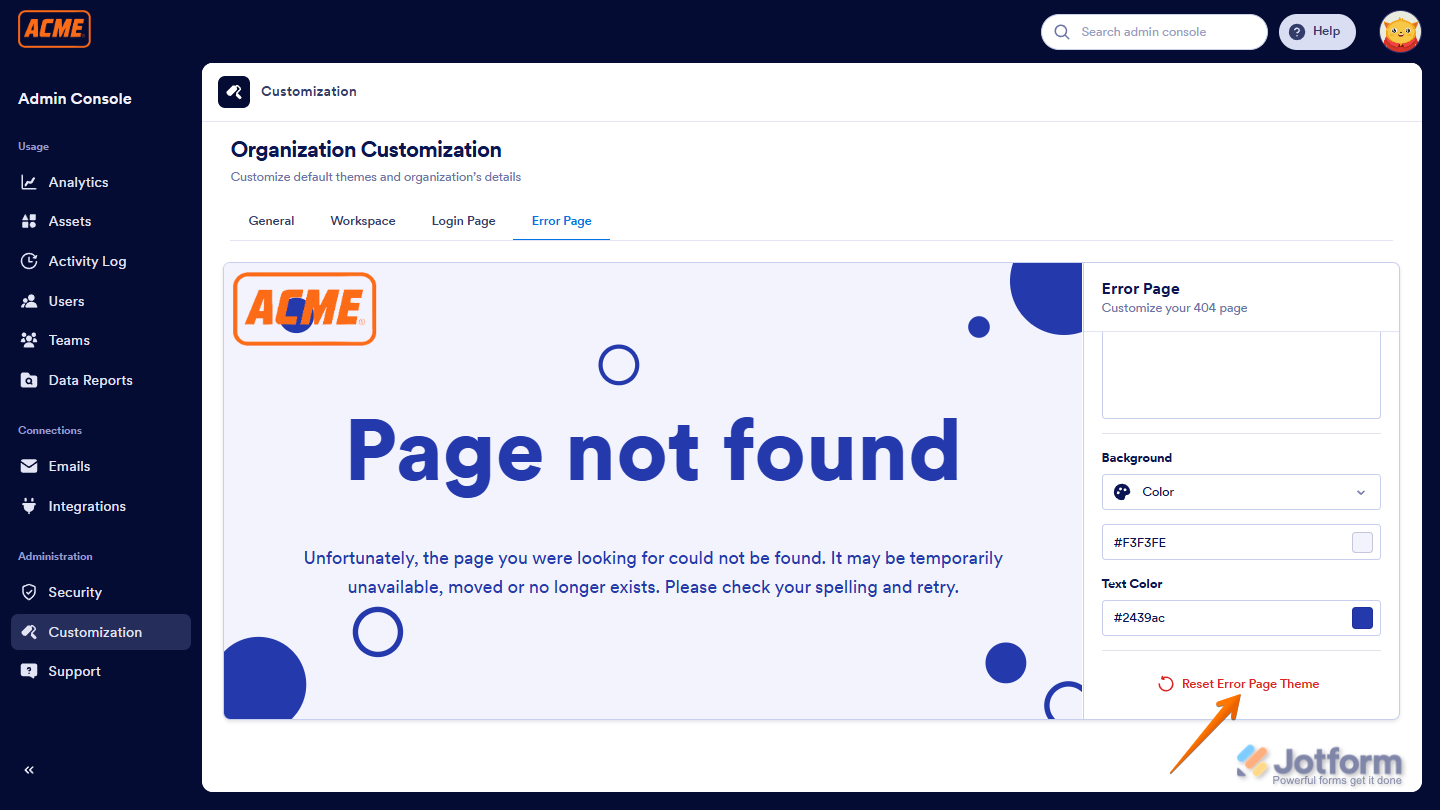
You can also click on the Reset Error Page Theme to restore the default look and settings for your Error page.

Send Comment:
1 Comment:
215 days ago
How do I apply the theme I just set up?