Accepting files with Jotform is possible with the File Upload element. You will receive the files as a link through your form’s notification email. You can also send these files as attachments. On top of that, you can download the files through Jotform Tables.

When downloading, you can choose to:
- Download All Uploaded Files At Once
- Download a Specific Set of Files
- Download File Uploads Based on a Time Range
- Download Individual Files
Download All Uploaded Files
You can download all uploaded files through Jotform Tables or Jotform Inbox. Here’s how you can do it through Jotform Tables:
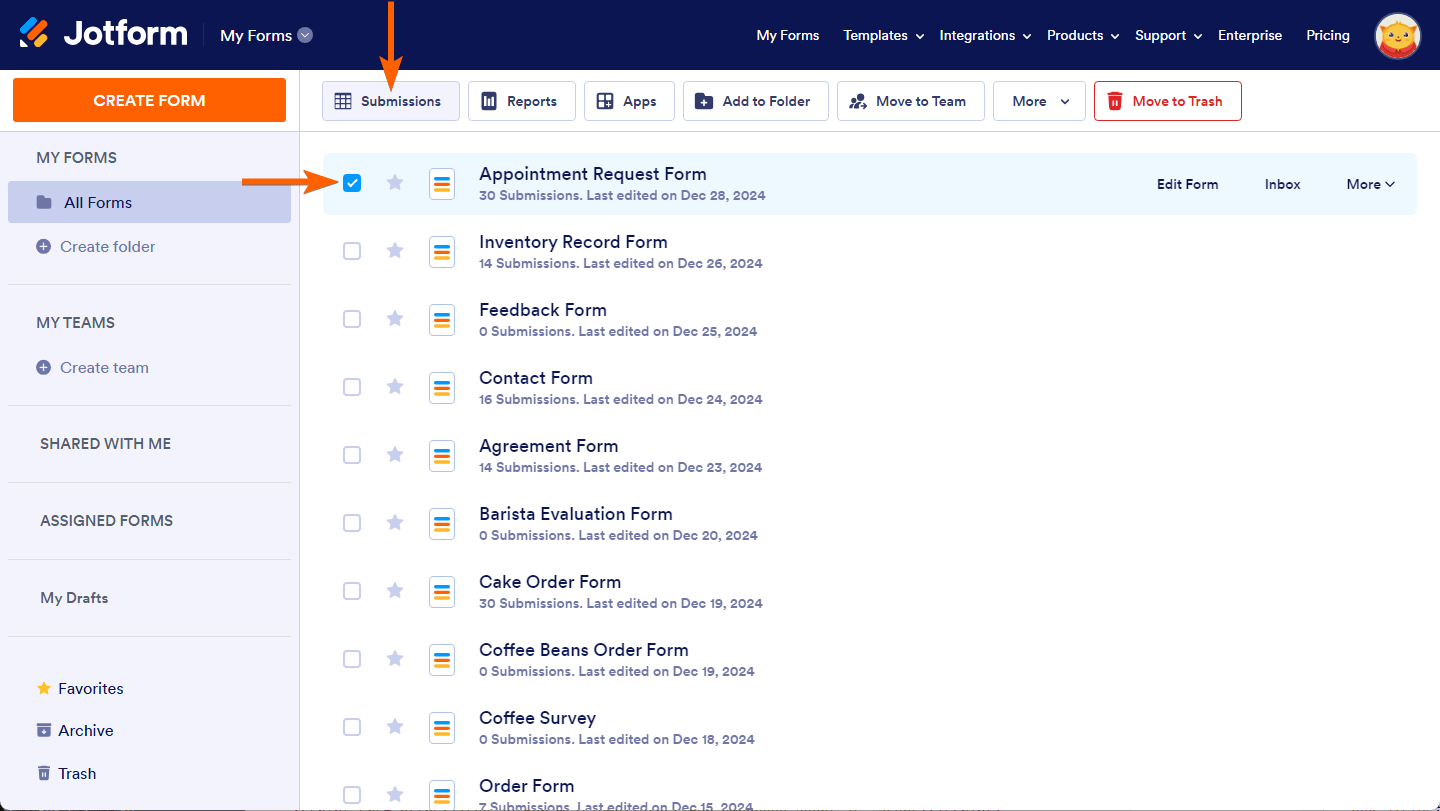
- On the My Forms page, click on your form to select it.
- Then, click on the Submissions button in the top toolbar to view its submission data.
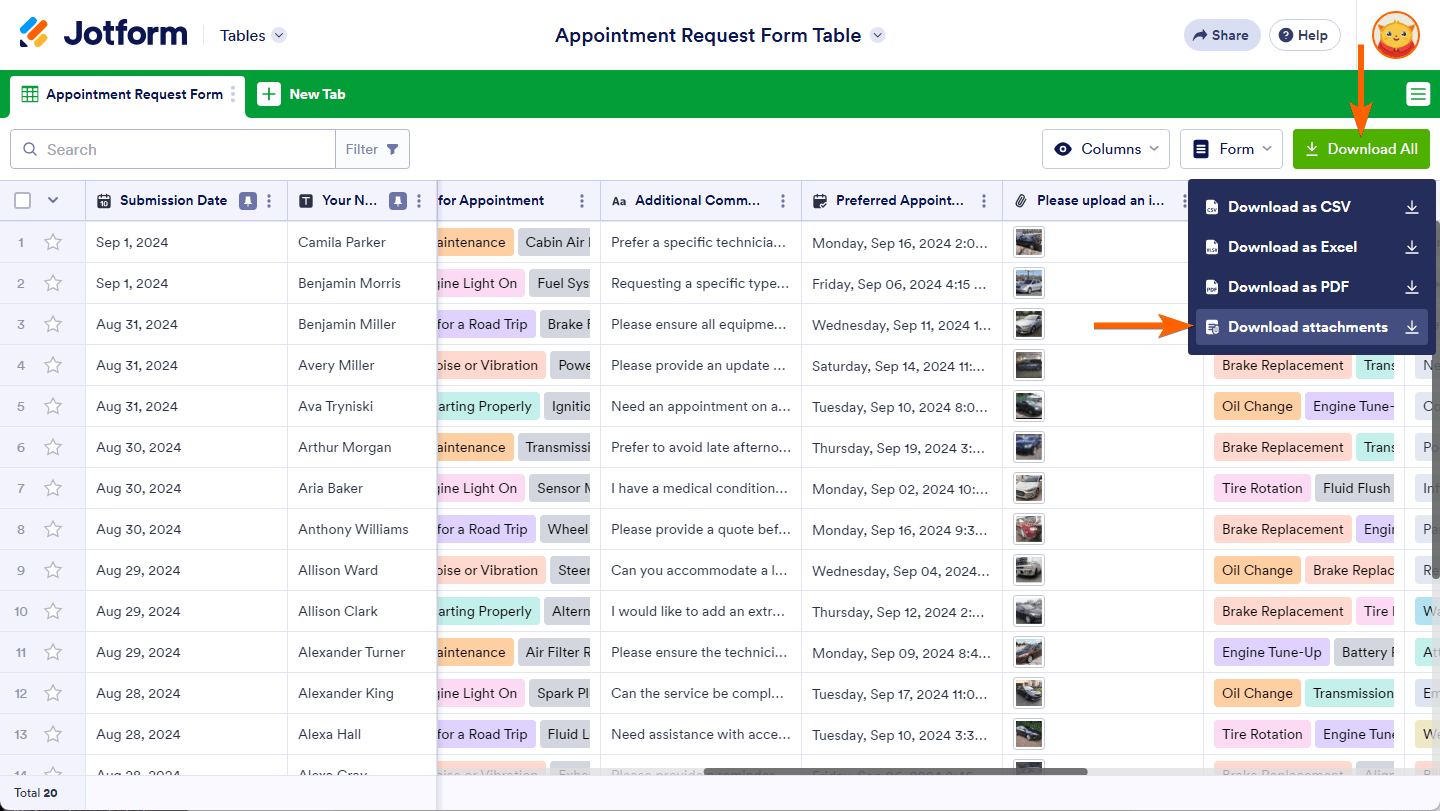
- In Jotform Tables, click the Download All button on the right side of the page to open the download options.
- Choose the Download Attachments option.
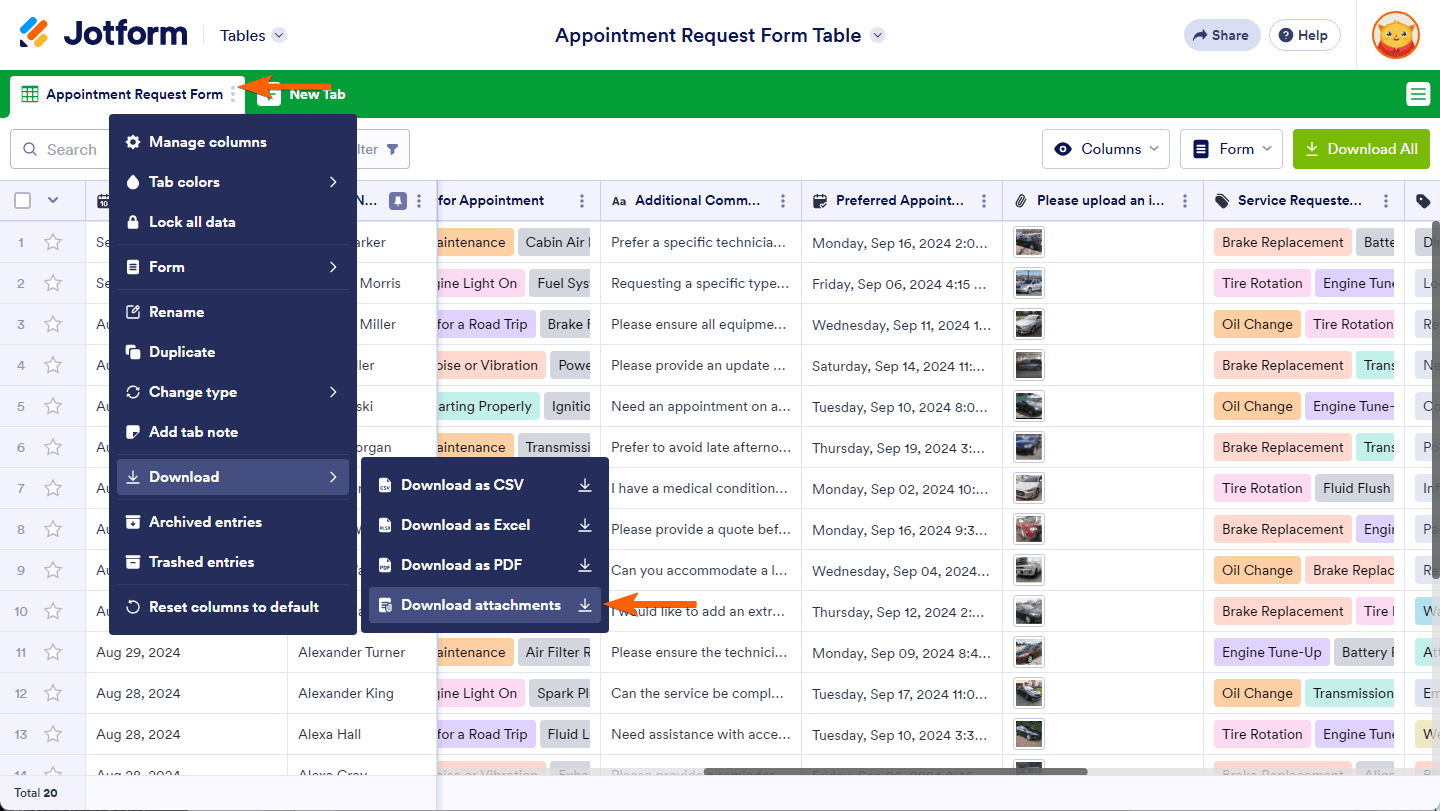
Alternatively, you can also click the Three Dots icon next to the name of the main submissions tab, then hover your mouse over the Download option, and click on the Download Attachments option.
The system will begin zipping your file uploads. You’ll see the following popup informing you that you’ll receive an email with a link to download the zipped file.
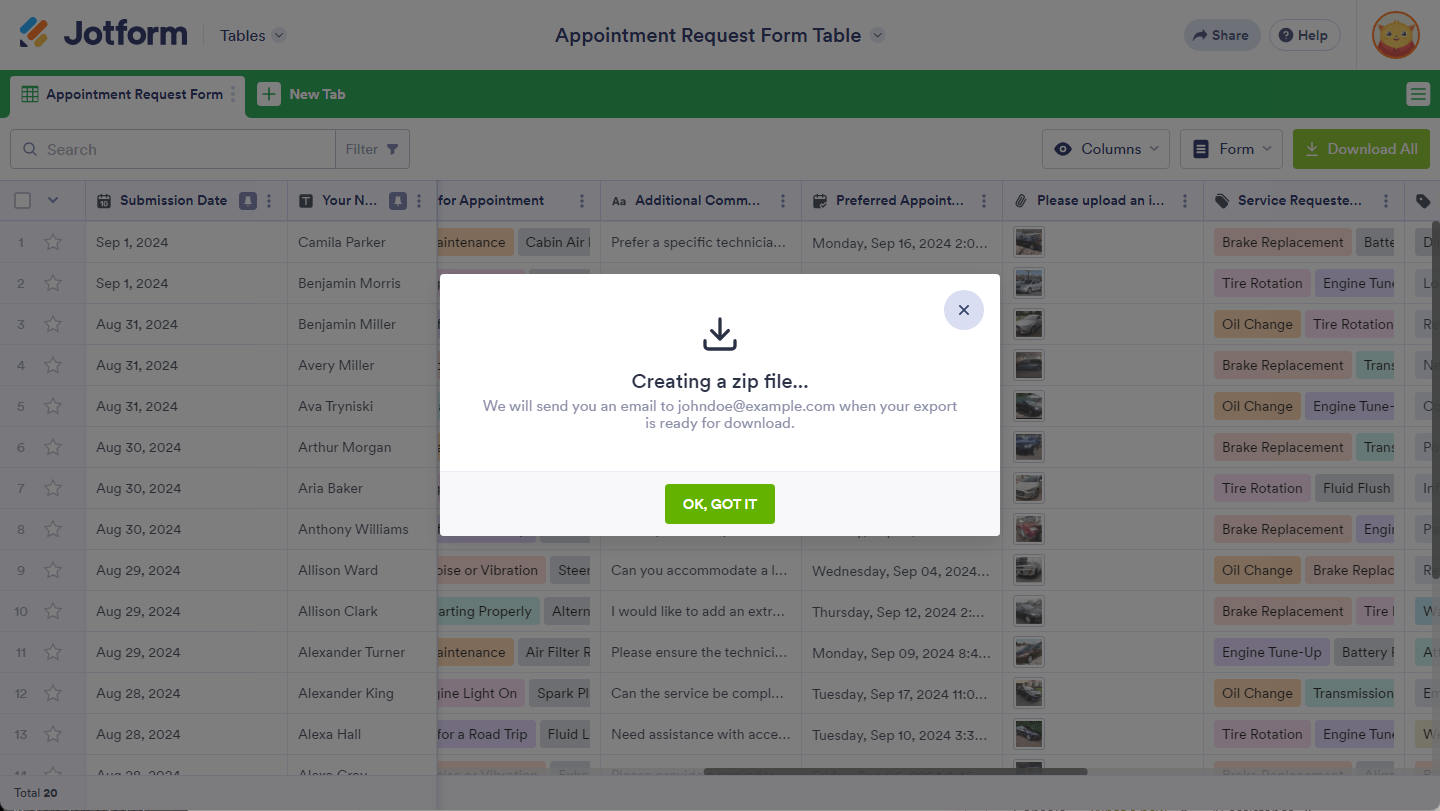
Note
This process may take some time if your form has a large number of file uploads.
Download a Specific Set of Files
You can also download a specific set of files by selecting them through the list. Here’s how:
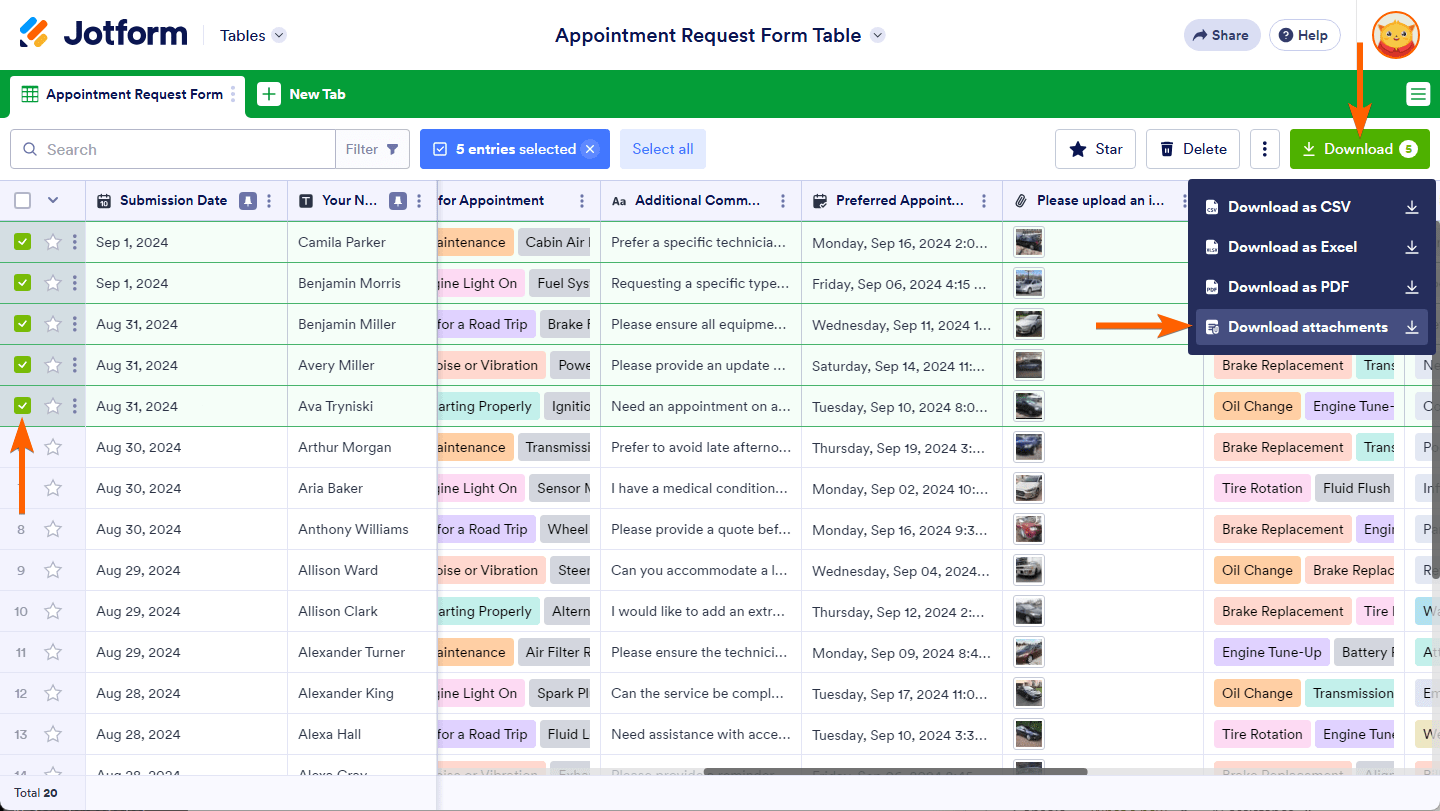
- Select the submissions from the table. You’ll see the number of selected submissions on the Download button.
- Click the Download button.
- Finally, click the Download Attachments option to begin the download process.
Similar to downloading all file uploads, this method isn’t instant. Our system will zip your files and send the zipped file through email.
Download File Uploads Based on a Time Range
Downloading files based on a time range is done by filtering them through Jotform Tables. Here’s how:
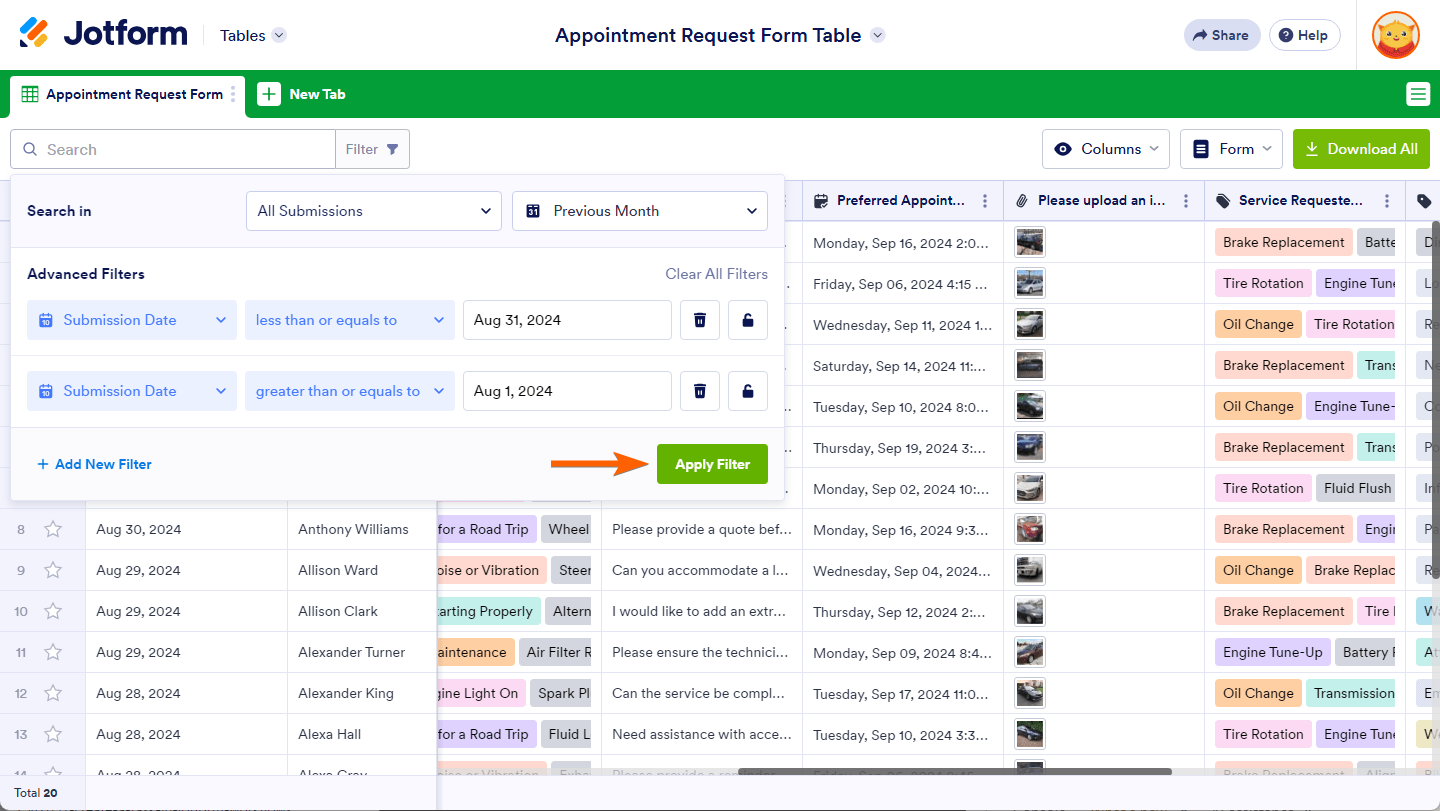
- Click the Filter button.
- In the Search In section, click the All Time dropdown.
- Choose and click a time range from the list beside the calendar.

- Click anywhere outside of the calendar/time range modal to set your filter.
- Click the Apply Filter button. Your filter is now active.
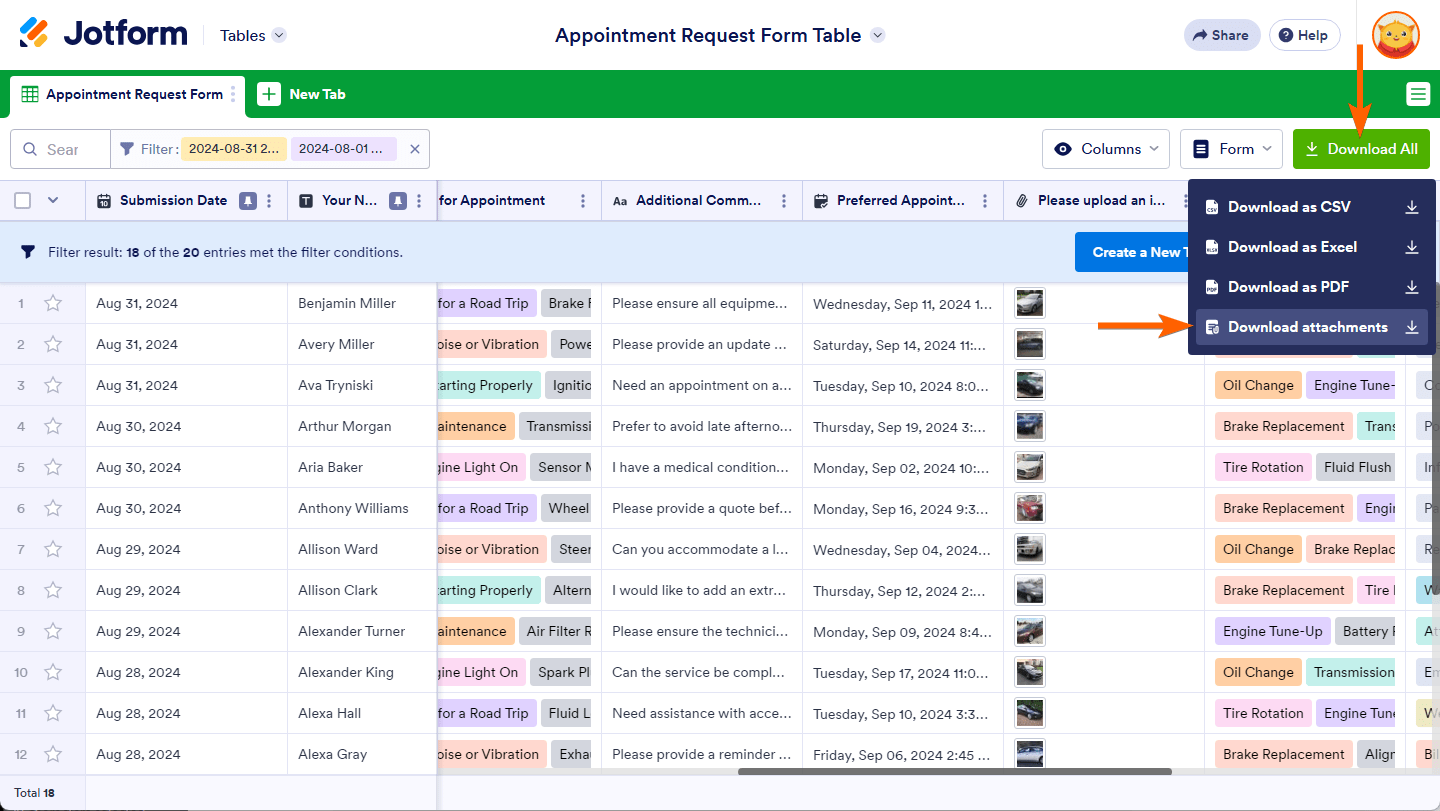
- Click the Download All button and then the Download Attachment option.
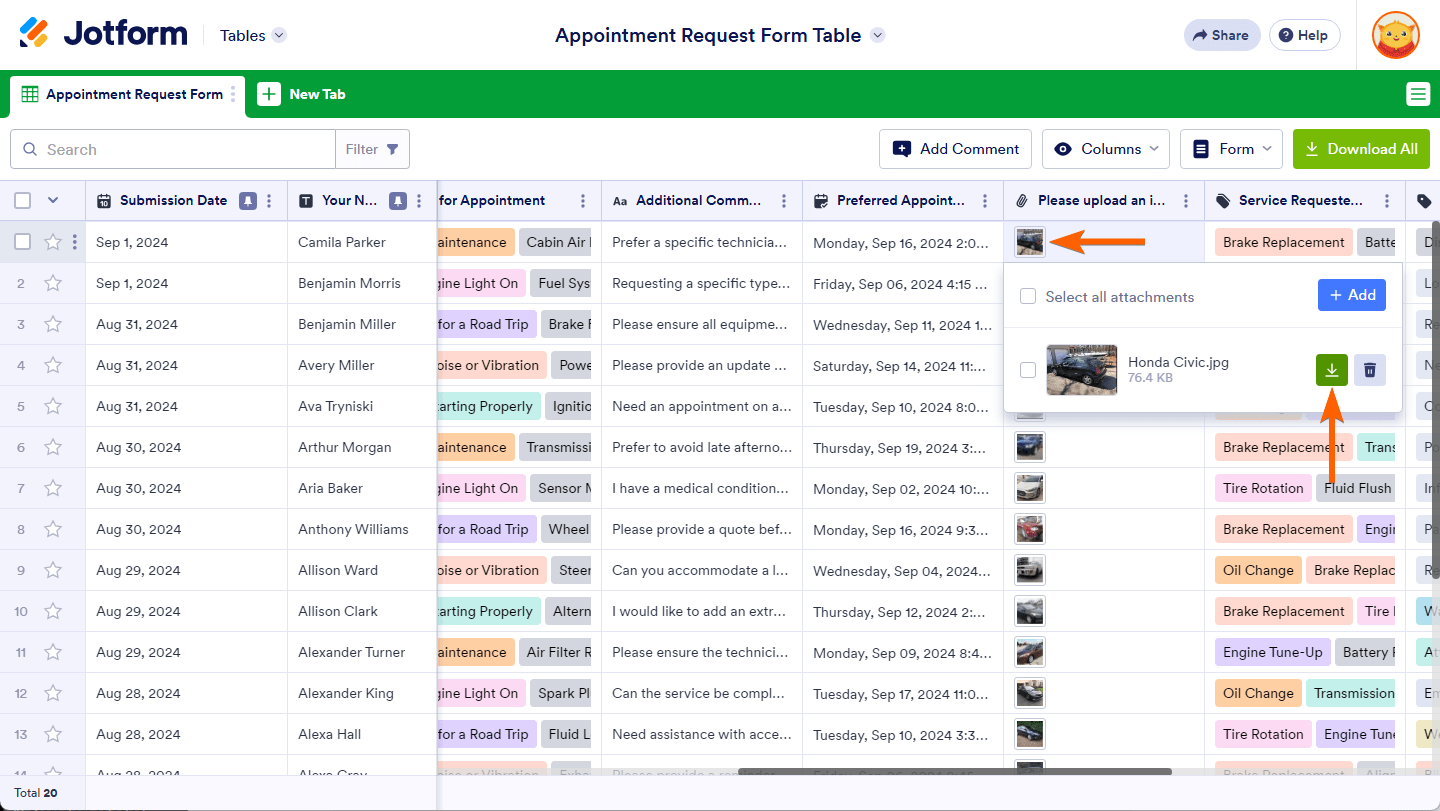
Download Individual Files
If you want to download an individual file, click on the cell that contains the file thumbnail and click the green Download button:

Send Comment:
19 Comments:
60 days ago
I'm unable to download submissions. This stopped working and I now get an error. How can I enable downloads while viewing submissions?
87 days ago
I am still not getting all the files to download. It only downloads the first image.
264 days ago
When I download to .PDF using the Download button, there is information missing. Not all the columns are coming through. When I view the form, they show up, and when I print as a .pdf, they show up, but when I use the green Download button, several columns of information are missing.
286 days ago
Is it possible to download the table on a schedule and save the download to e.g. SharePoint or OneDrive?
295 days ago
Hi,
Is there any way to change the separator character for the CSV-download. I need to use a semicolon and not a comma.
Thank You!
Scott
More than a year ago
HI There, I am trying to download the files from our submission form but it only allows me the option of downloading as Excel or CSV file - I cannot see the option to "download attachments". Can you please help.
More than a year ago
Does this work for audio files? When I click 'Download All', it doesn't show the 'Download Attachments' option.
More than a year ago
Can I send zip file to our back up email address?
More than a year ago
Hi, I log in using our charity login. I am in the process of uploading cat adoption submission forms to our database. I had no issues with Jan or Feb ones, I got an easy system going, where I told it to download the form then uploaded it from my downloads folder. Now, it simply refuses to download any more. It says 'waiting for jotform.eu.com' and doesn't do anything at all. It's broken! I've put my personal email address on here for ease of access to your reply, as I'll be working now until this evening. Thanks
More than a year ago
Would love in the future to be able to download the submission table and have the uploads hyperlinked in the table. Even if there was a way to vlookup and sync the two would be helpful.
More than a year ago
Can I setup up downloads with a filename that is based on data in the table? It's very manual to link the download content to the file submission as the down;aod name is not included in the submission file.
More than a year ago
di jotform sy kok tidak ada untuk download attacment, hanya ada download csv, excel, pdf
More than a year ago
Can I setup up downloads with a filename that is based on data in the table?
More than a year ago
My company has shared access to a jotform table with me and I have every download option except for Download as PDF. I'm brainstorming with my colleagues on how to remedy this. Any ideas how they can share that option? It doesn't say Read Only or Collaborator for me. See below and thanks in advance.
More than a year ago
Can I download all attachments into one file I can print out ... versus the Zip file giving me 100 different files to open to just prin the waiver form and the vax card?
More than a year ago
I'm having the same issue as Hassan. The hpotos taken by the Take Photo widget are not considered attachements, so there is no option to download them
More than a year ago
HI,
I am using take photo widget for my Performance Management survey 6.2 version. The problem I am facing is that I need to download all images that are being uploaded on the form. But there is no option for download attachment. When i download using download using excel or text file, i only get link of the picture.
Previously when i was using upload document option, i was able to download all images that were uploaded on the form.
please help me in resolving this issue.
Regards,
Hassan Saleem Malik
More than a year ago
Hi, is there a way to download just the submission info and not all the other language in the form?
More than a year ago
Cecile_A,
Perfect information, thanks so much for the actual steps in tutorial. They covered my whole spectrum of questions, including downloading and converting to Excell. Great work, thanks a bunch.