-
dudaprettoincPerguntado em 5 de novembro de 2023 às 15:35
Por gentileza, podem fazer a limpeza do meu cache para liberar mais espaço?
-
Rhina Jotform SupportRespondido em 5 de novembro de 2023 às 17:48
Hi Duda,
Thanks for reaching out to Jotform Support. Unfortunately, our Portuguese Support agents are busy helping other Jotform users at the moment. I'll try to help you in English using Google Translate, but you can reply in whichever language you feel comfortable using. Or, if you'd rather have support in Portuguese, let us know and we can have them do that. But, keep in mind that you'd have to wait until they're available again.
Now, let me help you with your question. I have cleared your form cache to refresh the form. Although caches aren't cleared automatically, it's easy to do it manually on your end as well. Let me show you how:
- On your My Forms page, hover your mouse on your Profile Avatar icon.
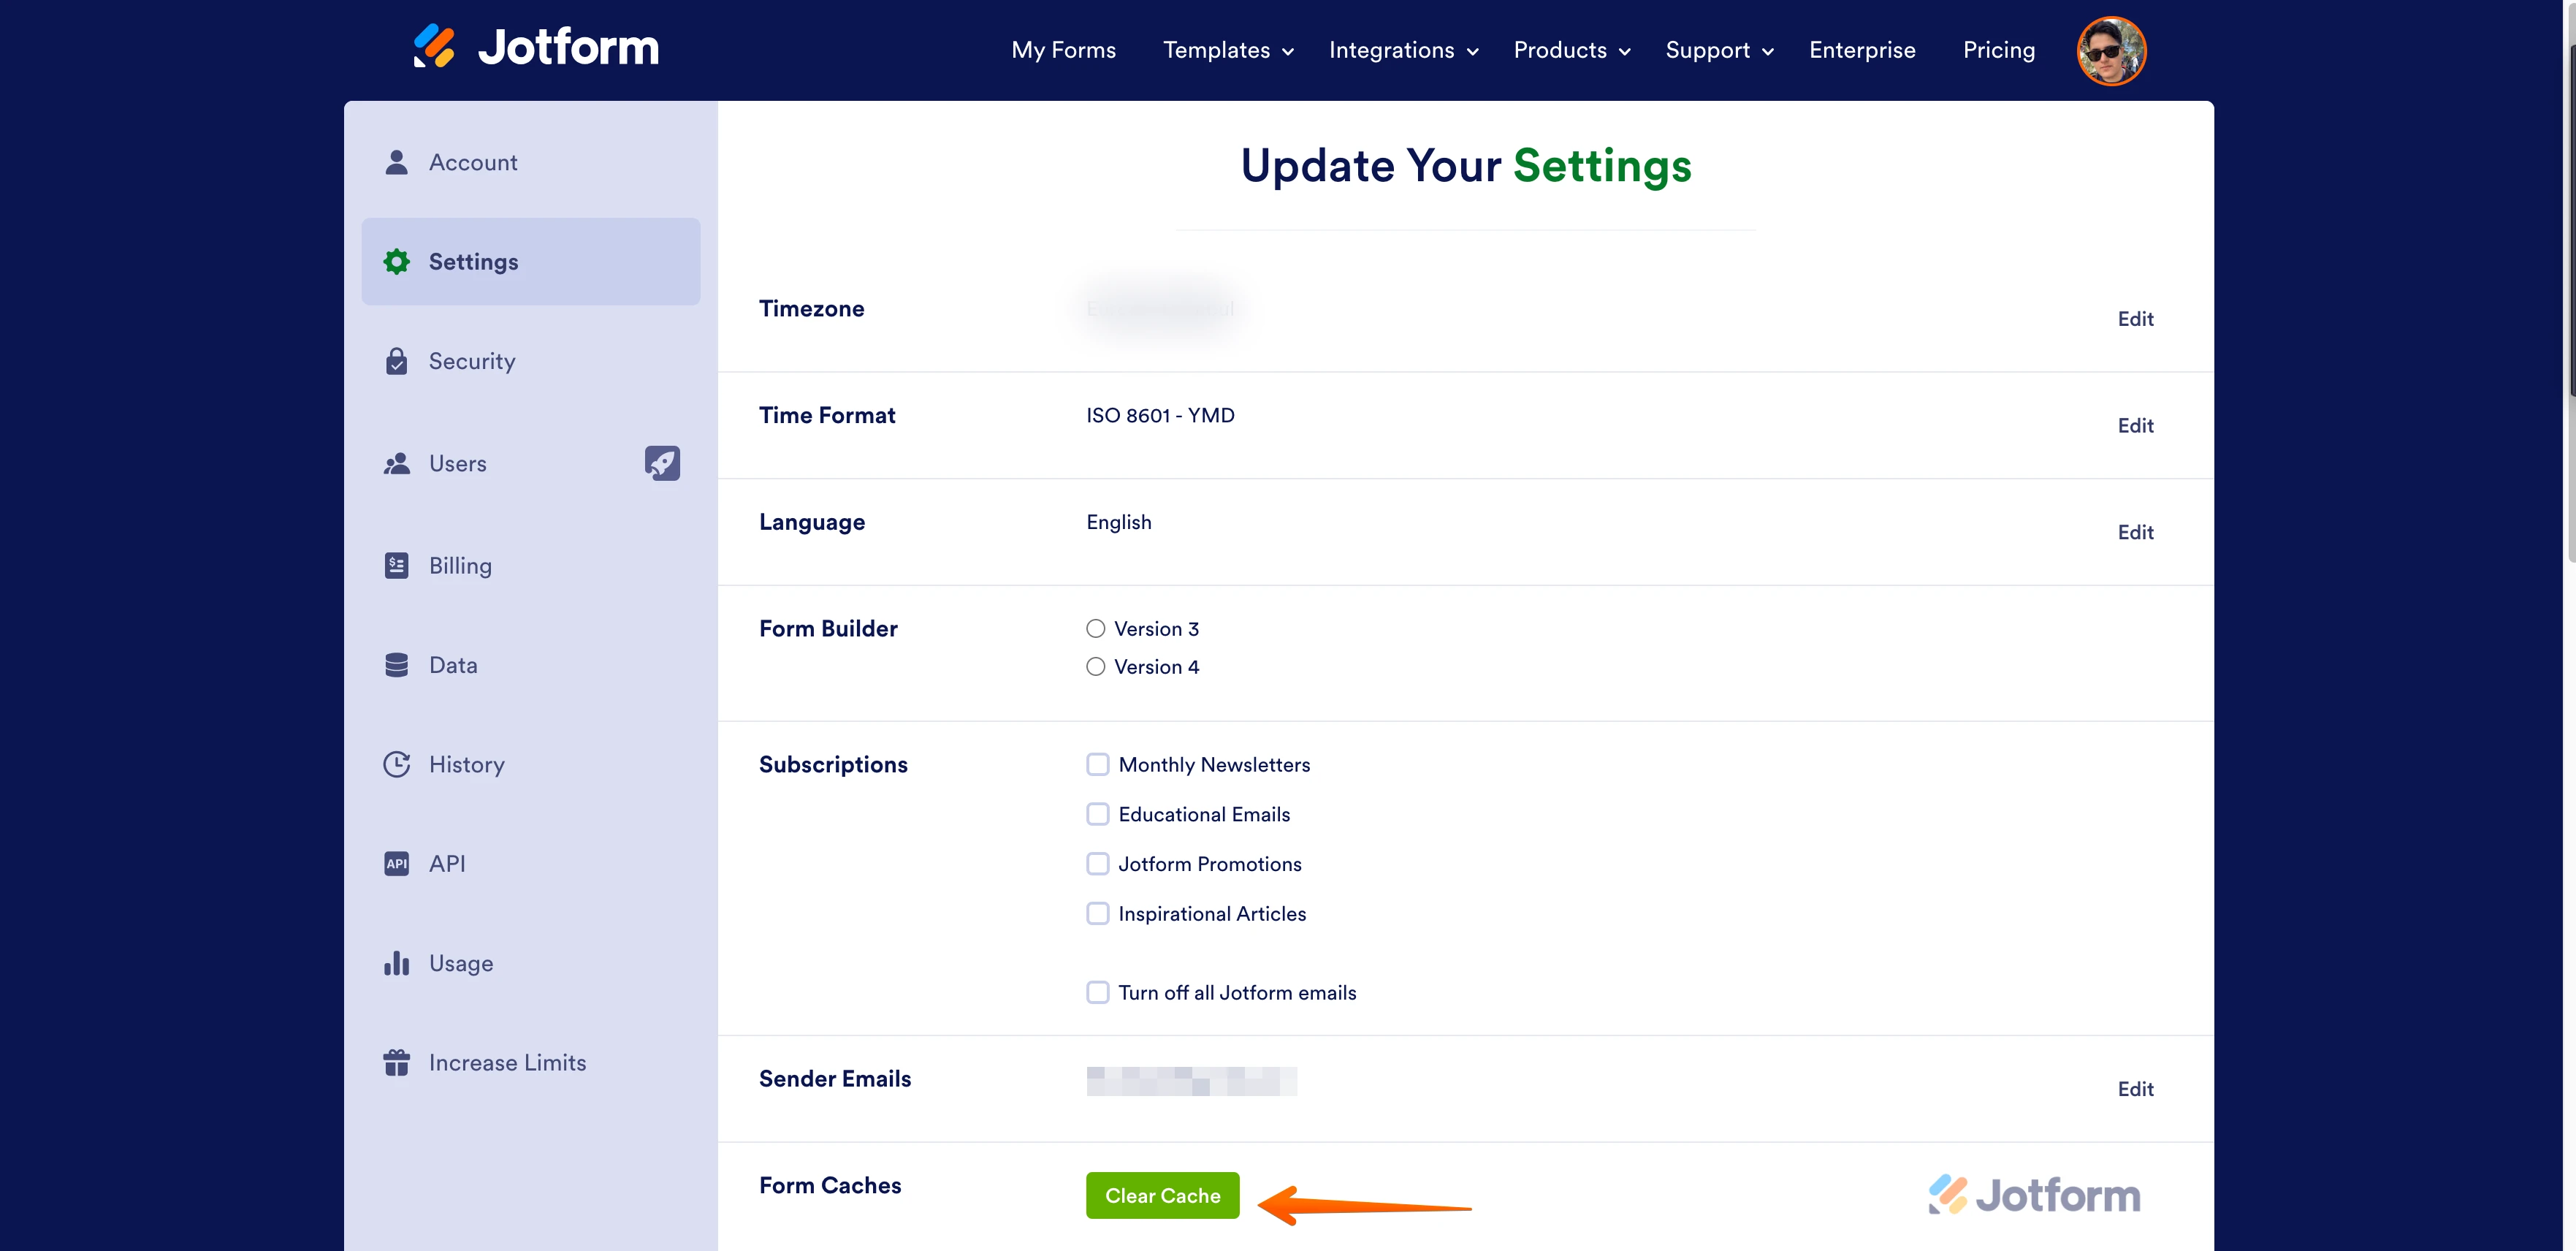
- In the window that opens, click on Settings.

- In the Settings menu, scroll down to the bottom of the page and click on Clear Cache. That's it, you're done.
You can also check this guide for more information about clearing caches. As for increasing the available space, you can delete and purge submissions on your form to increase the available upload space limit. Upload space is the available space you can use when storing files uploaded through the Upload Field in the form. To understand more about the form usage and limits you can checkout the guide here. Let me show you how:
1. First, access the Tables page, on the My Forms page. Select the form and click on Submissions on top to open Jotform Tables.
2. On the Tables page, choose the entries that needs to be deleted using the checkboxes and select Delete in the upper-right corner.
3. In the confirmation dialog, select Move to Trash.
4. After moving to the Trash, make sure to Purge the deleted submissions to free up the space. To view the Trashed entries, Click on the 3 dot icon on your Tables page and select Trashed Entries.
On the next prompt, select the entry you want to delete and click on Delete Forever to permanently delete the submission.Deleting the and purging the trashed data will free up space on your account. The deleted data will no longer count or go against your available space. Before deleting your submission I recommend downloading the submissions so you have a back up copy.
Reach out again if there's anything else we can help you with.


 On the next prompt, select the entry you want to delete and click on Delete Forever to permanently delete the submission.