-
Controladoria_controladoriaPerguntado em 27 de dezembro de 2023 às 14:50
Como preencher automáticamente o campo de um documento assinável com base em um formulário?
-
Karlo Jotform SupportRespondido em 27 de dezembro de 2023 às 17:19
Hi Controladoria_controladoria,
Thanks for reaching out to Jotform Support. Unfortunately, our Portuguese support agents are busy helping other Jotform users at the moment. I'll try to help you in English using Google Translate, but you can reply in whichever language you feel comfortable using. Or, if you'd rather have support in Portuguese, let us know, and we can have them do that. But keep in mind that you'll have to wait until they're available again.
Now, let me help you with your question. To clarify, are you referring to the Jotform sign document? If so, unfortunately, it is not possible to send data to a Sign Document for prefilling since it does not have a unique field ID.
We've made a small guide explaining the main aspects of Jotform Sign that you might find helpful.
1. Creating a Signable Document
- Go to your My Documents page and click on Create Sign Document.
- Next, you can upload your own document, or you can use the Demo Document to test it out.
- Then, you can add more documents, or you can continue by clicking on the Create Signable Document button.
- You’ll be redirected to the Jotform Sign Builder page.
Please note that, after creating your document, you can let the system detect fillable fields automatically by clicking on the Detect Fields button, or you can manually add fields from the menu on the left after dismissing the popup message.

2. Adding Fields Manually
- In Jotform Sign Builder, click on the Add Fields button on the left side of the screen.
- Then just drag and drop elements from the menu that opens on the left into your document. Although there’s no limit to the number of elements you can add, having too many fields might negatively affect the performance of your document.
3. Editing Fields
- In Jotform Sign Builder, select the related field and click on the Gear icon below the field.
- In the menu that comes up, you can make changes to the field. For example, you can change the Field Name, and you can set options based on the element you’re using.
4. Assigning Fields
- You can easily assign, edit, add, and delete roles just by clicking on the Assign Field To button.
- After clicking on it, a window will open. When it does, you can make your changes.
5. Changing the Document Title
- In Jotform Sign Builder, click on Settings in the green navigation bar at the top of the page.
- Under the General Settings tab, you can edit the document’s title in the Document Title text area.
6. Customizing the Email Settings
- In Jotform Sign Builder, click on Settings in the green navigation bar at the top of the page.
- Then, click on Email Settings.
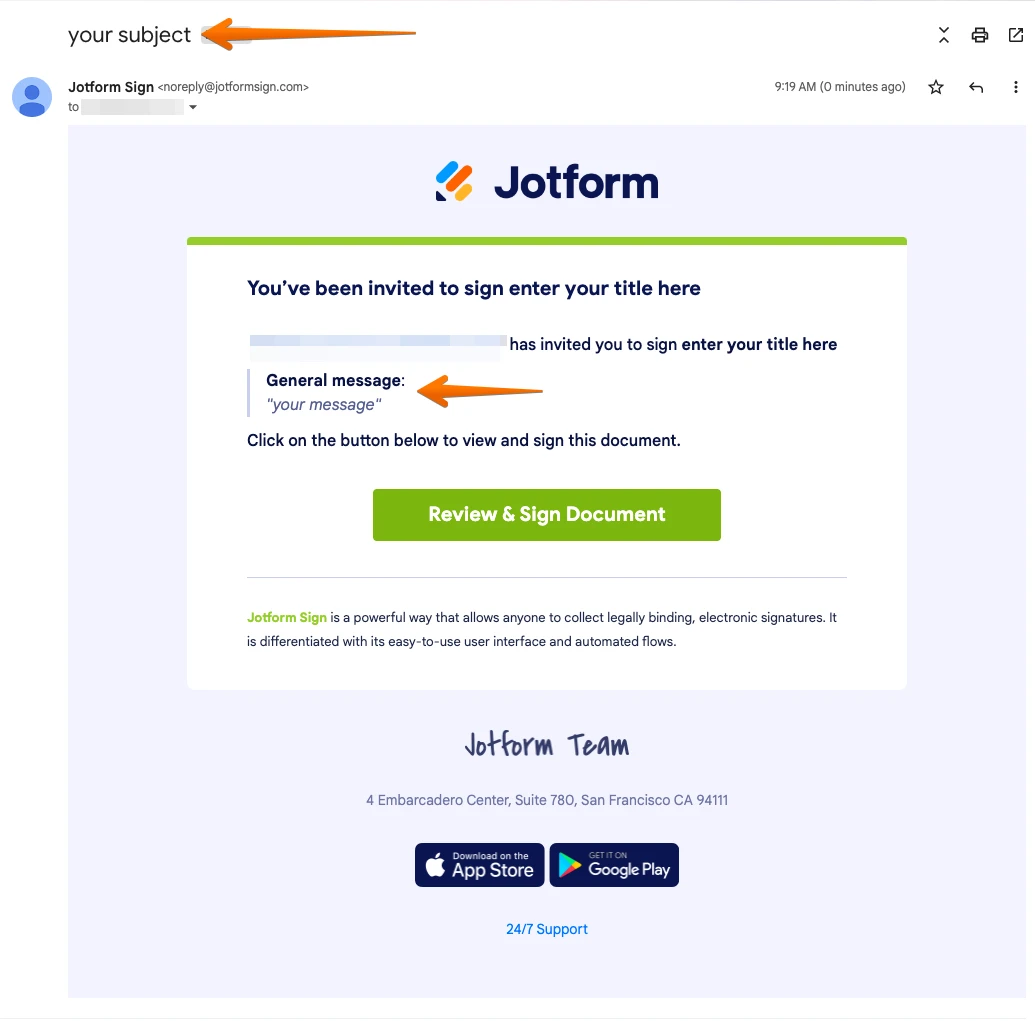
- In the Email Settings section, you can edit both the Email Subject and Email Message.
After completing the steps above to customize the email settings, your email will look like the one below:

7. Publishing the Document
- In Jotform Sign Builder, click on Send in the green navigation bar at the top of the page.
- In the Send To Sign section, you can easily send your document so people can sign it.
- All you need to do is enter a name and email address in the related fields.
- Then, click on Send To Sign.
You can also see a list of your Sent Documents as well at the bottom of the Send section:
Also, you can send Reminder Emails, set an Expiration Date, add a CC Recipient, and enable Signer Delegation under the Options tab:
8. Tracking Documents
- Go to your My Documents page and select your document.
- Then, click on Signed Documents.
- This will automatically redirect you to the Jotform Sign Inbox.
- In the Jotform Sign Inbox, you can see all of your documents. They may be listed under several tabs, such as Waiting for My Signature, Waiting for Others, Completed, Canceled, and Declined.
Check out this guide on How to Use Jotform Sign.
Let us know if there’s anything else we can help you with.
-
Controladoria_controladoriaRespondido em 4 de janeiro de 2024 às 08:33
Thanks for the feedback! Here we took a break during New Year's Eve. It's a shame I can't use form data to automatically populate my signable documents. In any case, I would like to take this opportunity to suggest this improvement, just as it exists between forms for forms.
Another point is the subscriptions widget. There are two subscription modes. One of them is with your finger or mouse swiping and drawing the signature. The second is a standard writing font. This second way, writing with a keyboard and standardized font, seems very false for contracts, for example. A second suggestion would be to give the option to disable the written signature. In any case, I thank you. -
Eliza Jotform SupportRespondido em 4 de janeiro de 2024 às 11:01
Hi Controladoria_controladoria,
Thanks for getting back to us. While the feature you’re looking for isn’t currently available, rest assured we’re always working to add new services and features to Jotform. I've gone ahead and escalated your request to our Developers. When or if it's implemented depends on their workload, how viable it is, and how many other users request it. If there are any updates, we’ll circle back to this thread and let you know.
As for your other request, I've moved that to a new thread. You can check that out here.
Let us know if there’s anything else we can help you with.


