Syncing your Microsoft Teams Calendar with your Microsoft Outlook Calendar ensures that all your meetings, appointments, and events are seamlessly integrated across both platforms. This synchronization helps you stay organized and manage your schedule more efficiently.
Microsoft automatically syncs both calendars, eliminating the need for any further action on your part. You can access and manage your meetings and information from either application.
In Jotform, you can set up the Microsoft Teams integration to create a meeting and sync it to your calendars. Here’s how you can do it.
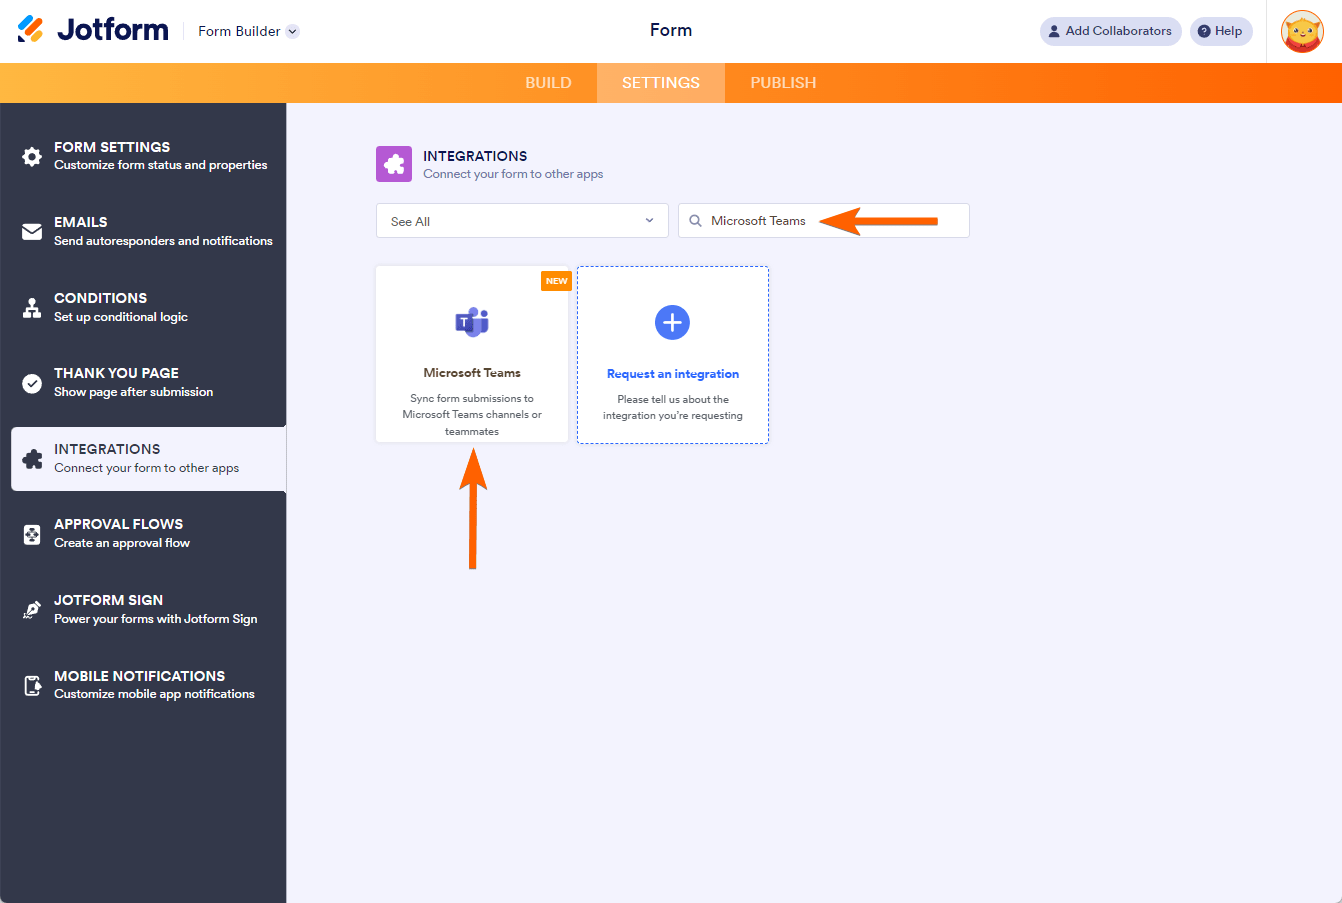
- In the Form Builder, go to the Settings tab.
- Click the Integrations option from the left panel.
- Search for and select Microsoft Teams.
- Select the Create Meeting option from the list of Microsoft Teams actions.
- Click the Next button to proceed.
- Click the Authenticate button. Ensure you permit Jotform to access your Microsoft account.
Note
The Microsoft Teams integration requires a work or a school account. Personal Microsoft accounts aren’t supported.
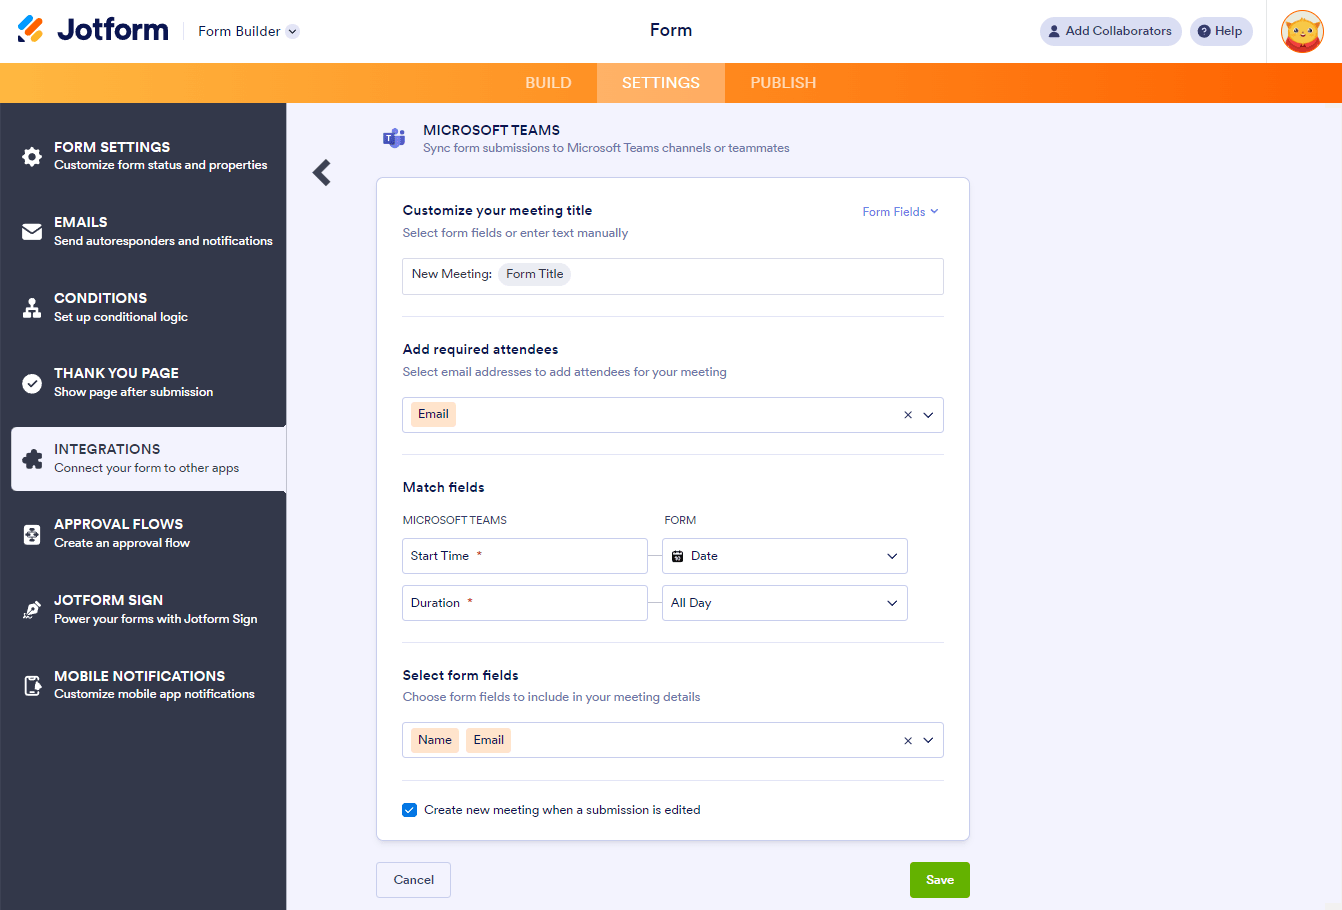
- Set up the following options accordingly:
- Customize your meeting title — You can personalize the title with data from your form by clicking the Form Fields option or manually entering a title.
- Add required attendees — You can add attendees to your event by selecting the email addresses from the dropdown.
- Match fields — You must map the Start Time and Duration from Teams to your form. You can map the Start Time to your form’s Date Picker or Appointment element. Select from the predefined values or the Appointment element for the Duration option.
- Select form fields — Select the fields you want to include in your meeting details.
- Create a new meeting when a submission is edited — Check this option to create a new meeting when the submission is edited.
- Finally, click the Save button to complete the integration.
Pro Tip
With Jotform’s Action Buttons, you can set up the integration as outlined above and create meetings to Microsoft Teams and Outlook Calendars with a click of a button.
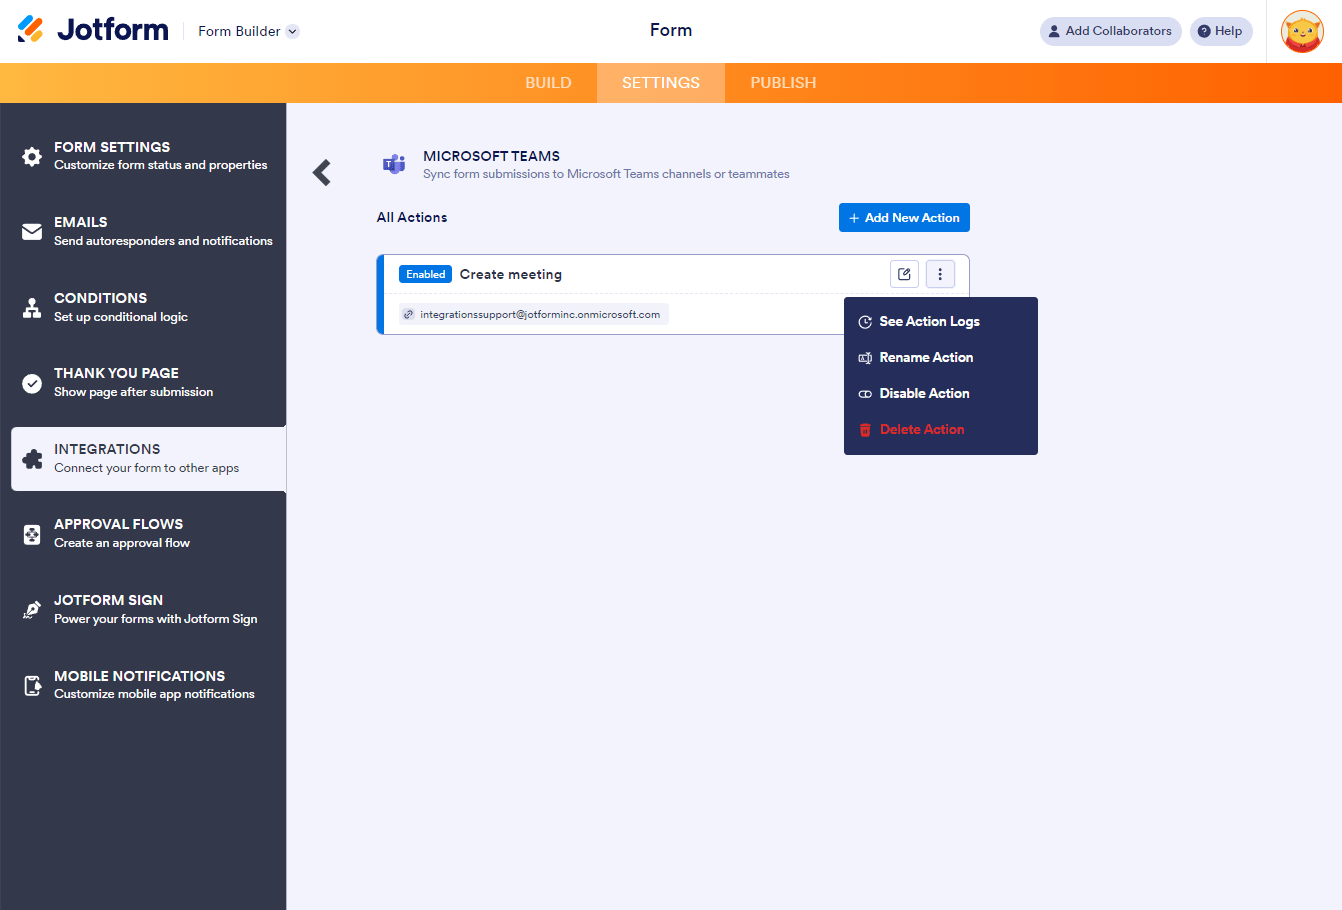
Once the integration is set up, you can see the actions you created. If you hover your mouse over an action, the Edit Action (pencil icon) and the More (three vertical dots icon) options will appear to the right. The More option includes the following:
- See Action Logs — This option displays your Microsoft Teams’ successful and failed runs. It’s useful when troubleshooting issues.
- Rename Action — Select this option to personalize the action’s title.
- Disable Action — Use this option to temporarily stop the integration from completing the configured action.
- Delete Action — Select this option to remove the integration from your form.
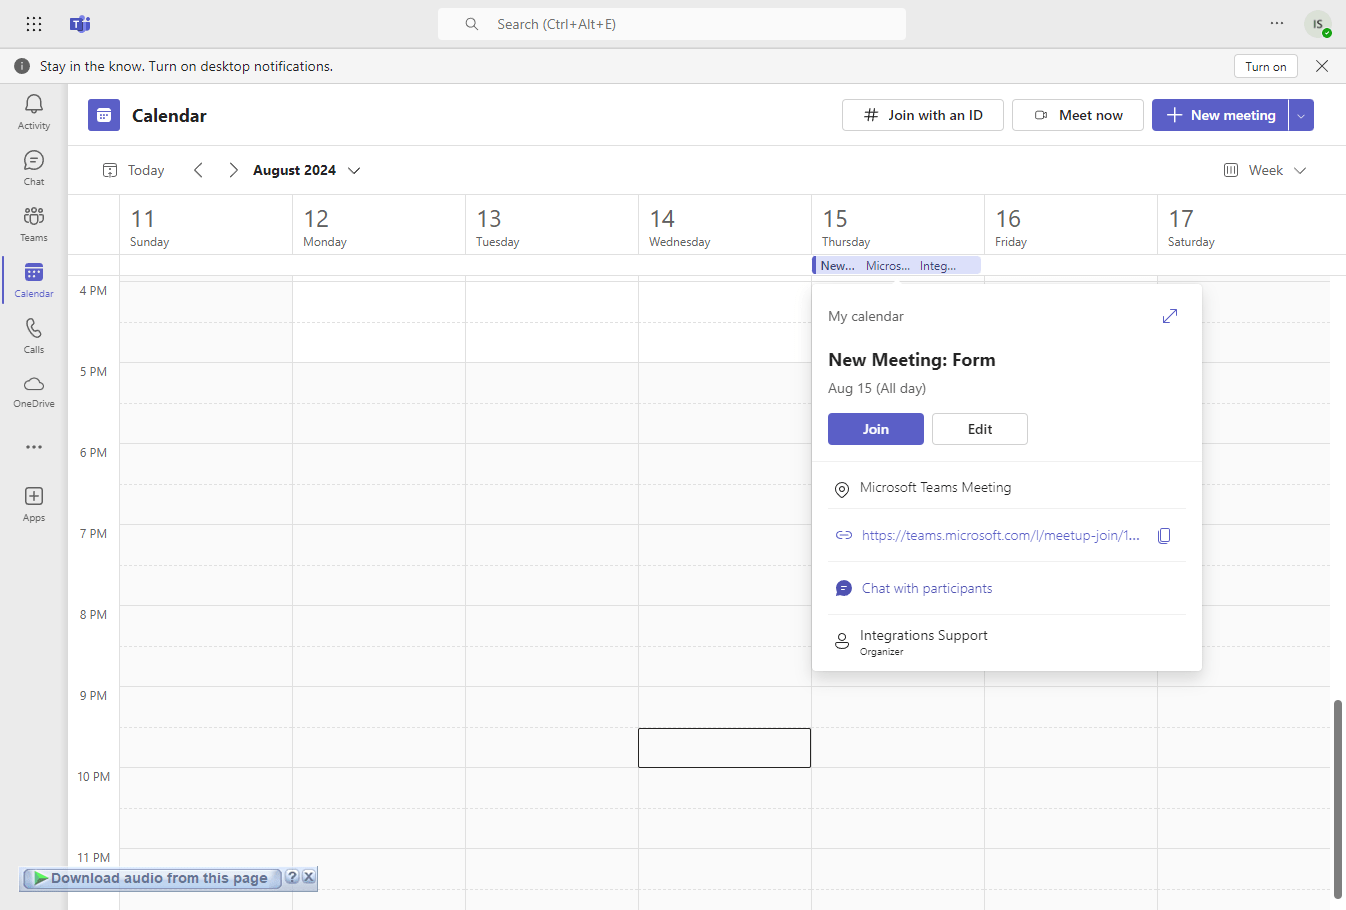
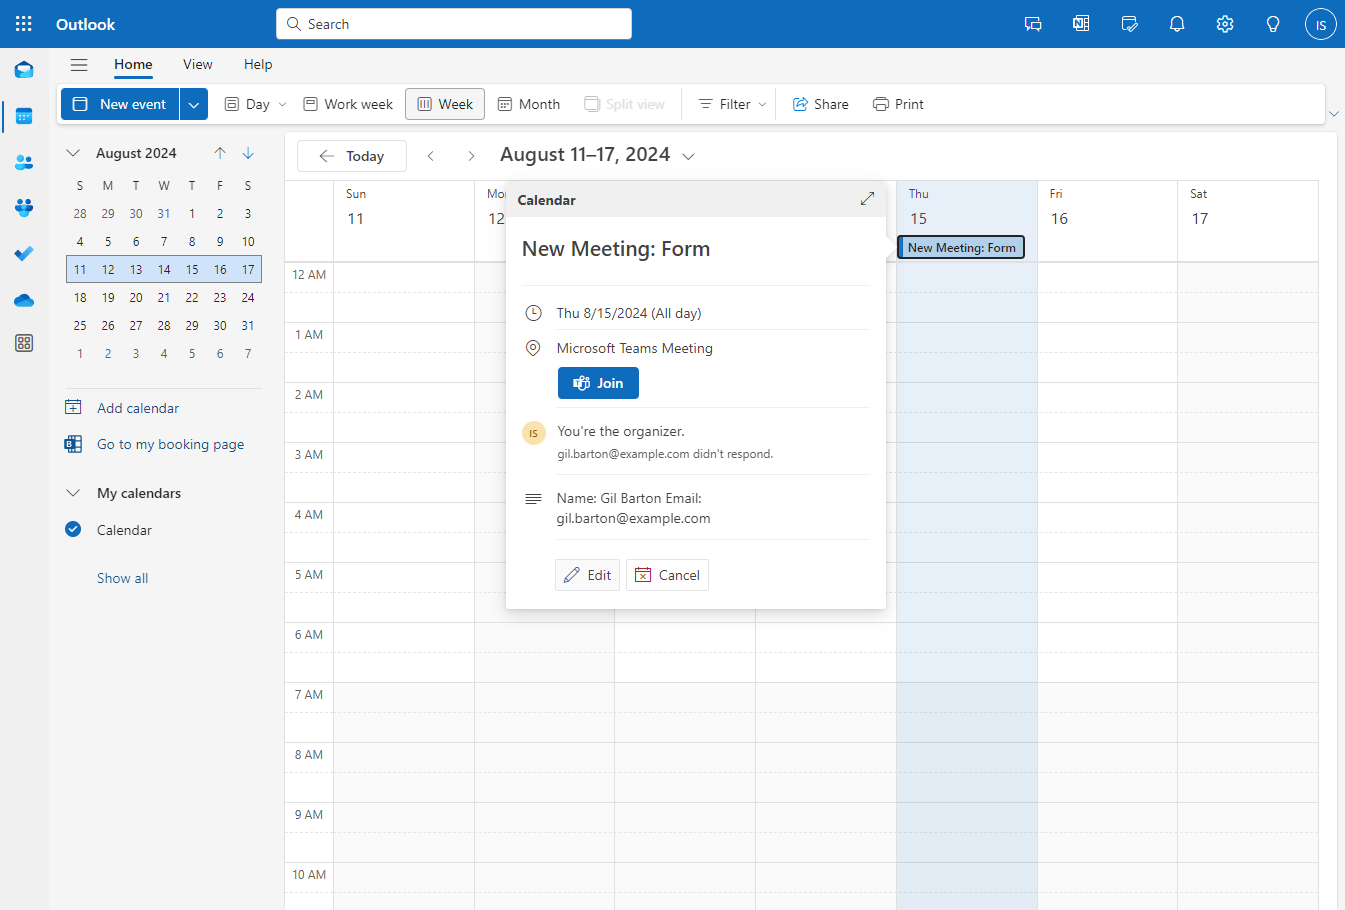
Below is an example of how the meeting from your form gets posted to both Microsoft Teams and Outlook Calendars:


Send Comment:
1 Comment:
More than a year ago
Hey there,
is it possible that clients can only book appointments, that aren´t already booked. For example:
I have already a meeting on monday 9am in my outlook calendar.
If someone wants to book an appointment, they shouldn´t be able to select monday 9am.
Is there any chance to synchronize this?