monday.com is a visual, easy, intuitive Work Operating System (Work OS) that powers teams to run projects confidently.
With Jotform’s monday.com Prefill feature, you can automatically pre-populate form fields with data from your monday.com account, particularly with your existing boards.
Getting Your monday.com API Key
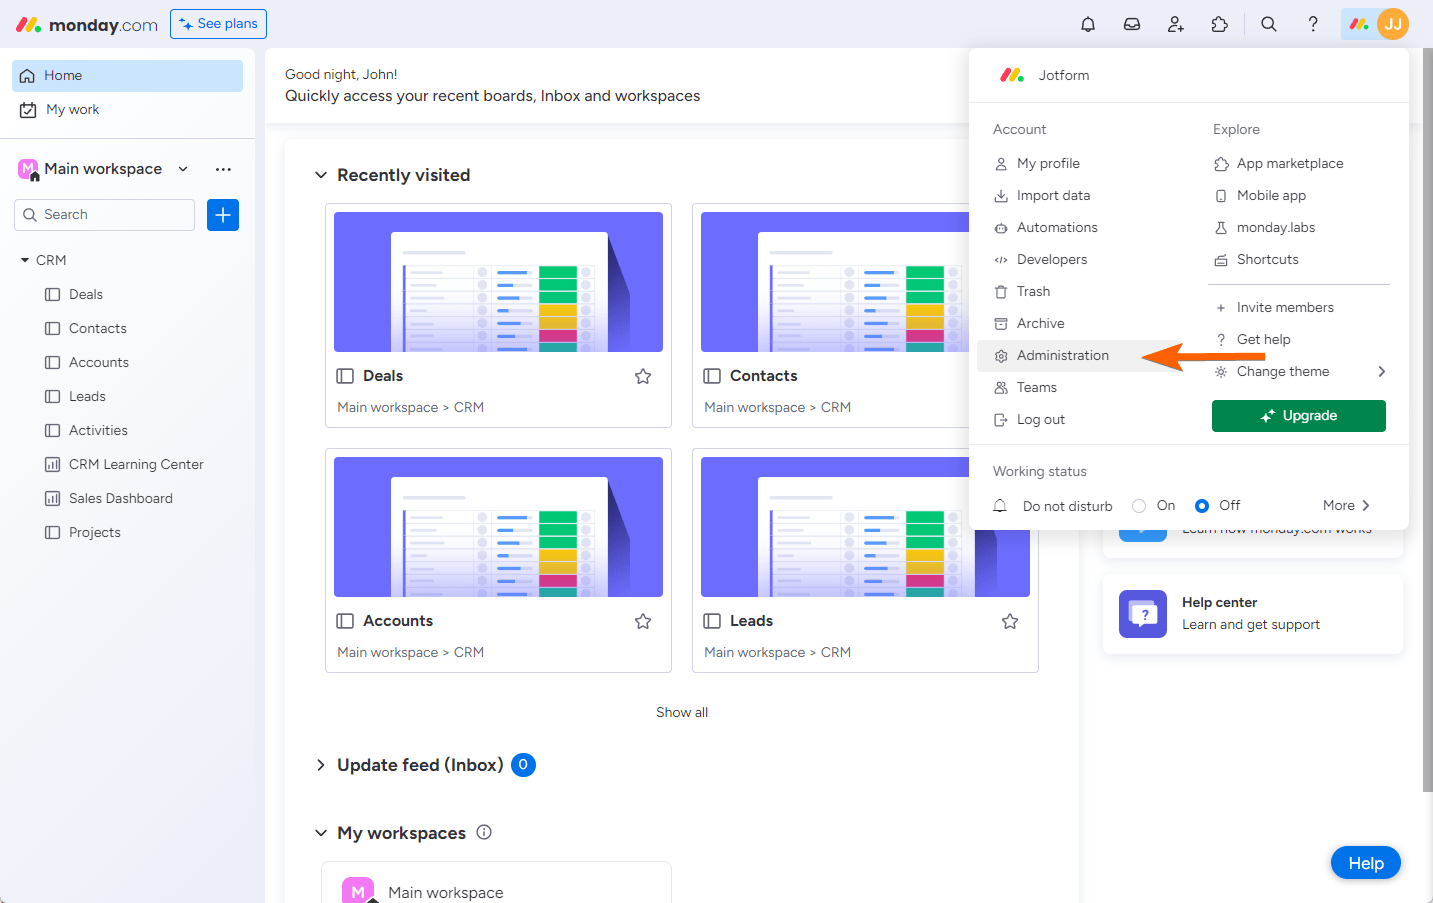
Connecting your monday.com account with Jotform requires the API Key. Here’s how you can get it:
- Log into your monday.com account.
- Click your Profile Picture at the top-right section of the page.
- Select Administration from the options.
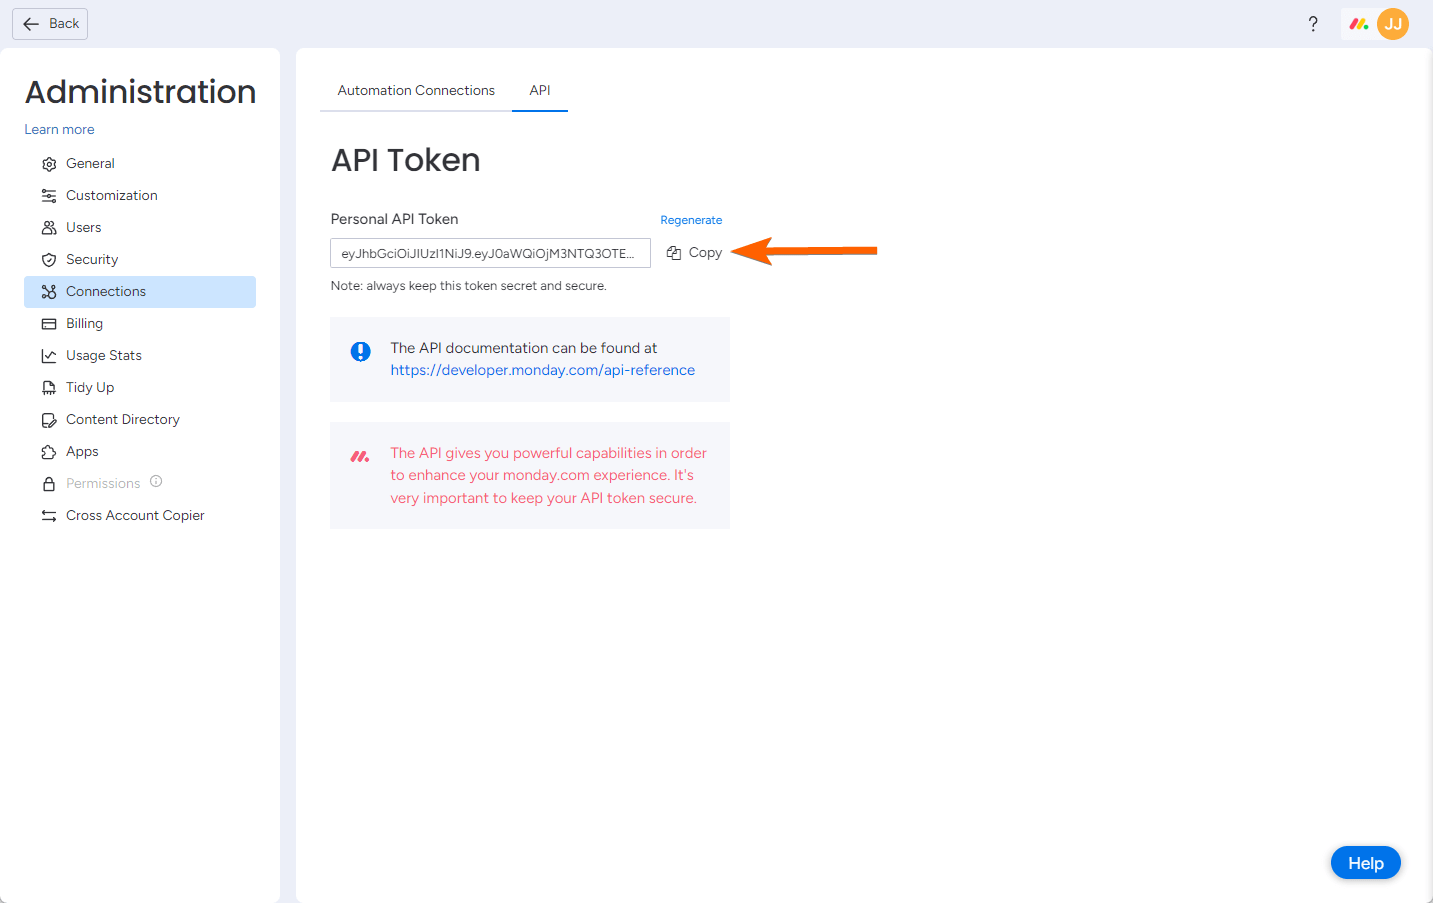
- Go to the Connections tab.
- Copy your Personal API Token from the API section.
Setting up monday.com Prefill
You now have the API Key, so connect your monday.com account and set up the prefill.
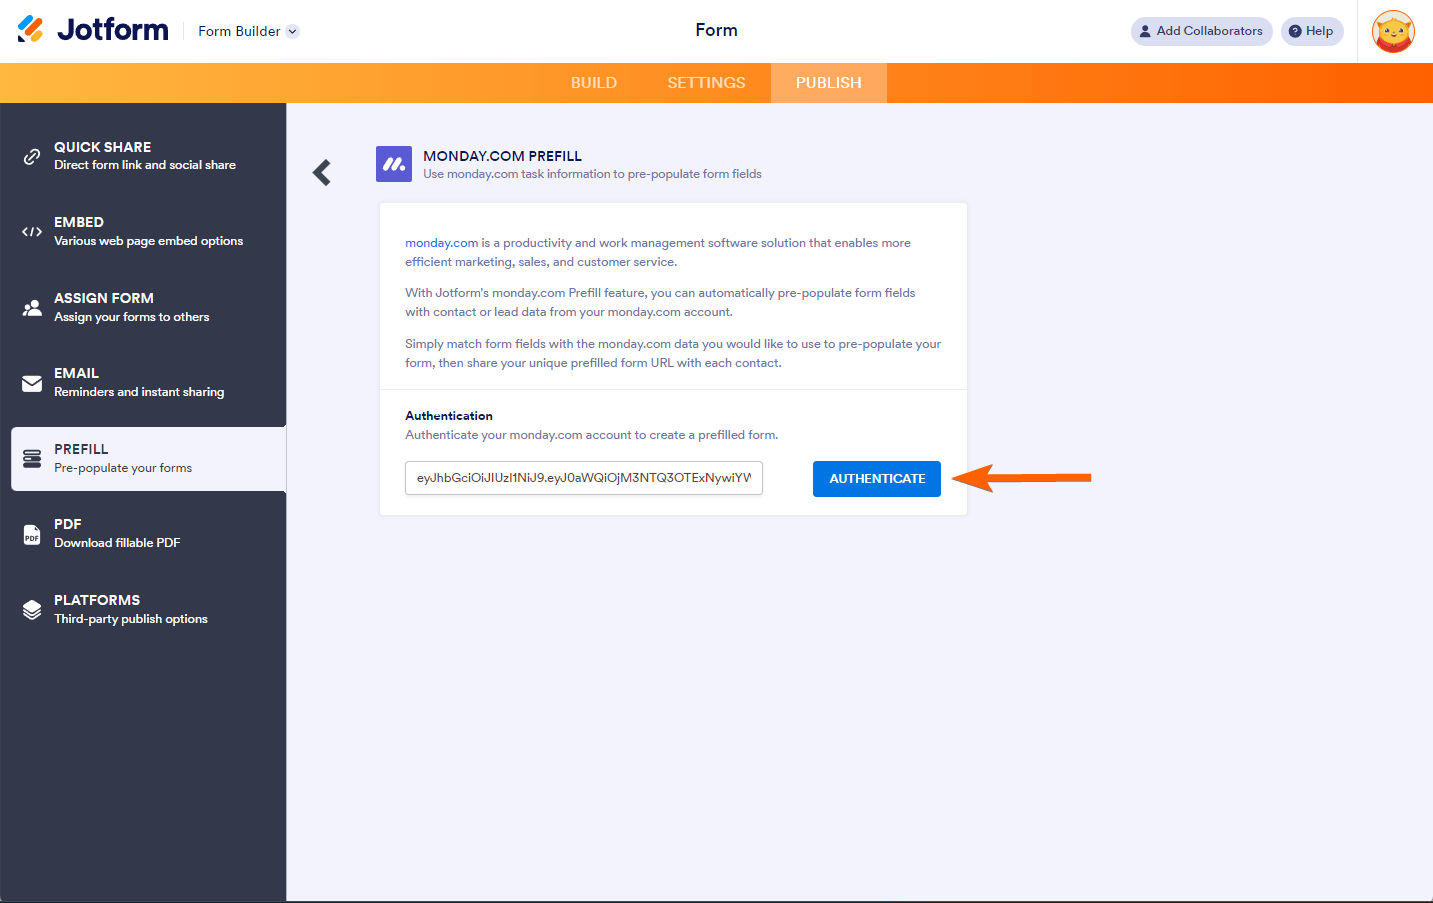
- In the Form Builder, go to the Publish tab.
- Click Prefill on the left.
- Select monday.com Prefill.

- Provide your Monday.com API Key.
- Click the Authenticate button.
- Set up your prefill settings as shown below:
- Select a Board
- Select a Group
- March Your Fields
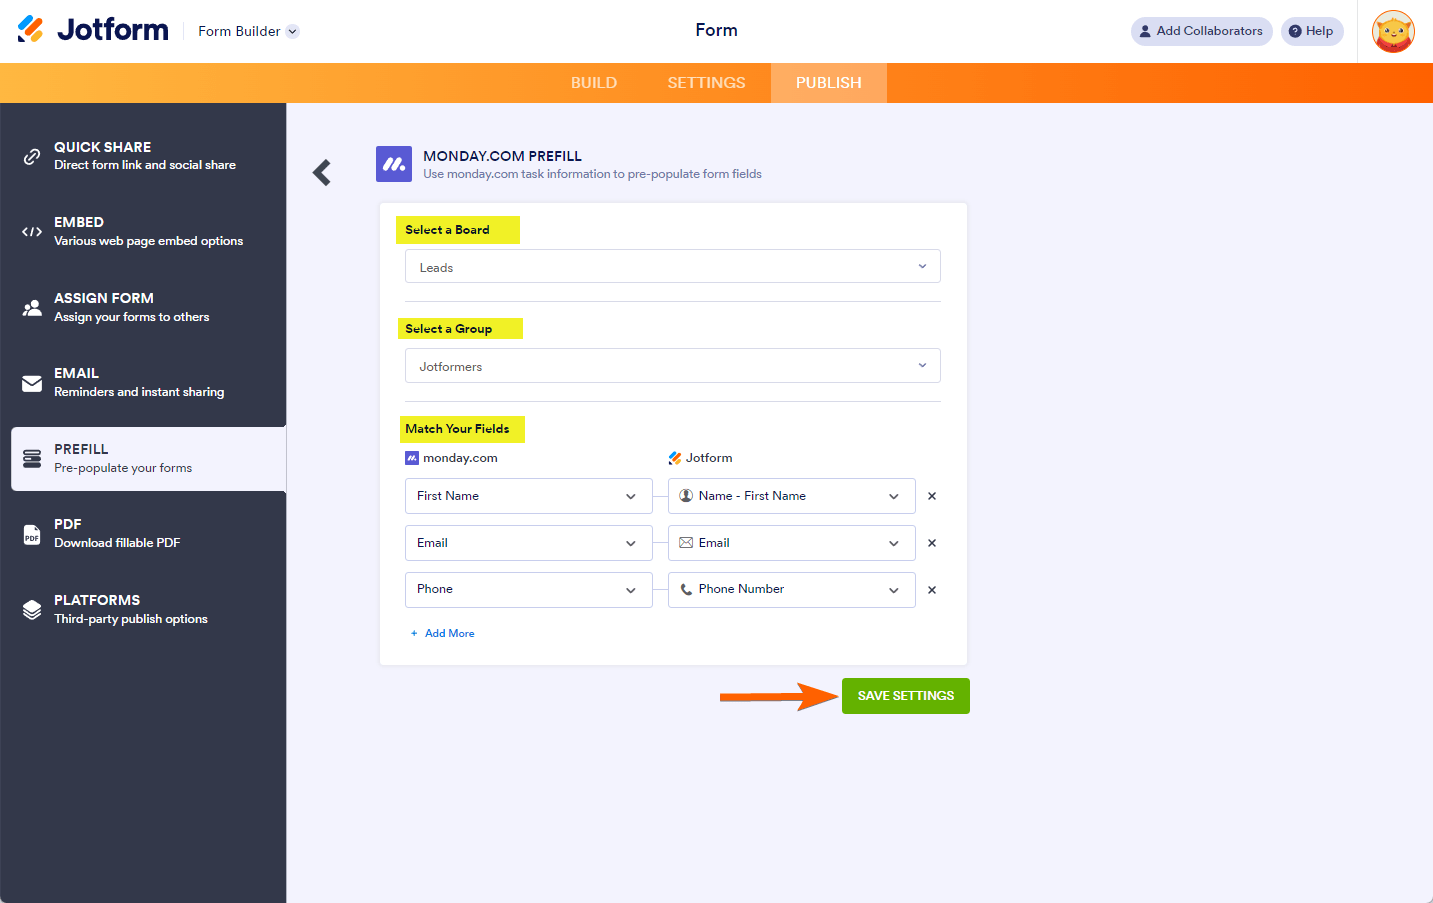
- Click the Add More link to map additional fields. Otherwise, click the Save Settings button to save the Prefill settings and start adding your Pipedrive Prefill.
Adding monday.com Prefill
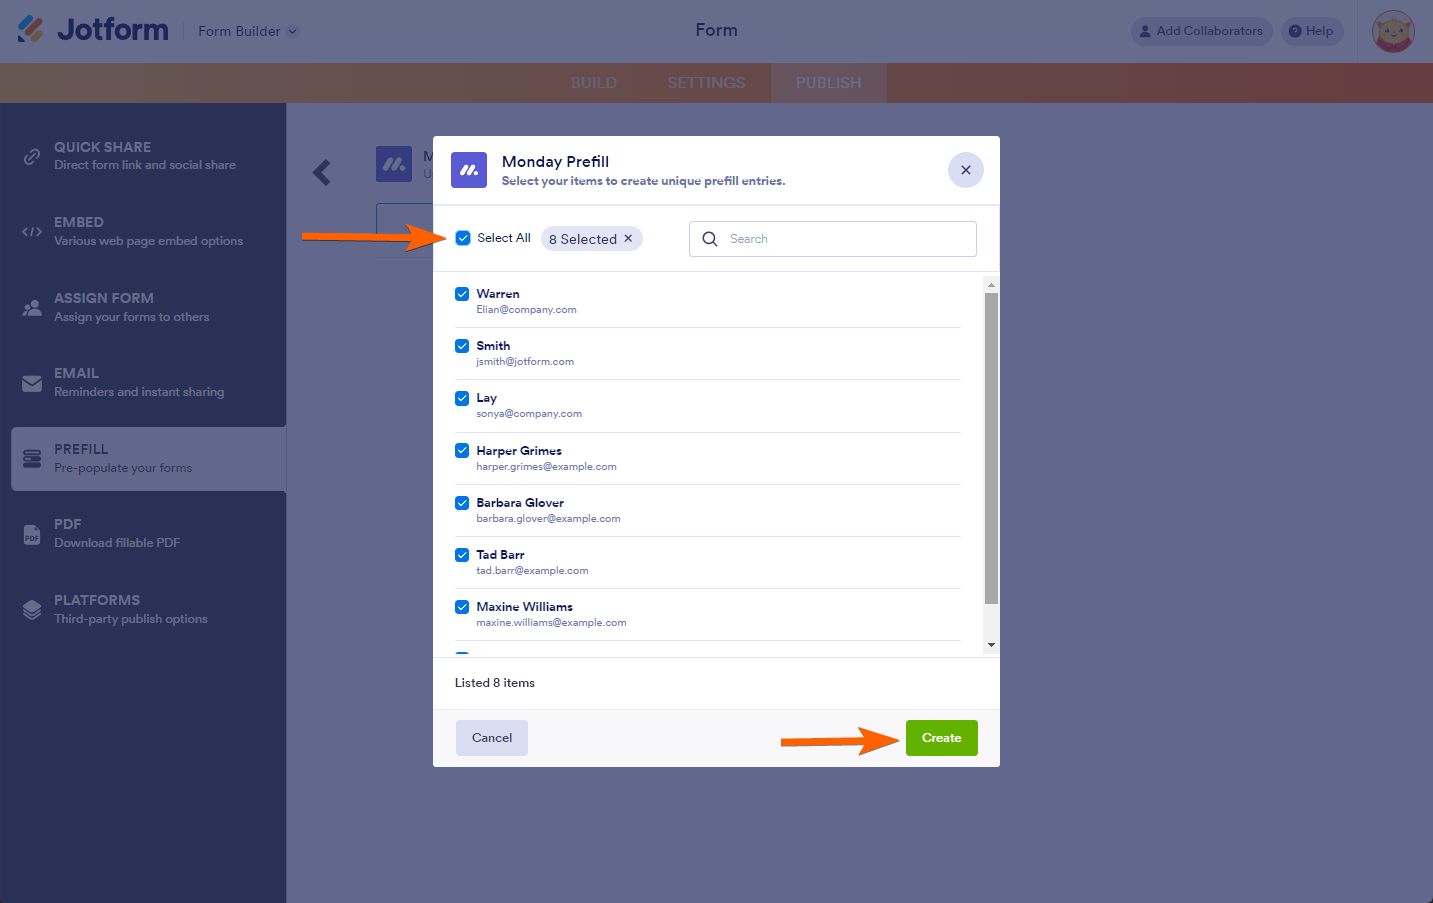
Once you have completed the Prefill Settings, you can now add Prefill items.
- Click the Add a New Prefill button.

- Select the Monday.com entries you would like to create as prefilled items.
- Lastly, click the Create button. You will automatically see the prefilled items after this step.
Note
With monday.com Prefill, you can only select and create up to 20 prefill items. Selecting more than 20 is possible, but clicking the Create button will not work. Instead, you will receive a message indicating the limit.
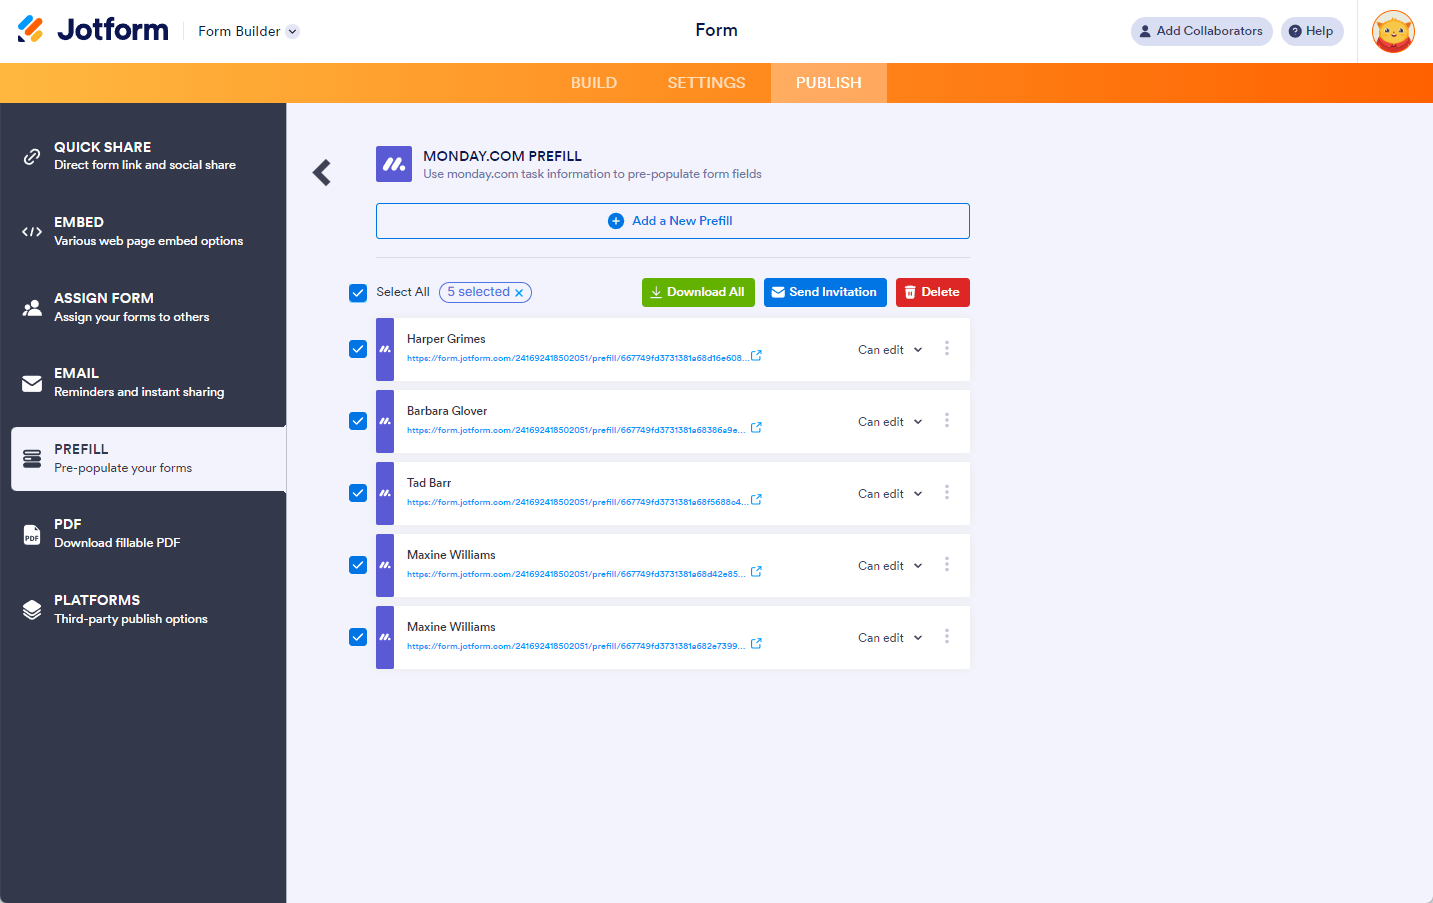
Managing monday.com Prefill Items
Once the prefilled items are created, you can now go ahead and send them or copy the links. If you want to manage multiple prefill items, select them from the list, and you should see the following buttons:
- Download — You can download all prefilled items in a CSV file.
- Send Invitation — Click this button to send the prefilled items to their designated recipients. As noted below, you can only send up to 5 prefilled items at a time.
- Delete — To delete the selected prefilled items. This cannot be undone.
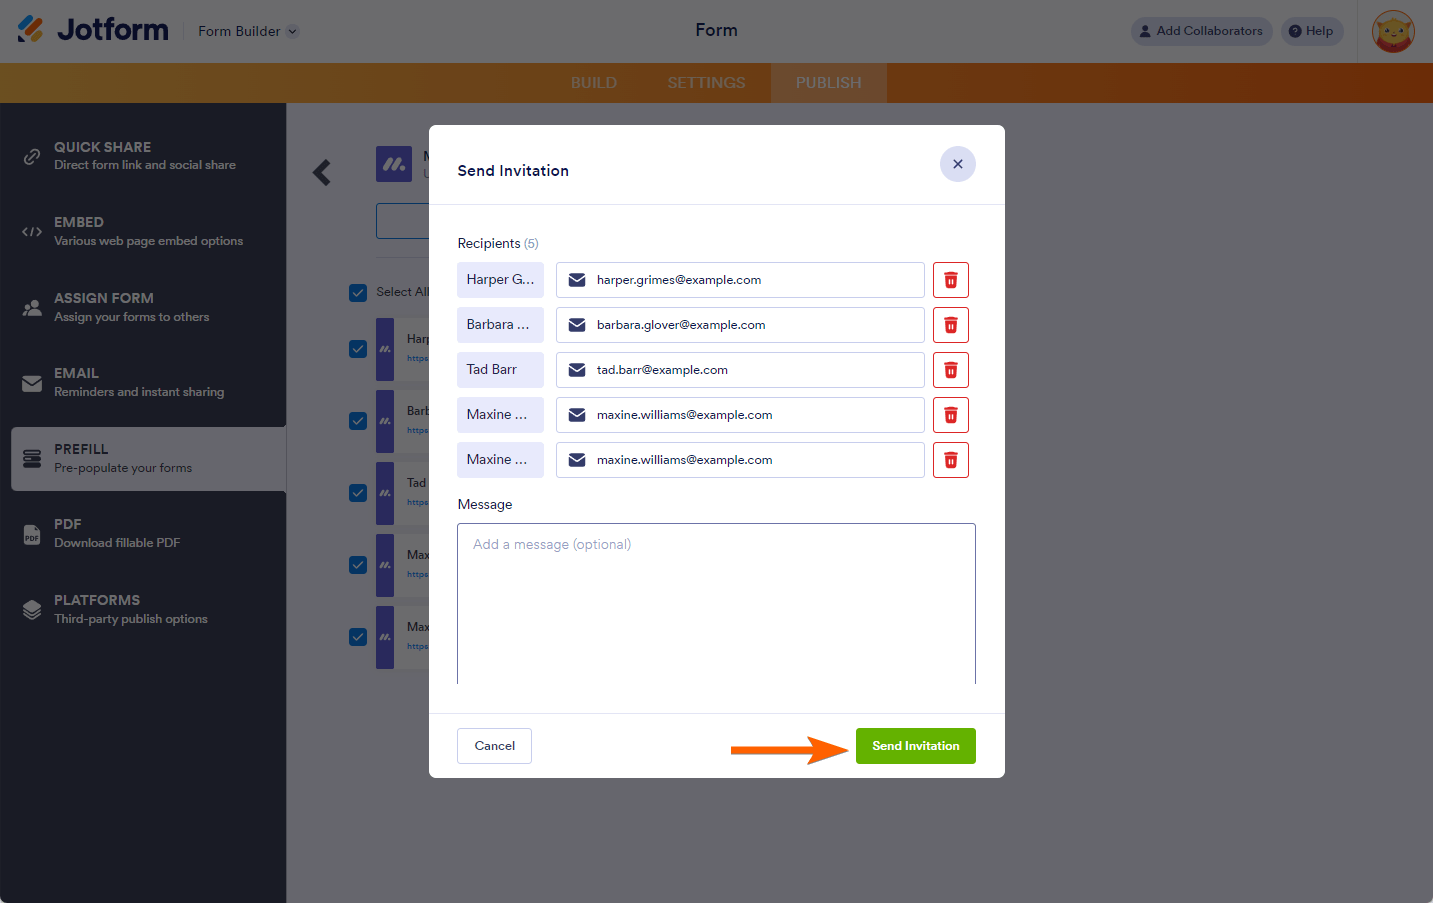
When you click the Send Invitation button, a popup window automatically fills the recipients with the user’s email address. You can change the recipient(s) if you want to. You can also optionally add a message. Once ready, click the Send Invitation button at the bottom of the window.
Note
You can select all Prefilled URLs, but note you can only send an invitation to up to five (5) people at a time. Selecting more than this number will display an error message.
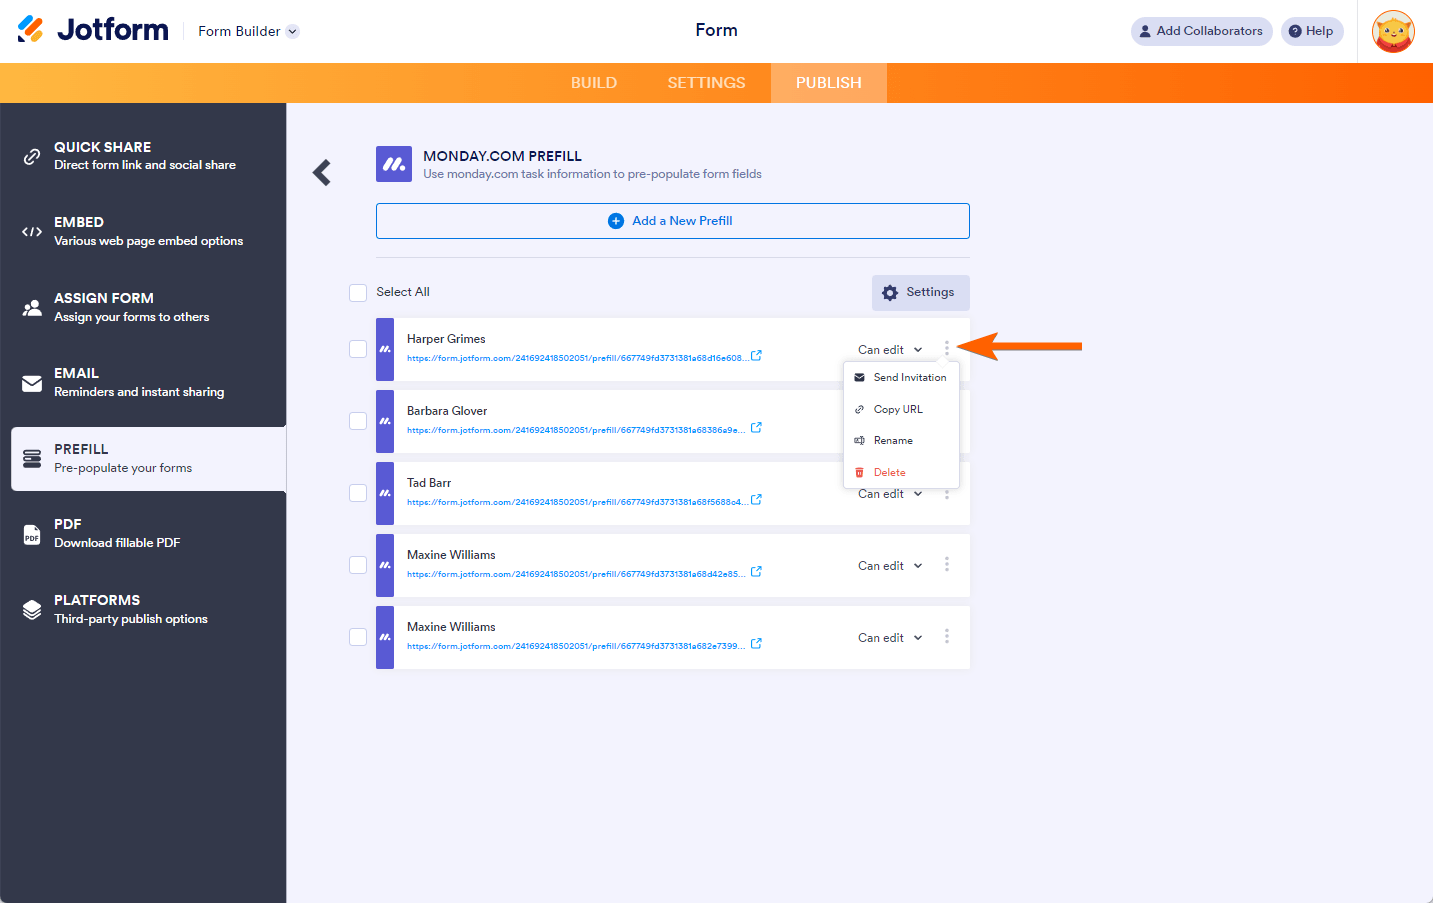
Managing Individual monday.com Prefill Item
On individual Prefilled items, clicking the Kebab (3 vertical dots) menu will allow you to do the following:
- Send Invitation — If you want to send the prefilled URL individually or wish to resend it to the recipient.
- Copy URL — If you want to copy the URL for other purposes.
- Rename — If you want to change the name of the Prefill item.
- Delete — To delete the prefilled URL.
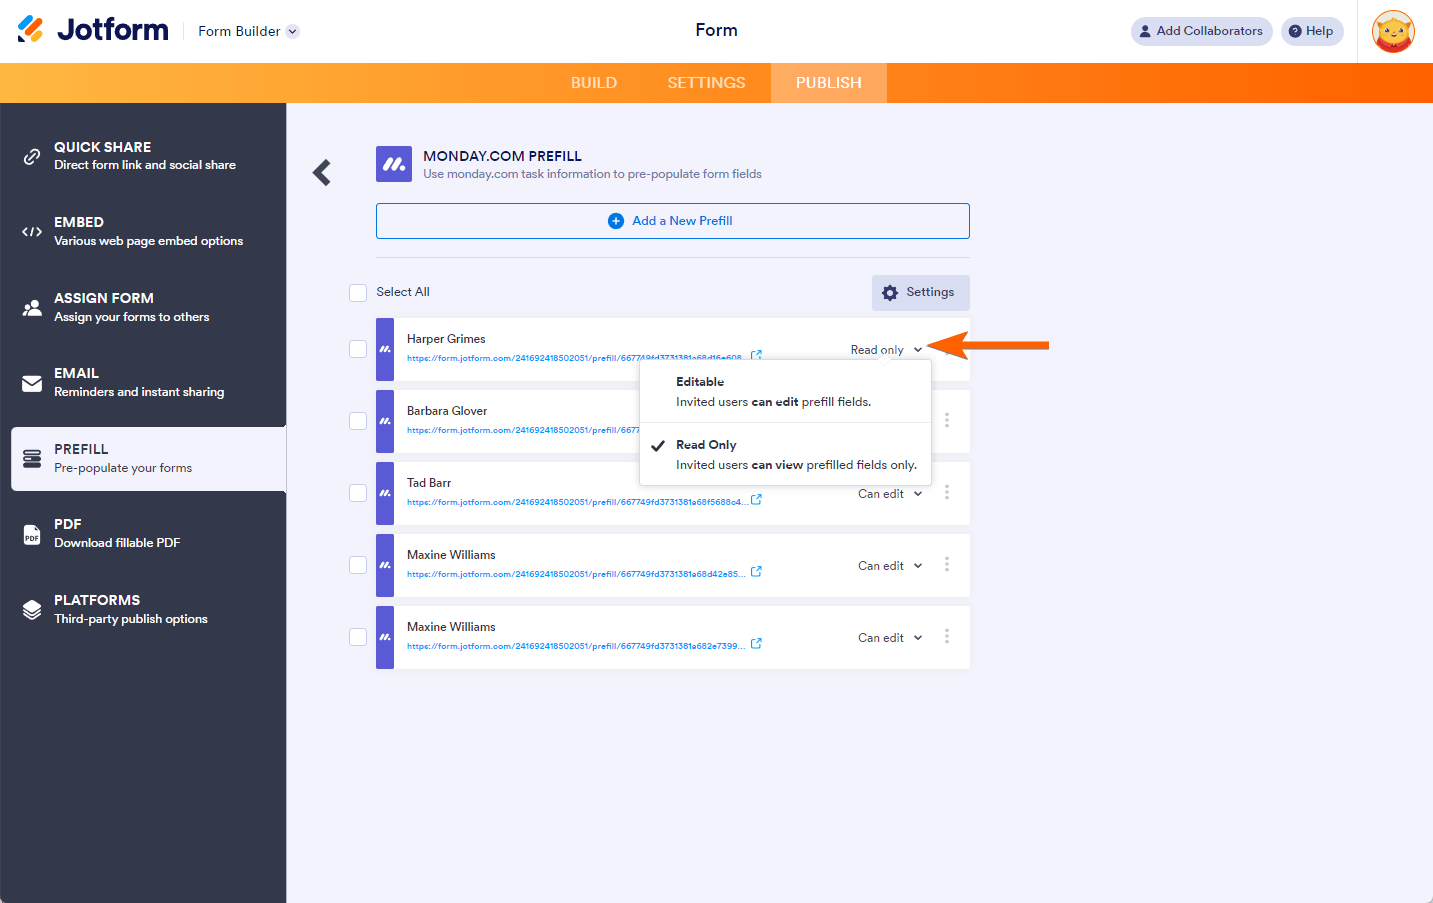
Changing Permission for Invited Users in monday.com Prefill
By default, users can edit the pre-filled data. If you do not want users to edit the data, you can change the permission from Can Edit to Read Only. Click Can Edit and click the Read Only option, as shown in the image below.
monday.com Prefill supports the following fields only:
- Text: Name, Address, Email, Short Text, Long Text
- Long Text: Name, Address, Email, Long Text, Short Text
- Phone: Phone Number, Number, Short Text, Long Text
- Email: Email, Short Text, Long Text
- Link: Short Text, Long Text
- Numbers: Number, Spinner, Scale Rating, Short Text, Long Text
- Item ID: Number, Short Text, Long Text
- Rating: Number, Short Text, Long Text
- Status: Single Choice, Dropdown, Multiple Choice, Short Text, Long Text
- Dropdown: Single Choice, Dropdown, Multiple Choice, Short Text, Long Text
- Tags: Single Choice, Dropdown, Multiple Choice, Short Text, Long Text
- Country: Short Text, Long Text
- Location: Short Text, Long Text
- Date: Short Text, Long Text
- Week: Short Text, Long Text
- Hour: Short Text, Long Text


Send Comment: