Jotform Boards allows users to connect multiple forms to a single board, making it easier to manage and review submissions in one place. This setup keeps everything structured, allowing smooth tracking, updates, and collaboration without switching between separate forms.
Connecting Forms and Matching Fields
To ensure your tasks are filled with the right data, it’s important to map fields correctly when connecting forms to your boards. This helps keep everything organized and easy to manage. You can connect forms to your boards and map their fields to task fields in a few easy steps. Here’s how to do it:
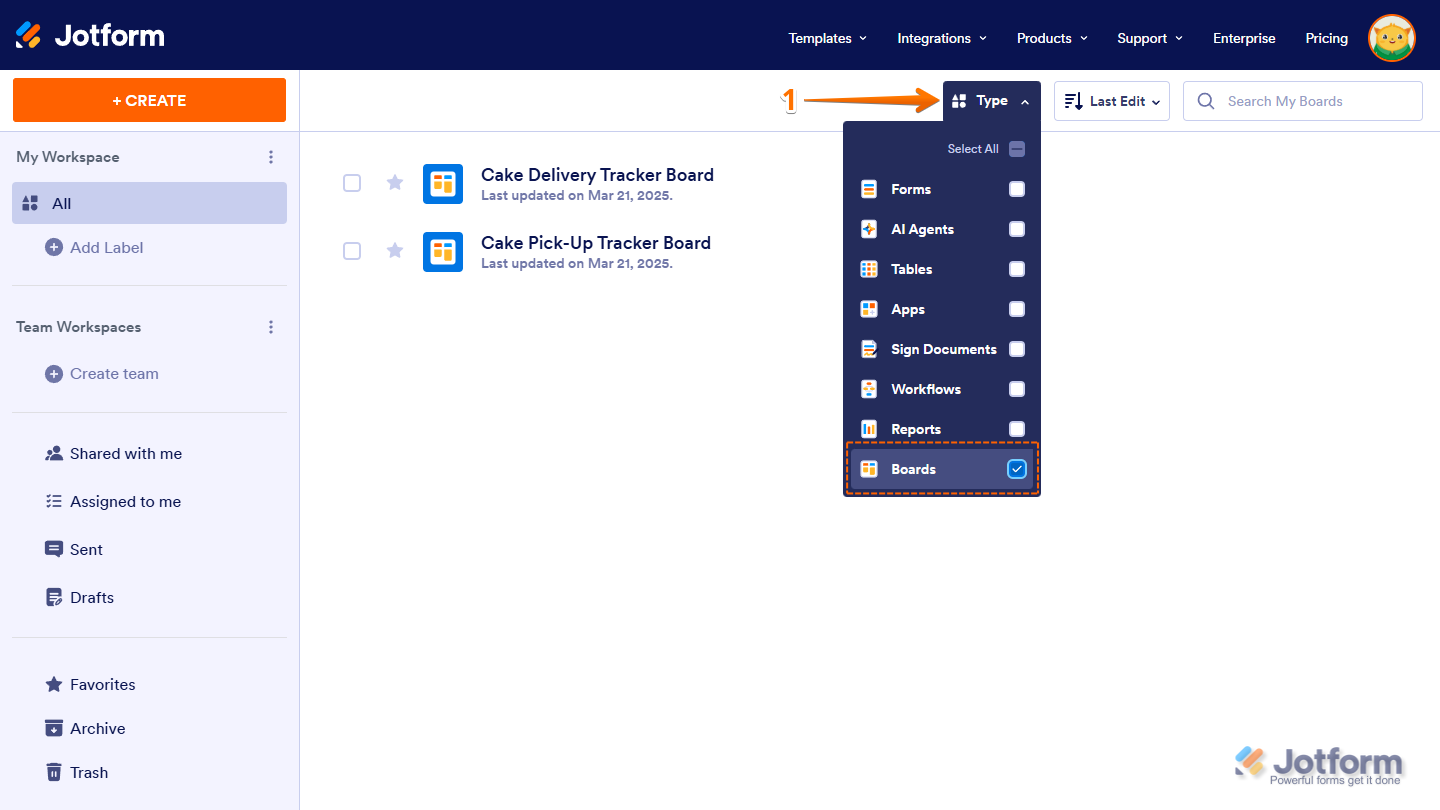
- On your Workspace page, click on Type at the top, and in the Dropdown menu that opens, uncheck the boxes next to all the assets except Boards, so only they’ll be shown on the page.
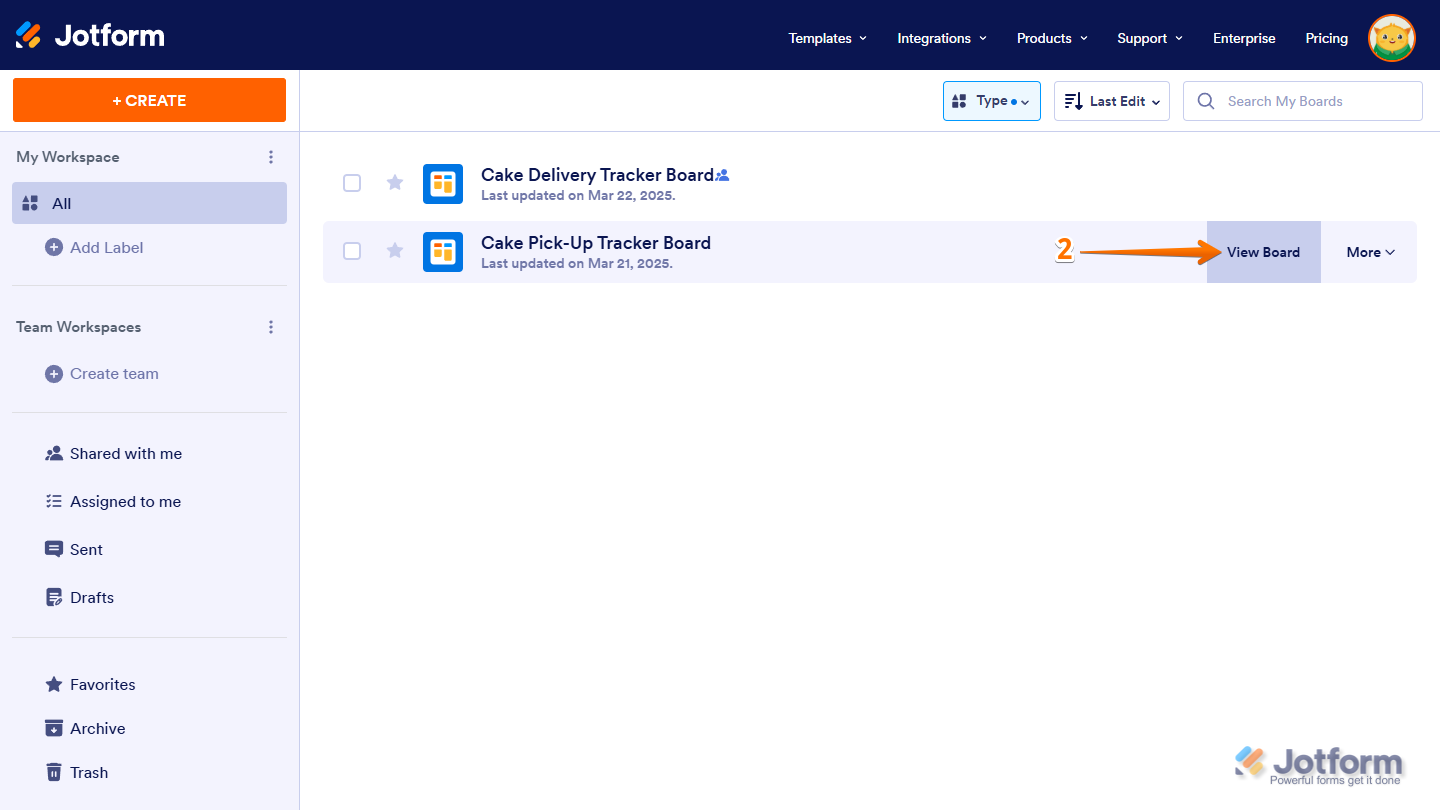
- Now, hover your mouse over the board you want to connect a form to, and click on View Board on the right side of the page.
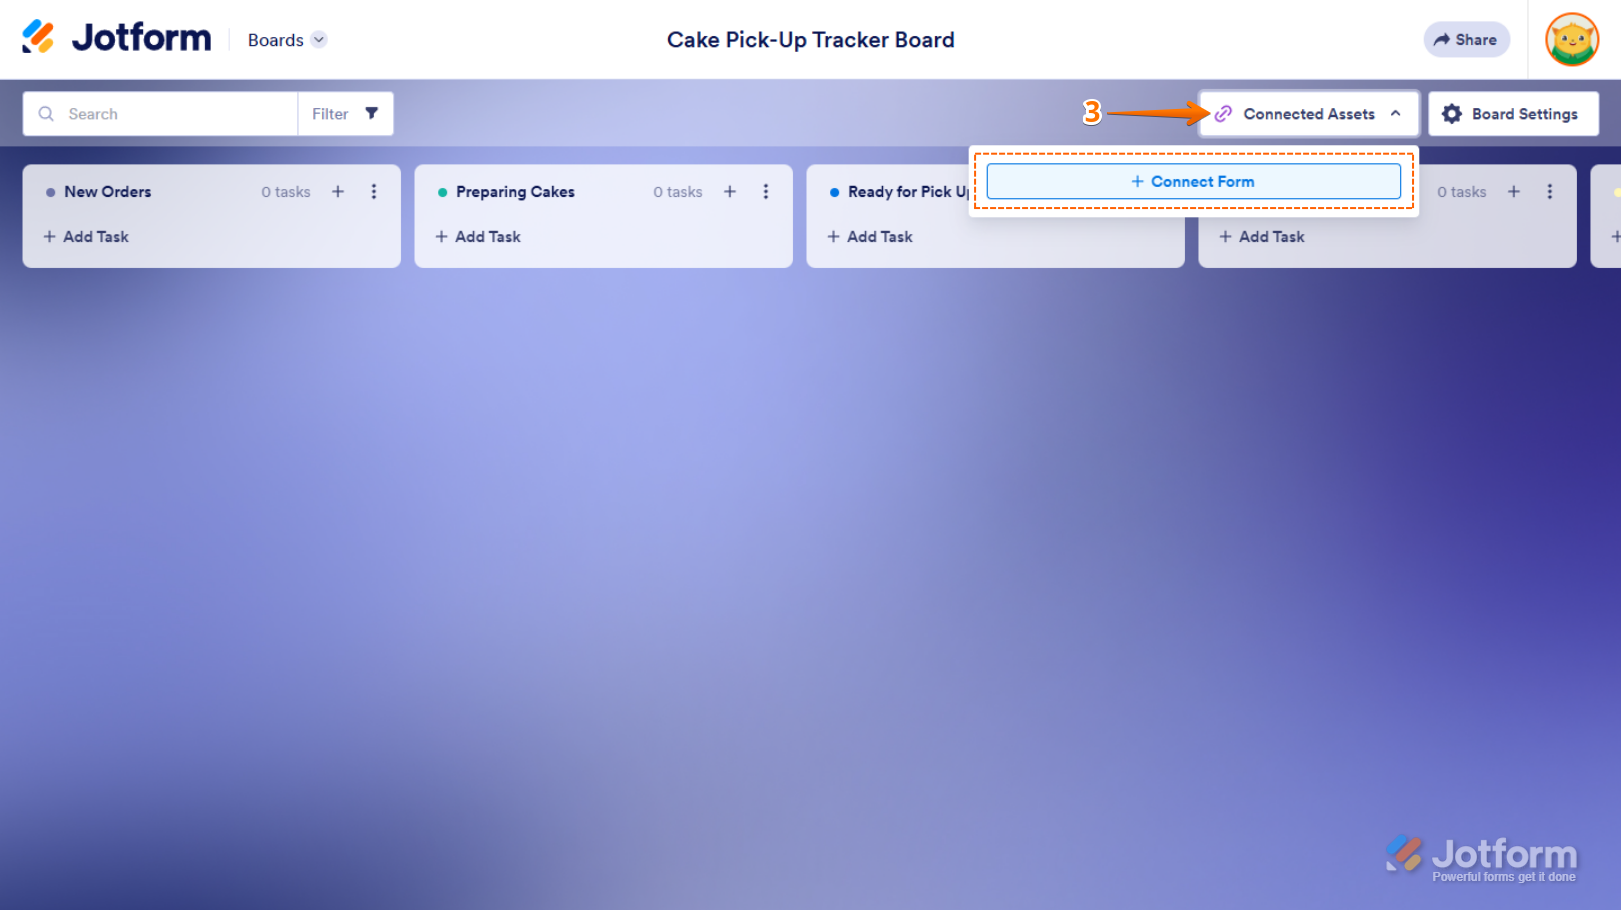
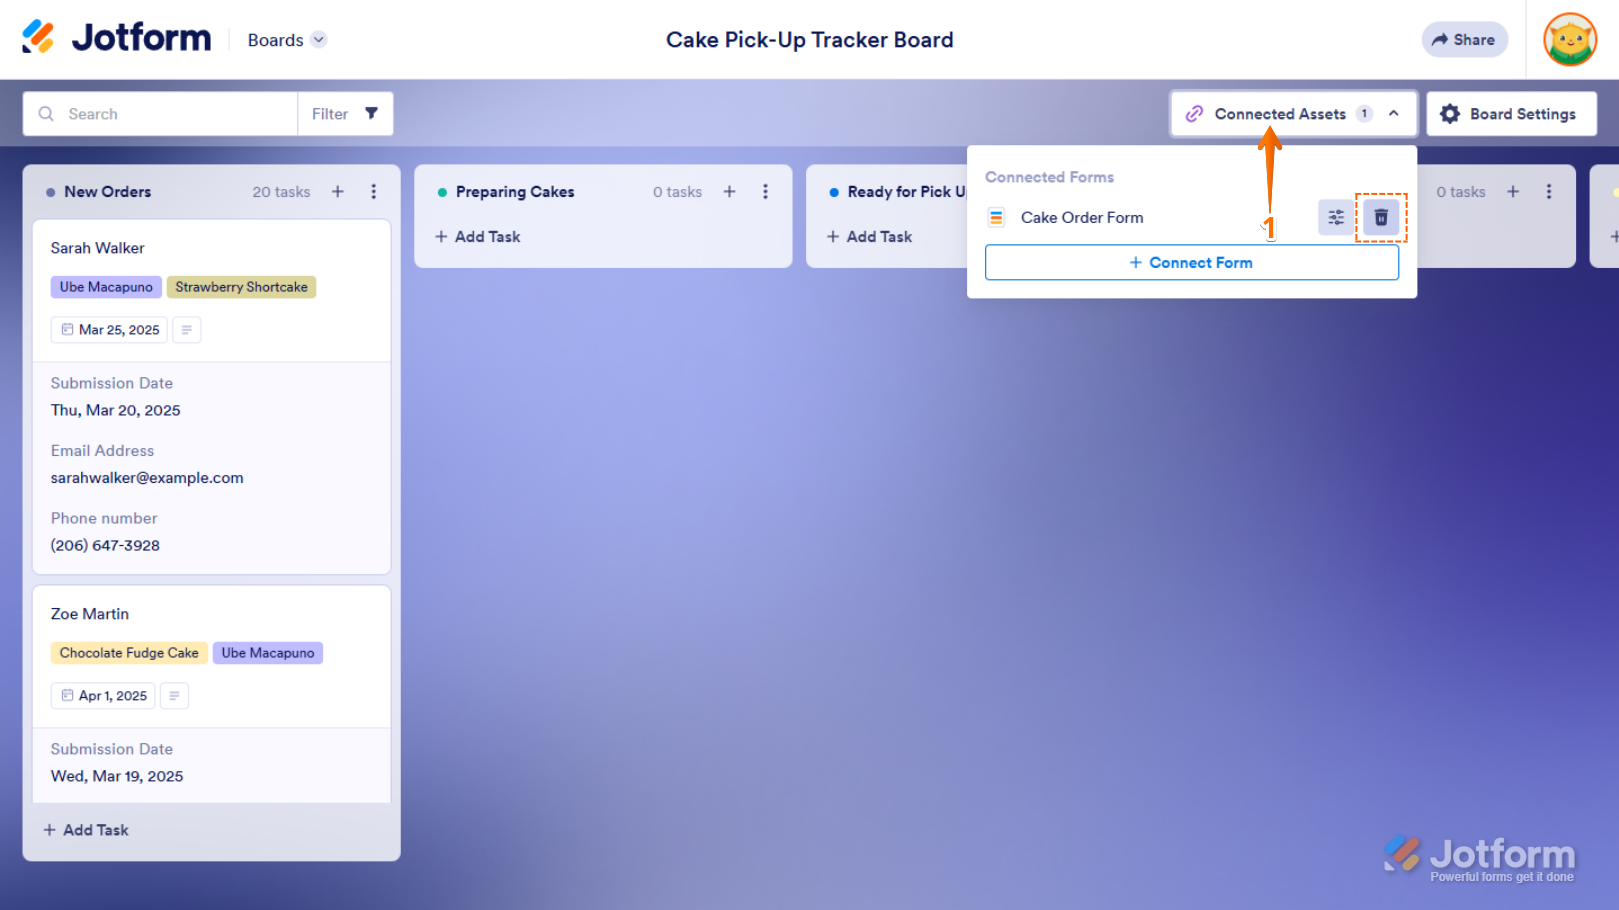
- On your Board, click on Connected Assets at the top, and in the Connected Forms section that opens, click on Connect Form.
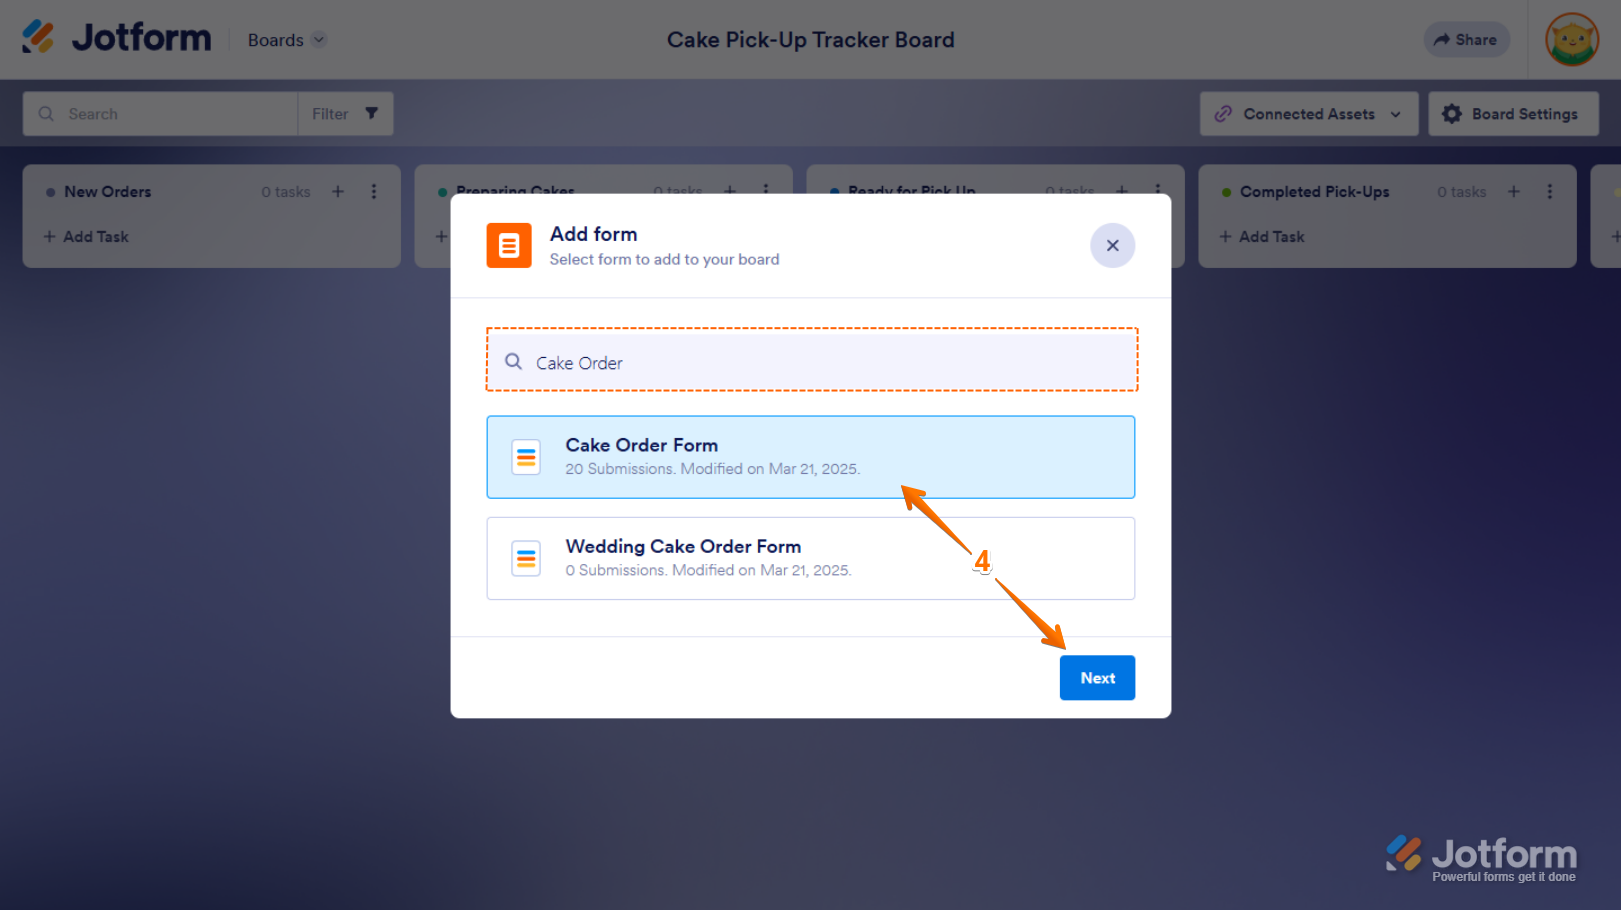
- Now, in the Add Form window, select the form you want to connect and click on Next at the bottom. Or, use the Search bar at the top of the Form List menu to find one easily.
- Then, in the Match Fields section, click on the Dropdown menu under the Form Field column if you want to select a different form field that matches the default Title field under the Task Fields column.
- Next, click on +Add Field to set up the next task field.
The task fields you added will automatically display the value of the form field you match them to in a task. You’ll need to have at least the Title field matched to a form field to continue. Here are the different form field types each task field supports:
- Title — You can select a Full Name, Dropdown, Single Choice, Multiple Choice, Short Text, or Long Text field to match this task field.
- Date — You can select a Date Picker or Appointment field to match this task field.
- Tags — You can select a Single choice, Multiple choice, or Dropdown field to match this task field.
- Description — You can select a Full Name, Dropdown, Single Choice, Multiple Choice, Short Text, or Long Text field to match this task field.
- Now, remove the check in the box next to Import Existing Submissions if you don’t want to add the submissions from the form as tasks on your board right now.
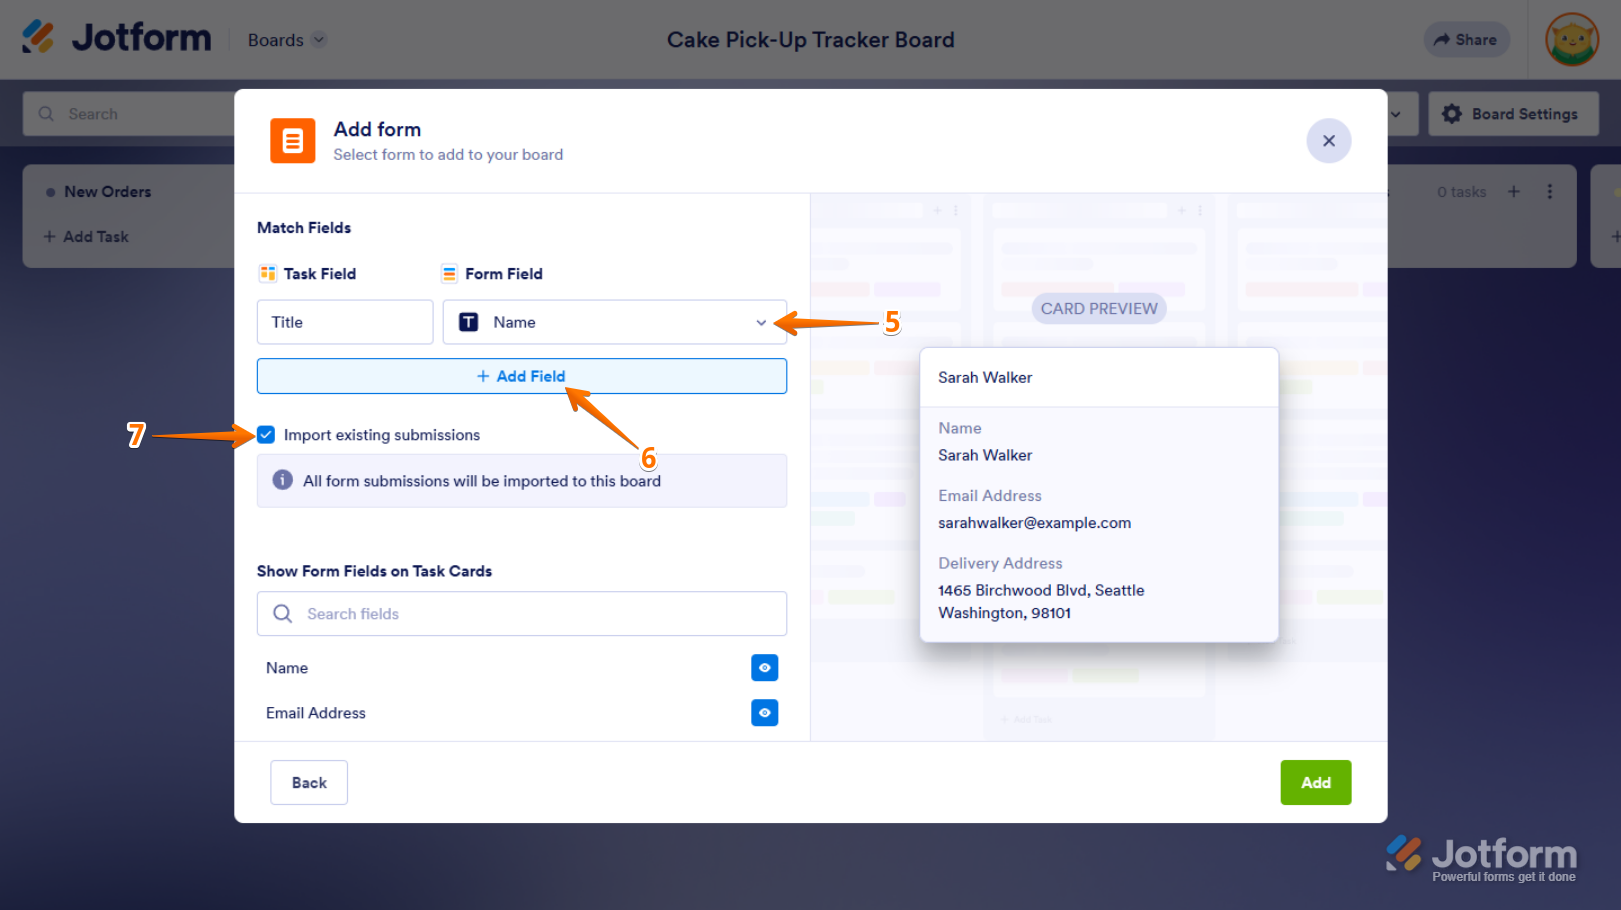
- Next, in the Show Form Fields on Task Card section, click on the Eye icon on the right side of a form field to display its real-time value on the task cards. Or, use the Search bar at the top of the Form Fields List menu to find one easily. You can display up to five (5) form fields on your task cards.
- Once you’re done, click on Add on the bottom-right side of the window.

That’s it! Now, you’ve connected a form and matched its fields to the task fields on your board.
Notes
- The value of the task fields on your boards doesn’t update automatically when the data in the form field it’s matched to is changed when the submission is edited. You can either manually edit its value or reconfigure the form connected to your board with the Update All Existing Tasks checked to show the latest data for the form field.
- But, the form fields displayed on the task cards are automatically updated with the changes made to the submission data.
- The number on the Connected Assets dropdown indicates how many assets, including Forms, AI Agents, Workflows, and Sign Documents, are connected to your board.
Managing Forms on Your Boards
You can manage connected forms from the Connected Assets section at any time. This lets you add new forms, remove ones you no longer need, or adjust settings to keep everything organized.
Updating Connected Form Settings
You can update connected forms to make changes, adjust field matchings, or keep submissions up to date. Here’s how to do it:
- While on your Board, click on Connected Assets at the top, and in the Connected Forms section that opens, click on the Slider icon on the right side of the form you want to update.

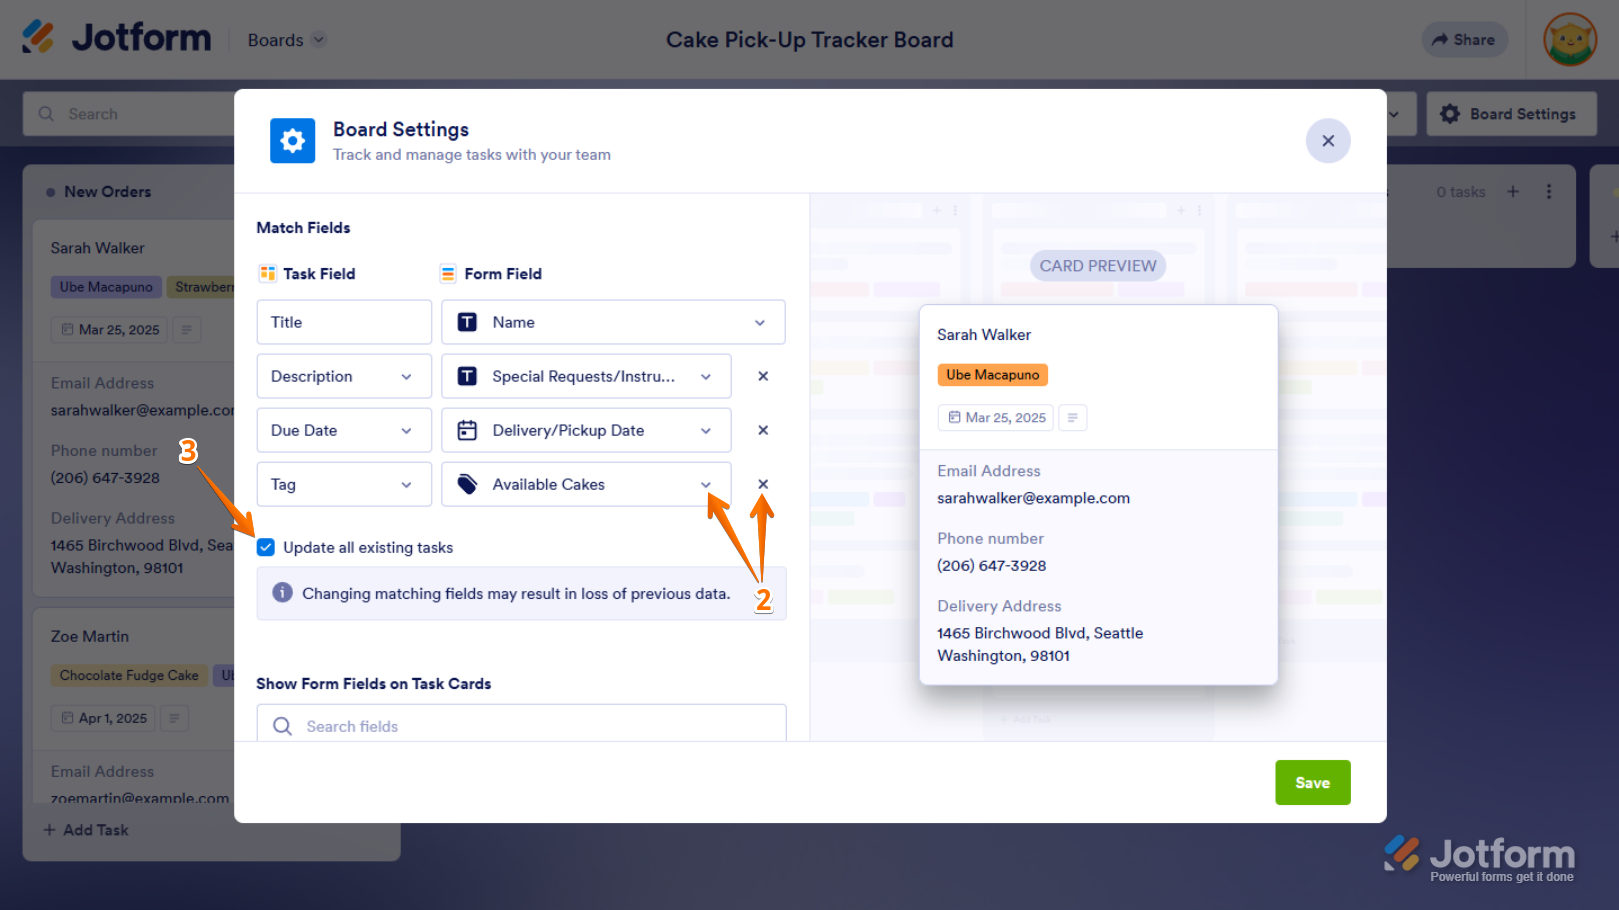
- Now, in the Board Settings window, click on a Dropdown menu to select another task field or form field. The X button on the right of the matched fields allows you to remove them, and the Add Field button lets you set up a new one.
- Next, put a check in the box next to the Update all existing tasks option if you want to apply the changes to the tasks you previously added to your board.
- Then, in the Show Form Fields on Task Card section, click on the Eye icon on the right side of a form field to remove it or select a new one. Or, use the Search bar at the top of the Form Fields List menu to find one easily. You can display up to five (5) form fields on your task cards.
- Once you’re done, click on Save in the bottom-right corner of the window.

That’s it! You’ve now updated the settings of your connected form.
Removing Connected Forms
You can remove connected forms when they’re no longer needed, keeping your board focused on relevant submissions. Here’s how to do it:
- While on your Board, click on Connected Assets at the top, and in the Connected Forms section that opens, click on the Trash Can icon on the right side of the form you want to delete.
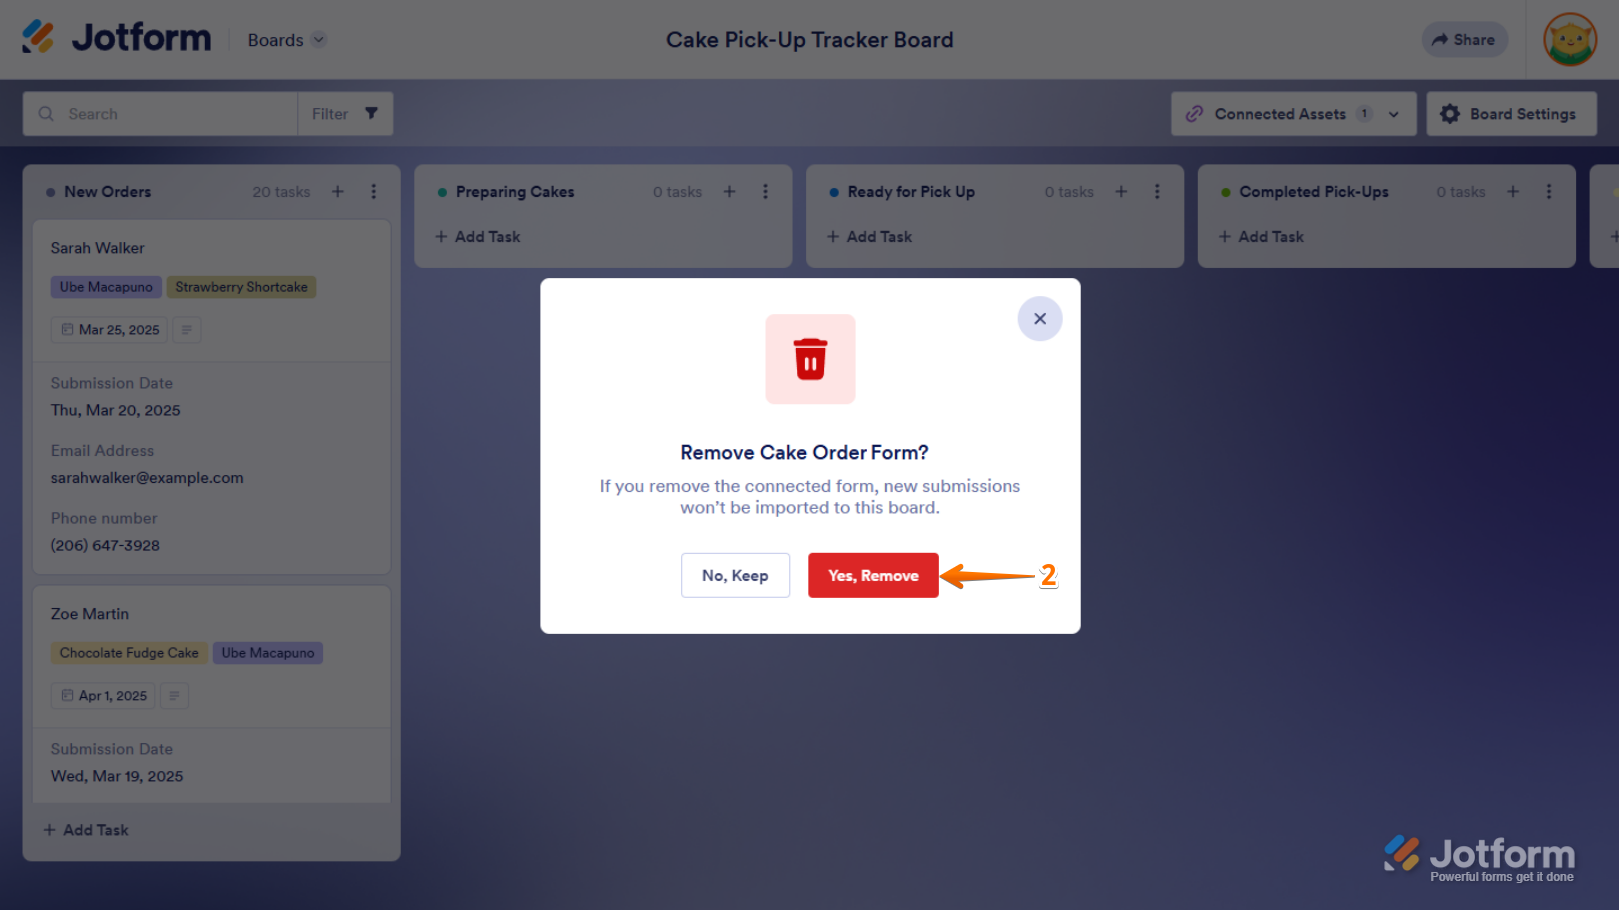
- Then, in the Confirmation window, click on Yes, Remove.
That’s it! You’ve now disconnected your form from your board.
Notes
Disconnecting a form from your boards won’t remove the tasks added through it.

Send Comment: