Okta Single Sign-On (SSO) offers a seamless and secure way to manage user authentication across multiple applications, streamlining access and enhancing security. It provides a centralized identity and access management solution designed to simplify the login process while maintaining robust control over user credentials.
When integrated into your Jotform Enterprise Server, Okta SSO ensures secure and centralized access to forms, submissions, and administrative tools for users and administrators. This integration not only protects sensitive data but also improves operational efficiency and compliance.
Notes
- Enabling SAML disables the integrated app’s regular sign-in page. Your users can log in to your server only through Okta.
- Backup sign-in URLs where users can sign in using their regular username and password are not supported in Jotform Enterprise. You can contact Jotform Enterprise support to turn off SAML if necessary.
The Jotform Enterprise SAML integration currently supports the following features:
- SP-initiated SSO
- IDP-initiated SSO
- Just in Time (JIT) provisioning
This integration uses the Jotform SAML application from Okta’s App Catalog. If you wish to set up Okta’s SAML 2.0 application for Jotfom Enterprise, visit How to Set Up Okta SSO for Jotform Enterprise instead.
Adding and Setting Up Jotform SAML Application
You must access your Administration Panel in Okta to add and set up the Jotform SAML Application. Here’s how to do it:
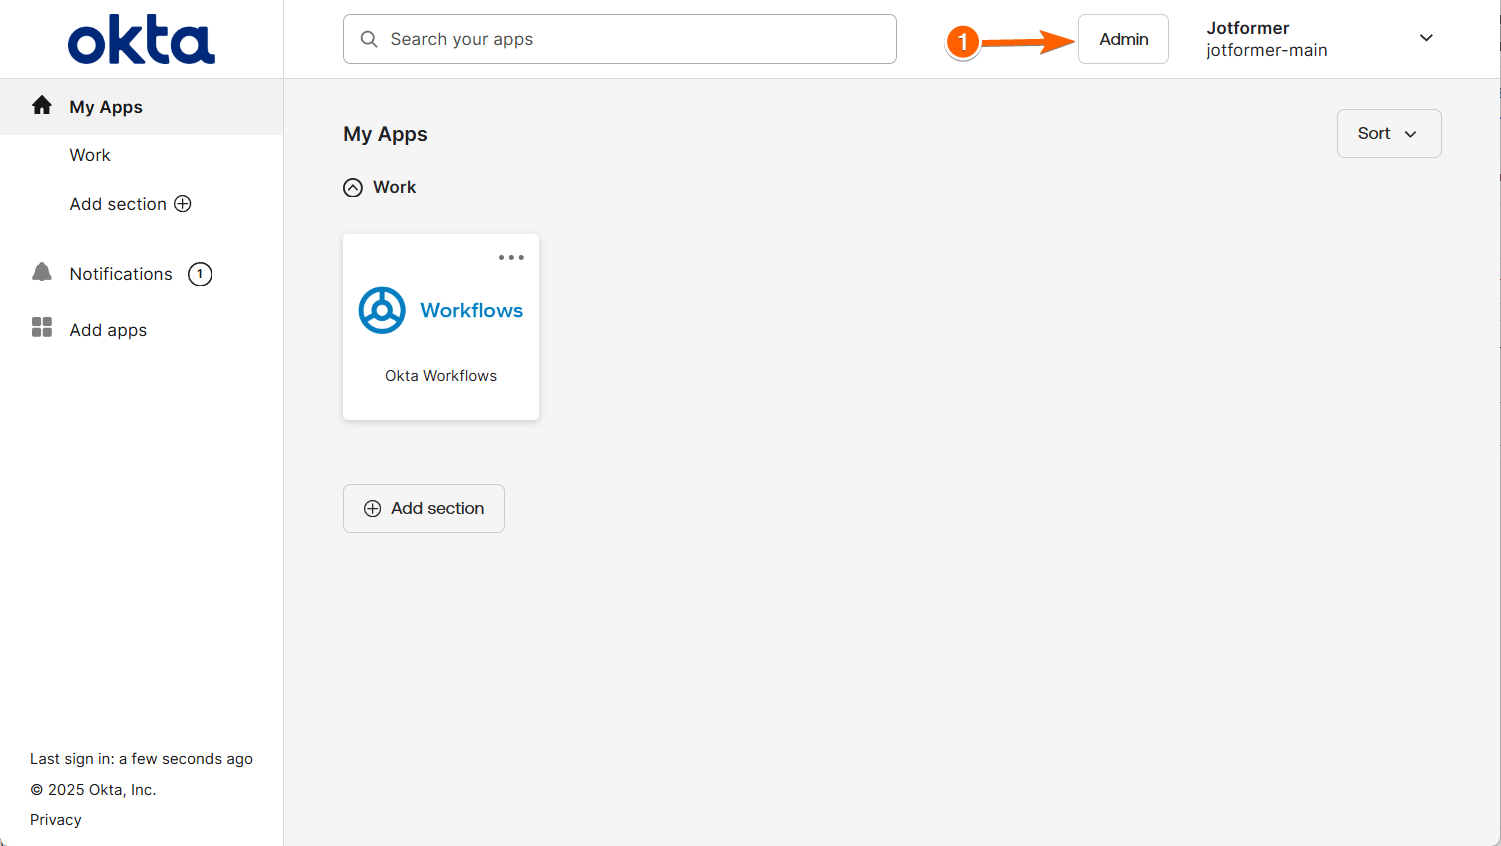
- On your Okta Homepage, in the top navigation menu, click on Admin. This will open a new tab for the administration panel.
- Now, click on Applications on the left sidebar of the Okta Admin page.
- Then, click on Browse App Catalog.

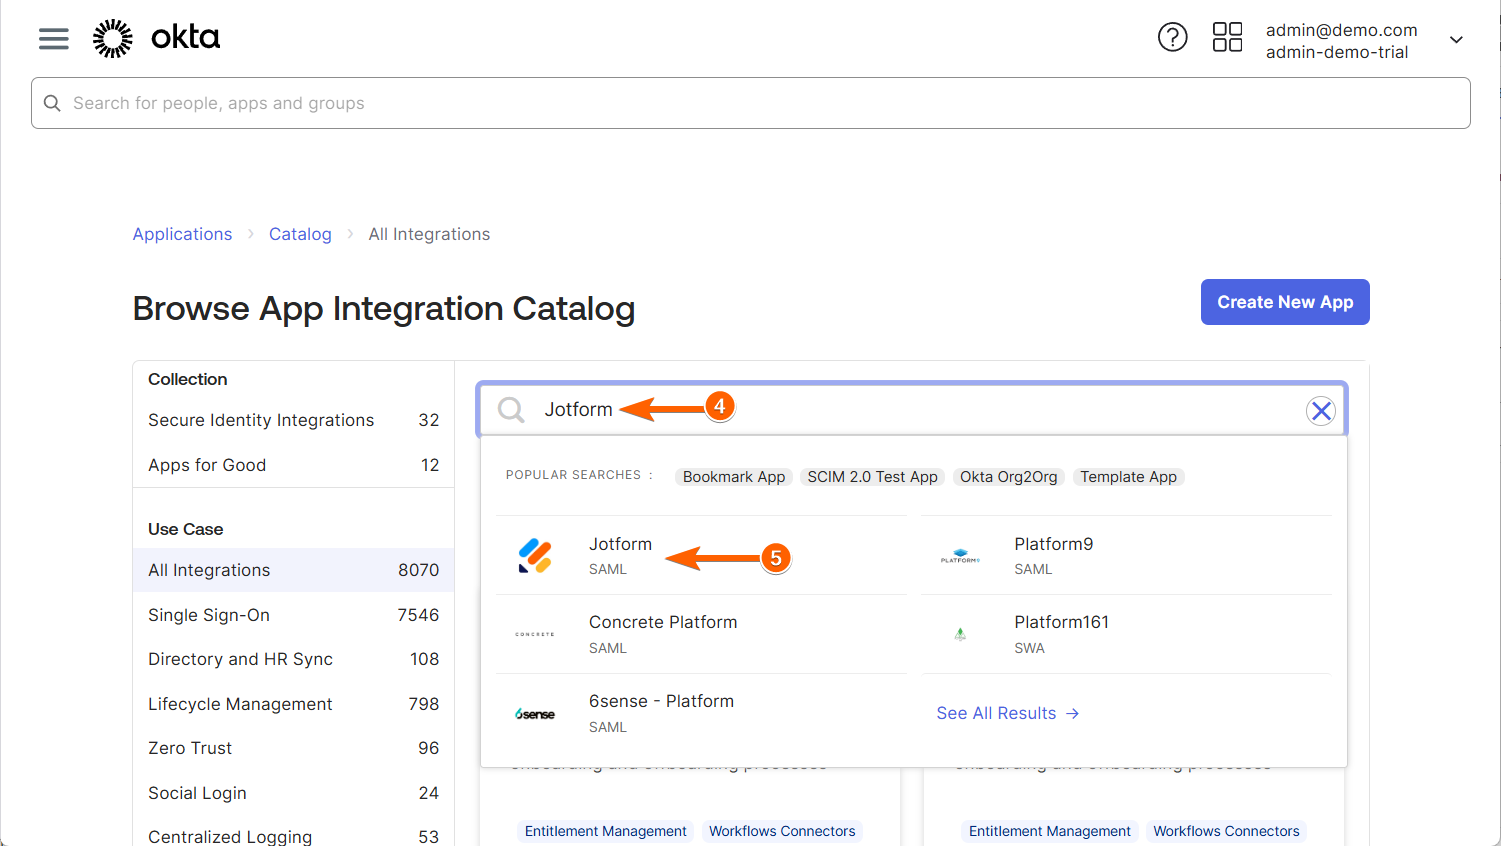
- Next, search for Jotform at the top of the Browse App Integration Catalog section.
- In the Search results that opens, click on Jotform to select it.
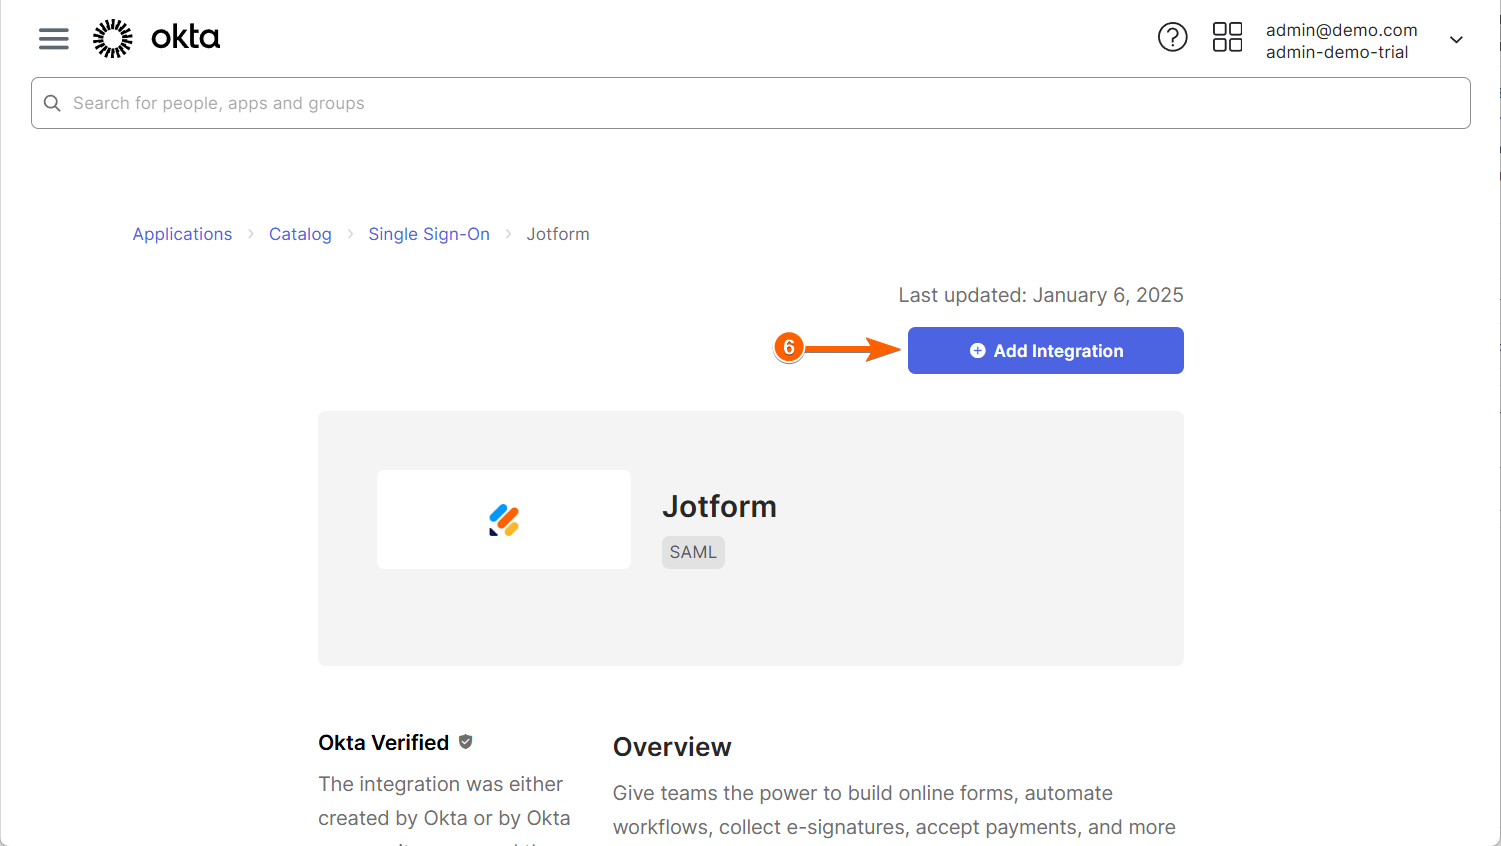
- Now, click on Add Integration to add the Jotform integration to your Okta instance.
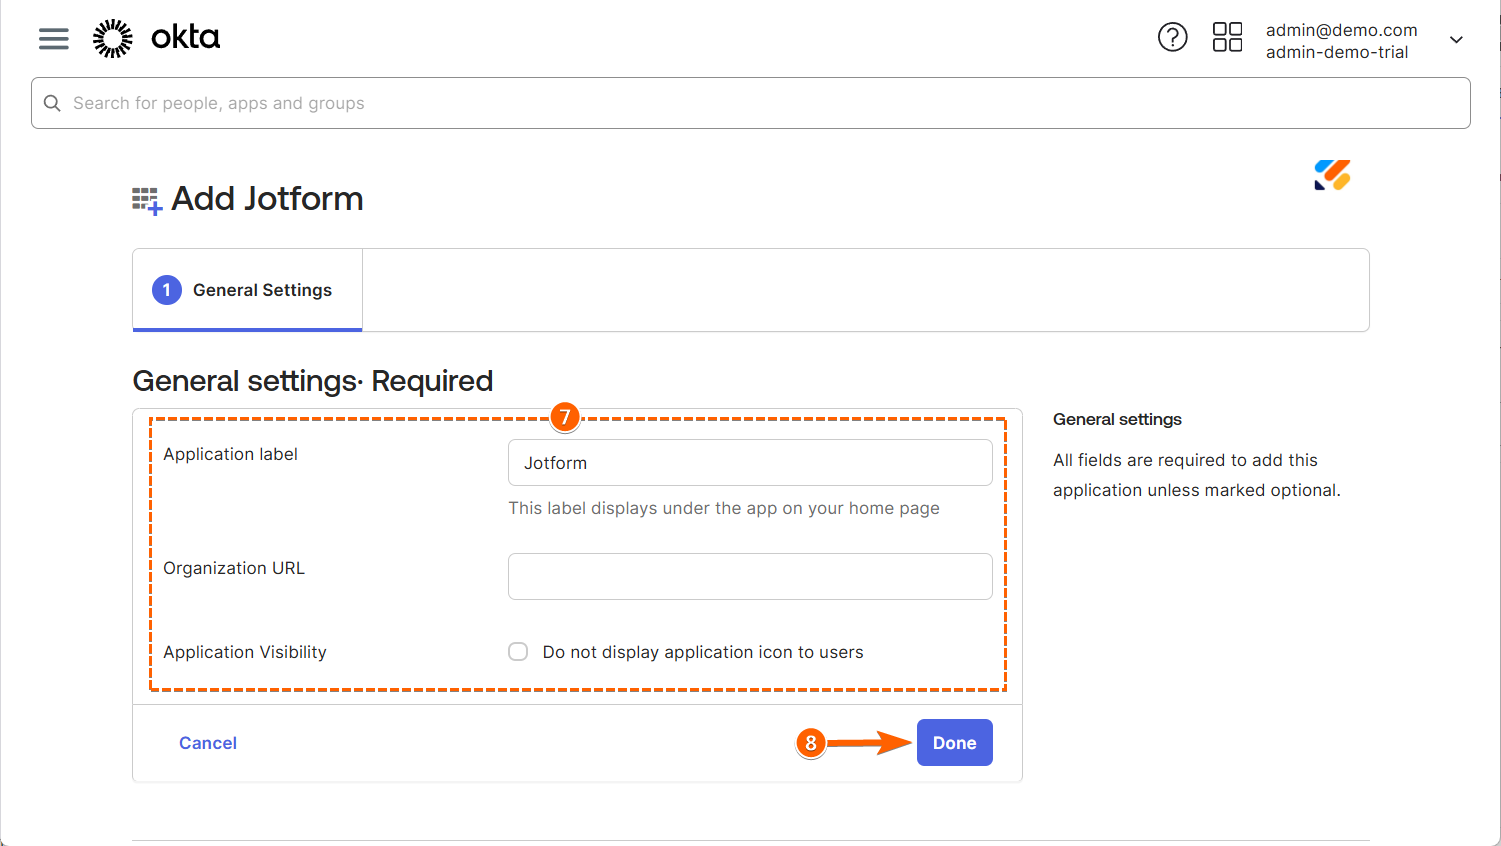
- Then, in the General Settings tab, set the following details:
- Application Label — This is the label displayed under your application list.
- Organization URL — Enter your organization URL using your Jotform Enterprise domain settings.
- Application Visibility — Check this option if you do not want non-admin users to see this app.
- Next, click on Done at the bottom to proceed.
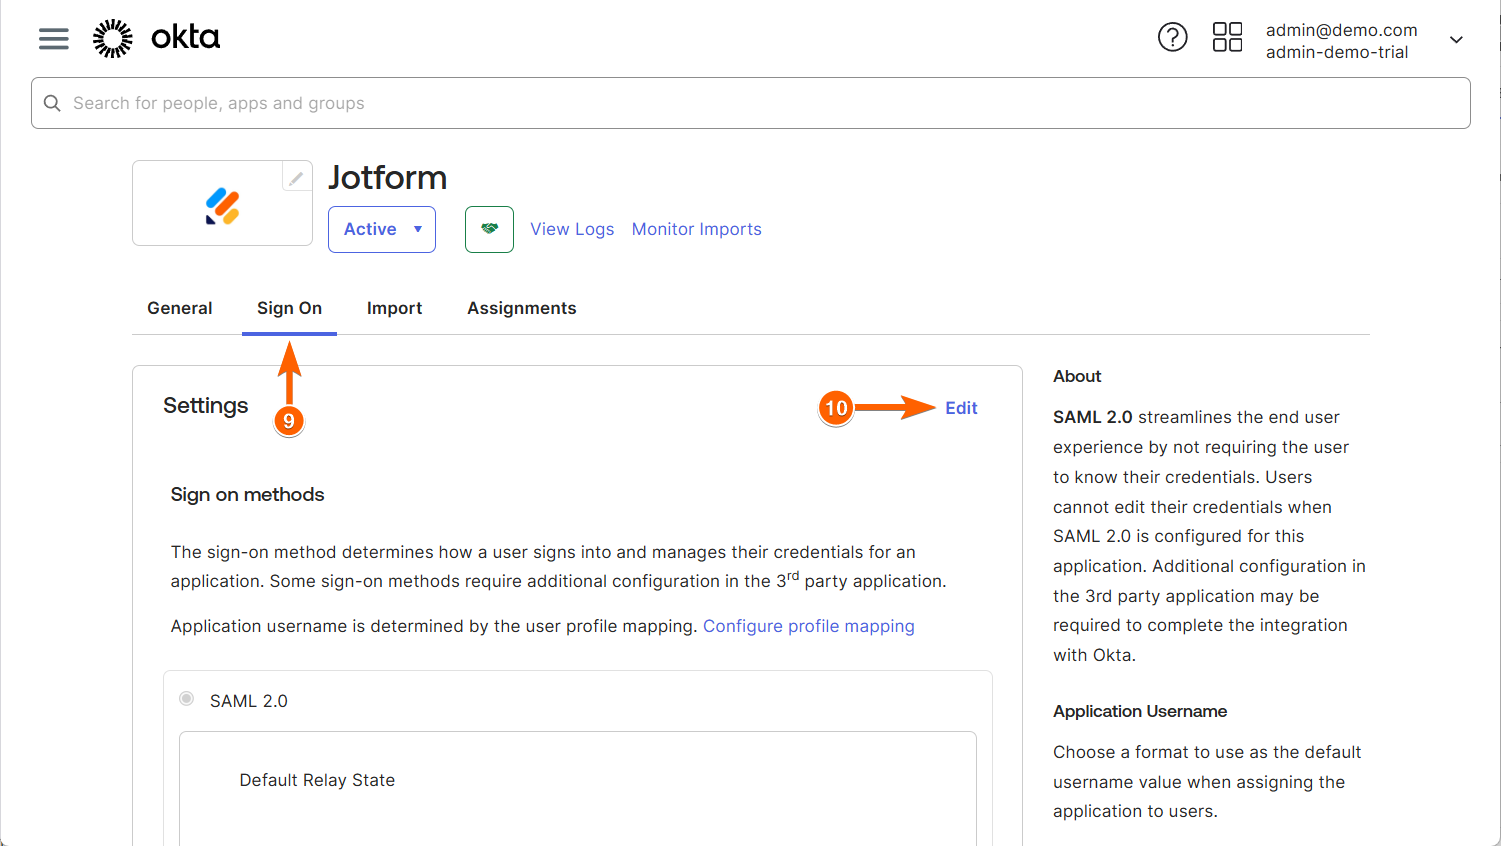
- On the Jotform Application page, go to the Sign On tab.
- Now, click on Edit on the right of the Settings section.
- Then, click to expand the Attributes (optional) section.
- Next, set up the Attributes Statements (optional) section as outlined in the screenshot below. You can view the attribute list supported by the JIT provision in the table at the end of this documentation.
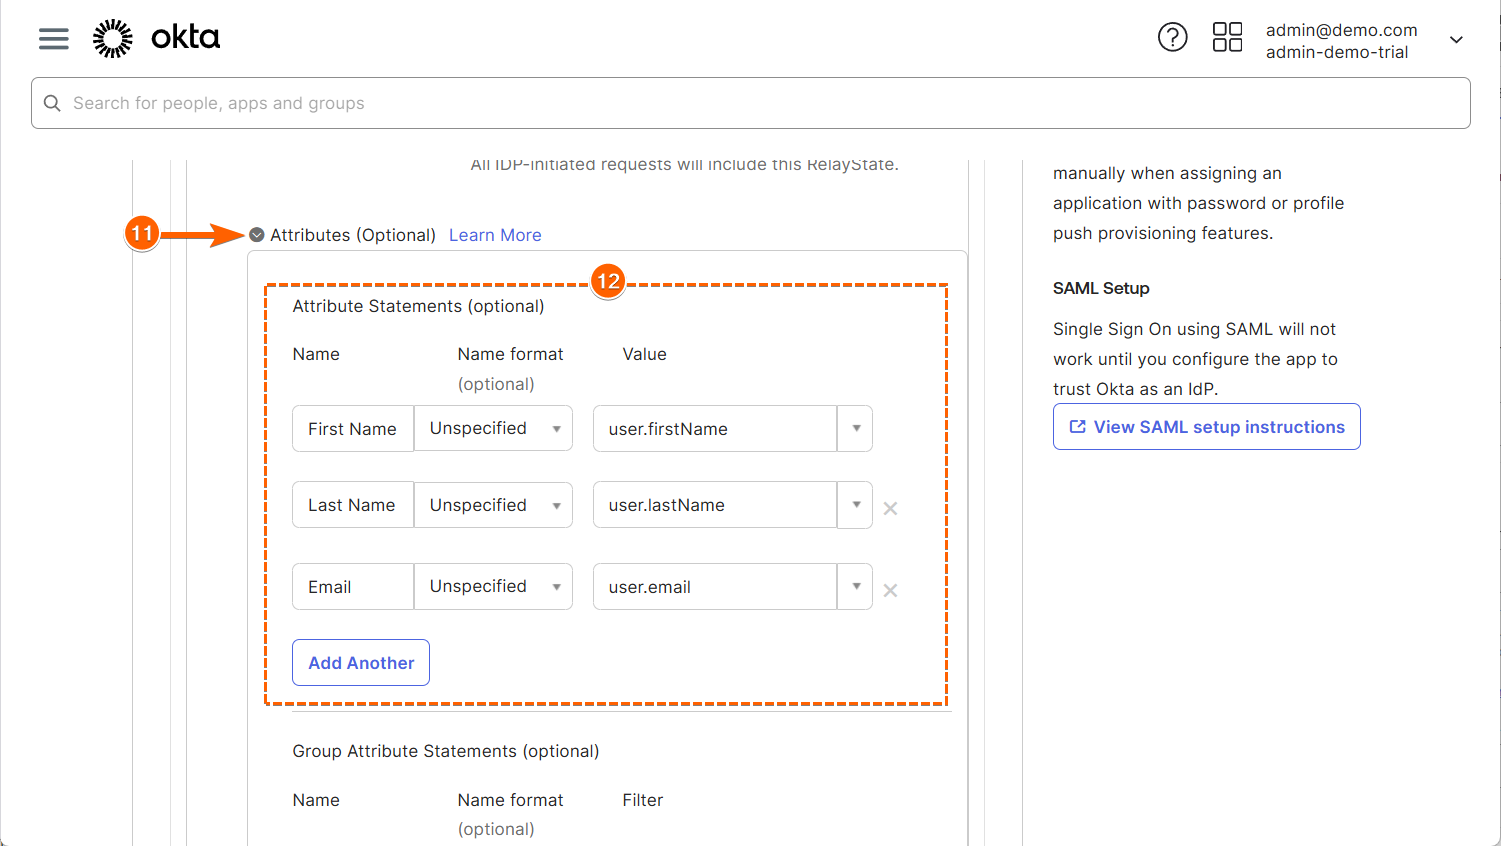
Note
The Attribute Statements are helpful for SSO Prefill. Click the Add Another button to map the other fields that Okta Supports.
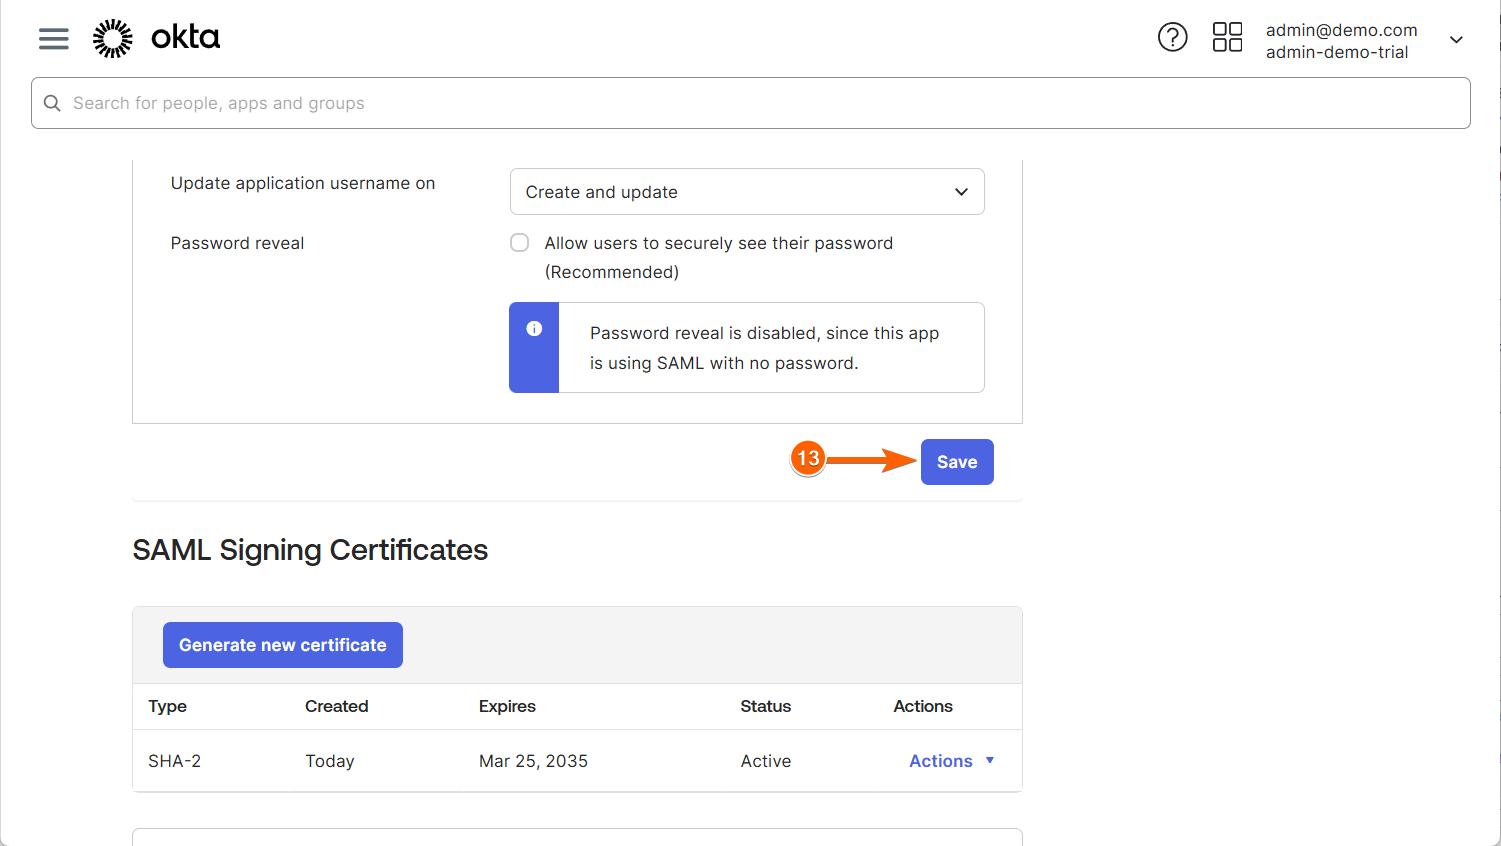
- Finally, click Save at the bottom of the page to save your changes, and that’s it!
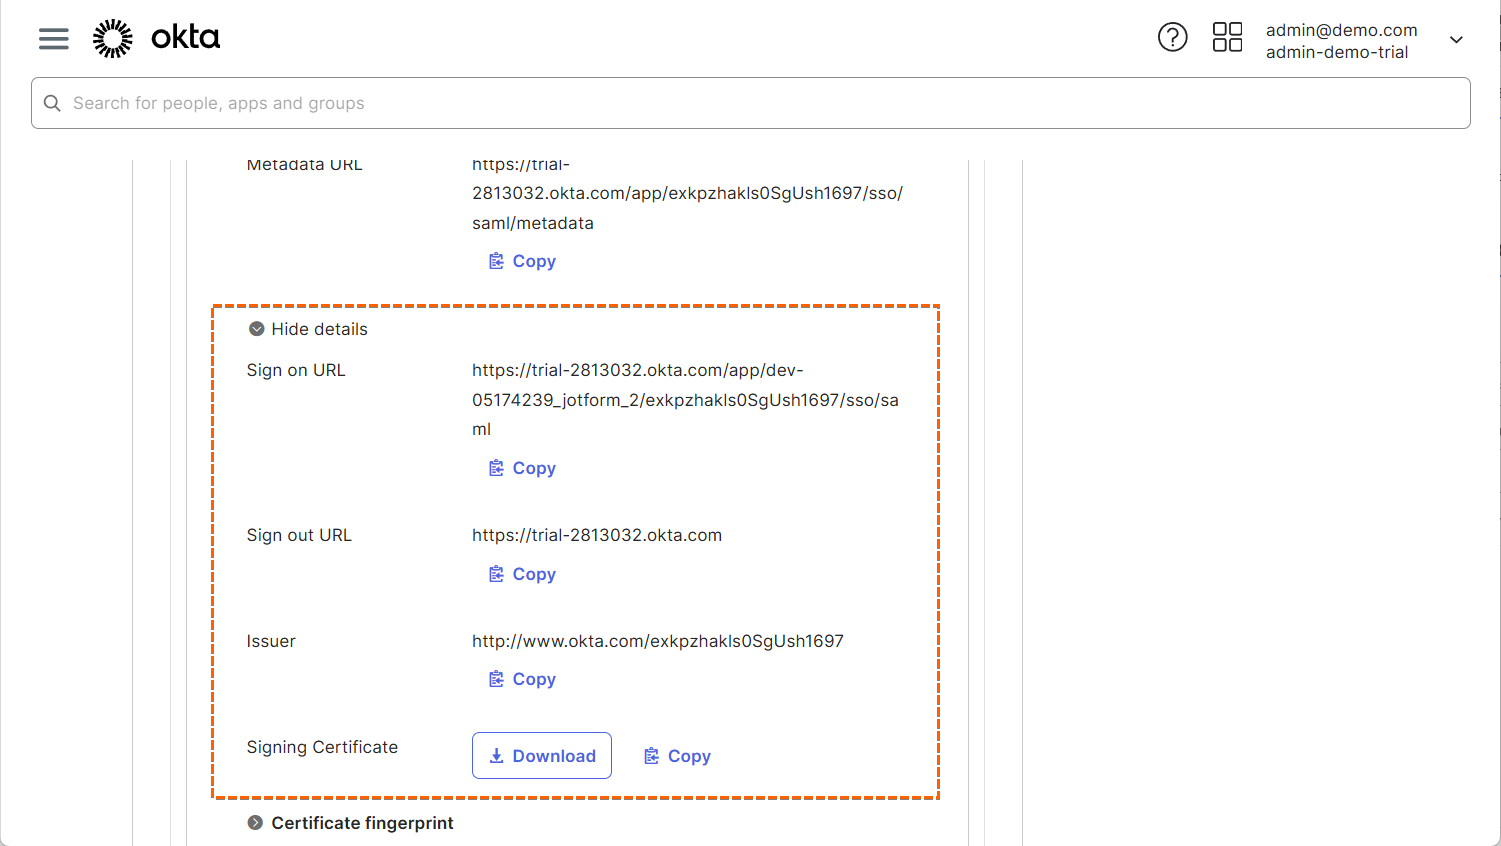
To copy your SAML details on the same page, toggle More Details/Hide Details under Metadata Details.
Connecting Okta SAML on Jotform Enterprise
You must access your Admin Console to connect your Okta SAML settings. Let’s get started!
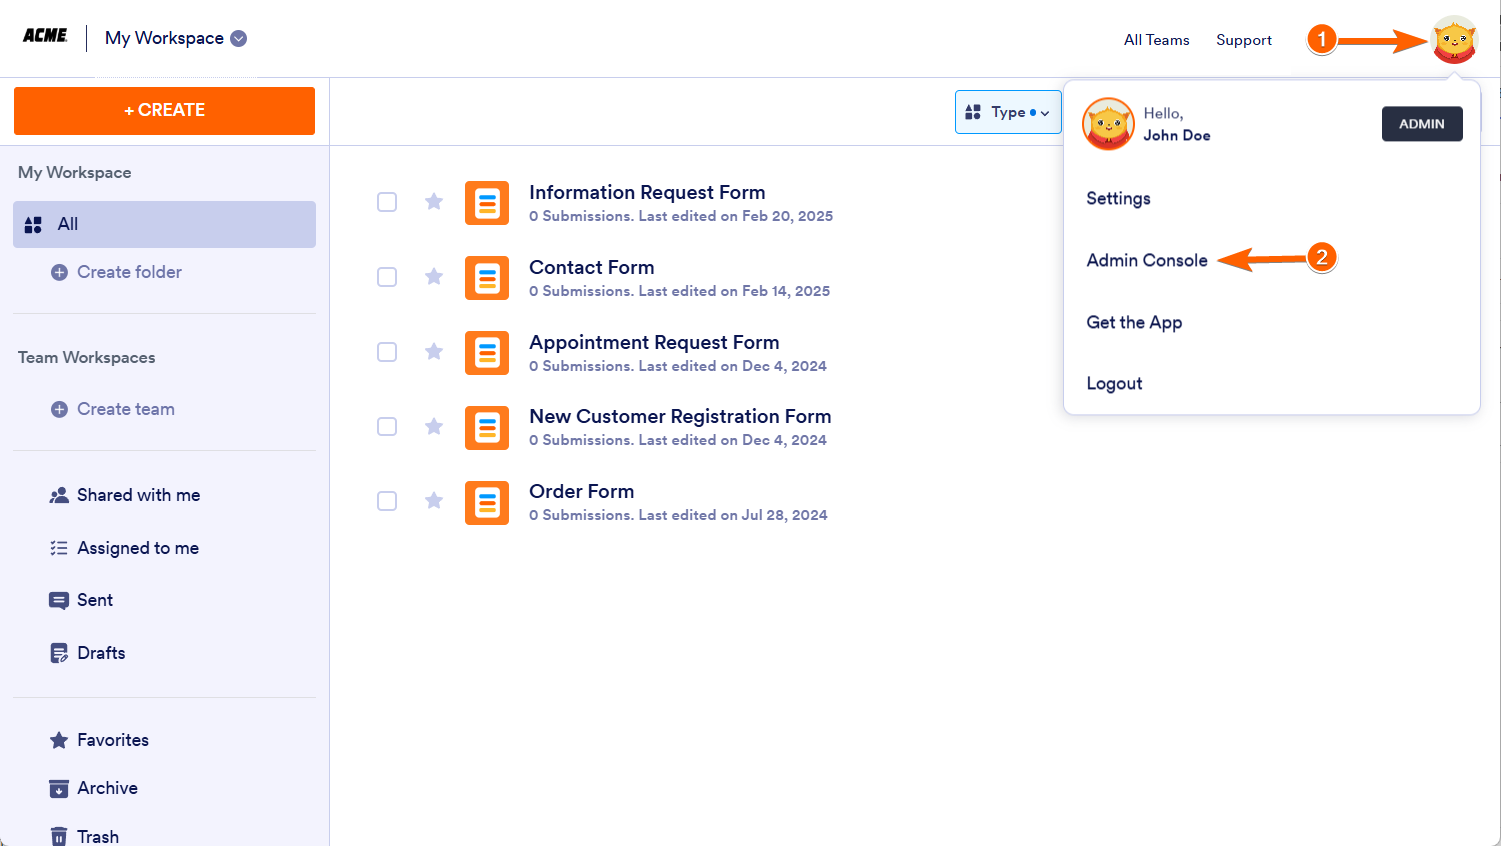
- On your My Workspace page in Jotform Enterprise, click on your Avatar/Profile picture on the right side of the screen.
- In the Dropdown menu that comes up, click on Admin Console.
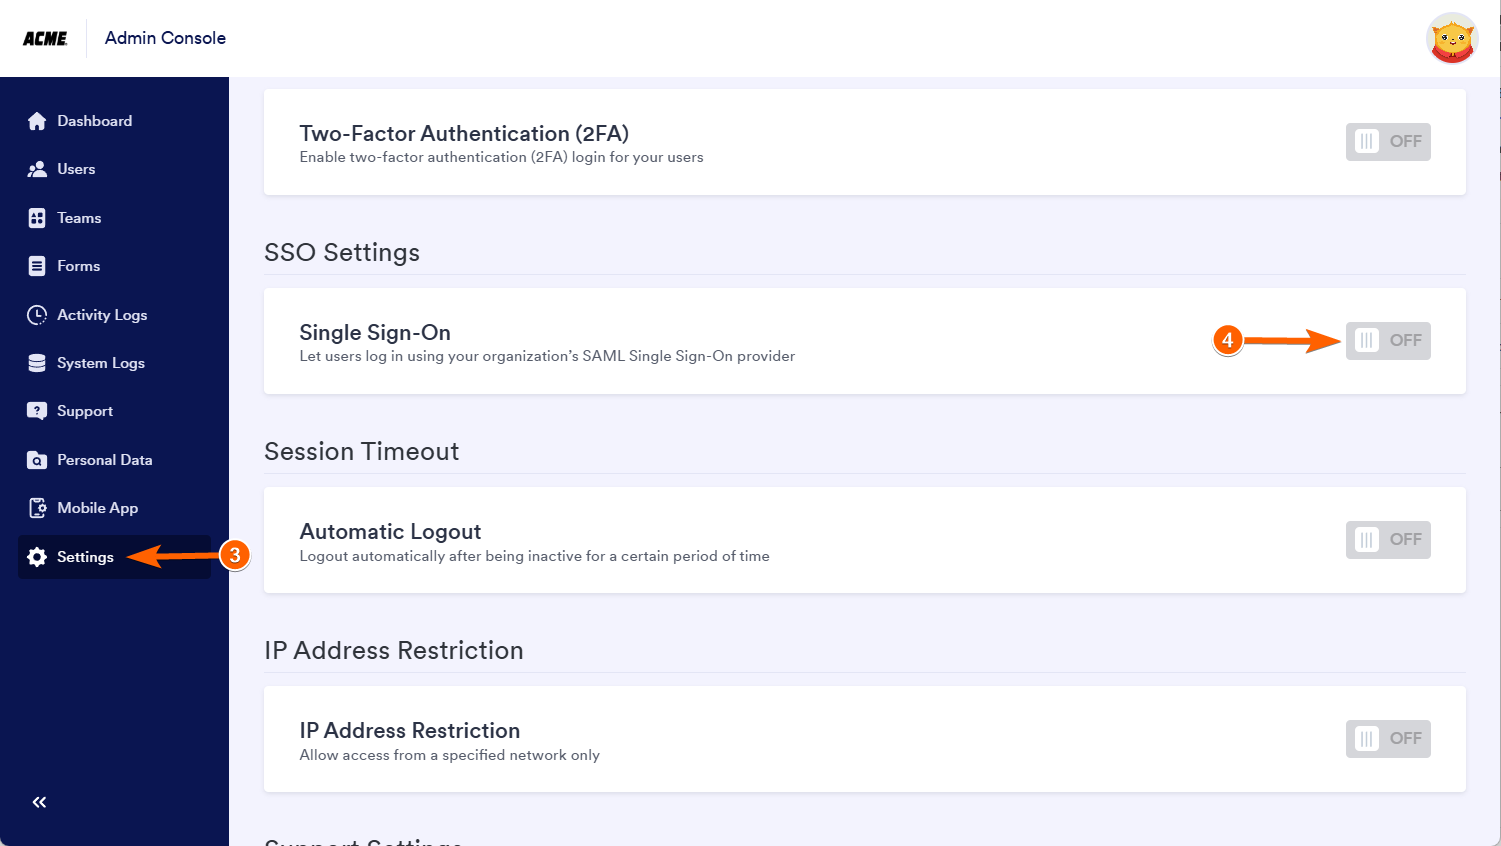
- Now, click on the Settings tab in the menu on the left to open your Jotform Enterprise settings page.
- Then, in the SSO Settings section, toggle the Switch icon on the right side of the Single Sign-On to enable it.
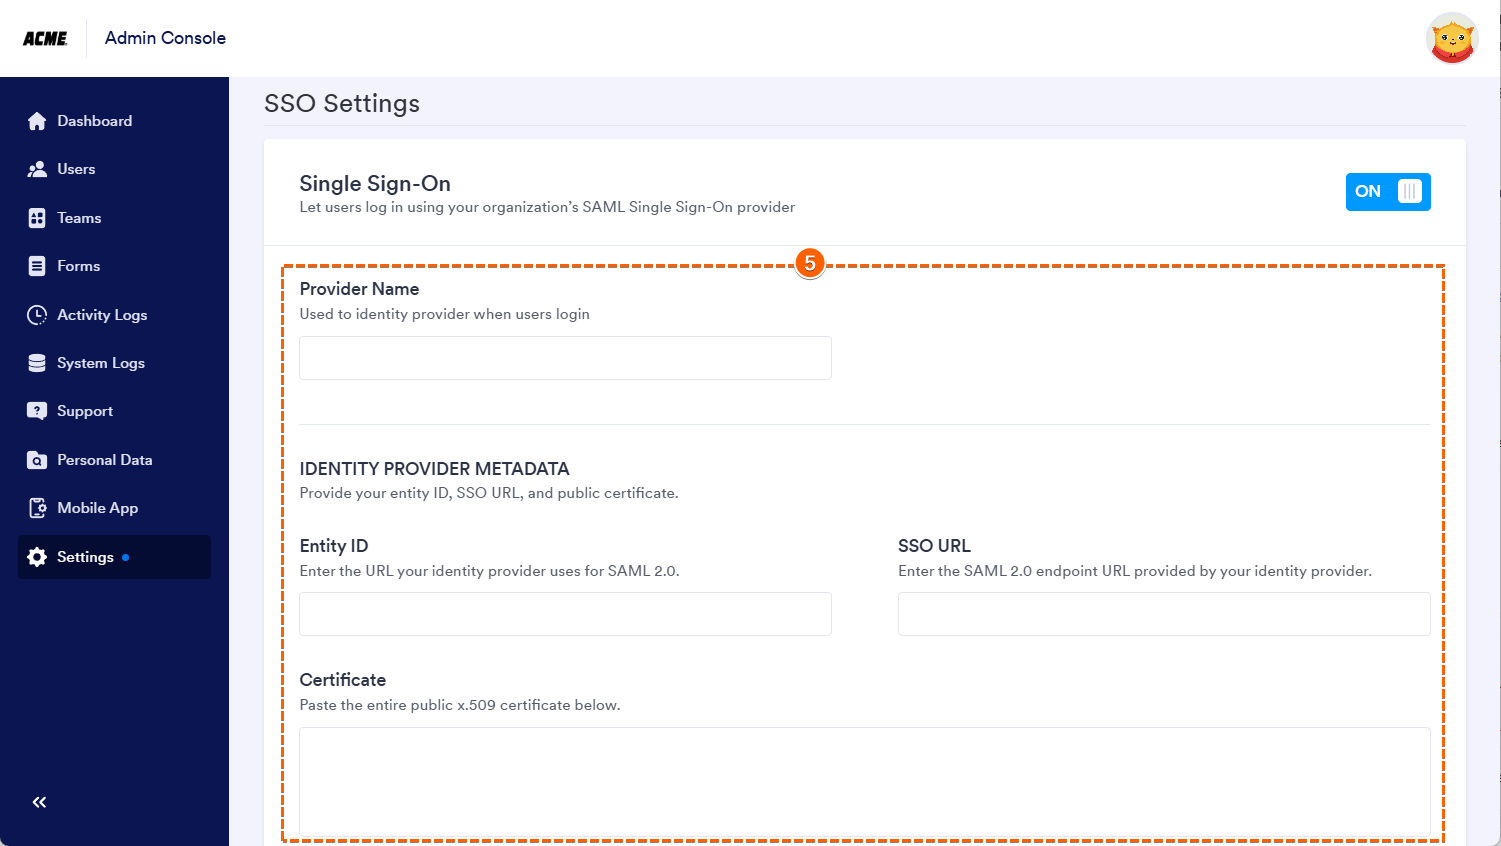
- Next, enter the Metadata Details you copied earlier from Okta as follows:
- Entity ID — Issuer.
- SSO URL — Single Sign-On URL.
- Certificate — Signing Certificate.
- SLO URL — Single Logout URL.
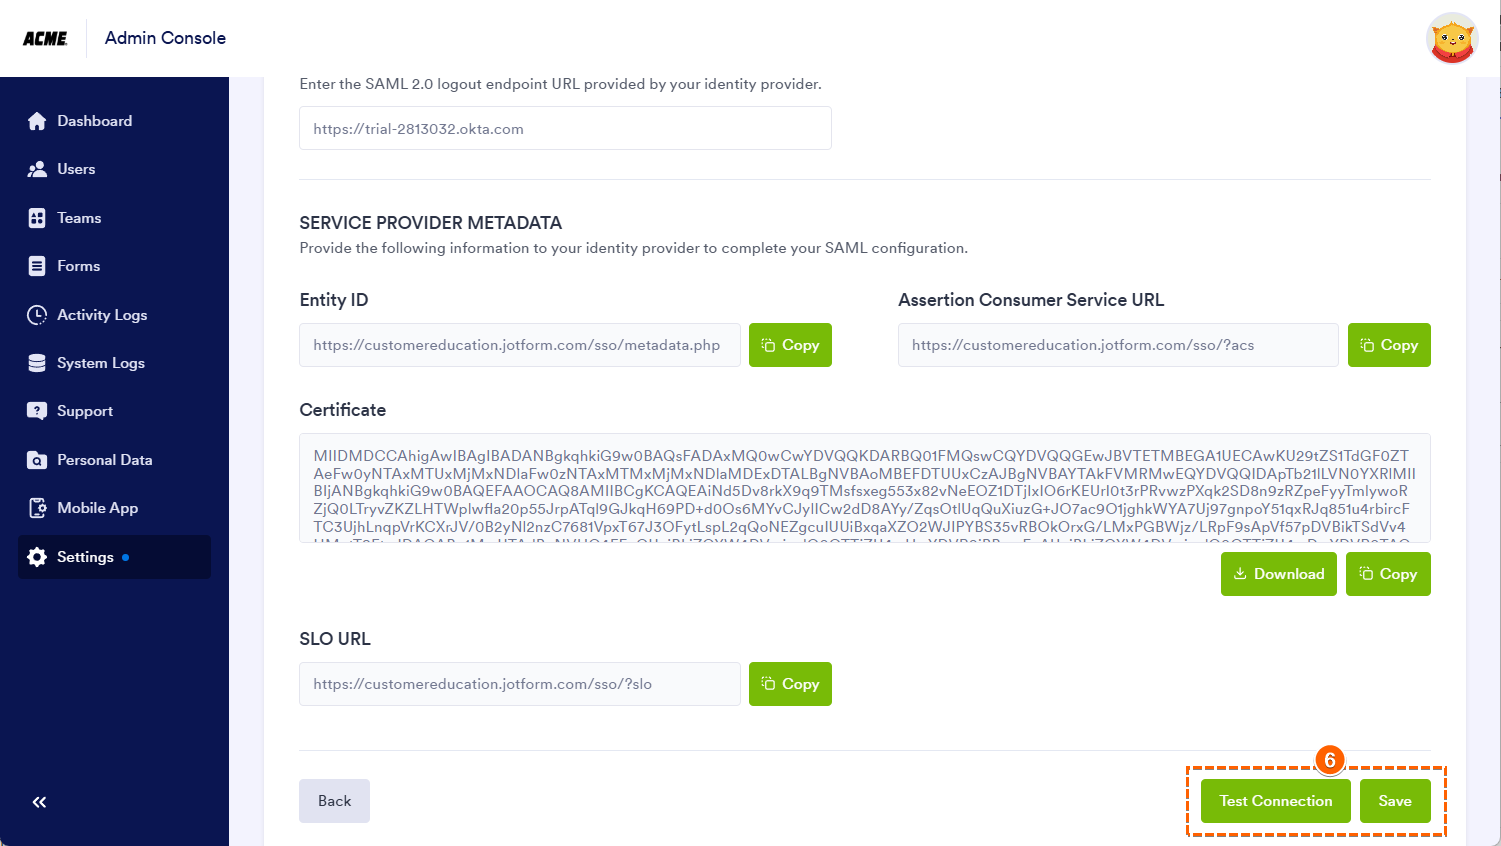
- Scroll down and click on Test Connection to ensure that the connection works, and click on Save to finally save your SSO configuration.
Once configured, you can add users to your SAML application and use Okta on your Jotform Enterprise server.
Notes
For the SSO prefill, you can add desired claims and manage them at the Jotform Enterprise Admin Console.
The following SAML attributes are just for JIT provisioning.
| Name | Value |
|---|---|
| user.email | |
| name | user.name |
| surname | user.surname |
SP-initiated SSO
SP-initiated flows trigger when the user hits an authentication-required route.

Send Comment: