Jotform’s Reusable Payment Connections make it easy to handle your payment integrations. You can link your account from your preferred payment gateway to Jotform once and then use it anywhere—from your forms to your Jotform apps. No more hassle of reconnecting to the same gateway account whenever you need to accept payments.
You can add the Reusable Payment Connections while building your form. You can also do it through the Connections page of your account panel.
Adding Reusable Payments Connections in the Form Builder
If you are in the Form Builder, you can add the Reusable Payment Connection through the Product List element or by adding a payment gateway.
- In the Form Builder, click the Add Element button.
- Add the Product List element or add the payment gateway directly.
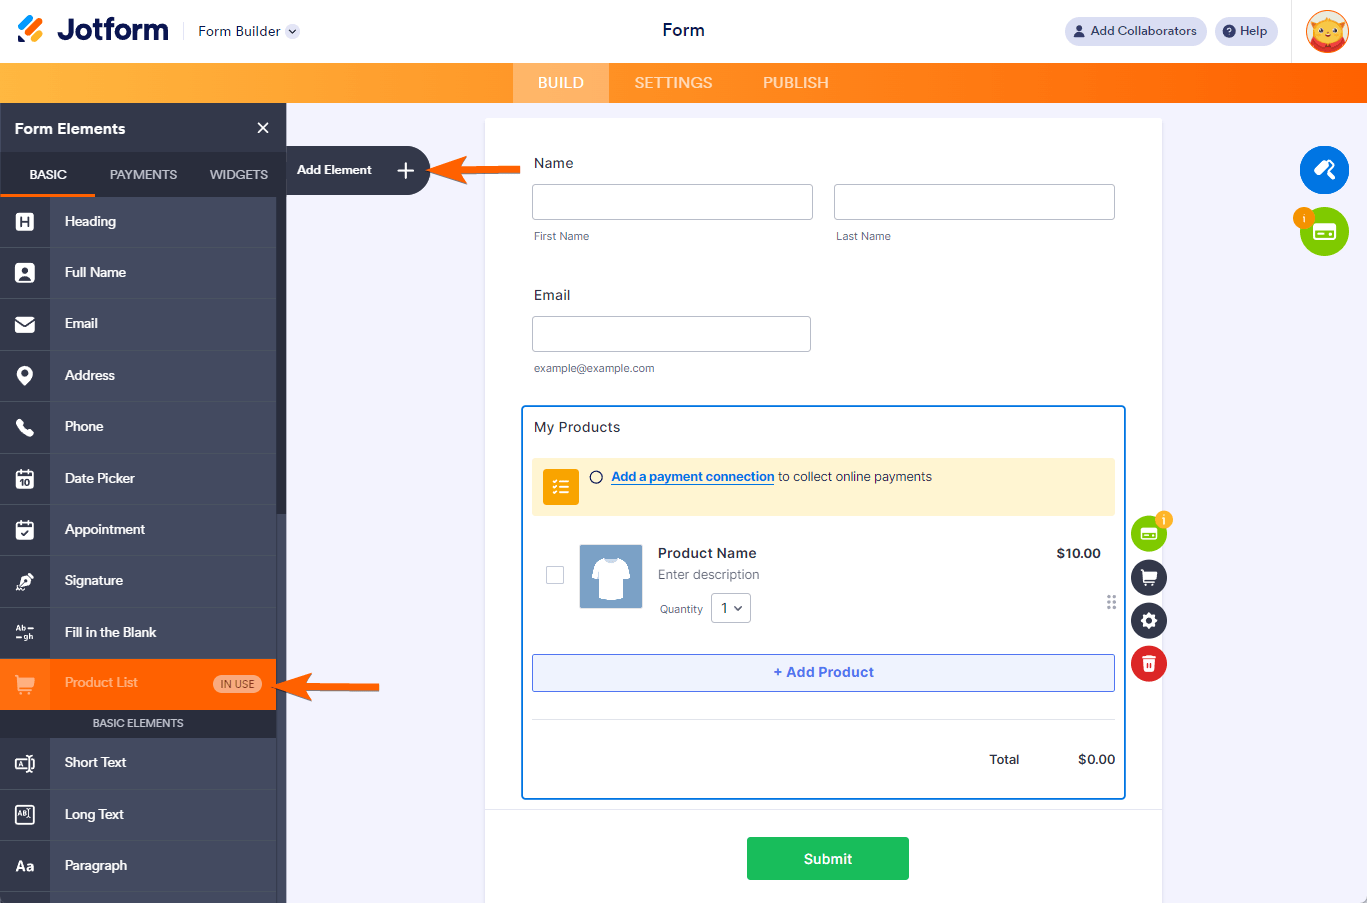
- Click the Payment Properties icon on the Product List element or the upper-right side of the Form Builder, just below the Designer icon, as pointed below.
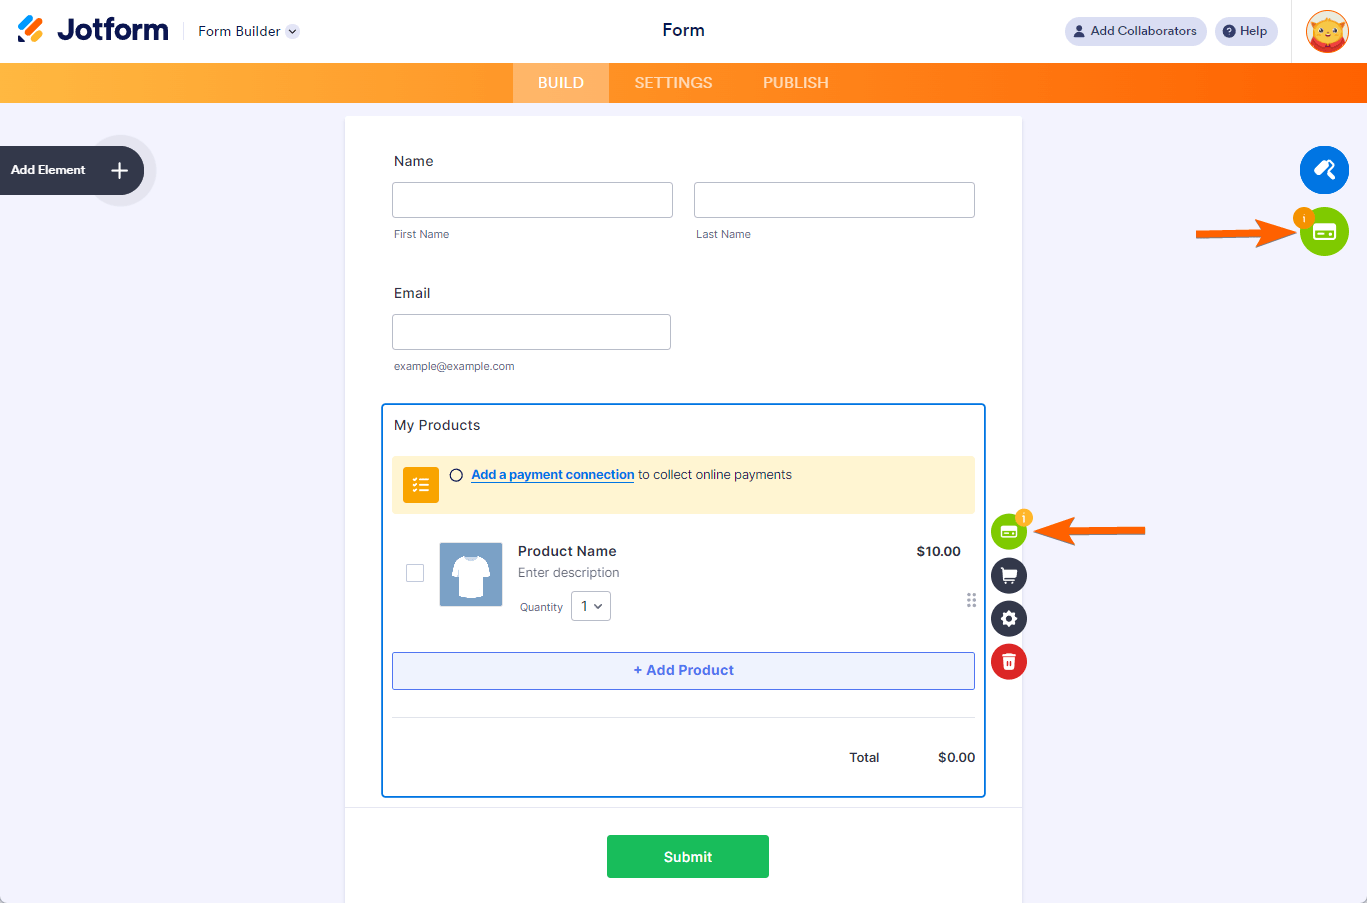
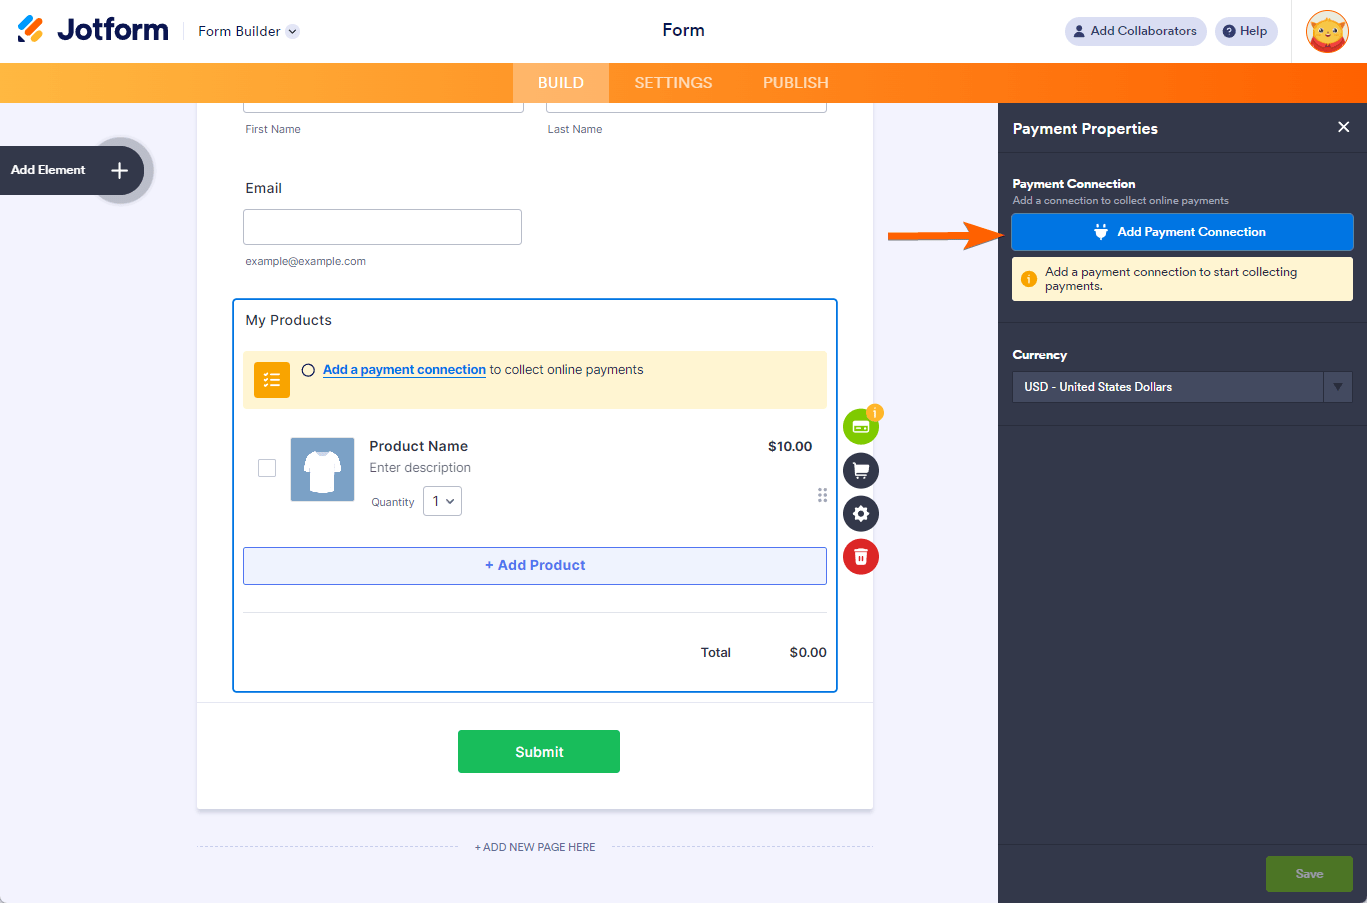
- Now, click the Add Payment Connection on the right panel.
If you’ve chosen to add a Payment Gateway directly instead of the Product List element, simply click the Plug icon to set up the connection.
- If this is your first attempt to add a new reusable connection, you will see the following page. Click the Add New Connection button to proceed.
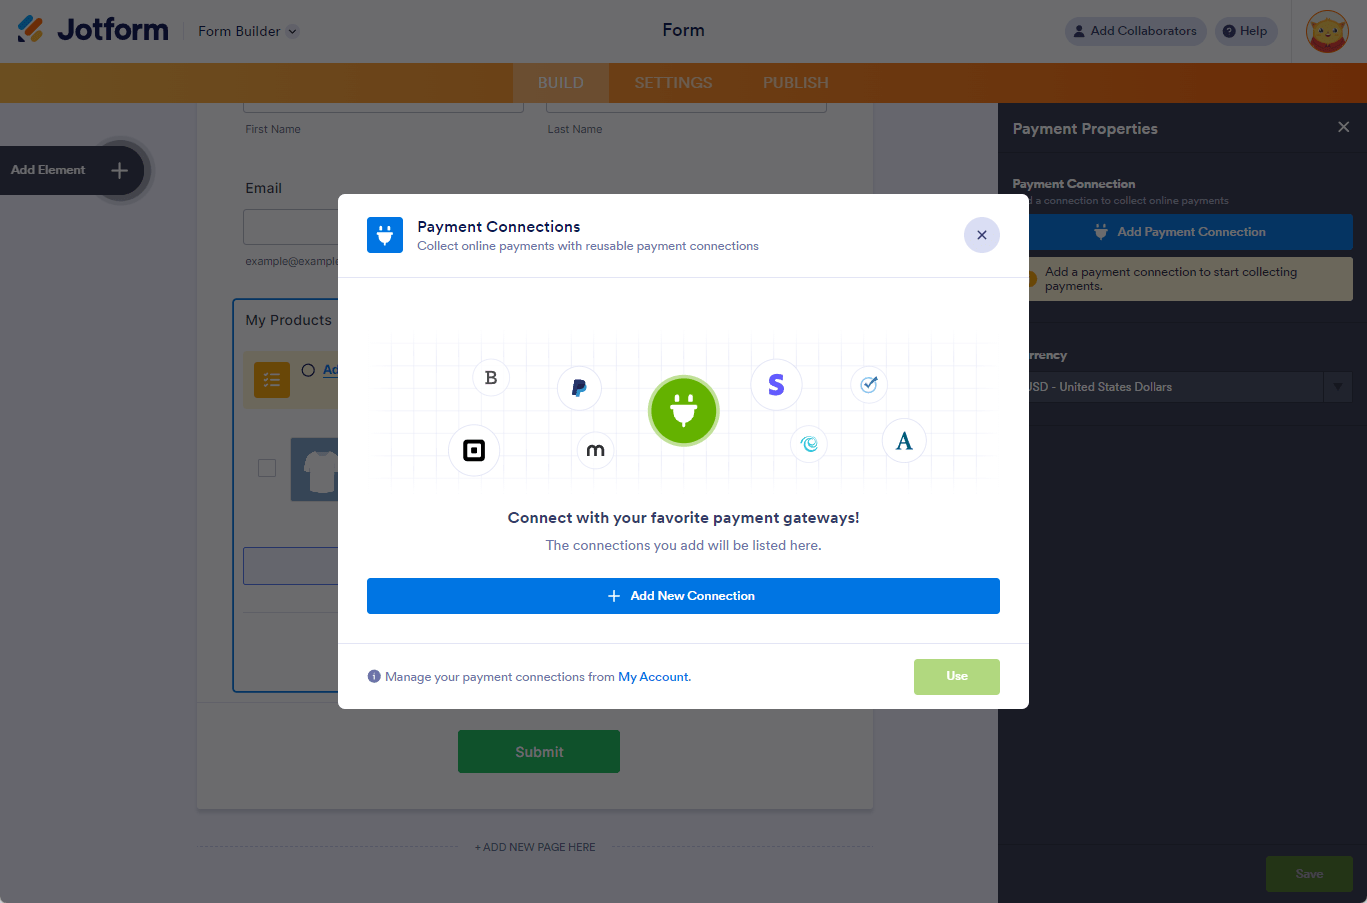
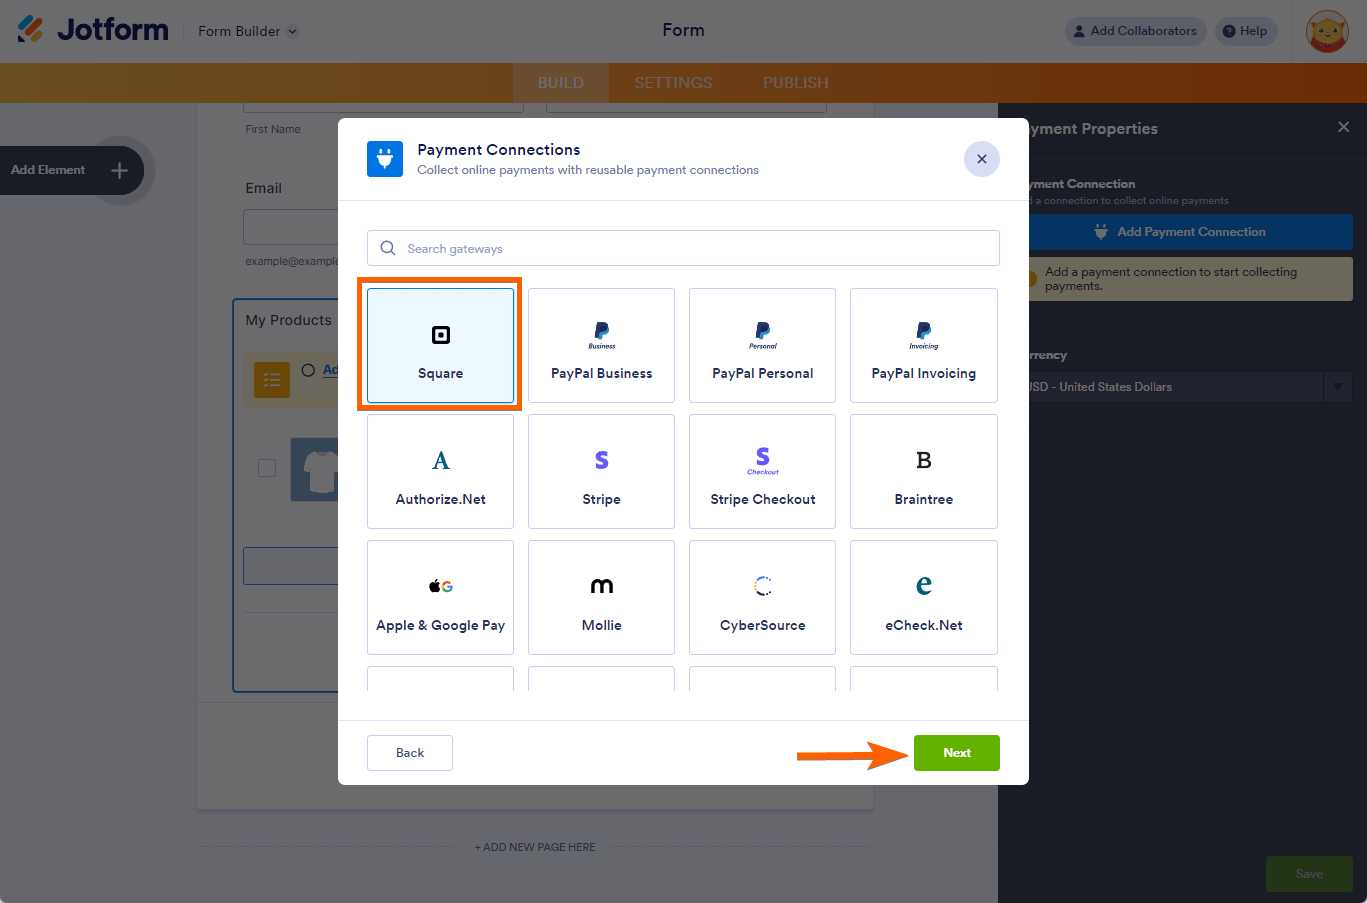
- Select your preferred gateway from the list, and click the Next button.
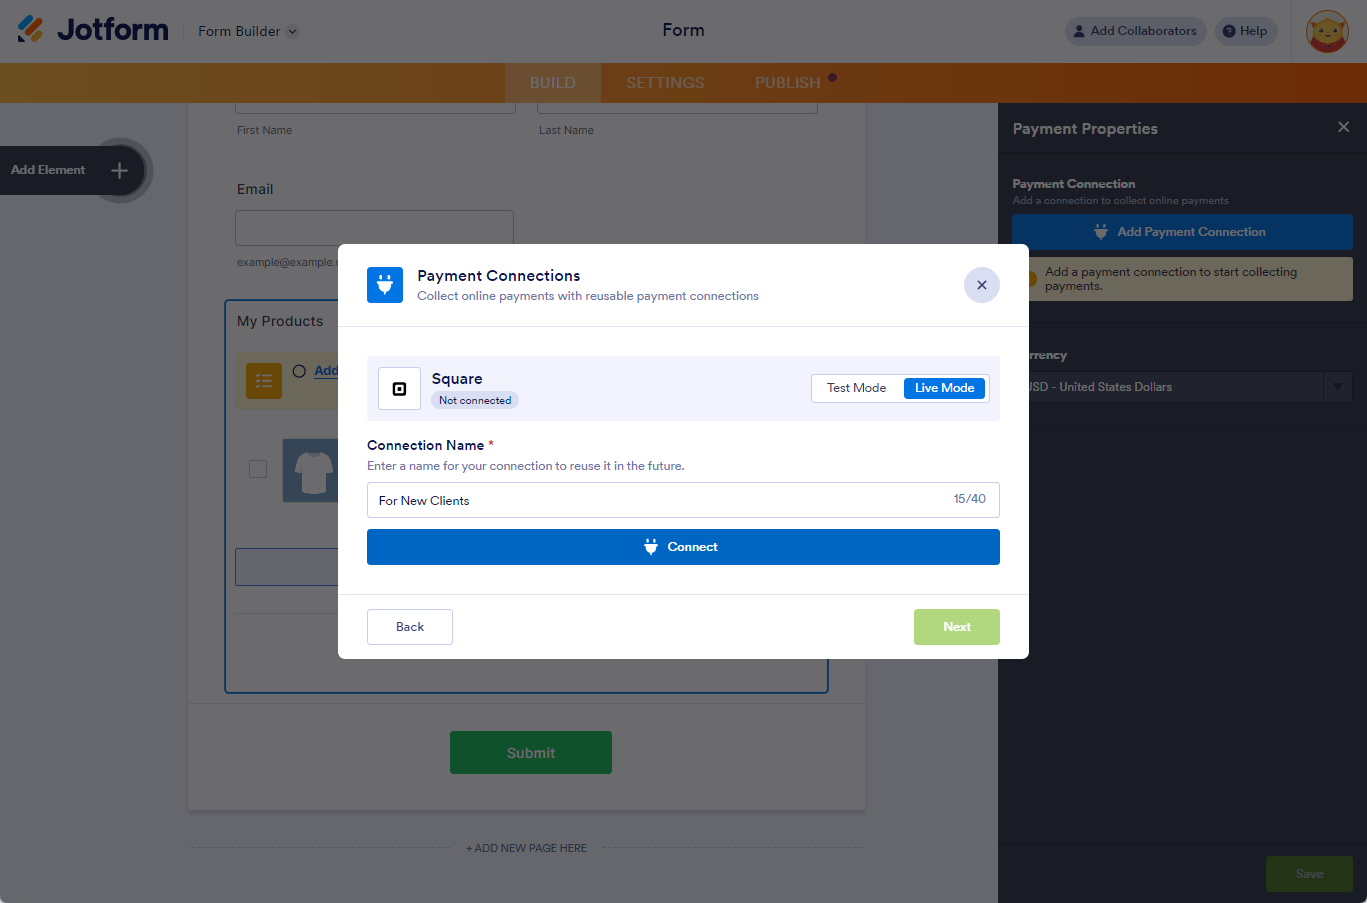
- Choose your Payment Mode, Live or Test, and ensure to enter the Connection Name.
- Click the Connect button to connect your account from the chosen payment gateway.
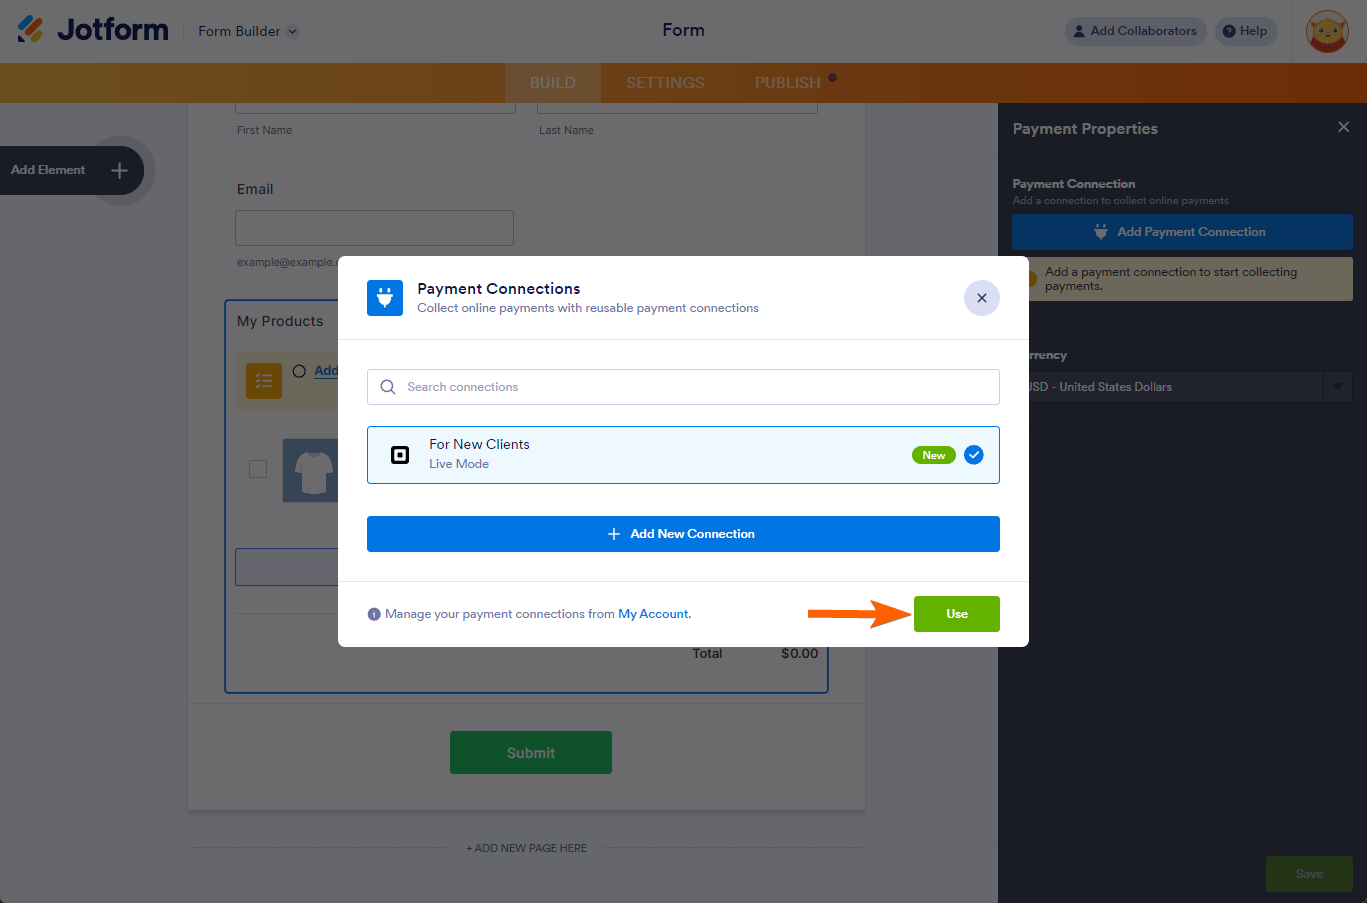
- Click the Next button once your account is connected.

- Finally, select the newly added reusable payment connection and click the Use button.
After using the newly added Payment Connection, you can see the other settings for the chosen payment gateway. Set it up further, and click the Save button to save the changes.

Managing Reusable Payment Connections
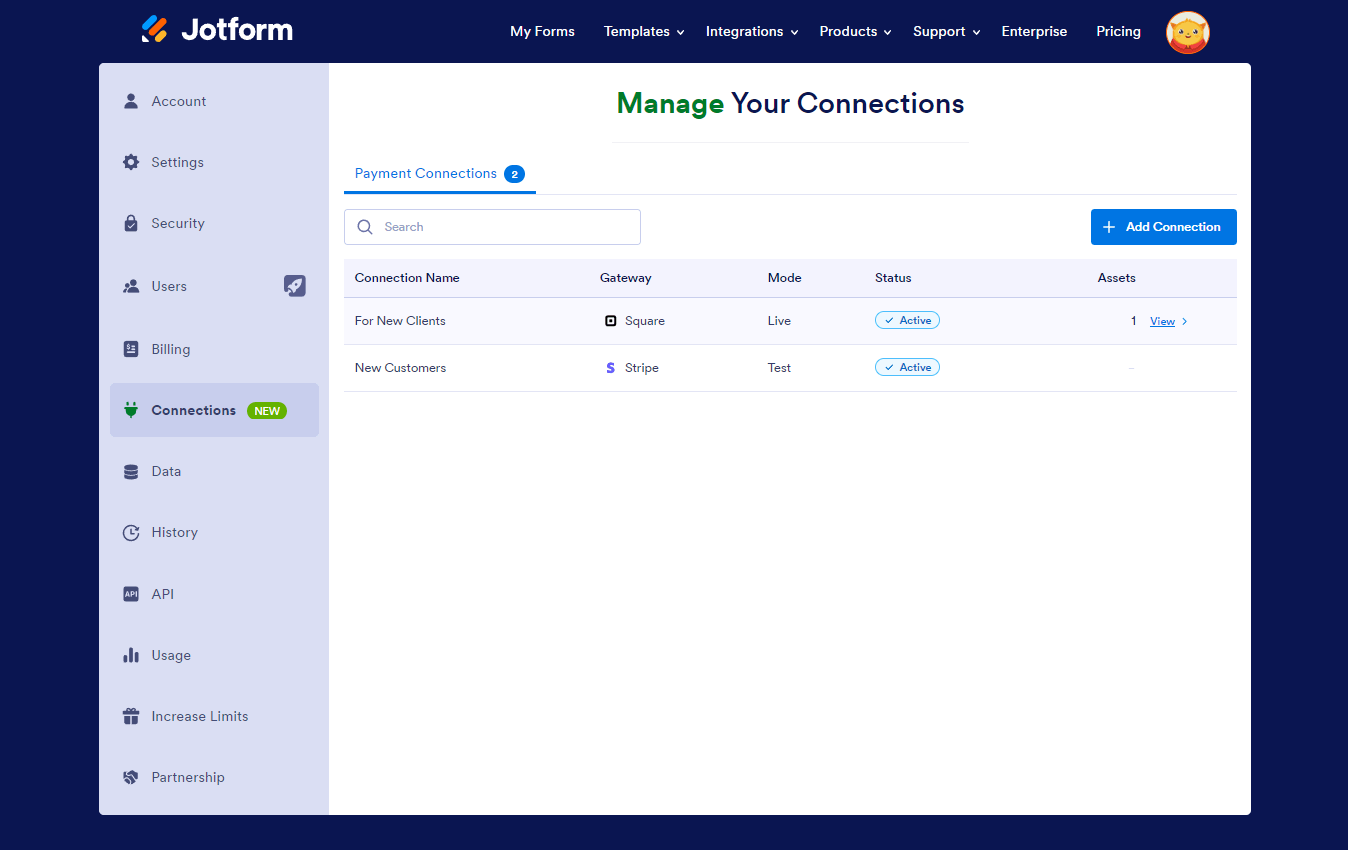
You can manage your active Reusable Payment Connections through the Connections section of the My Accounts page. On this page, you can do the following:
- Add a new connection. The flow of adding new connections is almost the same as adding through the Form Builder.
- View the list of all your connections.
- View the Gateway, Mode, Status, and the Assets.
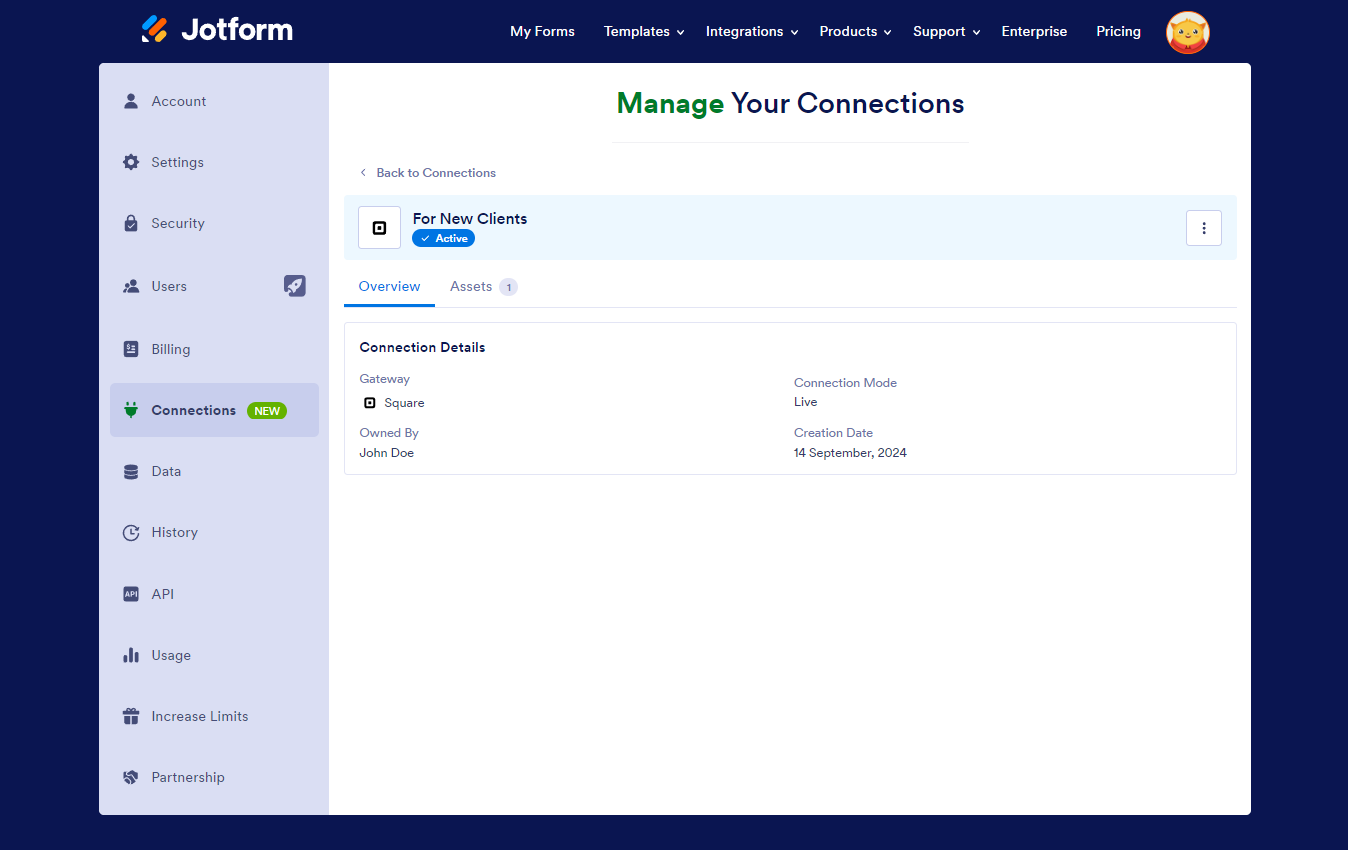
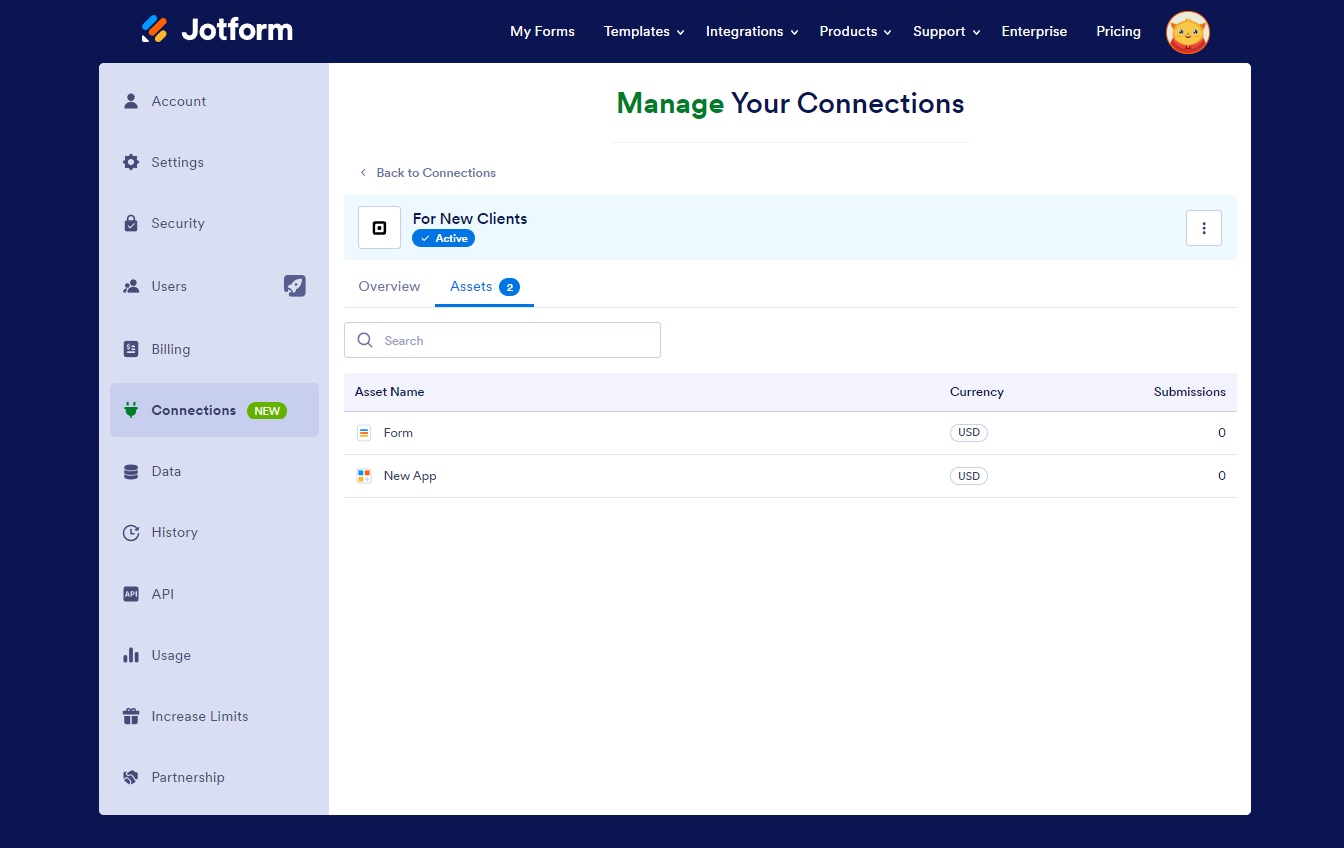
Clicking the View under the Assets column will open the Overview page, which will display the Connection Details, which includes the Gateway, Owner, Connection Mode, and the Creation Date. You will also see the Assets tab, which lists the Asset Name, Currency, and Submissions.
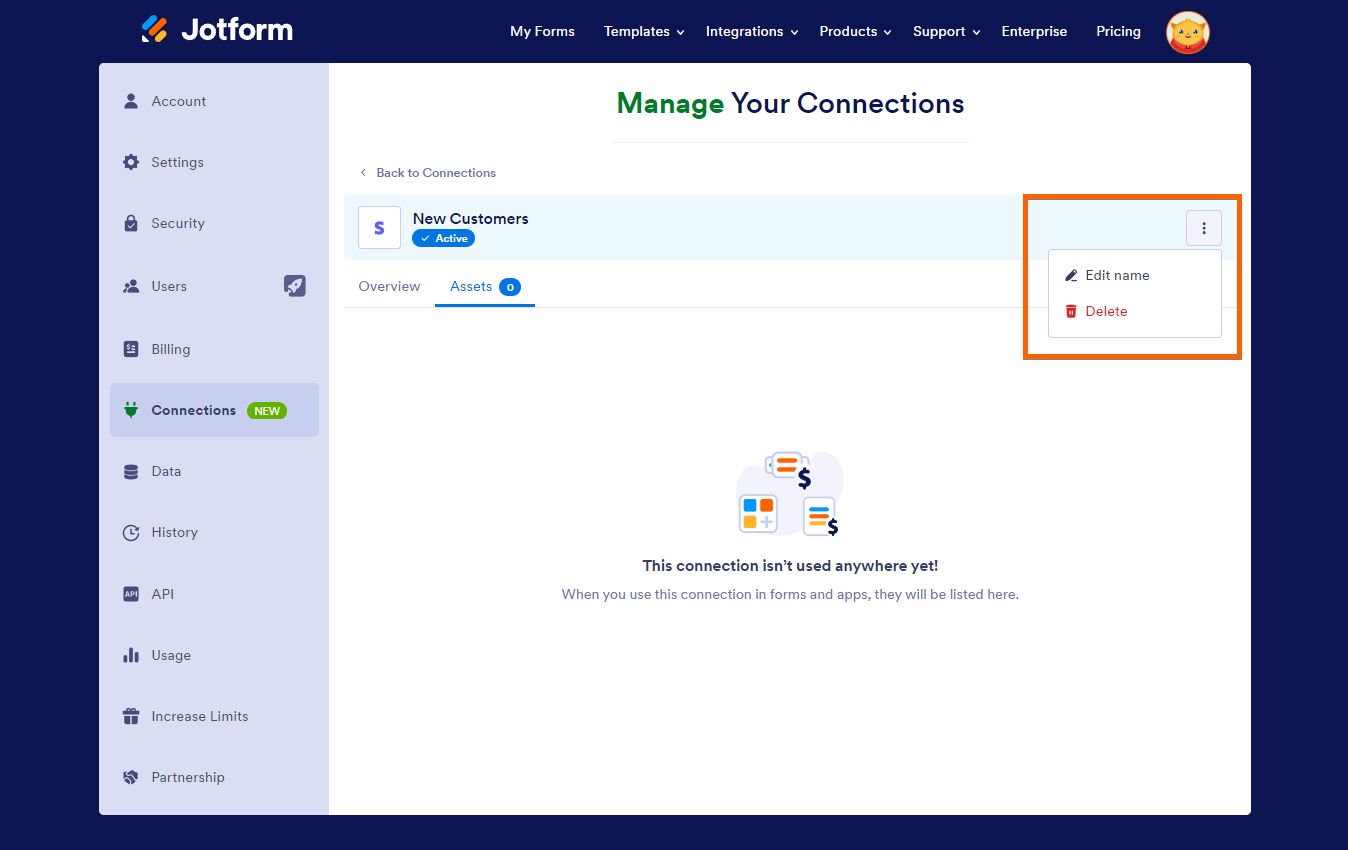
You can only delete the Reusable Payment Connection if it has no connected assets. Otherwise, you’ll only see the Edit Name option.

Switching Reusable Payment Connections
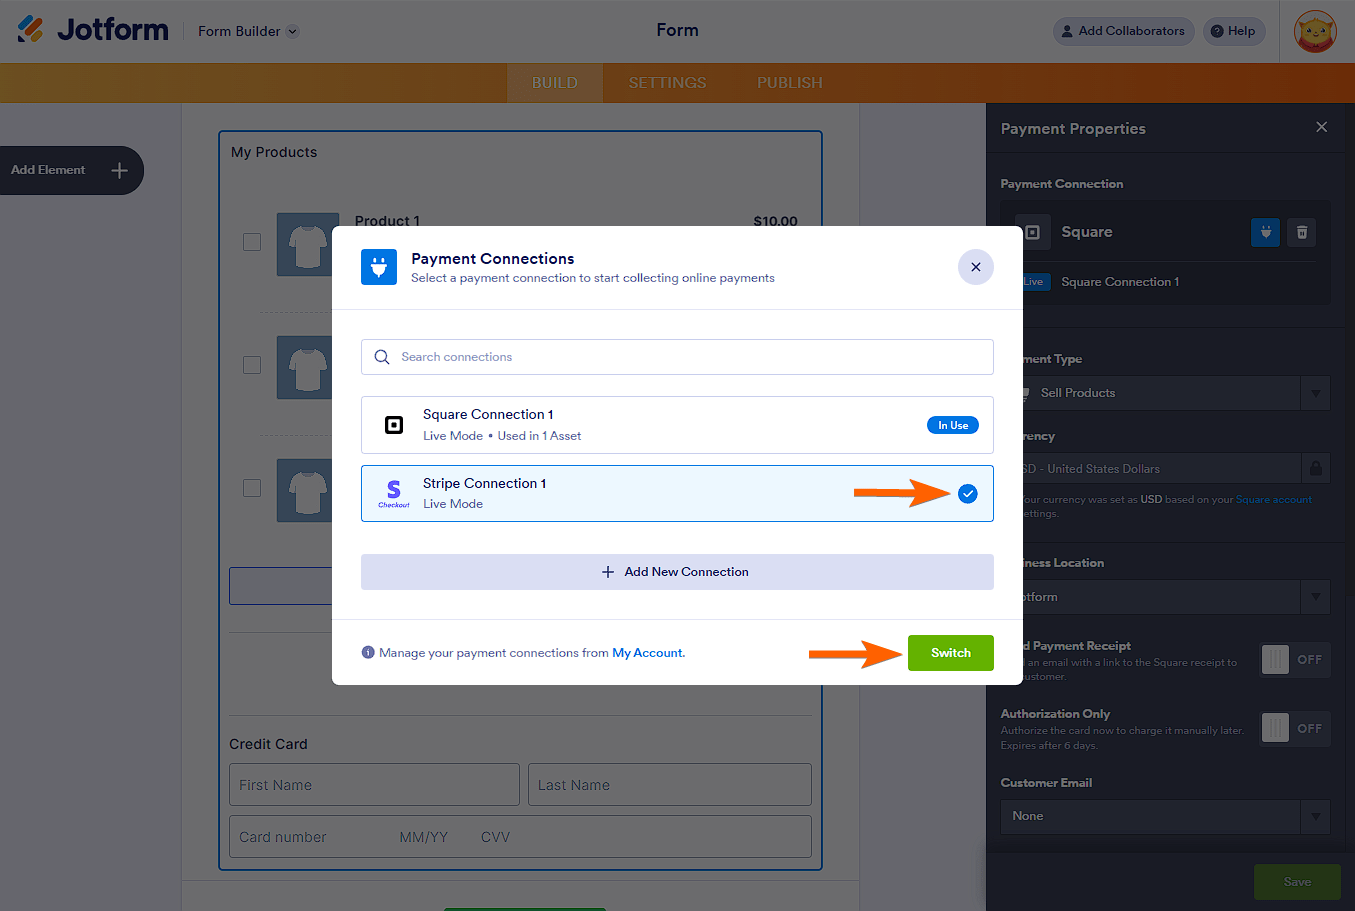
If you want to use another gateway in the form, you can switch it easily through the Payment Properties. The only requirement is to ensure you have set up or added a Payment Connection to your new preferred gateway.
- In the Form Builder, click the Payment Properties icon on the upper right-side part of the page. Alternatively, select the Payment element to see its inline options, and click the same green icon for the Payment Properties.
- Click the Plug icon through the Payment Connection section of the Payment Properties. It will open the Payment Connections modal.
- Now, select the other Payment Connection from the list. As mentioned above, you must have added the payment connection you’d like to switch to. If you haven’t done it yet, click the Add New Connection button in the modal or go through your Account – Connections to add it.
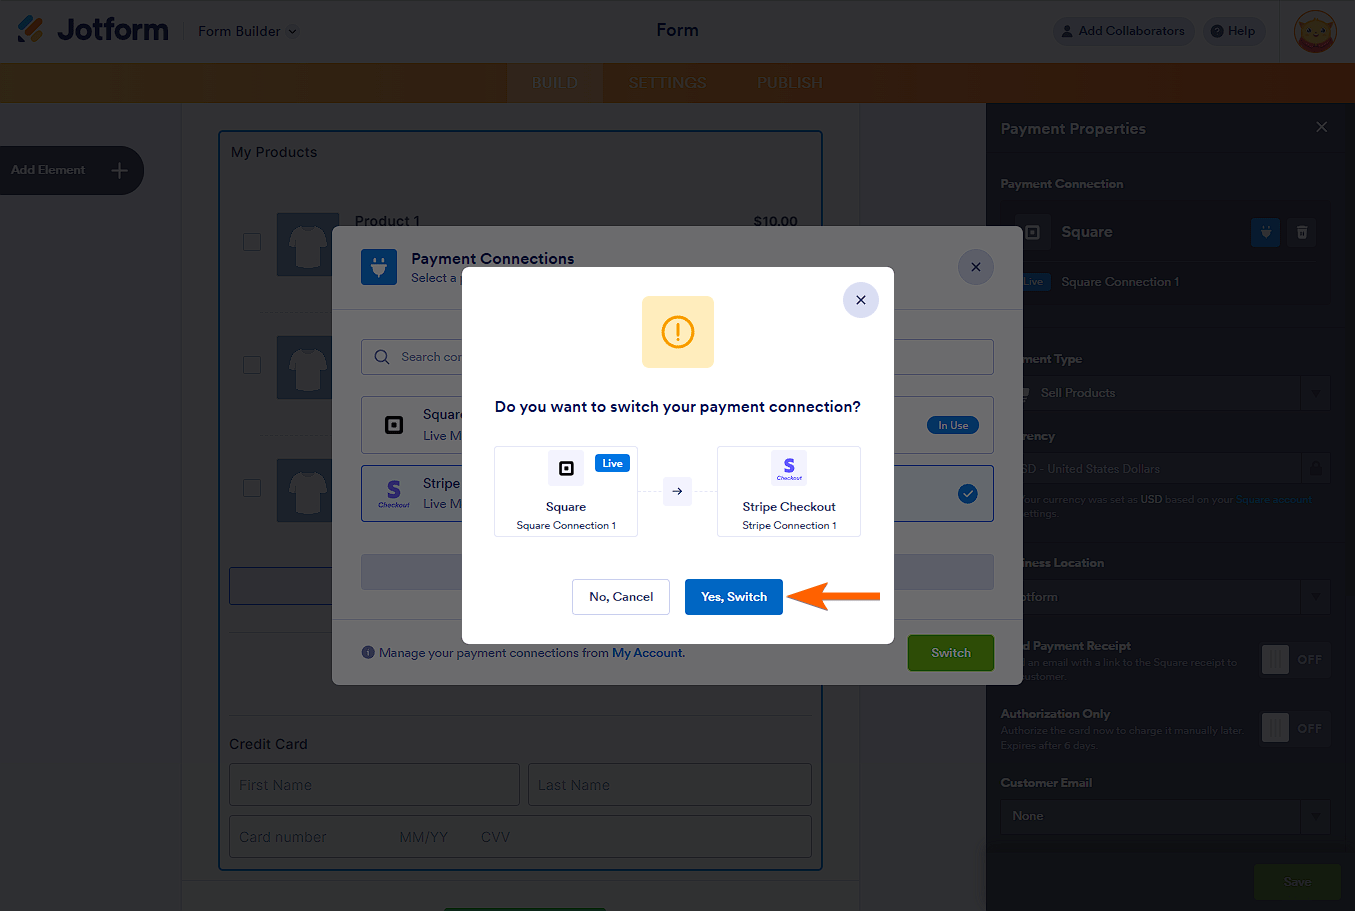
- Click the Switch button.
- Finally, confirm the action by clicking the Yes, Switch button. Way to go, you’re done switching!

Send Comment:
5 Comments:
43 days ago
Can i use a product list without payment and add a payment in later?
51 days ago
I have the same problem from the message below, it gets stuck on the "Work in progress...Please wait while we set up your payment connection" page. I tried clearing the cache, doesn't solve it.
52 days ago
I have been unable to set up a payment connection for my form. It takes me through all of the steps of connecting my accounts but after I've done that, it gets stuck on the "Work in progress...Please wait while we set up your payment connection" page.
188 days ago
Hi, HOw come I do not have this Option of Connections in my Account portal?
198 days ago
good to see the info