As a Jotform Enterprise administrator, you’ll have complete control over your server. You can add and manage users, view and manage forms, and view logs — to name a few. You can also update your server settings, which include the option to add a server-wide custom sender email by SMTP. You can choose Google, Microsoft, or a Custom SMTP. Your users can then use the custom sender email for their forms.
Adding the Custom Sender Email
Ensure you’re logged in to your Jotform Enterprise account, and follow the below steps to add the custom sender email.
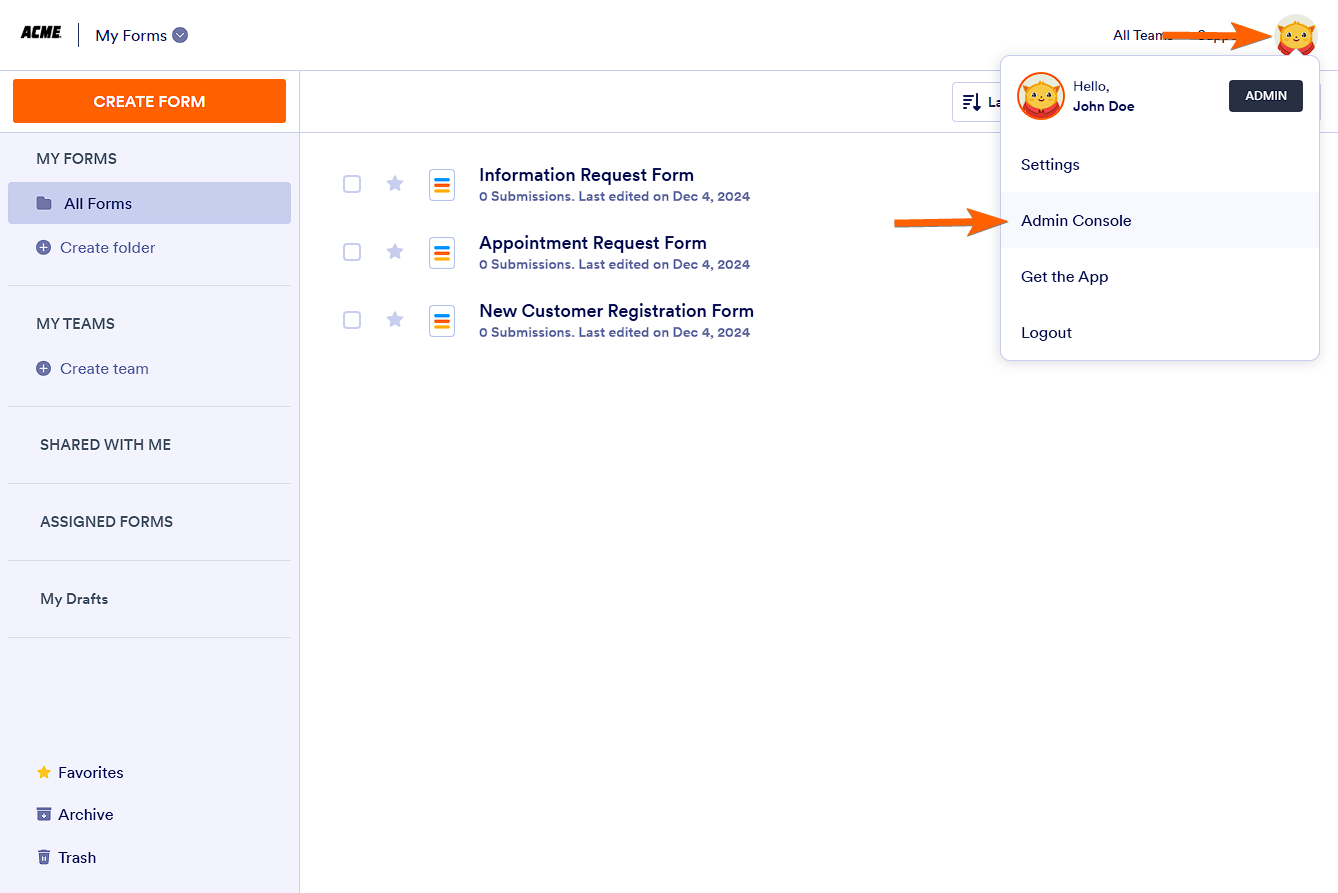
- Click your Profile Picture on the top-right side regardless of which page you’re currently viewing.
- Select Admin Console from the menu.
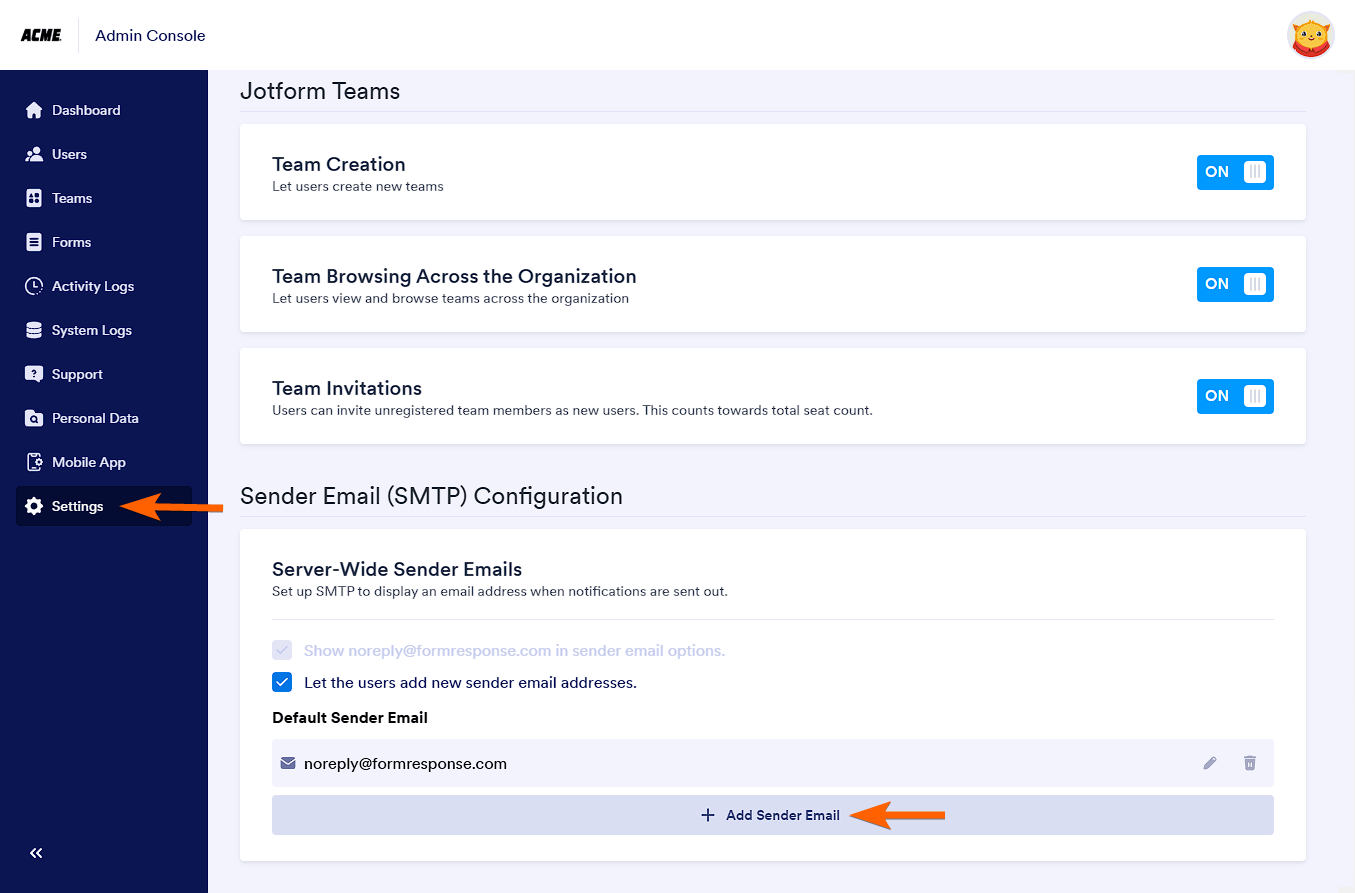
- On the left side of the Admin Console, select Settings.
- Under the Sender Email (SMTP) Configuration section at the bottom of the Settings page, click the Add Sender Email to select your SMTP provider.
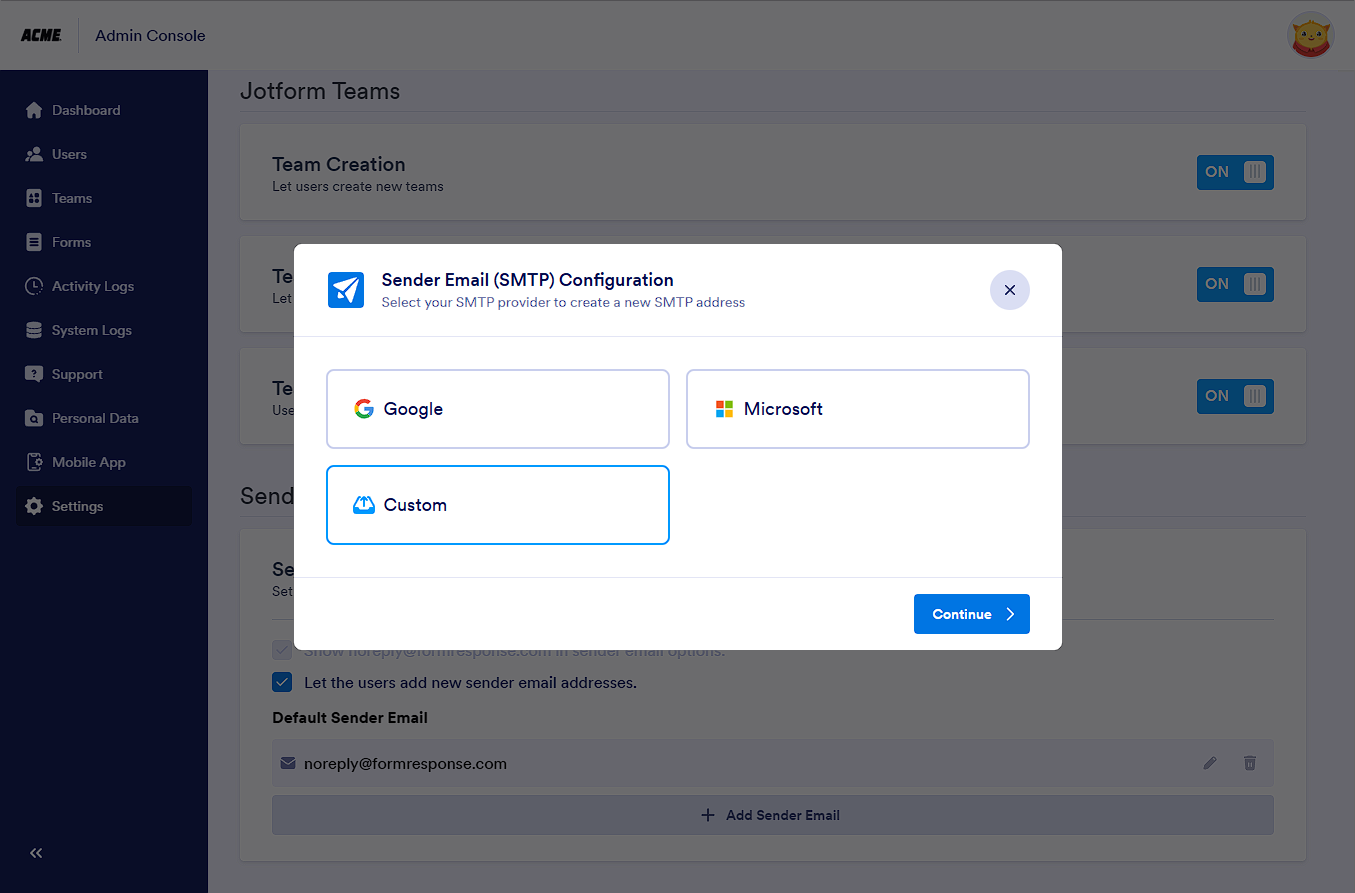
- Select Custom, and click the Continue button.
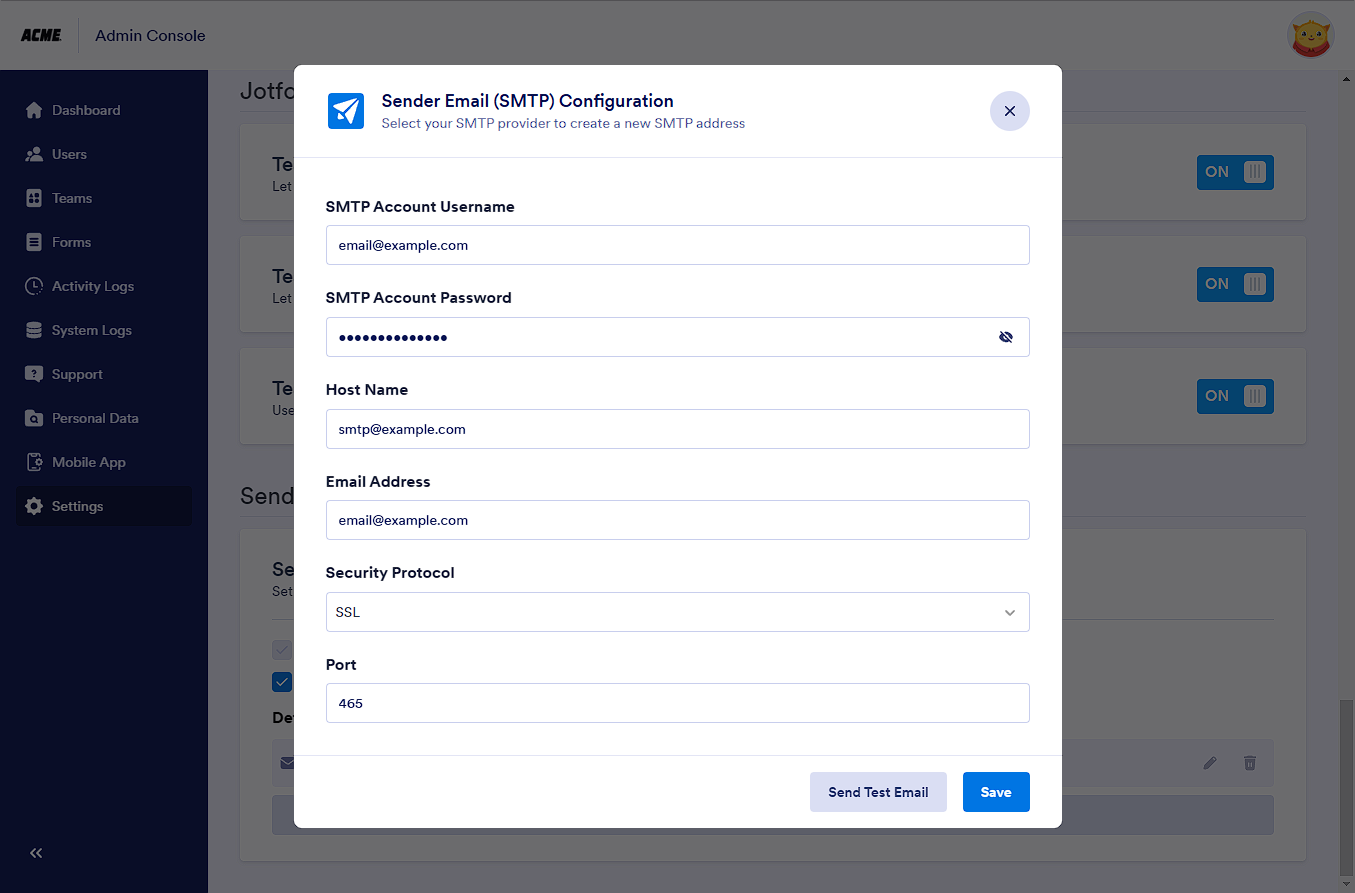
- Provide the SMTP credentials as follows:
- SMTP Account Username — In most providers, the username is the email address.
- SMTP Account Password — The password associated with your SMTP account.
- Host Name — Enter the hostname relative to the provided email address.
- Email Address — This will be the email address that will appear in the Sender Email dropdown of your form email settings.
- Security Protocol — Select the protocol; TLS or SSL.
- Port — Specify the port. The common ones are 465 for SSL, 587 for TLS, and 25 for Non-secure ports.
- Next, click the Send Test Email button. It’s recommended that the SMTP credentials be tested. If it works, the system will send a test email using the SMTP account you provided. If not, you should correct it based on the error message.
- Finally, click the Save button to complete the setup.
Setting up the Server-Wide Sender Emails
Now that you’ve added the custom sender email, let’s move into the individual checkboxes under the Server-Wide Sender Emails.
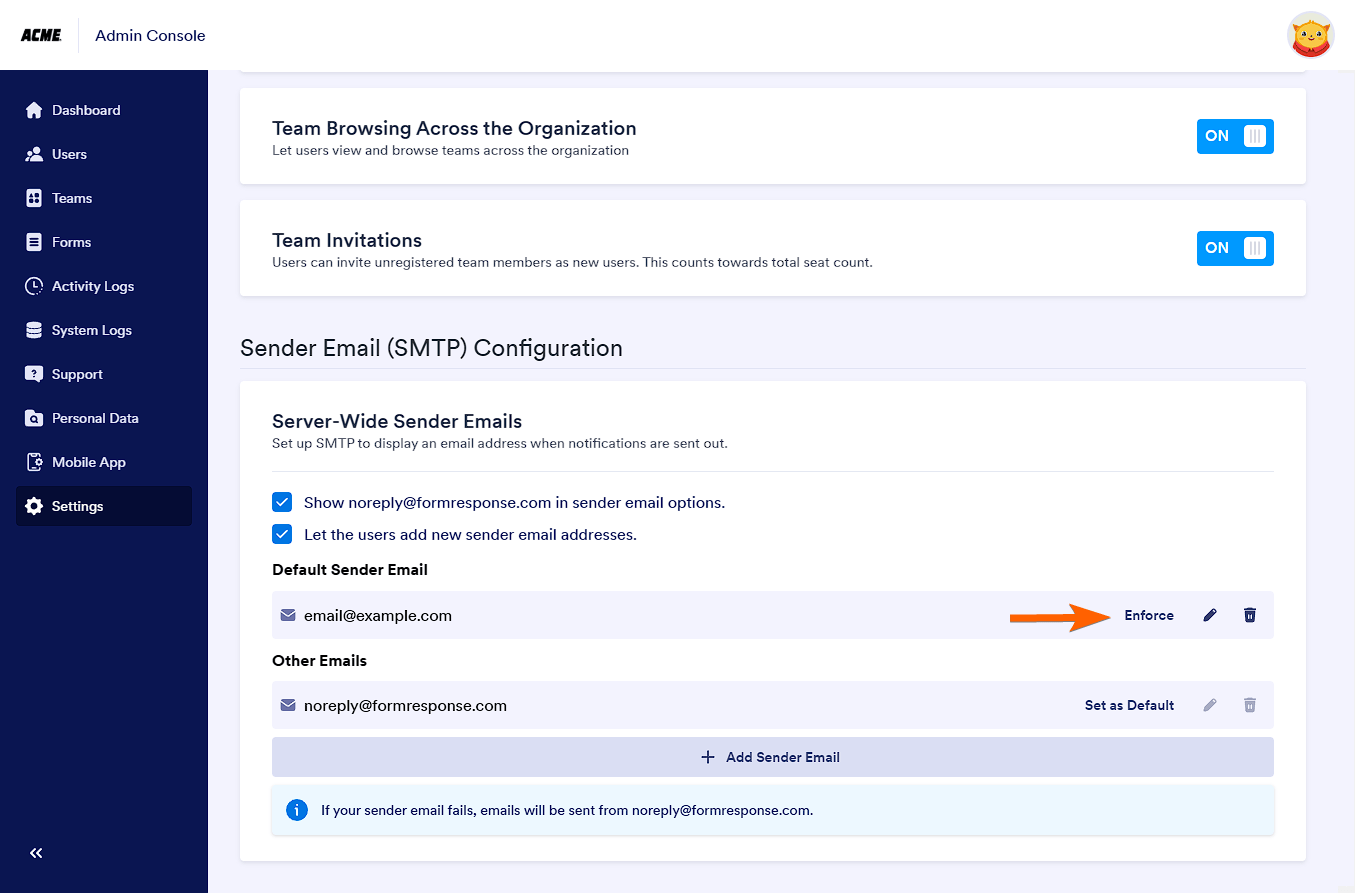
Show “noreply” email in sender email options
You can set the “Show ‘noreply’ email in sender email options” option based on the following conditions:
- The option is locked if noreply@formresponse.com is the Default Sender Email.
- You can check/uncheck the option if a custom sender email is set as the Default Sender Email, provided it is not enforced organization-wide.
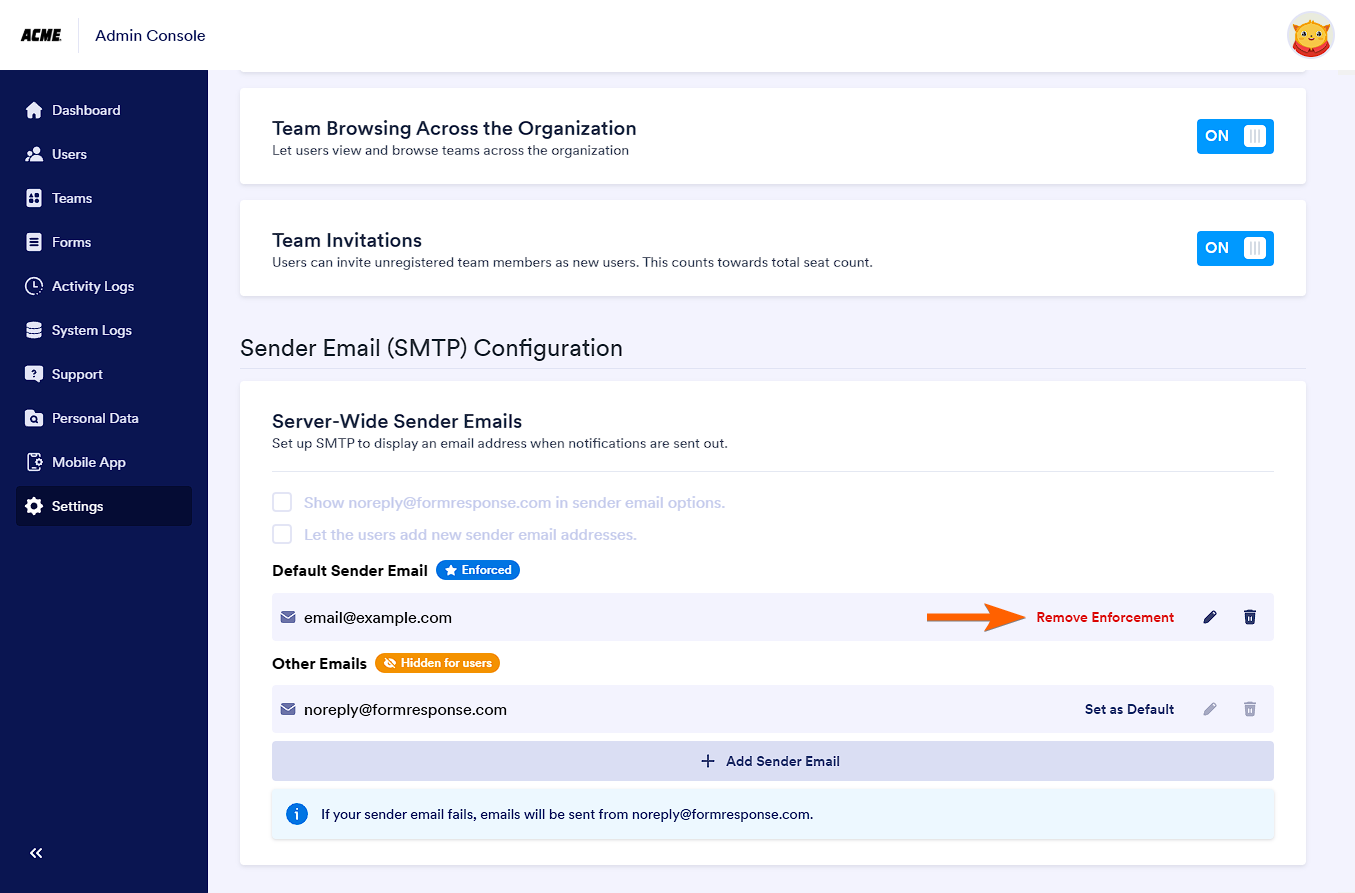
- The option is permanently disabled (unchecked) if the custom sender email is set as the Default Sender Email and enforced organization-wide.
Based on the above conditions, your Enterprise users will either see noreply@formresponse.com or not in the Sender Email dropdown of their forms.
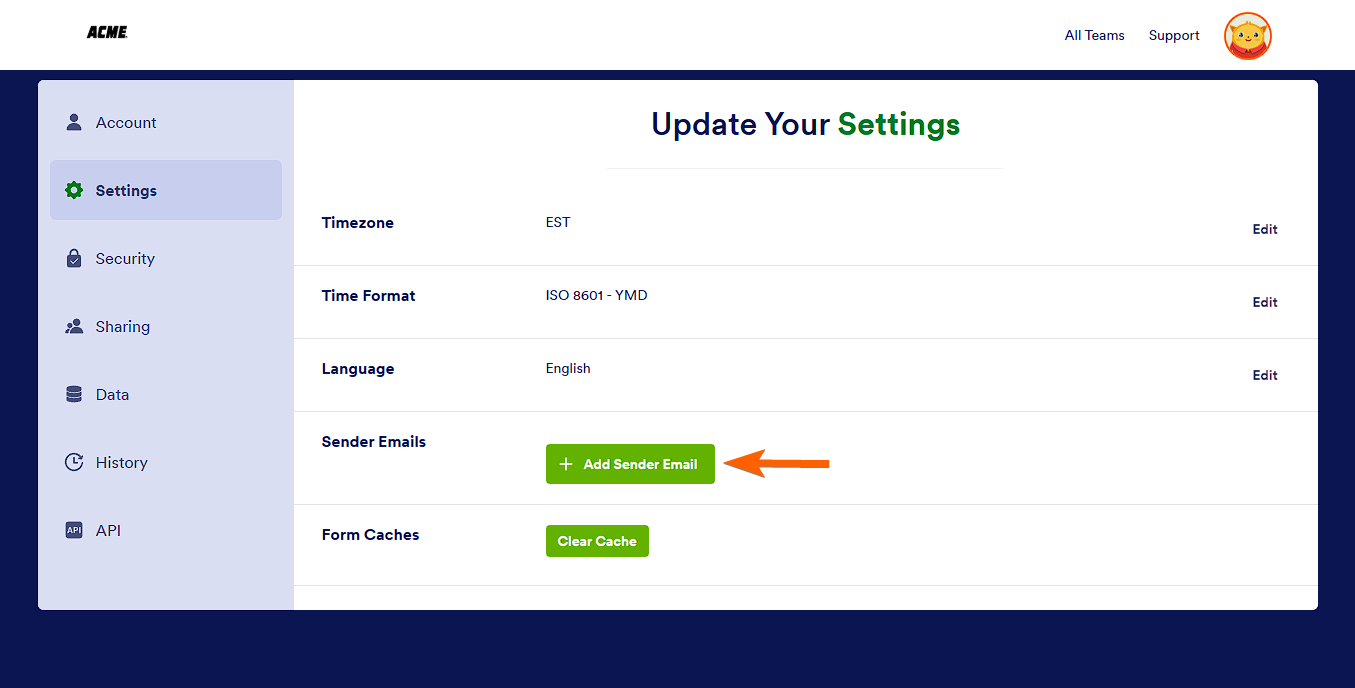
Let the users add new sender email addresses
You can set the “Let the users add new sender email addresses” option based on the following conditions:
- You can check/uncheck the option regardless of the Default Sender Email but provided that if you set a new Default Sender Email, it is not enforced organization-wide.
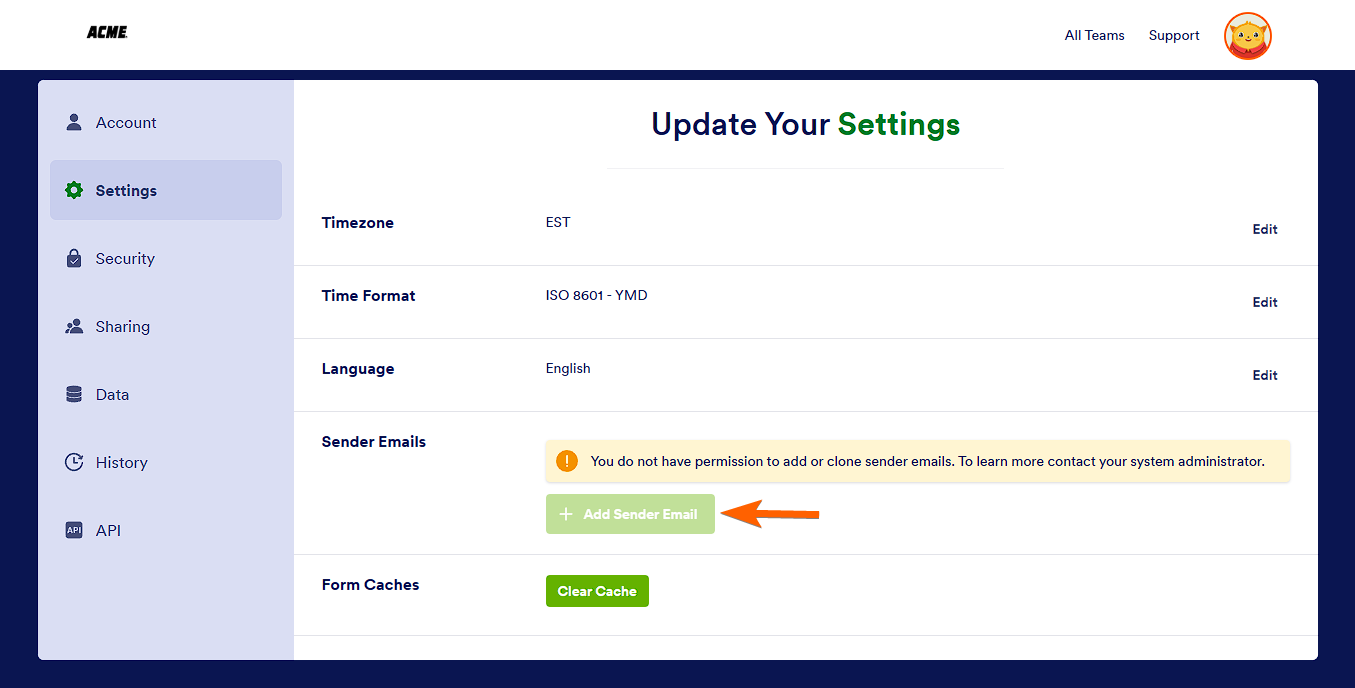
- It is unchecked and disabled if you set a new Default Sender Email and enforce it organization-wide.
Your Enterprise user can or cannot add a new sender based on the above conditions.



Send Comment: