SitePad helps users build their website with amazing drag & drop functionality, less time-consuming with fully responsive pre-designed templates. You can create a website with SitePad with no coding knowledge required.
If you have a form with Jotform, you could embed it on your SitePad website. With SitePad’s drag and drop feature, you’ll have your form displayed in less than a minute. Please read below for the steps.
Getting the Embed Code for SitePad
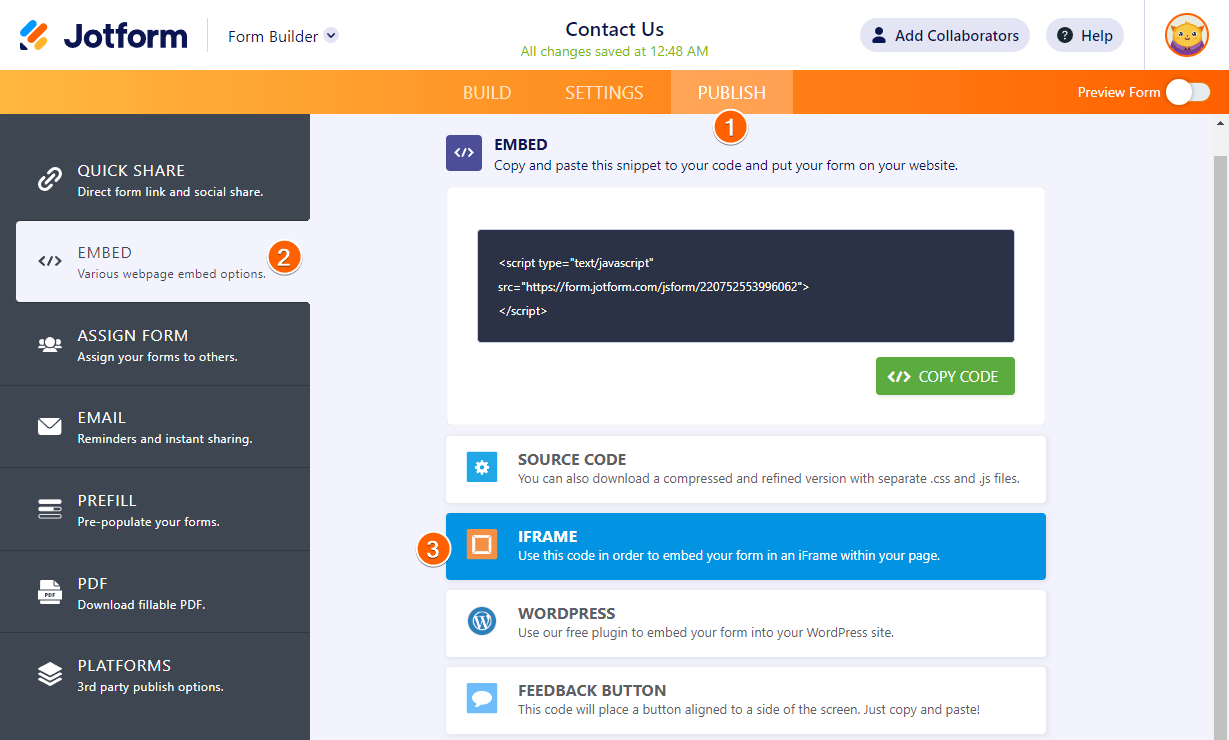
- In the Form Builder, go to the Publish tab.
- Click Embed on the left side.
- Choose and click iFrame from the embed options.
- Click the Copy Code button to copy your form’s iframe codes.
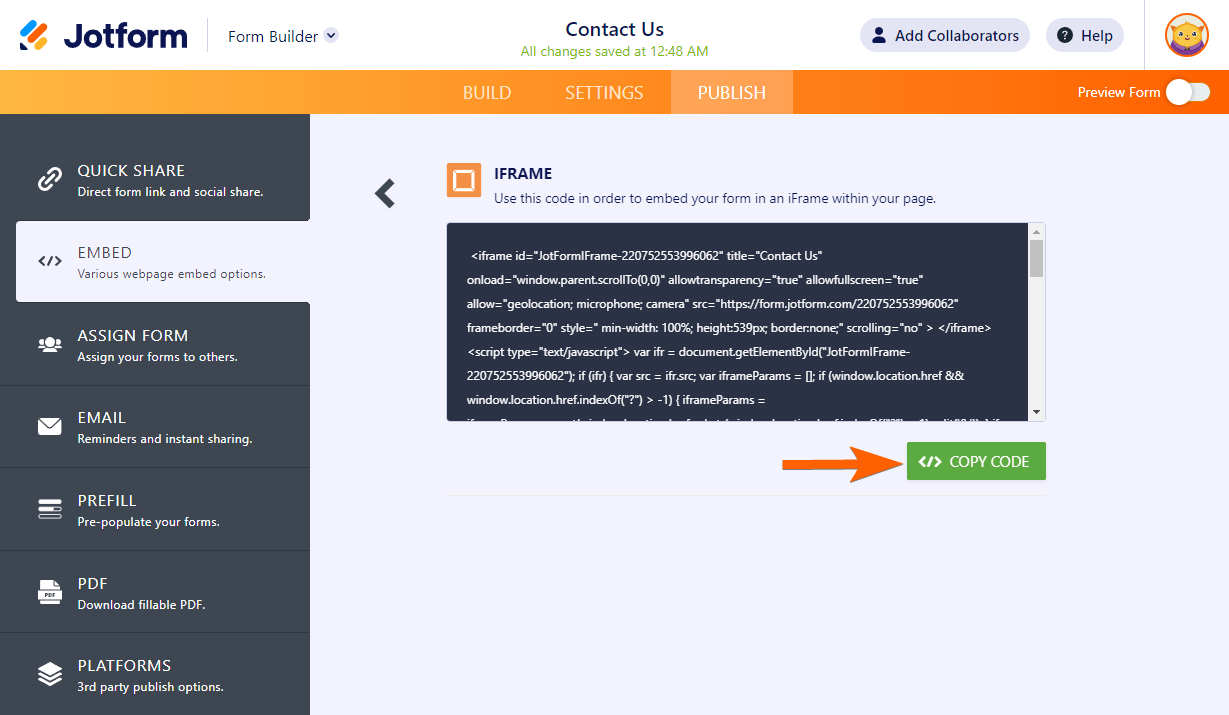
You now have your form’s embed code ready for publishing.
Adding Form in SitePad
- Log in to your SitePad website.
- In your SitePad’s admin panel, go to the Pages section.
- Edit the page where you want to display the form.
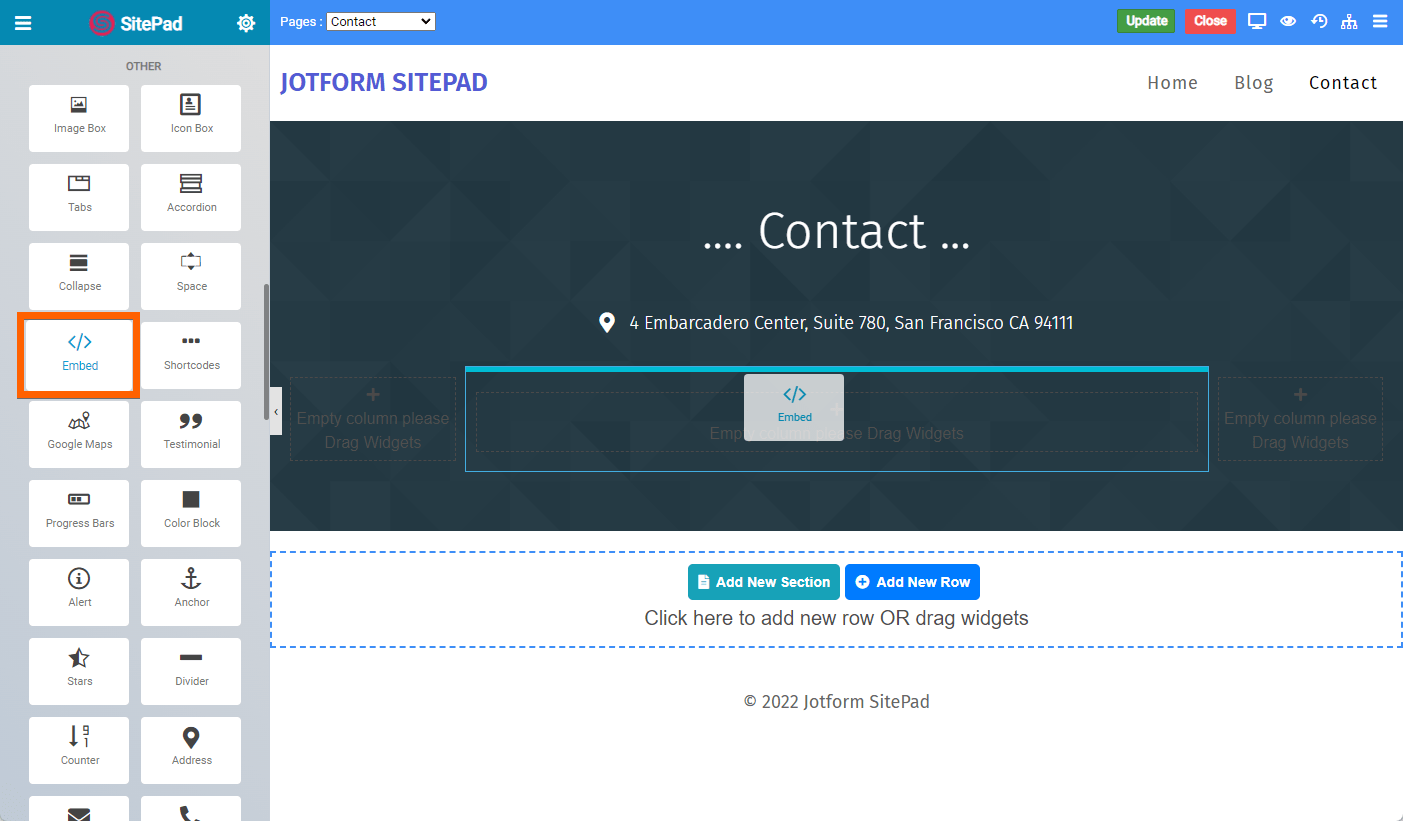
- Under the Widgets tab of the editor, find and drag/drop the Embed widget to the column/row where you want to embed the form.
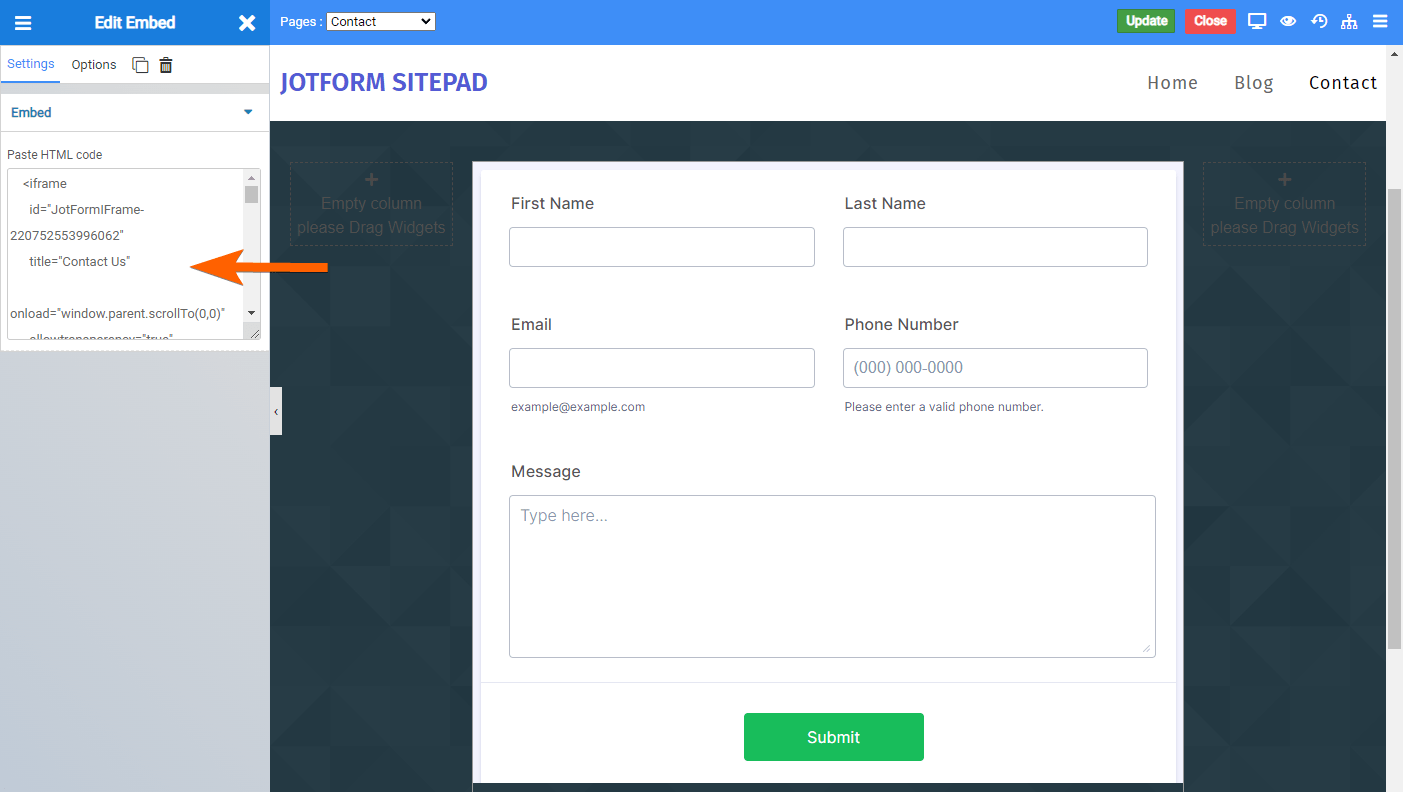
- Paste your form’s embed codes in the Embed box on the left side of the screen. At this step, you should see the form displayed in the editor.
- Click the Update button at the top of the editor. You can close the editor by clicking the Close button, and that’s it.

Send Comment: