Zendesk is CRM software that helps businesses build better customer relationships. With Jotform’s free Zendesk integration, you can automatically turn form submissions into new tickets in Zendesk – perfect for tackling support requests, orders, or customer feedback with your team.
Use this integration to:
- Collect customer requests, orders, and more through your website
- Turn form submissions into Zendesk support tickets
- Work with your team to process requests
First, create a custom online contact form or support request form, and ensure to add the primary fields such as the name, email, phone, and the message box using the Long Text Entry element. If you have all these ready, please follow the steps below set up the Zendesk integration:
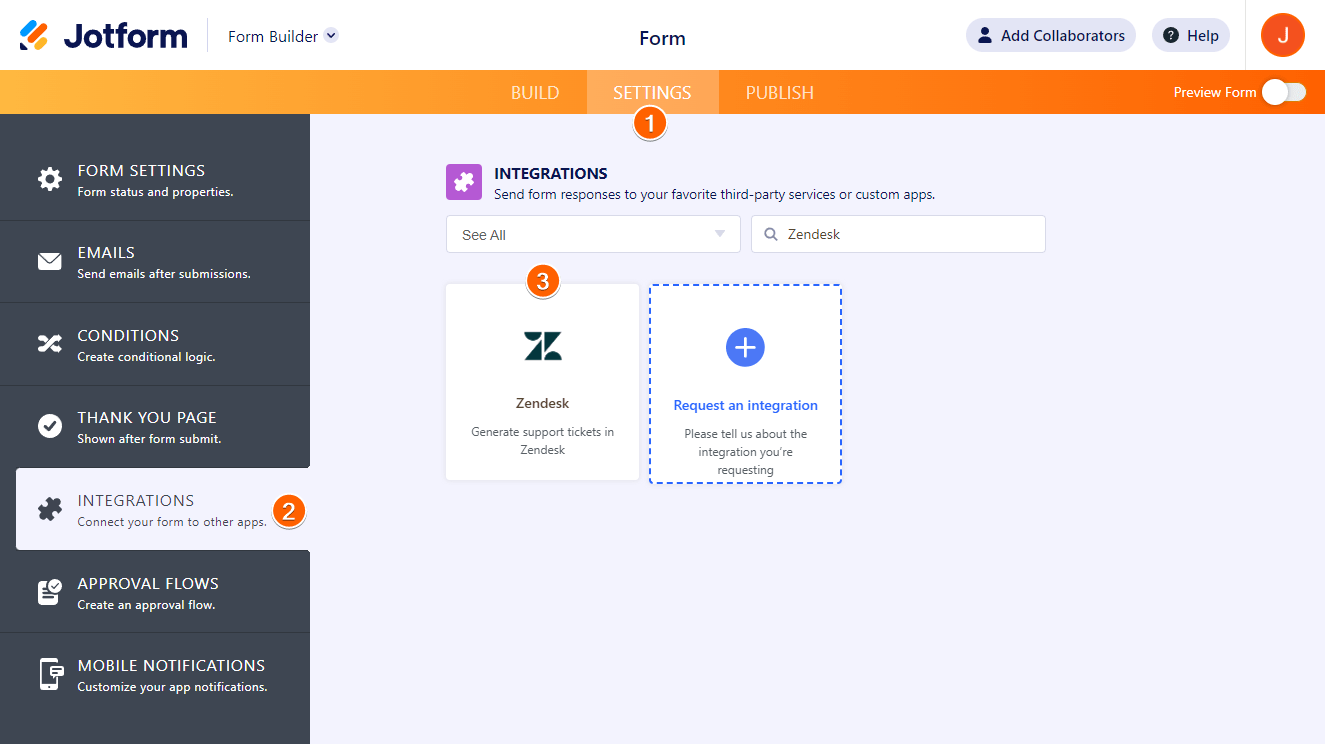
- In the Form Builder, go to the Settings tab.
- Click Integrations on the left side.
- Search Zendesk and click it.
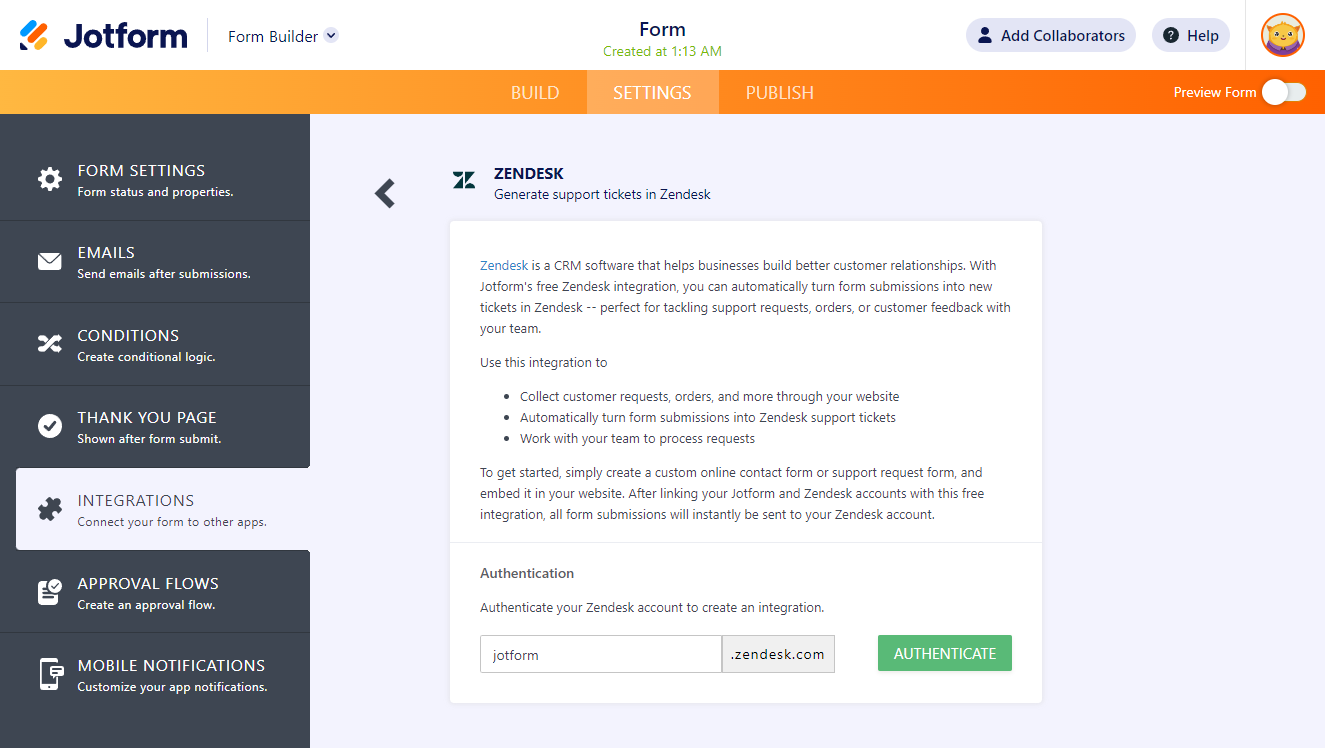
- Enter your Zendesk subdomain.
- Click the Authenticate button to connect and link your Zendesk account. If you’ve already linked it before, you can see a dropdown and select the account from there.
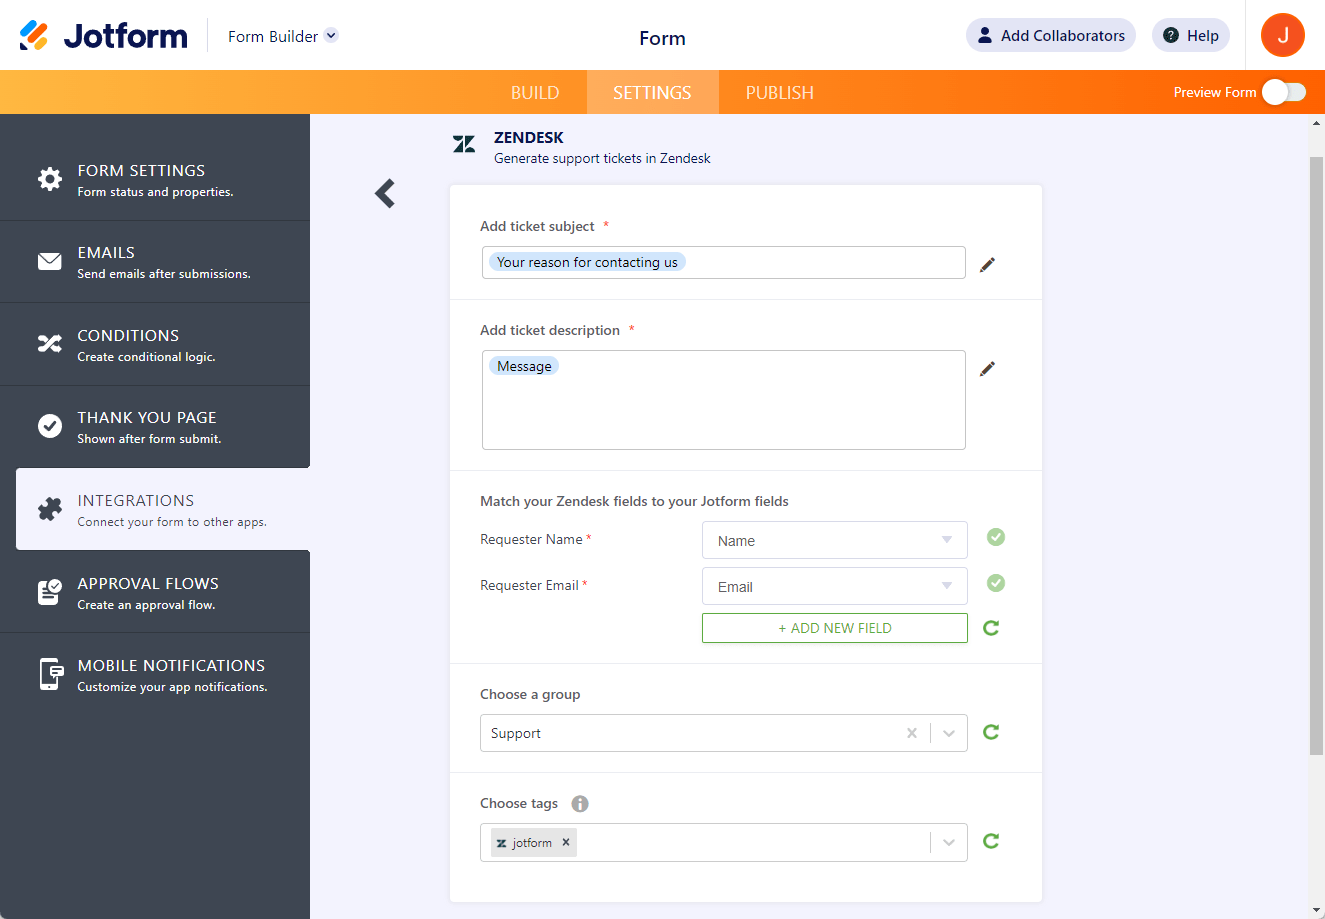
- Next, set up the following options as shown in the below image:
- Add ticket subject — You can select form fields in this box or type in a custom subject line.
- Add ticket description — Select the appropriate field for the ticket description – for example, the Long Text Entry element.
- Match your Zendesk fields to your Jotform fields — By default, Jotform matches the name and email fields, but you can also add and select your Zendesk’s native and custom fields.
- Choose a group — If you have a group that handles your form submissions, you can select it from this dropdown.
- Choose tags — If you have a specific workflow to follow, you can also set up Tags in the integration. You can select from your existing tags or type them.
- Attach uploaded files — This shows up if you have a File Upload element in the form.
When matching Zendesk fields to your Jotform fields, you can also select and map the following:
- Status — The predefined options are Open, Pending, and Solved. If you don’t choose one of them, the default will be New.
- Type — The predefined options are Question, Incident, Problem, and Task.
- Priority — You can select Low, Normal, High, and Urgent.
These fields from Zendesk support mapping to your Jotform form fields. However, you should ensure that the options are the same in these fields.
- Click the Save button at the bottom to save the integration settings.
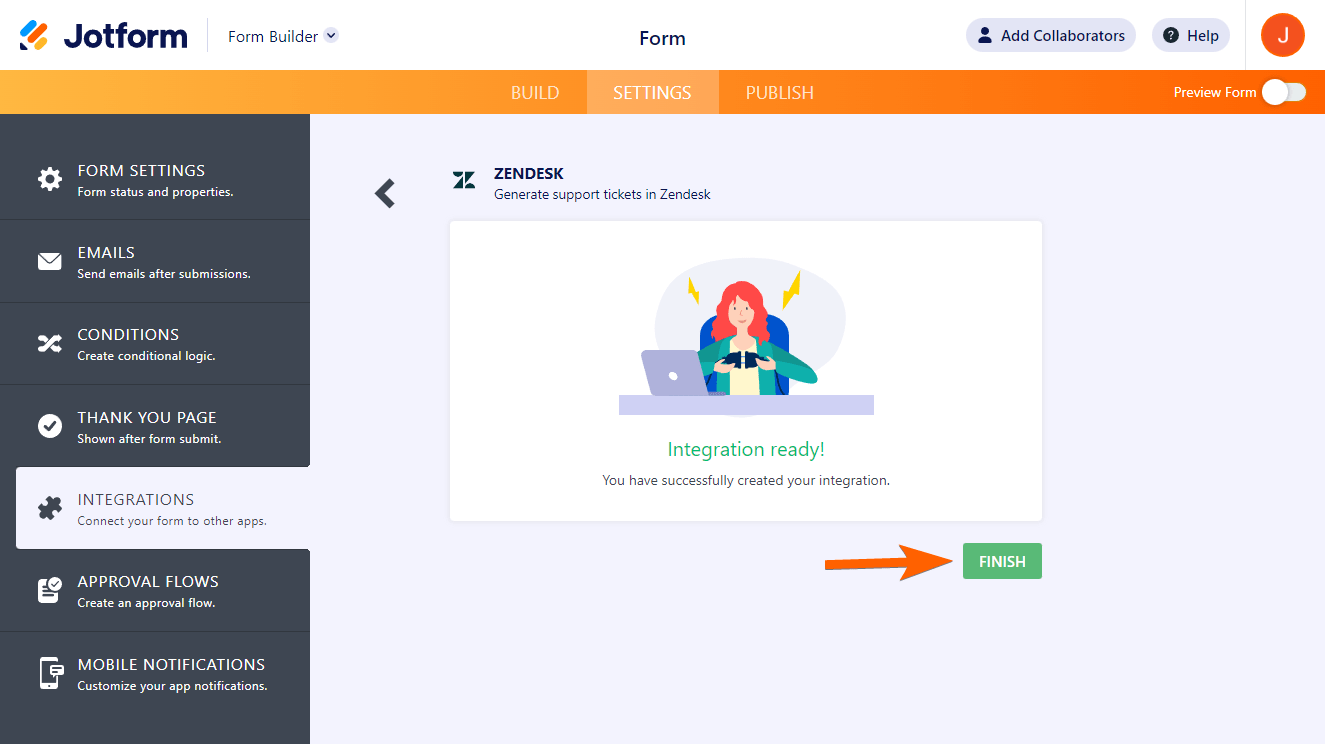
- Finally, click the Finish button.
And that’s it! Your form will now send data to Zendesk every time someone submits it.


Send Comment:
4 Comments:
More than a year ago
Hi, is there a way to map a Zendesk form?
More than a year ago
Checking to see if there is any update on this previous request from 1.5 years ago. Can the ticket description be an internal note rather than a public note?
More than a year ago
Is there a way to make the ticket description a private note instead of a public comment in Zendesk?
More than a year ago
Is this not available on HIPPA forms?