When you need to collect, analyze, and submit data in a structured spreadsheet format, the Spreadsheet widget is the perfect tool. It allows form users to input and submit data in a familiar table layout, making it easy to manage and use for various purposes, such as reporting or data analysis.

Setting Up the Spreadsheet Widget
To set up your Spreadsheet Widget, follow the steps below:
- In the Form Builder, click the Add Element button.

- Under the Widgets tab, search for Spreadsheet widget.
- Drag and drop or click it to add it to your form.
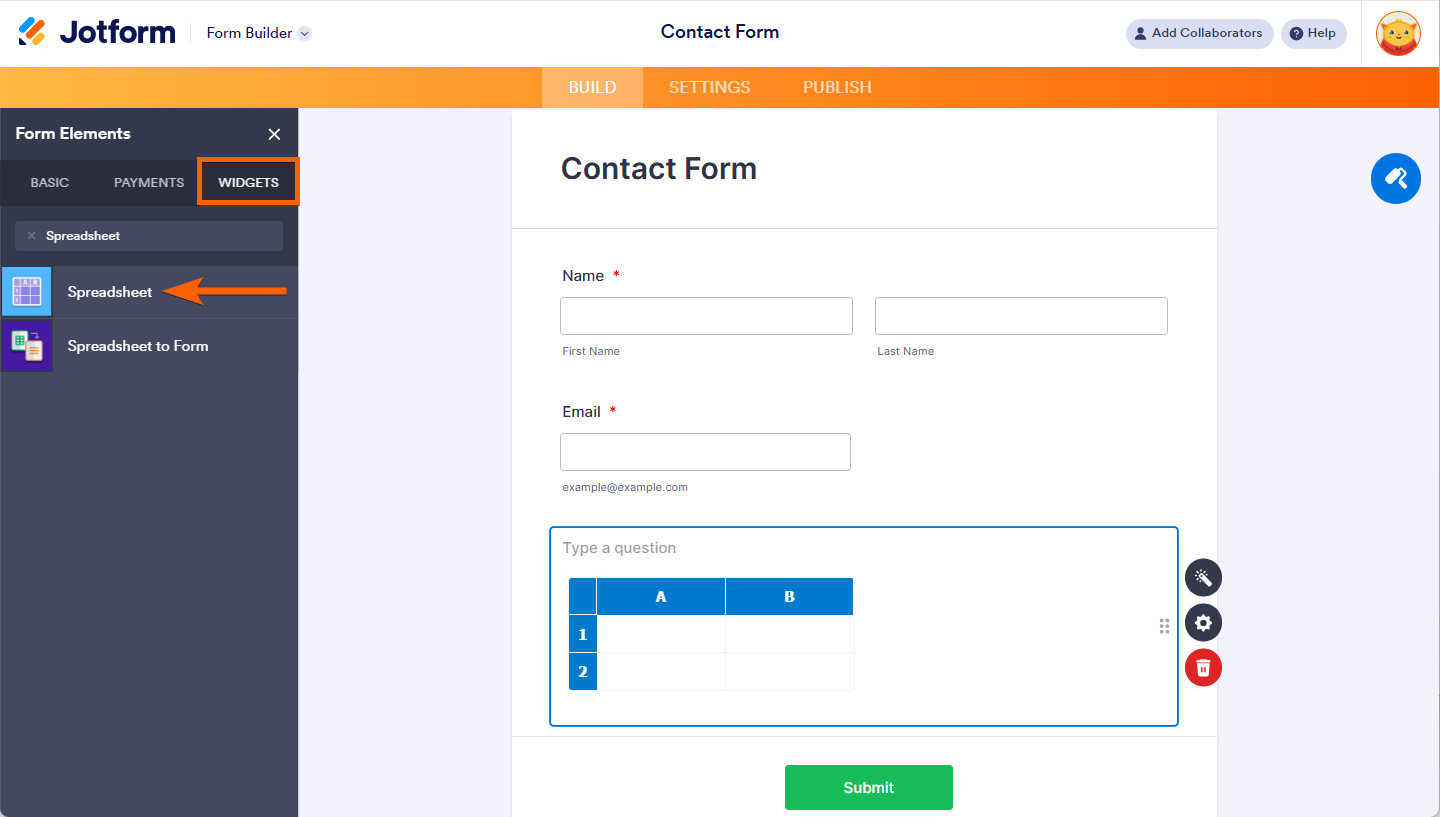
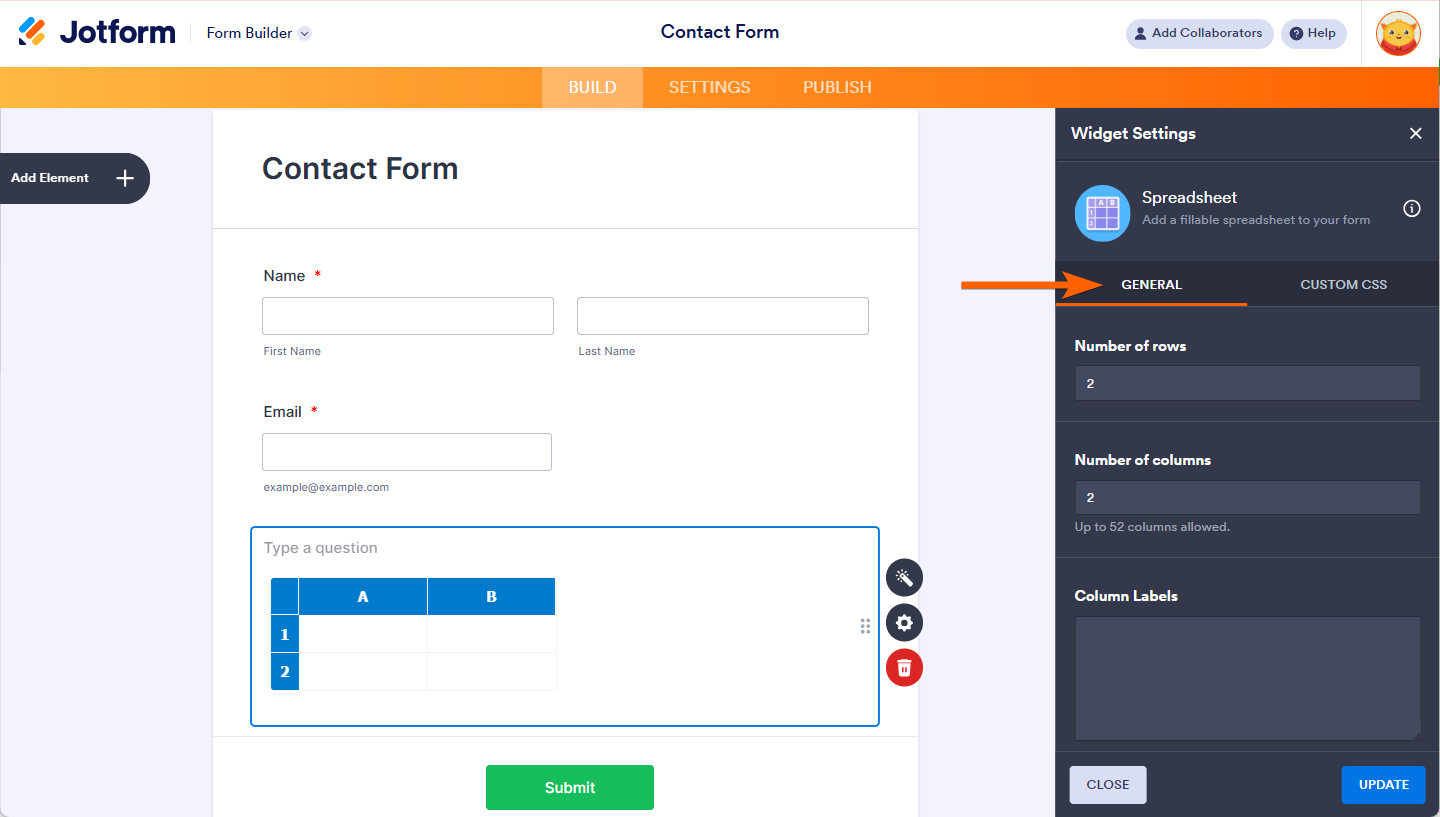
- Click on the Wand icon to open the Widget Settings.
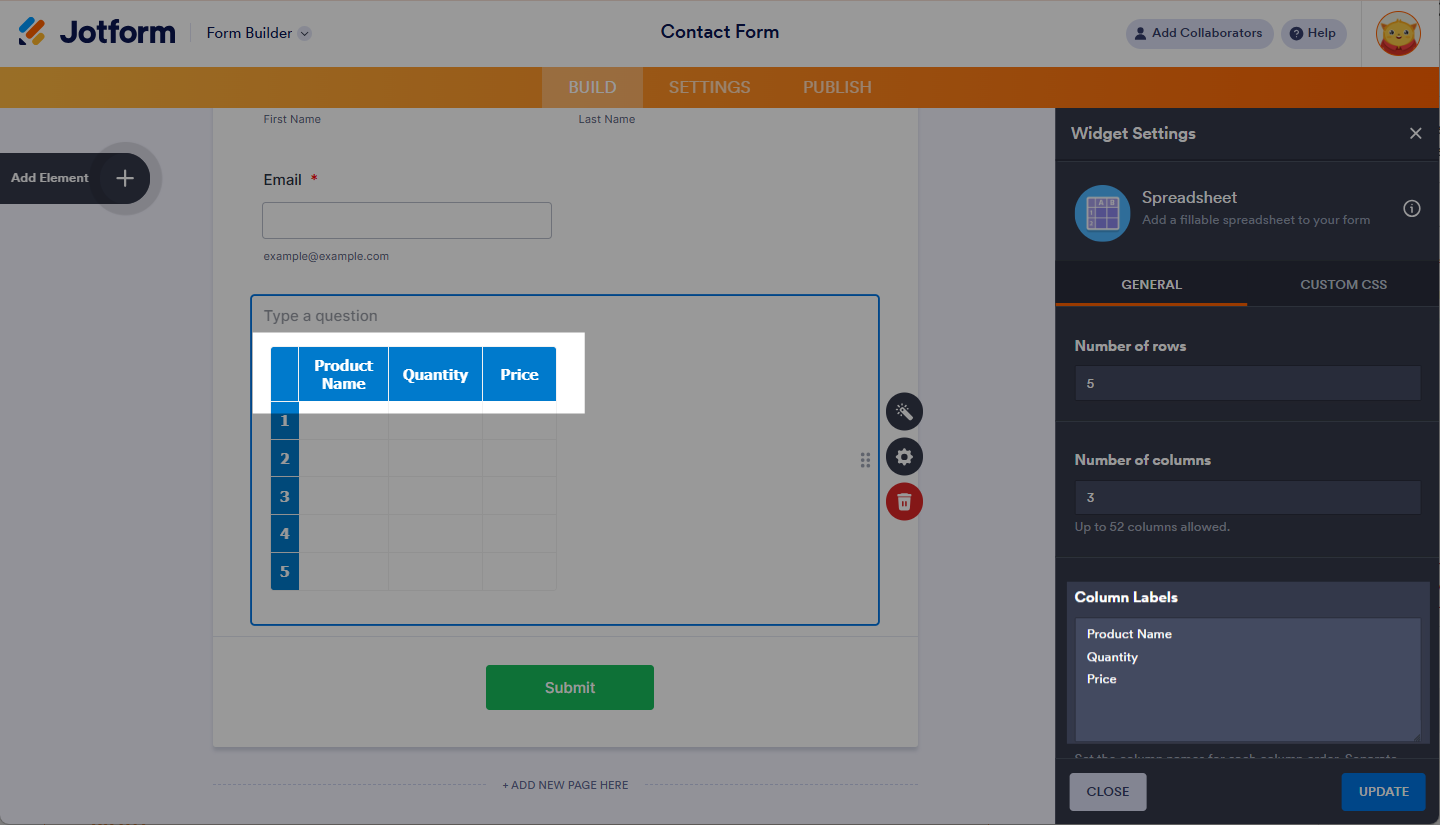
- Under General tab, set up the following options:
- Number of rows — Specify how many rows you want to display.
- Number of columns — Choose how many columns you want to add.
- Column labels — Optionally, add custom labels instead of default letters.
- Default values — Set default values for each cell in the spreadsheet.
- Read-only — Mark certain cells as read-only if needed.
- Click the Update Widget button to save your settings.
If you want to customize the design of your widget, click on the Custom CSS Tab. See How to Inject CSS Codes to Widgets for more information.
Configuring General Tab
To customize the layout and functionality of your Spreadsheet widget, you can adjust various settings under the General tab. These options help you define the structure of your spreadsheet, pre-fill cells with values, and make specific cells read-only for a more tailored user experience.
Number of Rows
This option allows you to specify how many rows you want to display in the Spreadsheet widget. For example, if you’re collecting data for 5 entries, you would set the number of rows to 5. This controls the vertical layout of the data that users will be able to input.
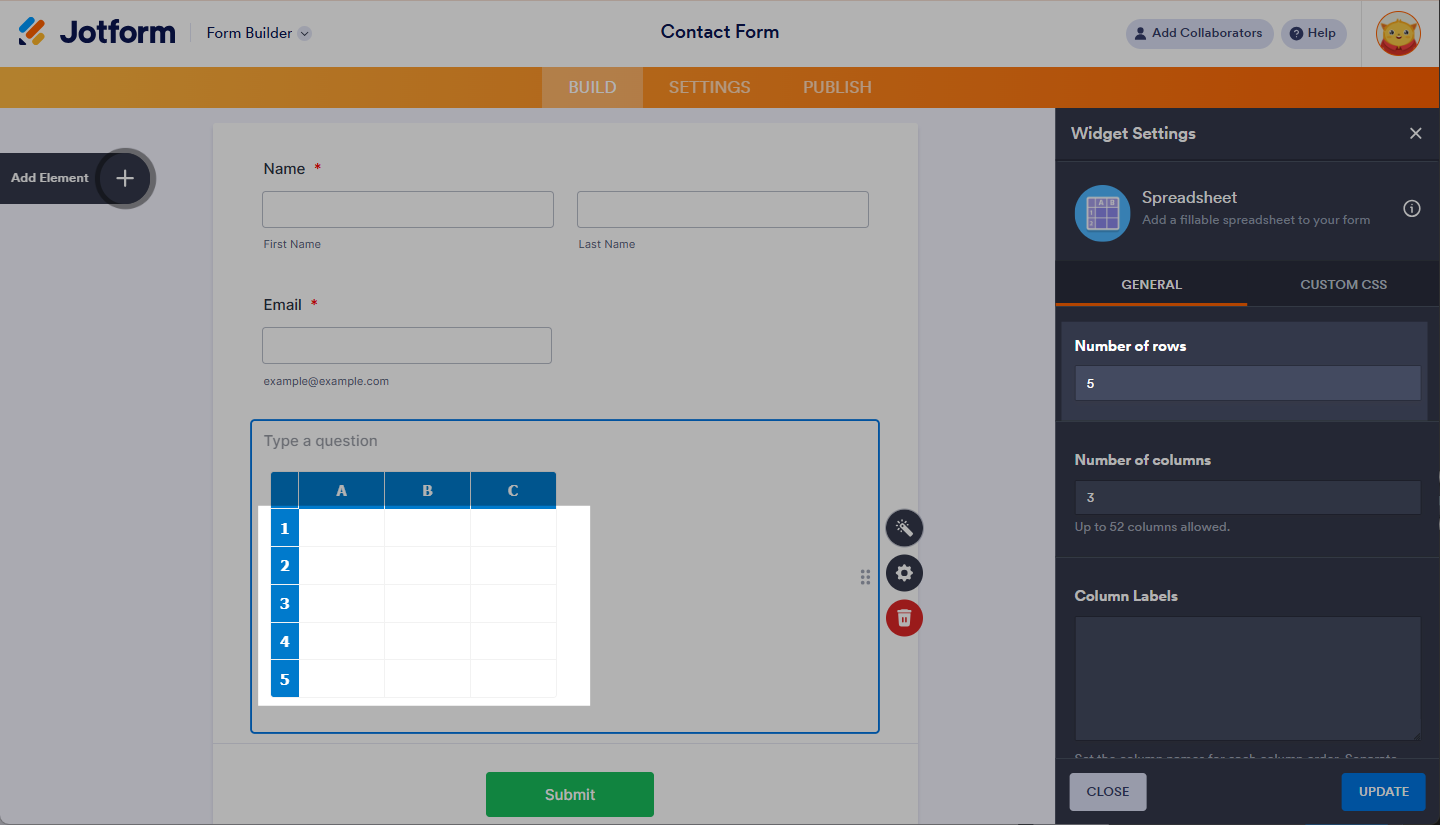
Number of Columns
Here, you define how many columns you need in the spreadsheet. For instance, if you want to collect data like “Product Name,” “Quantity,” and “Price,” you would set the number of columns to 3. This ensures that the data is structured in a way that suits your needs.
Note
You can set the Number of Columns in your Spreadsheet widget up to a maximum of 52.
Column Labels
This option allows you to replace the default column letters (A, B, C, etc.) with custom labels. For example, instead of “A,” “B,” and “C,” you can label them as “Product Name,” “Quantity,” and “Price.” To do this, just input the labels, separated by commas or new lines.
Note:
The widget will require you to input labels for all columns, each separated by a comma or a new line.
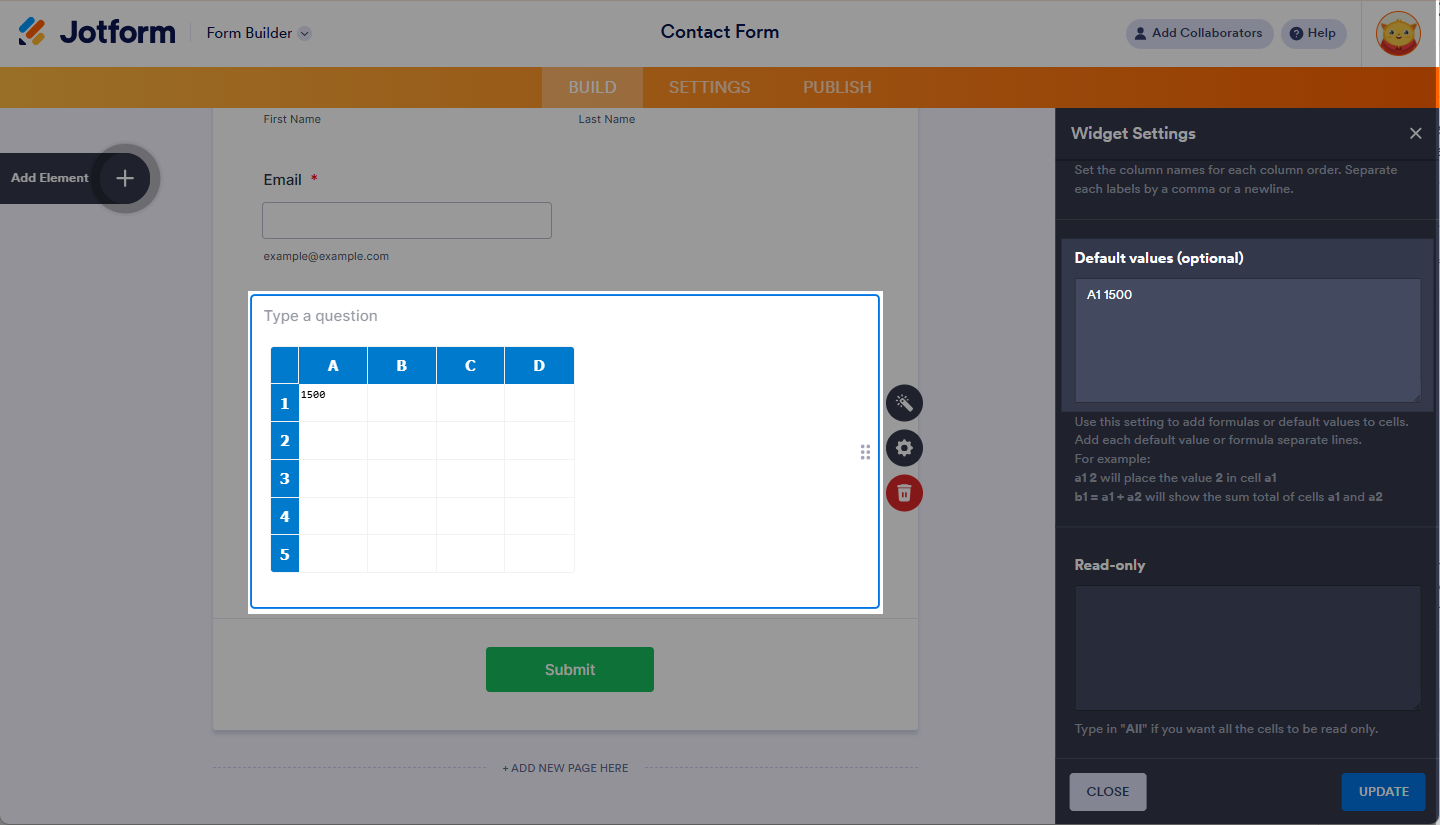
Default Values
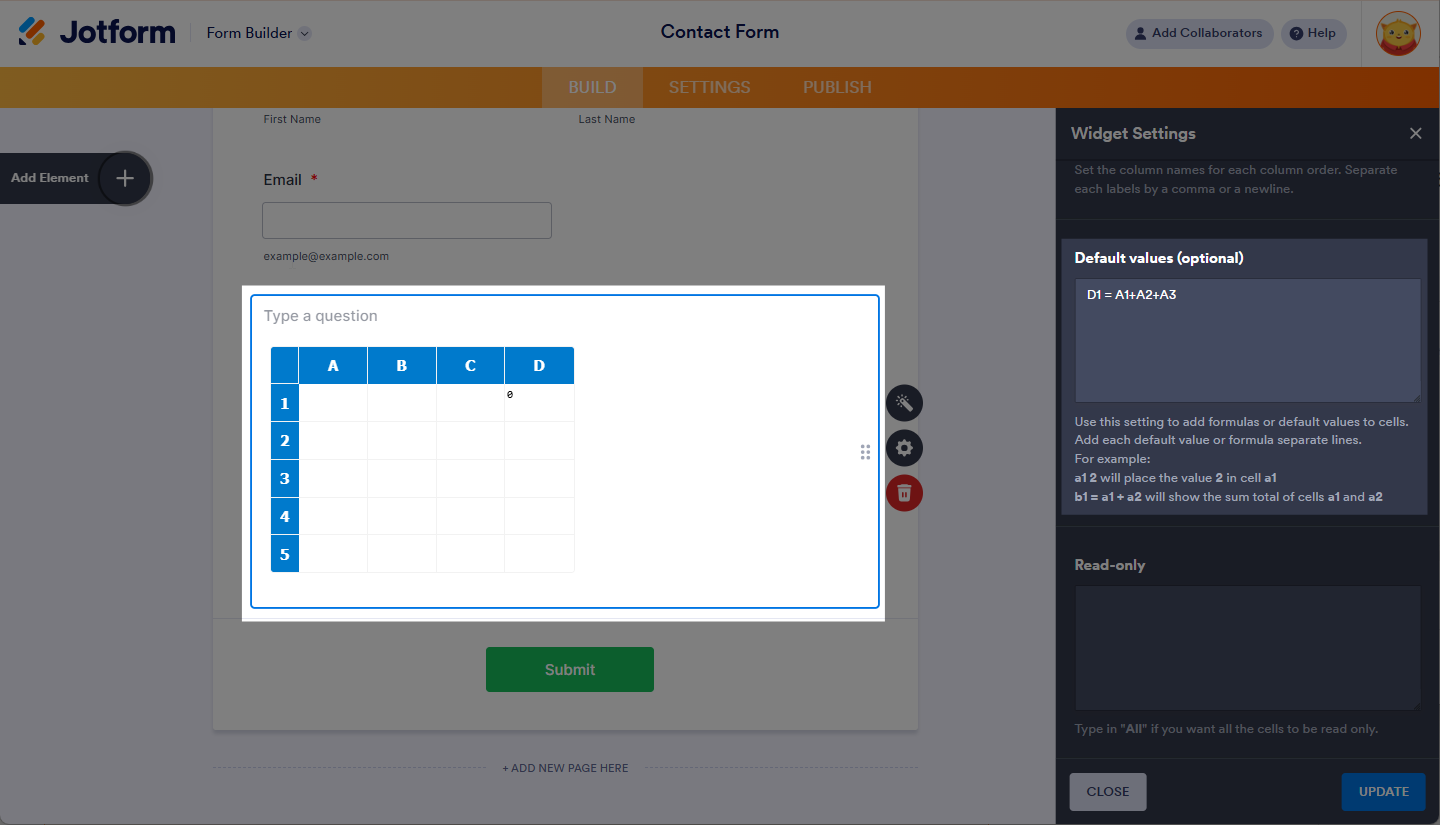
The “Default Values” box allows you to pre-fill cells with values, which helps speed up the data entry process for users. For example, if you want Column A, Row 1, to have a value of “1500,” you simply enter “A1 1500” in the Default Values box. Here’s an example:
You can also assign calculation formulas to specific cells. For instance, if you want the sum of Row 1, Columns A, B, and C to be displayed in Row 1, Column D, enter the following formula:
- D1 = A1 + B1 + C1
Note:
The Spreadsheet widget supports Match Functions as referenced from this page: Mozilla – Math JavaScript Functions.
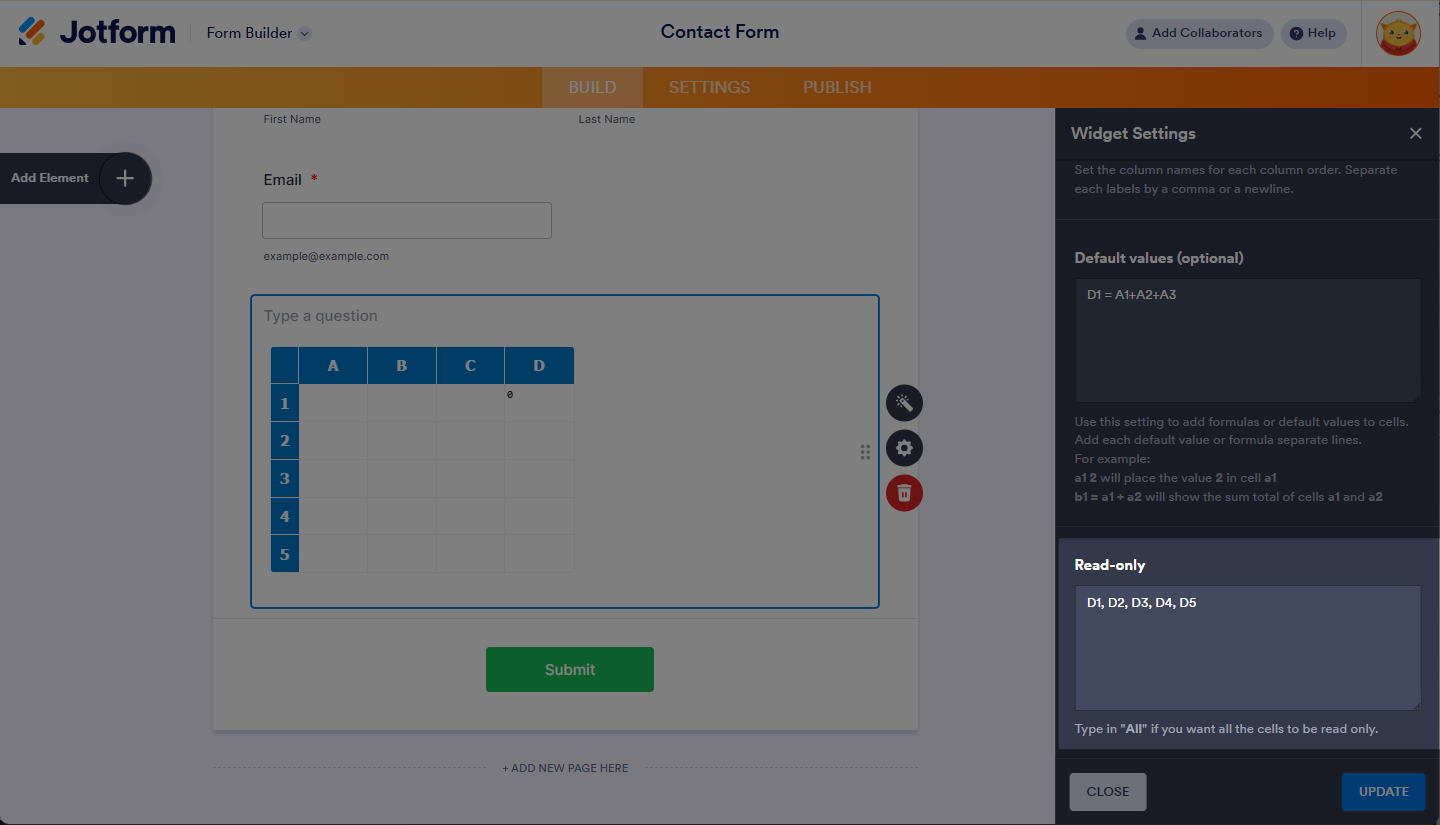
Read Only
The Read-Only section allows you to lock specific cells so users can view them but cannot make any changes. This is especially useful for cells containing calculated results. For example, if you want to make Column D, Rows 1 to 5, non-editable, you would input “D1, D2, D3, D4, D5” in the Read-Only box. This ensures that users can only view the calculated results without modifying them.
- D1, D2, D3, D4, D5
You can see the demo form here.


Send Comment:
15 Comments:
61 days ago
Using Spreadsheet widget, is it possible to format specific fields as currency so that or specify a number field with two decimal places?
107 days ago
how do i get the results data into my program to do calculations
134 days ago
Can I add a dropdown list in a cell?
149 days ago
Is there a way you can modify the number of rows and columns while filling the form?
295 days ago
How can I customize a specific box? For example, since it is the total of the sum of an entire column, the font is bold and two points (pt, px) larger... Google Translate
346 days ago
how do you import data from a table to spreadsheet widget?
More than a year ago
How do i increase the row height or make the row heights automatically adjust
More than a year ago
How do you make the columns wider?
More than a year ago
how do you format the cell contents to right justify amounts?
More than a year ago
i cannot get the form to dynamically adapt the cell width or height to show all the text in the cell? there is plenty of room on the page but it is not showing the full text?
More than a year ago
How can you label the rows? Can you put a drop down in a cell for the user to select from?
More than a year ago
Hi,
I would like to ask if I can change the number of rows through filling form automatically. ( I don't want to fix the number of rows )
More than a year ago
Why can't you add row and column labels?
More than a year ago
How do you pass the value from spreadsheet cell to another field in the form
More than a year ago
É possível mudar o Rótulo das Linhas? Ao invés de 1, 2, 3, 4 ... Colocar outros rótulos?