Asana is a premier platform for working with your team. It makes tracking projects, tasks, and activities incredibly easy, inspiring robust engagement with all the team members as you move towards your objectives. Simply put, Asana is the go-to platform for teams that work great together.
Sending your Jotform responses to Asana is now easier than ever. With a few intuitive clicks, you can map your Jotform fields to your Asana Project or Tasks. When a new Jotform submission comes through, it will be sent directly to your team in Asana.

Setting up the Asana Integration
To integrate Asana with your form
- In the Form Builder, go to the Settings tab.
- Click the Integrations on the left panel.
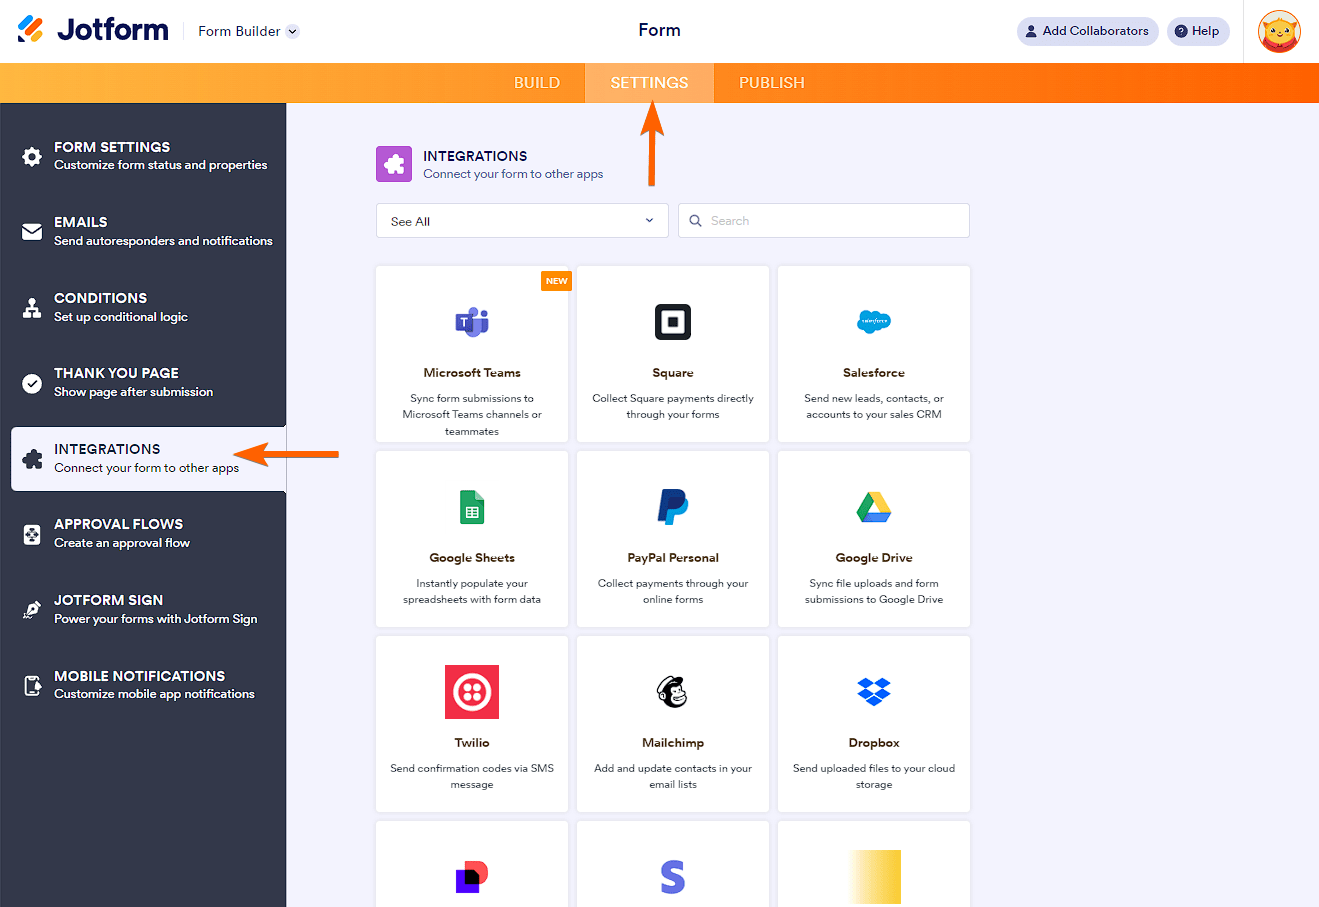
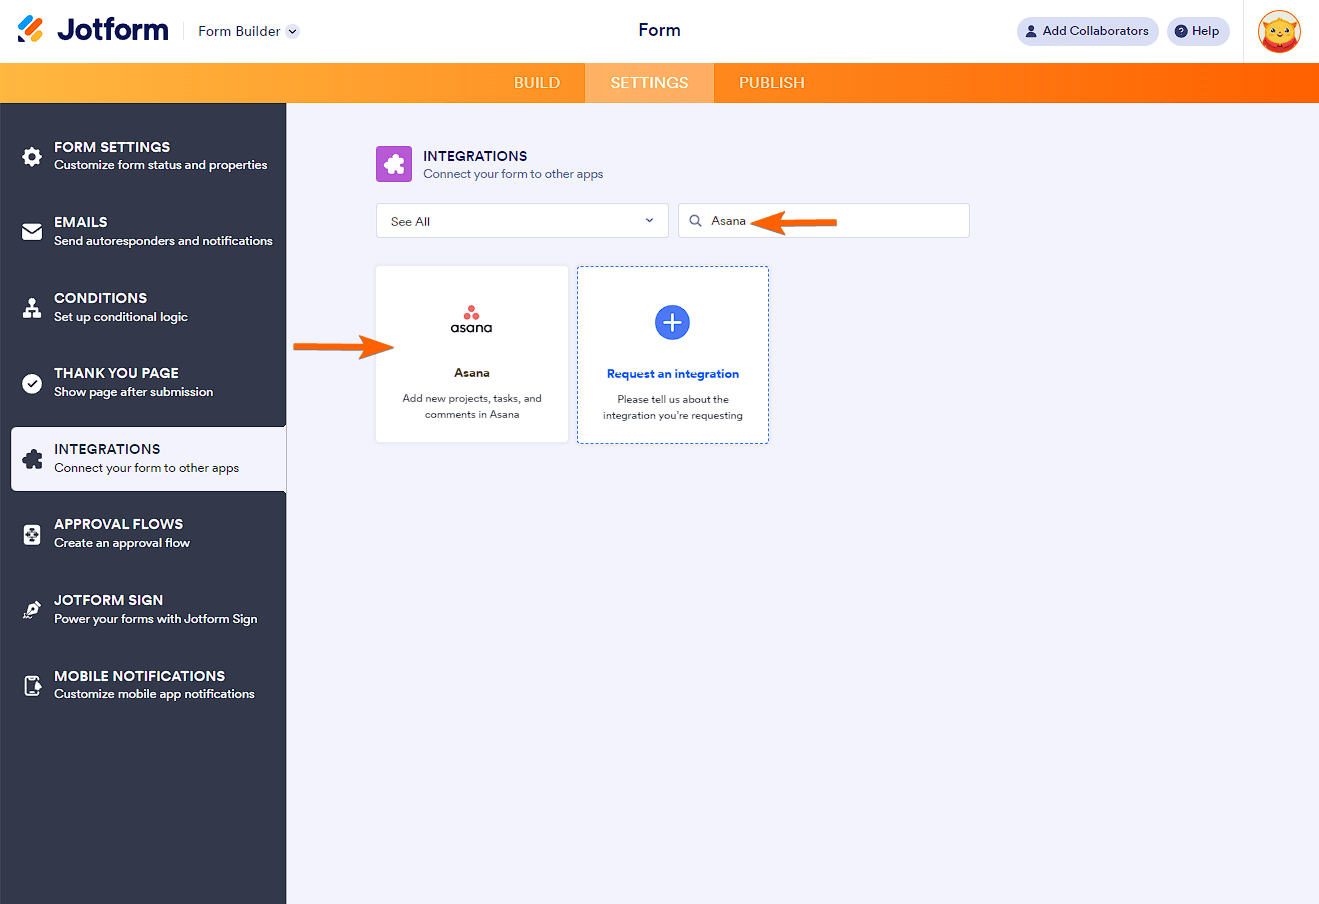
- Search for and click Asana from the list.
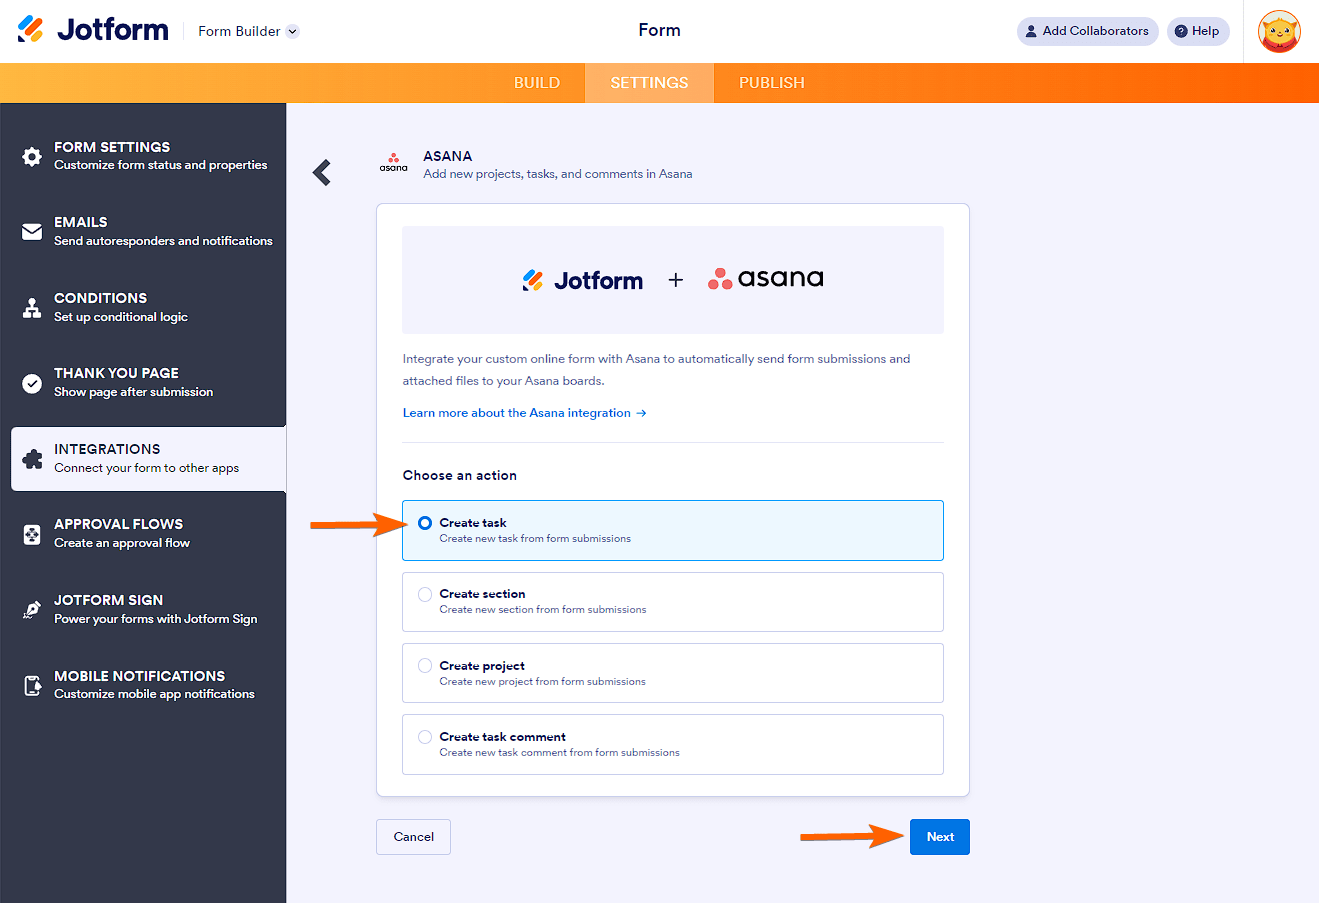
- Choose an action from the list. With Asana, you can:
- Create task
- Create section
- Create project
- Create task comment
- Click the Next button to proceed with the authentication.
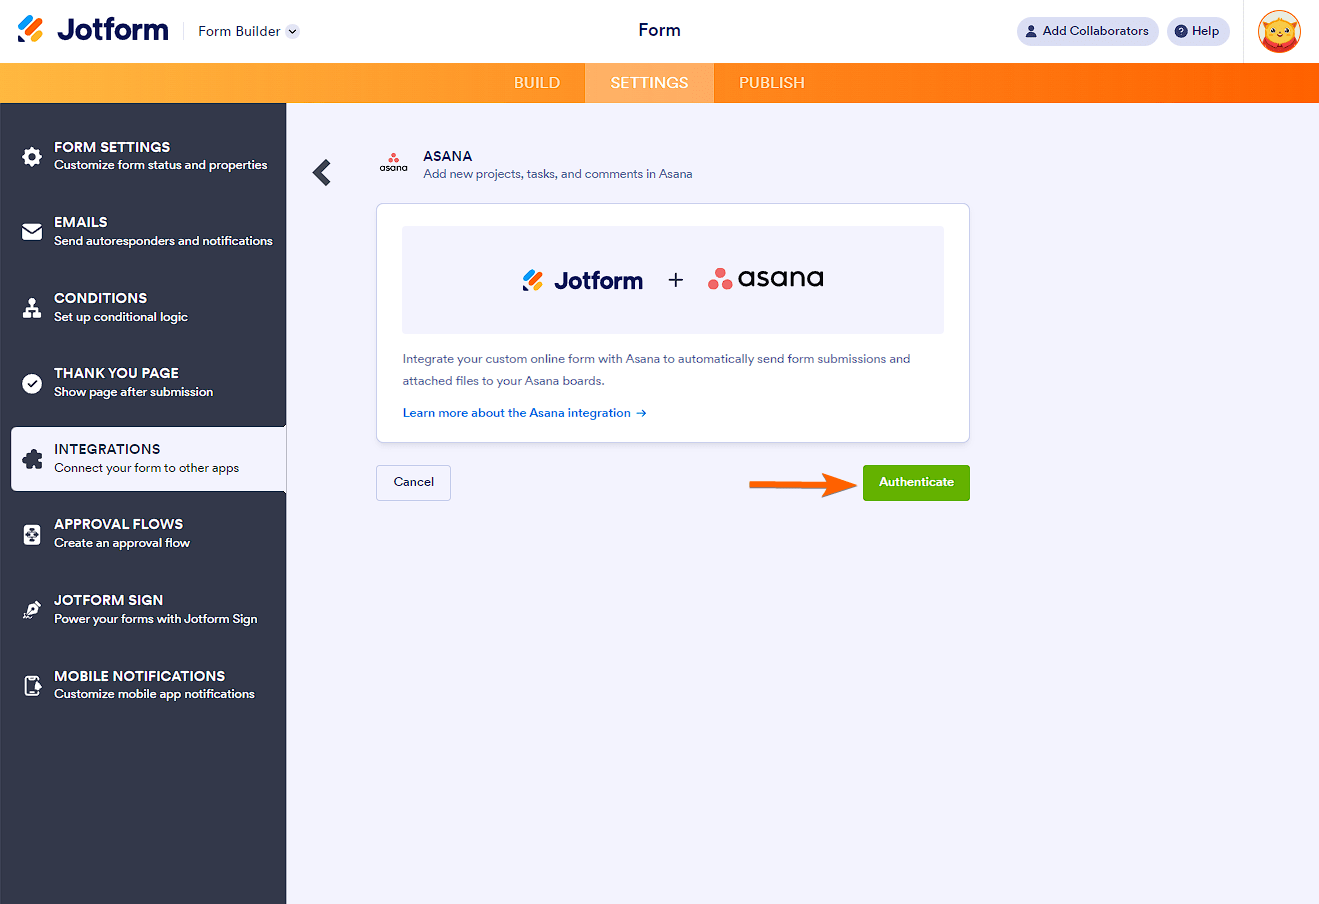
- Click the Authenticate button to connect your Asana account.
- Assuming you choose to Create a Task, you must do the following:
- Select Workspace
- Select Project — Choose a project from the selected workspace.
- Select Team — Select a team from the selected workspace. The integration will only ask you to select a team if you’ve originally signed up with your organization’s email address.
- Match Your Fields — Match your form fields based on the chosen action.
- Select uploaded files to Asana — This option is enabled when you have a File Upload element in the form.
- Create a new record when a submission is edited — Check this option if you wish to create a new record when you edit the submission.
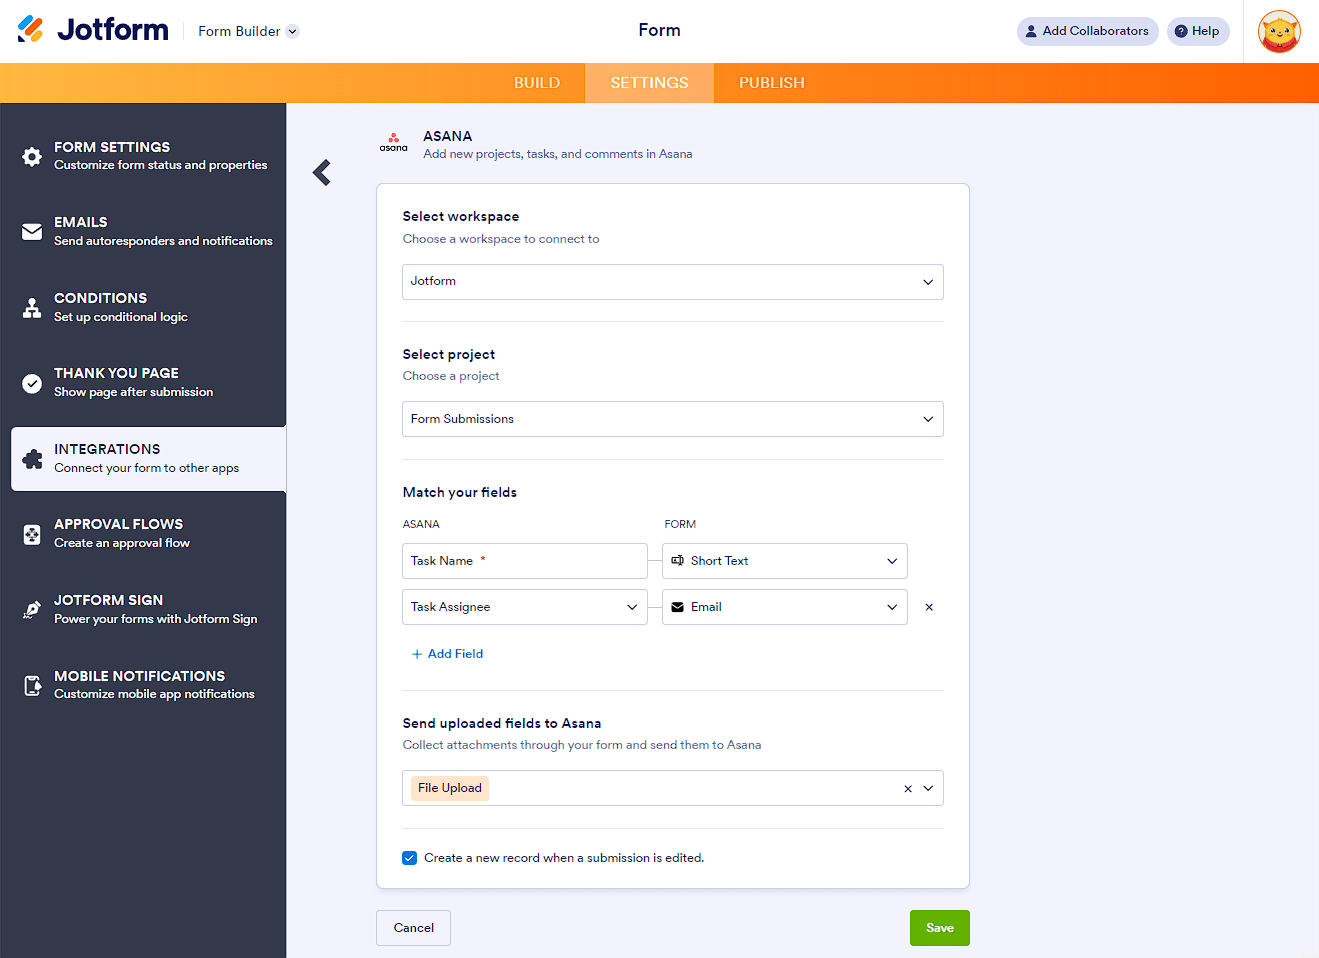
- Finally, click the Save button to complete the integration.
Adding New and Editing Existing Action
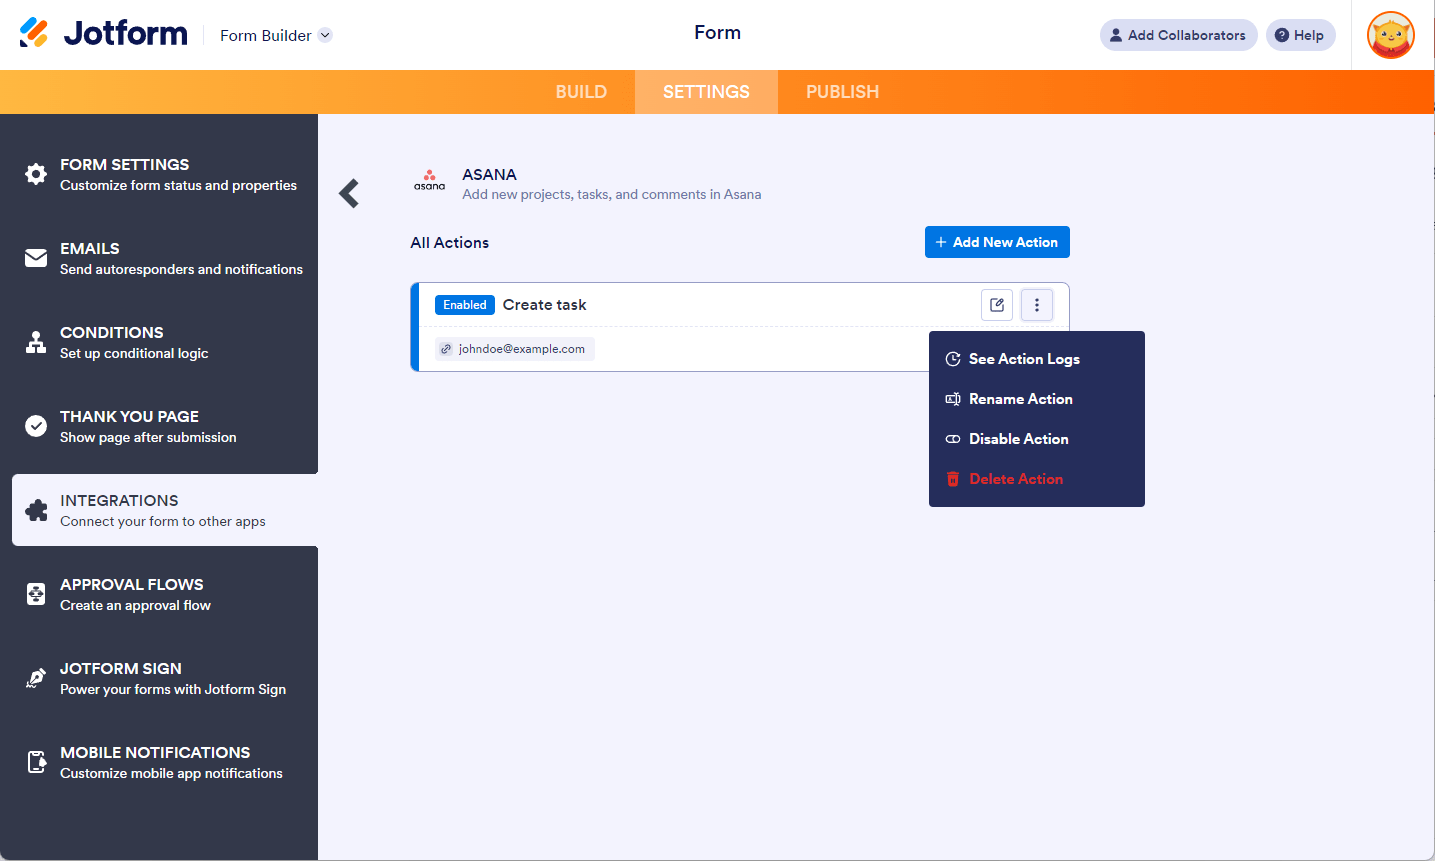
After saving the integration, you’ll see the active actions on the same window. Click the Add New Action to add a new Asana action to the same form. Hover your mouse to the existing icon and click the Pencil icon to edit it.
Clicking the More (thee-dotted vertical icon) beside the edit icon provides you with the following options:
- See Action Logs — This section will display the successful and failed runs of your Asana integration. It’s useful when troubleshooting issues.
- Rename Action — If you want to personalize the action’s title.
- Disable Action — This option is useful to temporarily stop the integration from sending data.
- Delete Action — If you want to remove the integration from your form.
Sending Data to Asana
Your Jotform, once submitted, will automatically send the data to Asana, freeing up your time to do what matters. We gave it a try with a support form. See it in action below:


Send Comment:
9 Comments:
More than a year ago
Hello,
I would like to know if it's possible to attach the submission PDF to an Asana task. I haven't found how to do it.
Thanks
Manon
More than a year ago
The Configurable List Widget no longer works with this integration. Is there a work-around?
More than a year ago
Can you add a Unique ID into the Asana Integration? There is no field for this or any sort of ID in the options. Is there also a way to add the submitters email address into the integration? I have tried adding Task Followers matched to Your Email (the submitters email) but nothing populates when the task is imported into Asana.
More than a year ago
Hi how do i remove the asana i linked the wrong asana account?
More than a year ago
Hi is there a way to map the custom fields to the jot form custom fields? For example, I have a drop down menu (as an asana custom field) and I have mapped it to the drop down in jot form, however, the dropdown selections are not showing up on the jot form.
More than a year ago
Is it possible for one jotform to be integrated into multiple Asana projects?
More than a year ago
How do we integrate more complicated forms to get the full detail in the 'description' of asana? including all free text boxes? It doesn't appear we can assign responses to multiple areas in asana - except for 'attachments'
If it possible to get the full survey, including questions as text in the description box?
More than a year ago
unclear whether this requires a premier Asana account
More than a year ago
Gave it a try and it does not create a task in the project and has no error messages or way to find out why it is not working. Support just said the fields probably don't match, but they do... Not a very good option