Chargify is a recurring billing system designed for subscription-based businesses. Chargify frees you from worrying about billing so you can focus on building innovative web applications.
Chargify provides a lot of advantages in recurring billings, such as the following:
- Trial Periods based on any duration of days or months
- Setup Fees can be charged on sign-up or after a trial period expires.
- Bill every period until canceled or automatically stop after so many days or months.
- Choose what products/plans are subject to taxes.
- Automatically calculate and bill based on location.
- Quickly create a compelling coupon and discount offers to support sales and marketing needs.
Note
With Chargify, you can only sell subscription items, and you must have those subscription items created through your Chargify dashboard before setting up the integration. The integration will fetch and list them automatically.
How to Integrate Your Forms with Chargify?
Create a new or edit an existing form and follow the steps below to integrate Chargify.
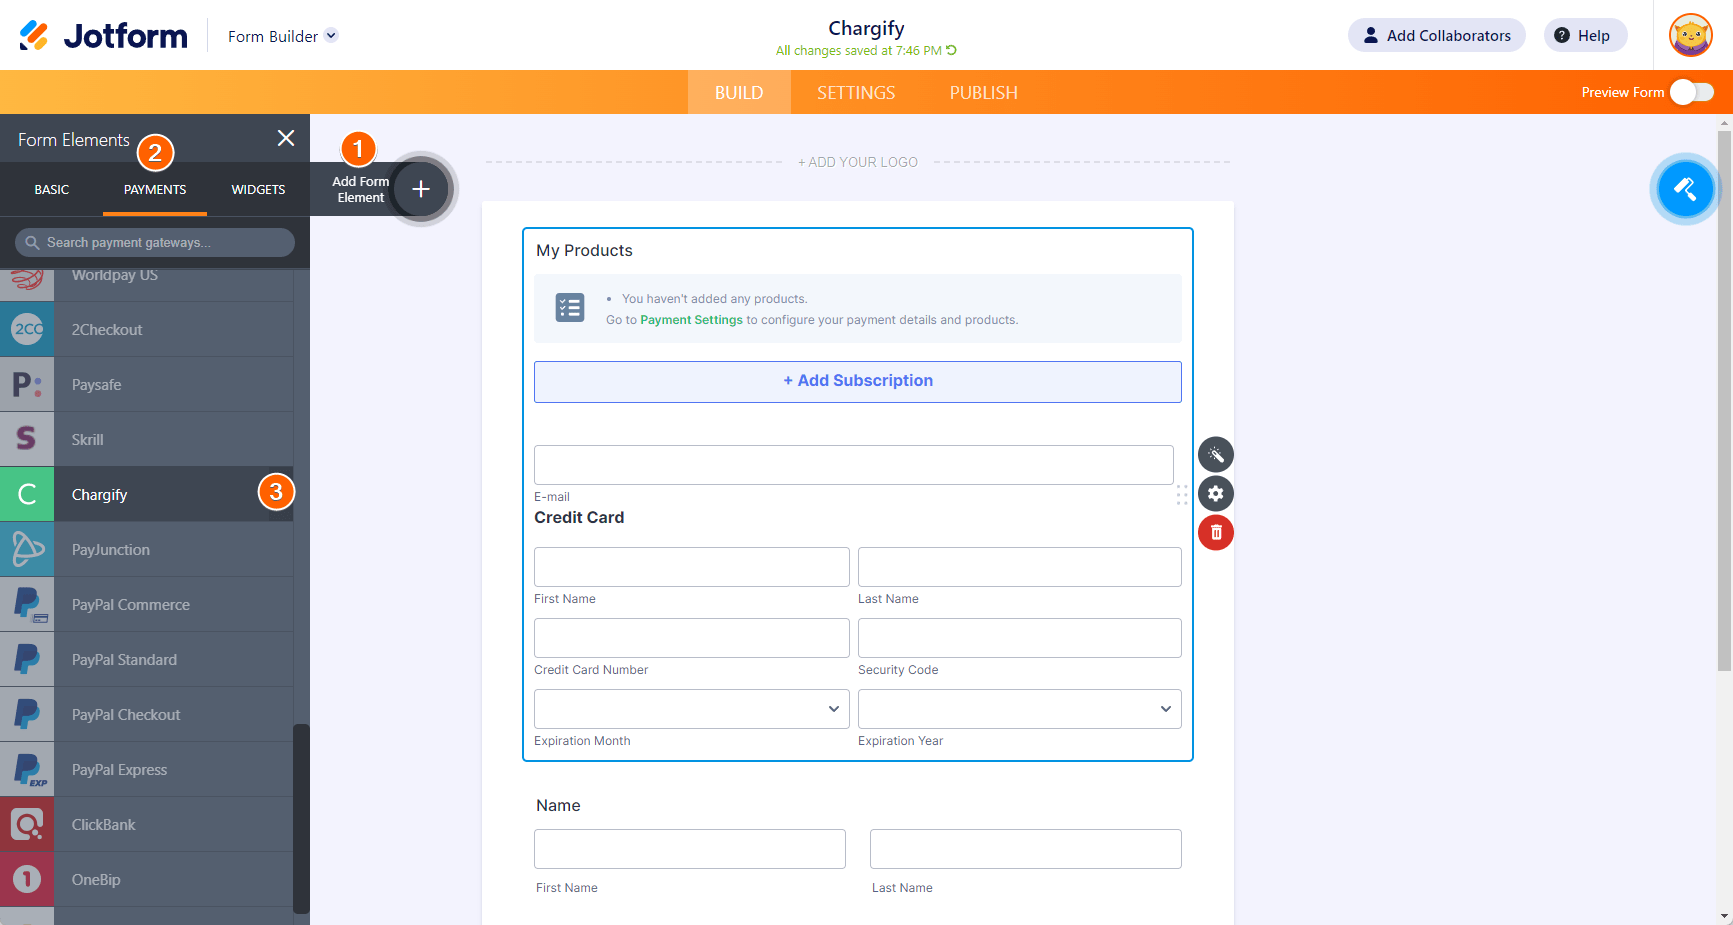
- In Form Builder, click the Add Form Element button on the left side of the screen.
- Go to the Payments tab.
- Click Chargify from the list. You can also drag/drop it to add.
Note
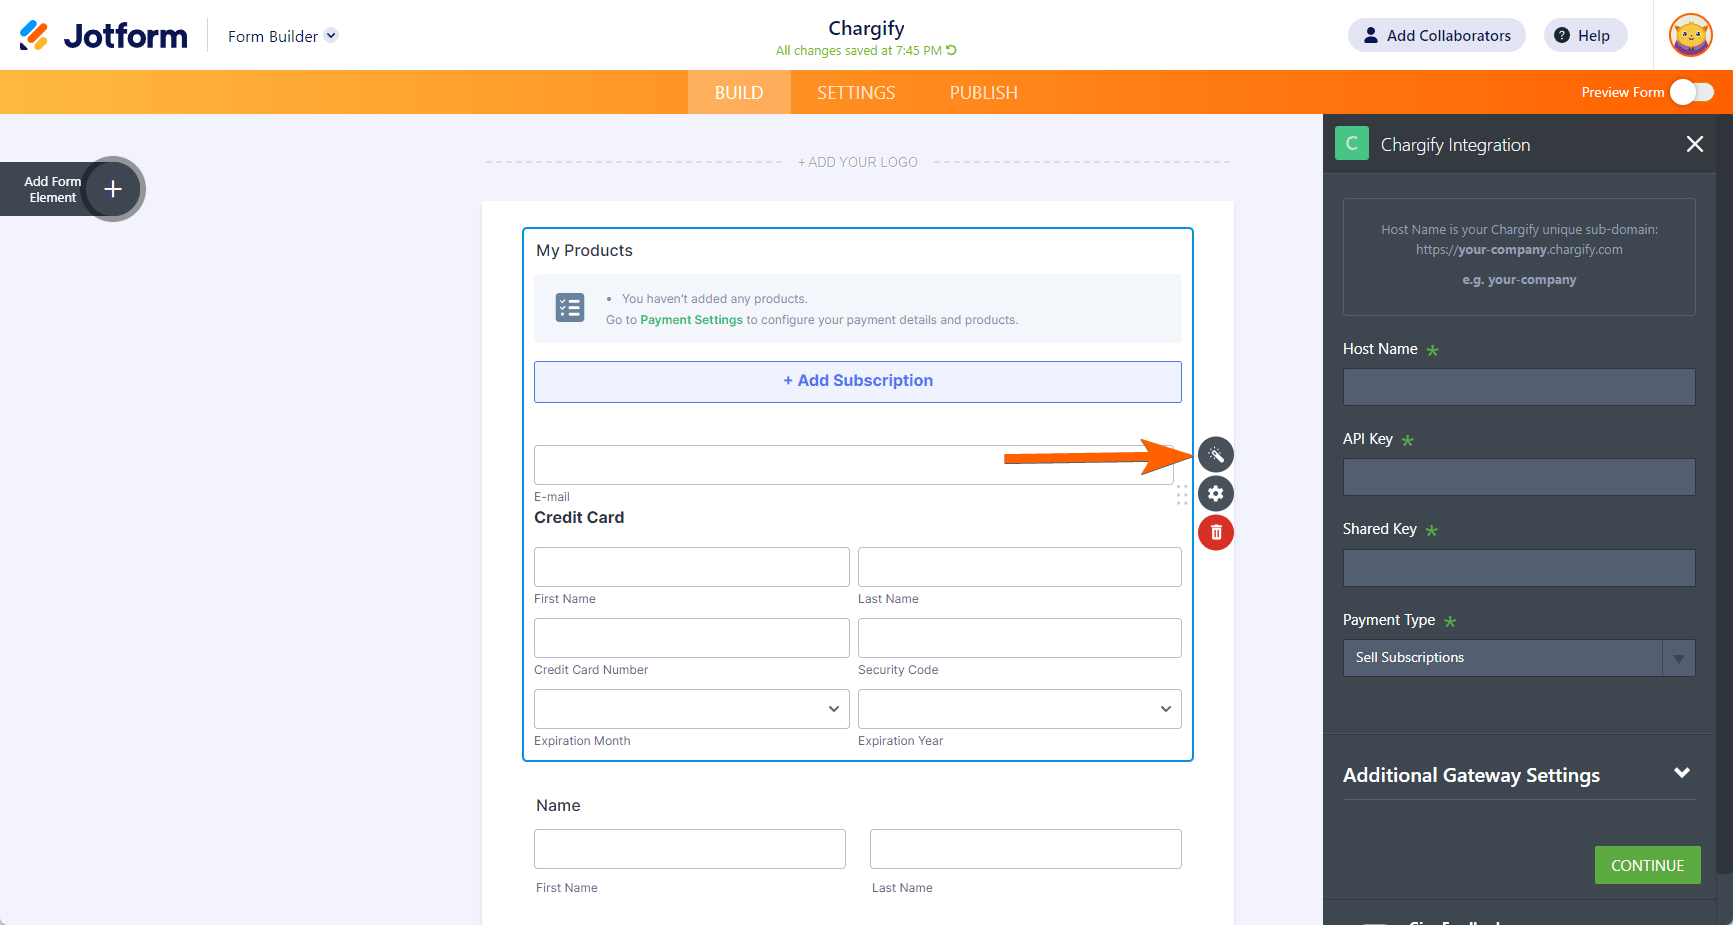
When you add Chargify, its Payment Settings will automatically open. If not, click the Wand icon to open it.
- In the Payment Settings, set up the following:
- Host Name — Your Chargify subdomain.
- API Key — You can obtain the API Key through the Integration section of your Chargify account. Visit Chargify – API Keys for more details.
- Shared Key — You can obtain this through the site settings of your Chargify profile. Visit Passwords & Shared Keys for more details.
- Payment Type — As noted above, you can only sell subscriptions with Chargify.
- Click the Continue button to fetch your subscription items from Chargify.
How to Test Chargify Integration?
The Test Mode of Chargify is different than other gateways. You need to create a test site in your Chargify dashboard and use the Host Name of this test site in Chargify’s Payment Settings.
| Credit Card Number | Details |
|---|---|
| 4111 1111 1111 1111 | Simulate a successful transaction. Enter the card number like 1 or any number ending in 1 |
| 4242 4242 4242 4242 | Simulate a declined transaction. Enter the card number like 2 or any number ending in 2. |
| 4012 0000 3333 0323 | Simulate a payment gateway error. Enter the card number like 3 or any number ending in 3. |
Check out the following page to learn more: Chargify Integration A New Way to Collect Recurring Payments.
Do you have any questions or suggestions about Jotform’s Chargify integration? Please post them in the comments below.


Send Comment: