Adding email verification to your form when collecting data is a simple yet powerful way to ensure accurate data, reduce spam, and improve communication with your users. With Jotform’s built-in Email Verification feature, you can require users to confirm their email address before submitting the form, making sure they’re real and valid, helping you build a more reliable and trustworthy contact list with ease. There are two ways to do this, verify the email, either before or after the submission.
Verifying Email Addresses using the E-mail Validator Widget
Using the E-mail Validator widget, anyone filling out your form will be required to verify their email addresses before they can submit it. Here’s how to set it up:
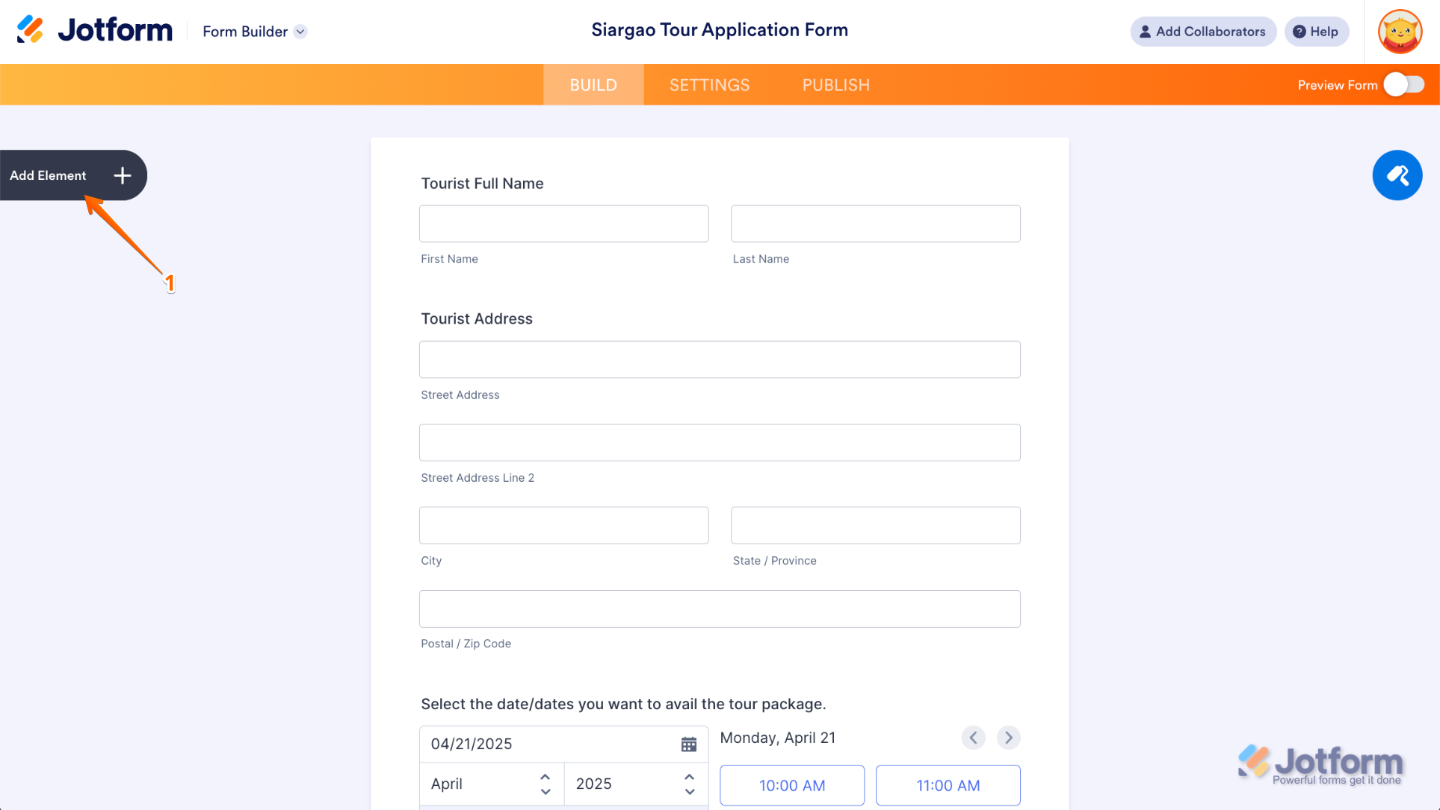
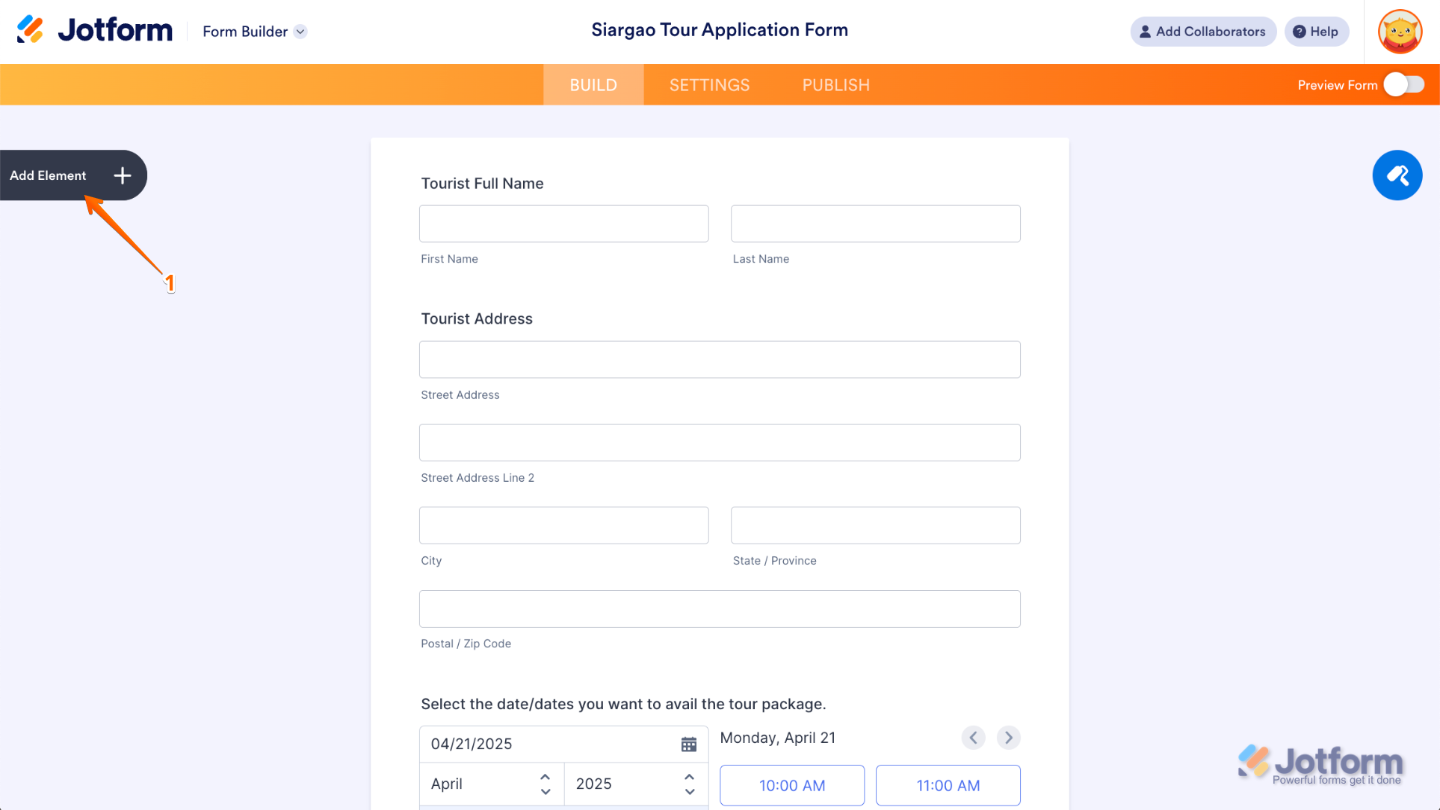
- In Form Builder, click on the Add Element menu on the left side of the page.
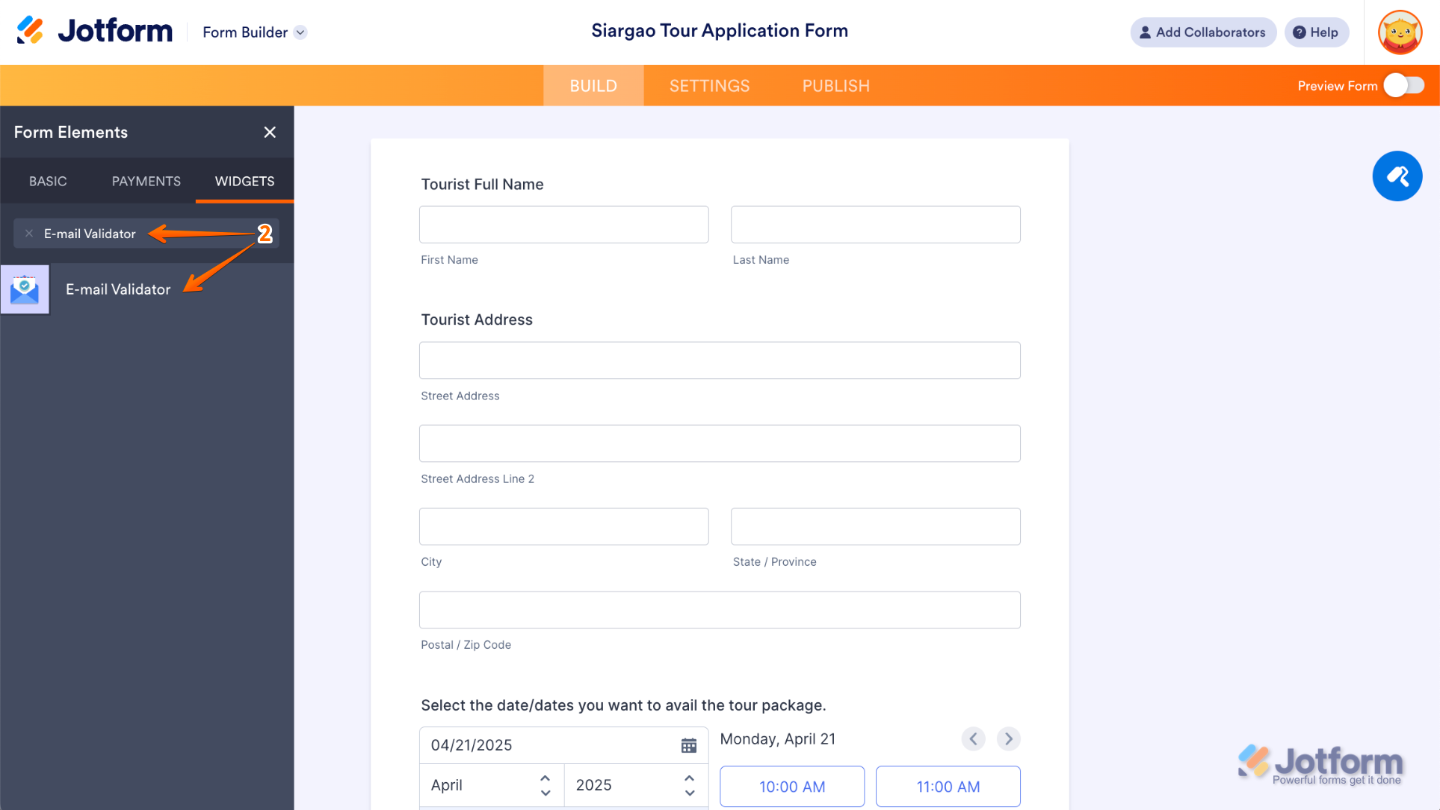
- Under the Widgets tab, enter E-mail Validator in the search bar, and then click on it to add it to your form.
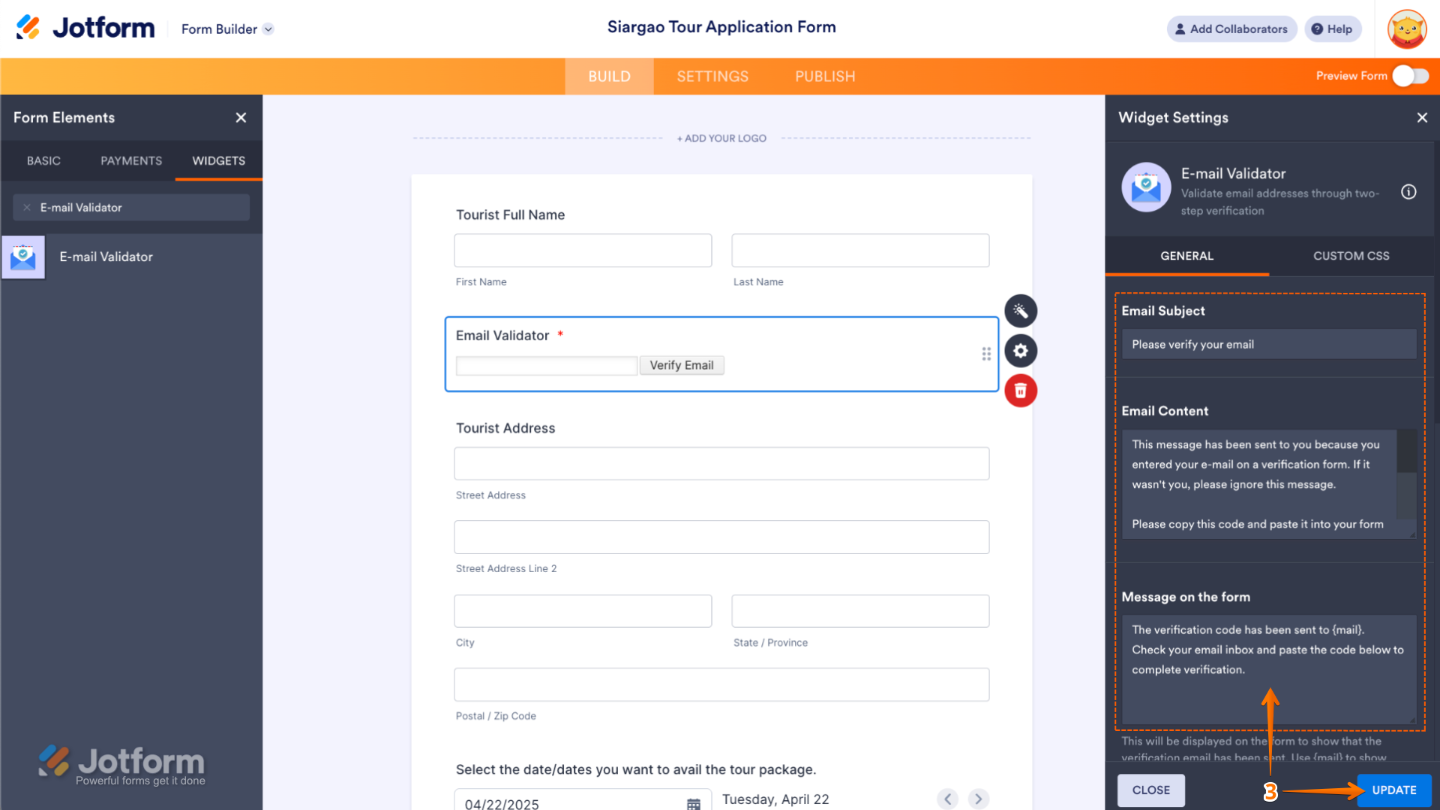
- In the Widget Settings menu on the right side of the page, enter the Email Subject, Email Content, and Message on the Form to be shown after submission. Then click on Update to save the changes.
Verifying Submissions using the Submission Verifier App
The Submission Verifier App allows your respondents to submit the form, regardless of whether their email address is valid, and after submission they’ll get a unique link that’ll be used for the verification process. You can even add the link to the form’s Autoresponder Email. Here’s how to set it up:
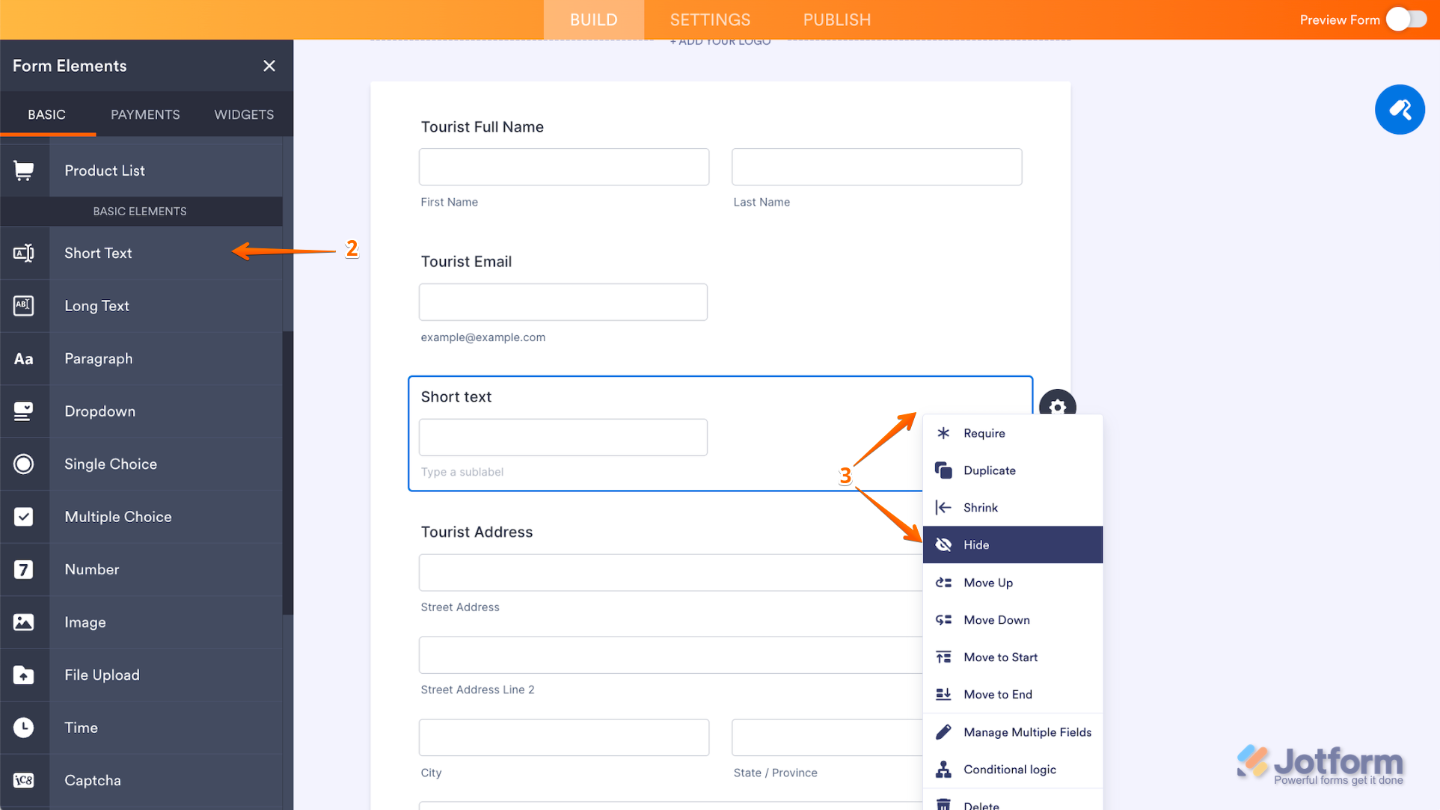
- In Form Builder, click on Add Element on the left side of the page.
- Then, click on the Short Text element to add it to your form.
- Now, right-click on the Short Text field and in the Dropdown menu, select Hide.
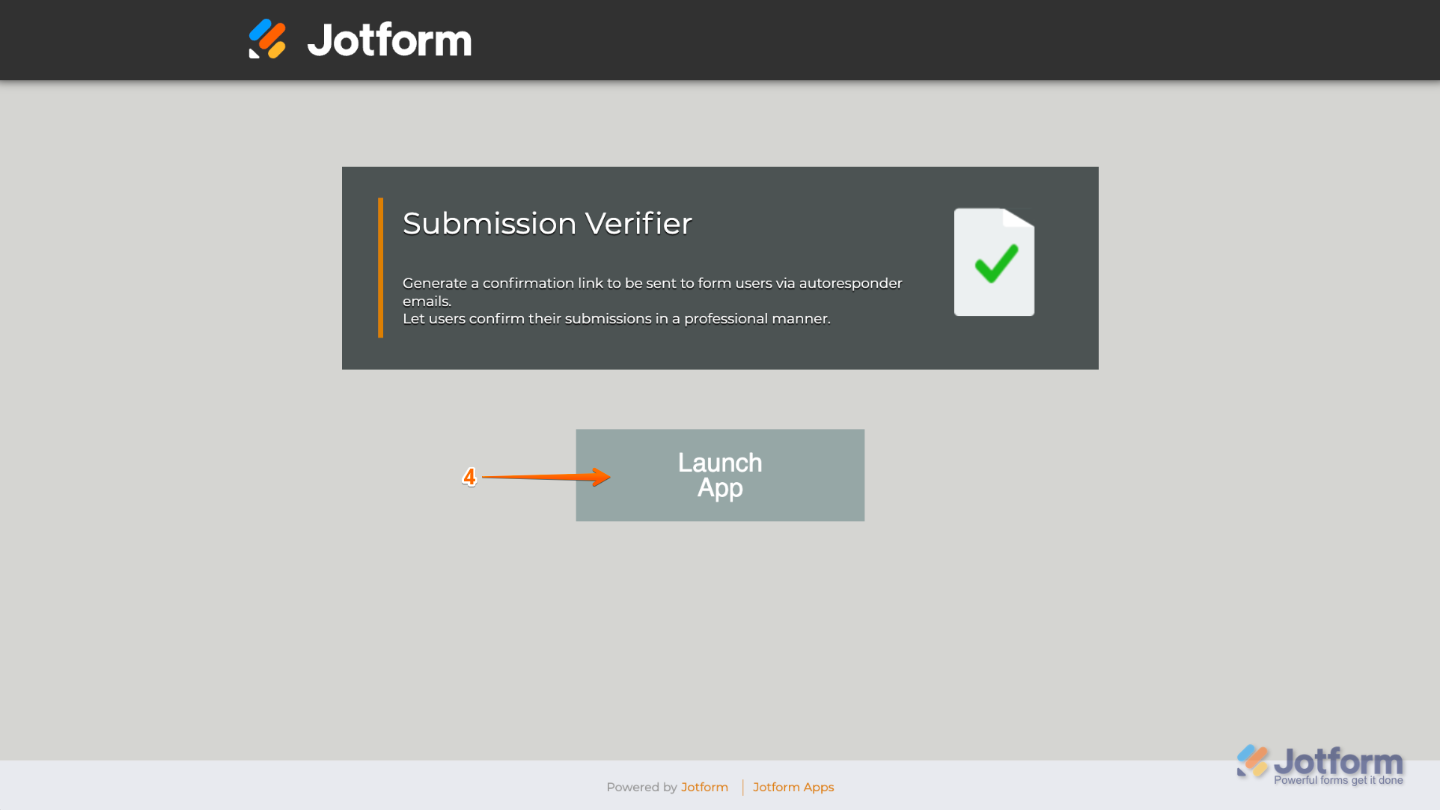
- Then, go to the Submission Verifier, and click on Launch App.
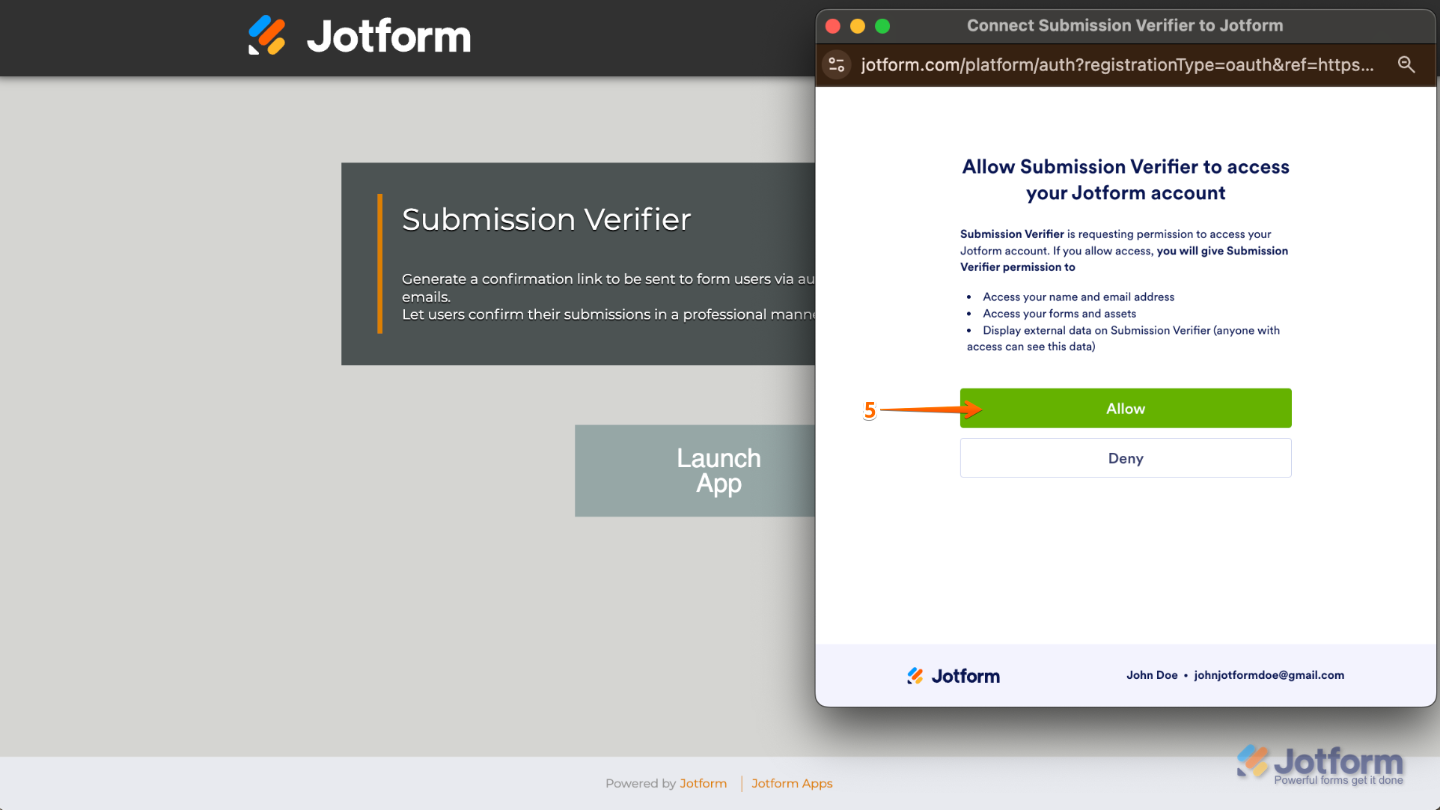
- In the Confirmation window that opens, click on Allow.
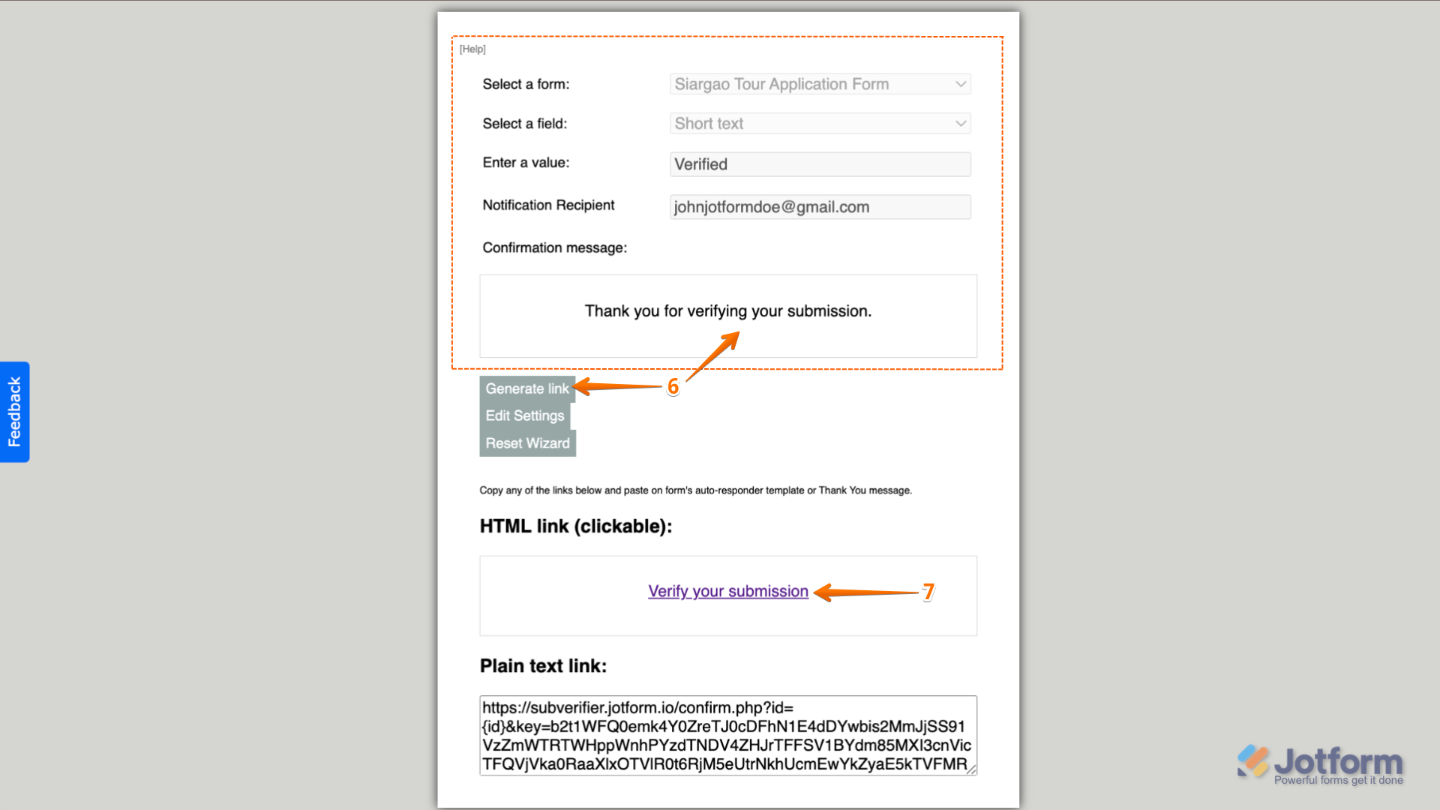
- Next, configure these settings, and then click on Generate Link.
- Select a Form — Choose the form you want to use.
- Select a Field — Choose a status field.
- Enter a Value — Set a value for the status field (e.g., Confirmed, Verified).
- Notification Recipient — Optionally add a notification recipient for verified entries. For example, you can enter your email address to get notifications when an email address has been verified.
- Confirmation Message — Customize the message your respondents get after verifying their email address.
- Copy the link generated from the HTML Link (clickable)field or the link from the Plain Text Link field, and then return to your form.
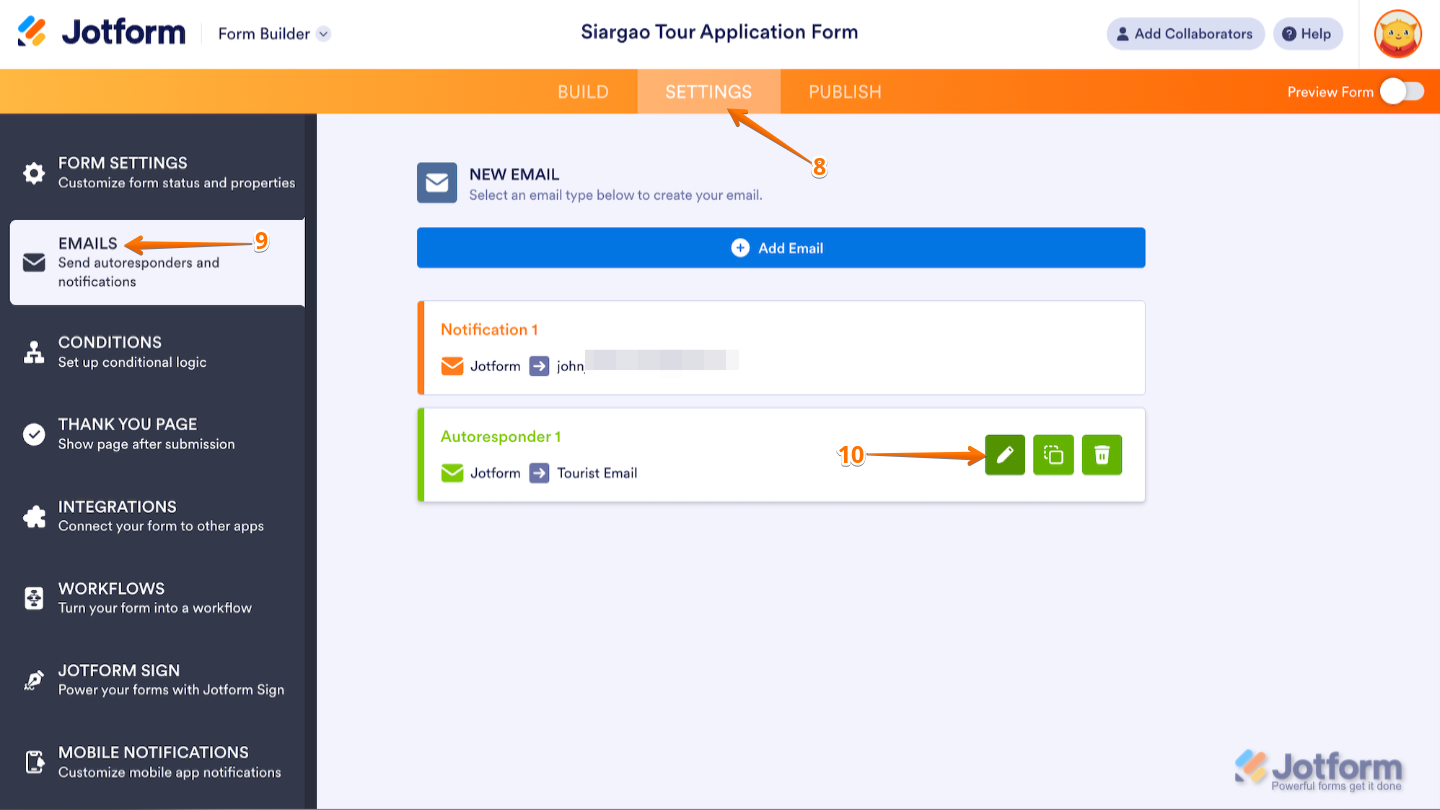
- Now, in Form Builder, in the orange navigation bar at the top of the page, click on Settings.
- Click on Emails on the left side of the screen.
- Hover your mouse over the Autoresponder Email and click on the Pencil icon to edit it.
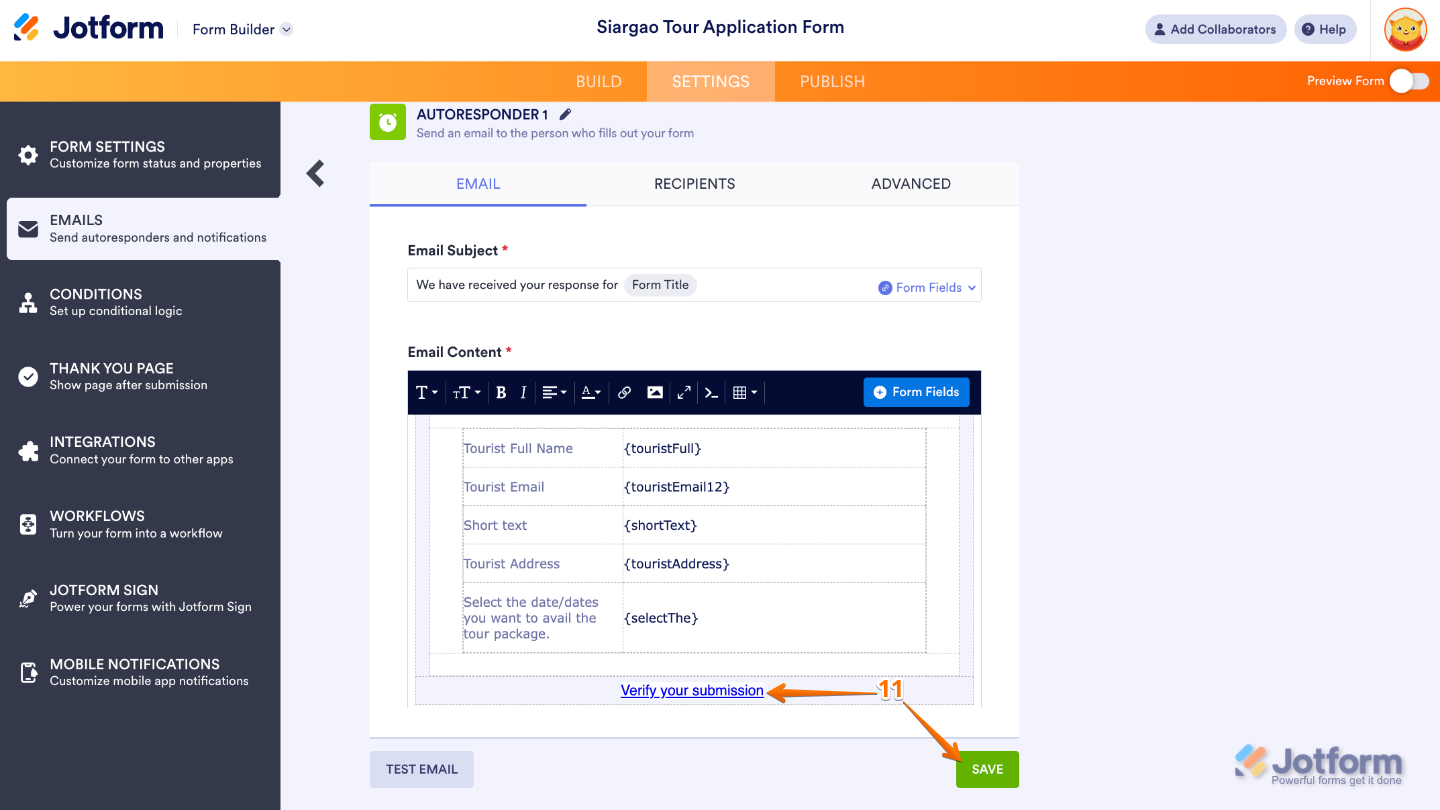
- Finally, in the Email Content section, paste in the link and then click on Save at the bottom.
That’s it. Now you can make a test submission to your form to see the result.
Send Comment:
7 Comments:
279 days ago
How do I change the length the code verification?
304 days ago
Running into trouble with verification on the APP. I created an app and signed up and have tried everything to get the verification to accept me. It keeps saying I am not authorized as I am not signed in as my email and I clearly am. I tried signing out of all jotform locations, desk top, phone etc. and cleared my cache on the phone and desk top restarted both and still get this error message from the app trying to verify my email.
More than a year ago
Hello,
the E-mail Validator is really very useful, easy to use and well done.
But I have a problem: the e-mail that the person receives with the verification code is not formatted. In the sense that the body of the message he receives is all on one line even though in ‘Widget Settings > Email Content’ the text is on several lines.
I have also tried putting the HTML code
but it doesn't work.
Is there any way? Am I doing something wrong?
Thank you and best regards, Francesco
More than a year ago
Hello, a business website am working with is requiring my email verification but the code is not reaching my inbox, what should I do?
More than a year ago
This is quite comprehensive! Thanks!
I have a question: You said "Optionally, set the Notification Recipient for verified entries." That means I don't need to generate links?
Found another interesting article on email verification - this one:
More than a year ago
Can jot form be used in elementor forms to verify addresses?
More than a year ago
Hi,
This is a nice blog on Email verification.