Labels help you organize workspace assets by categorizing them, making it easier to find and manage what you need. Instead of scrolling through a long list, you can filter and access Forms, AI Agents, Workflows, Apps, Sign Documents, Tables, and Reports based on their assigned labels. As your workspace grows, labels keep everything structured, helping you sort assets into meaningful groups. You can create sublabels for more detailed organization, customize labels to fit your workflow, and sort them alphabetically for easier navigation. Since labeled assets remain flexible, you can update or reassign them anytime to keep your workspace organized.
Creating Labels
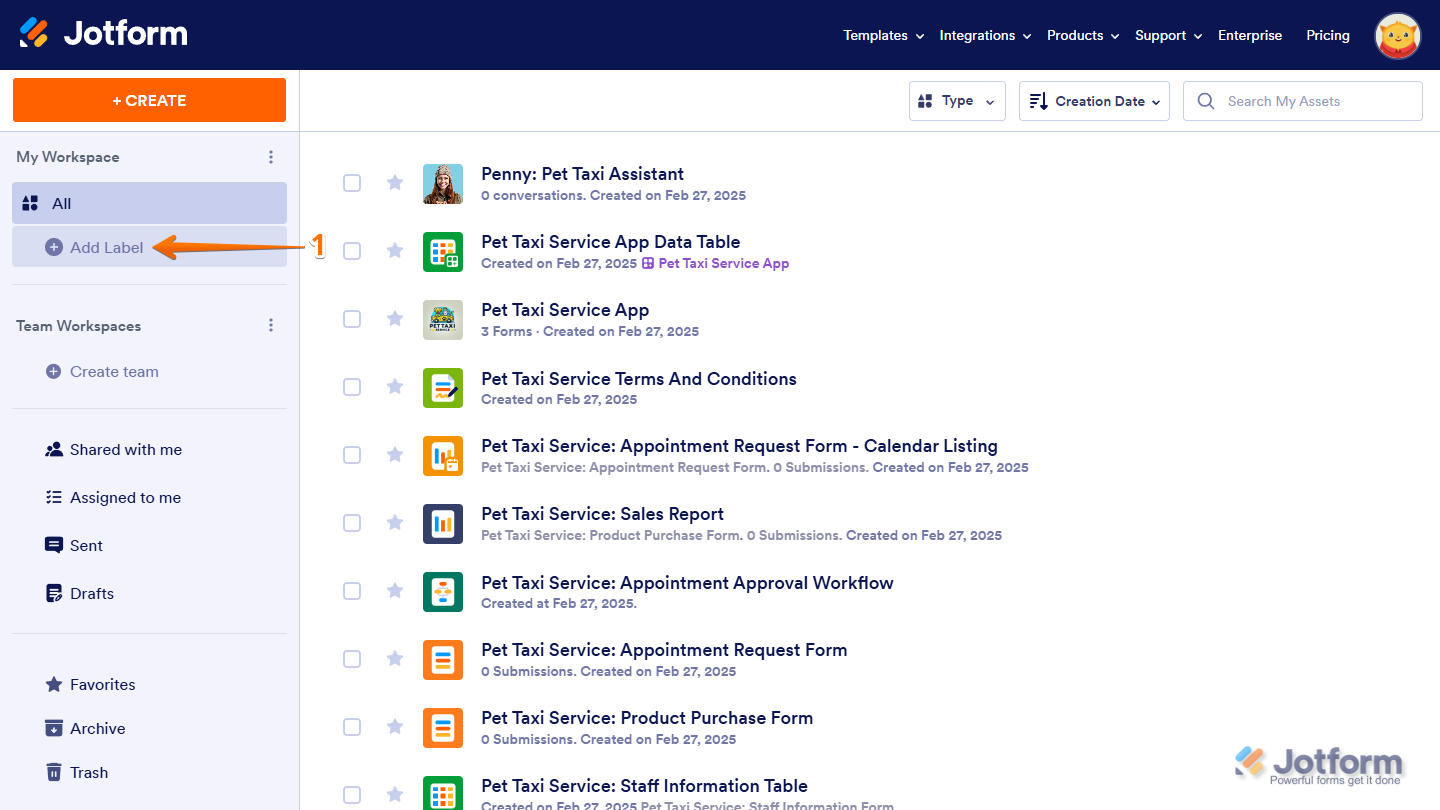
You can add labels in your workspace in just a few steps. Here’s how:
- On your Workspace page, click on Add Label on the left side of the screen.
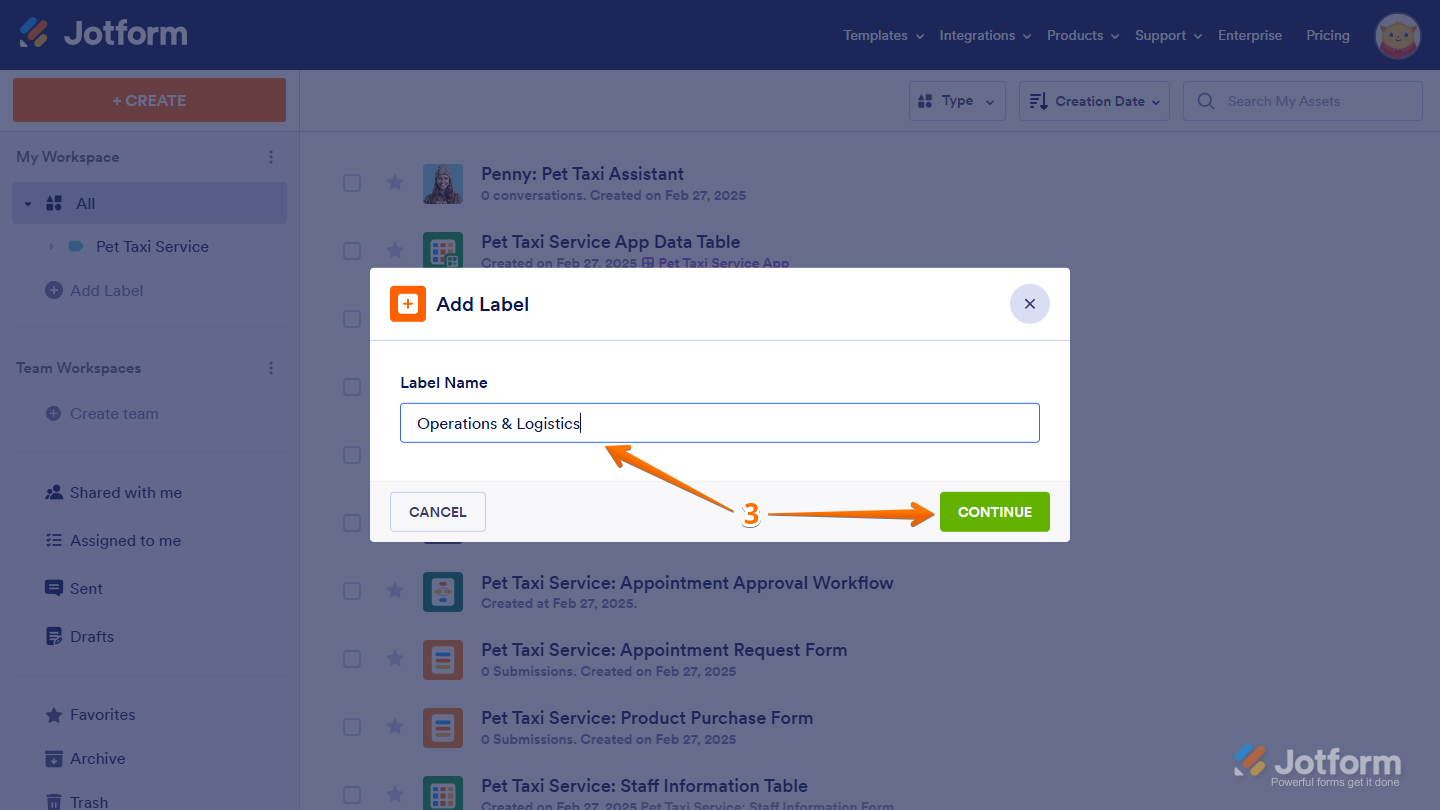
- Now, in the Add Label window that comes up, enter a Label Name and then click on Continue.

That’s it. You can now apply the label to your assets or create new assets using that label.
Creating Sublabels
You can create a sublabel or nest a label under another in your workspace to keep things organized. Here’s how to do that:
- On your Workspace page, hover your mouse over the right side of a label and click on the Three Dots icon.
- Then, in the menu that opens up, select Create Sublabel.

- Now, in the Add Label window that comes up, enter a Label Name and then click on Continue.
Note
- You can create up to 100 labels in total (including main labels and sublabels).
- Sublabels can be nested up to four (4) levels under a main label.
- New labels and sublabels are always added at the bottom of the list.
Adding Labels to Assets
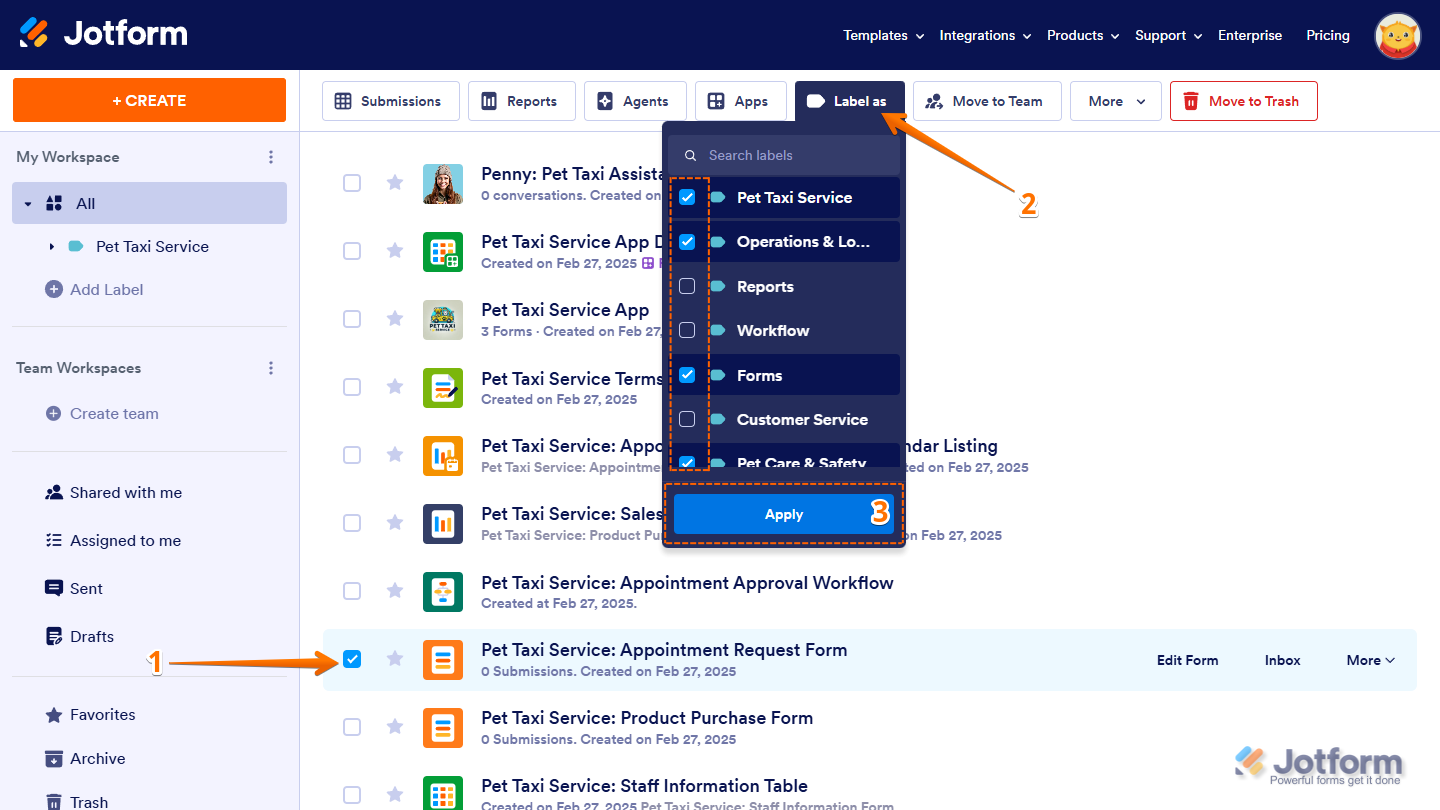
Applying labels to assets in your workspace takes just a few clicks. An asset can have multiple labels, and you can apply a label to one or many assets at once. Here’s how:
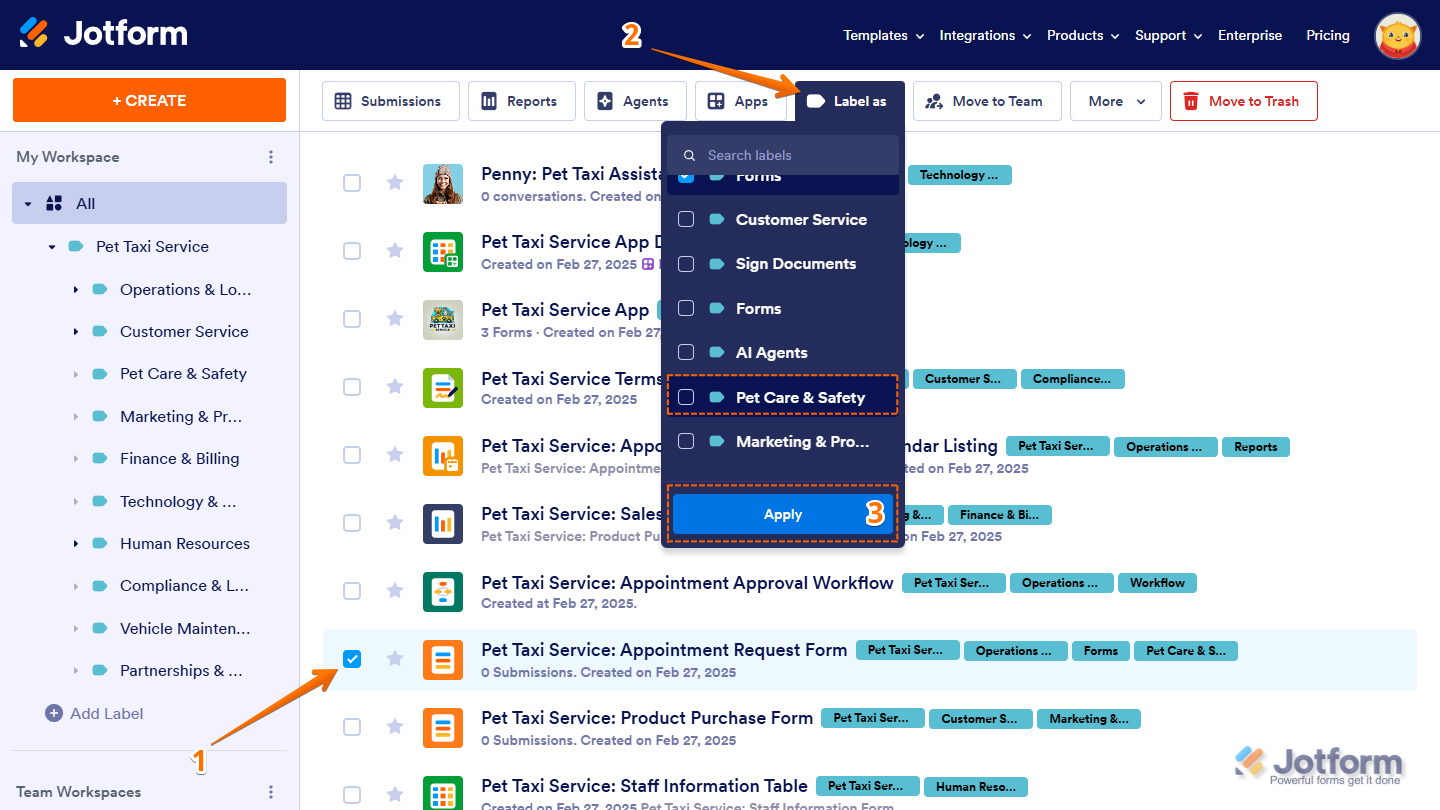
- On your Workspace page, select the asset or assets that you want to label.
- Then, click on Label As in the menu at the top of the page.
- Now, in the Dropdown menu, put checks in the boxes next to the labels you’d like to apply to your selected assets, and click on Apply.
Note
Labels in the Label As menu are listed in the same order as they appear on the left side of your Workspace page. Use the search bar at the top of the menu to find one easily.
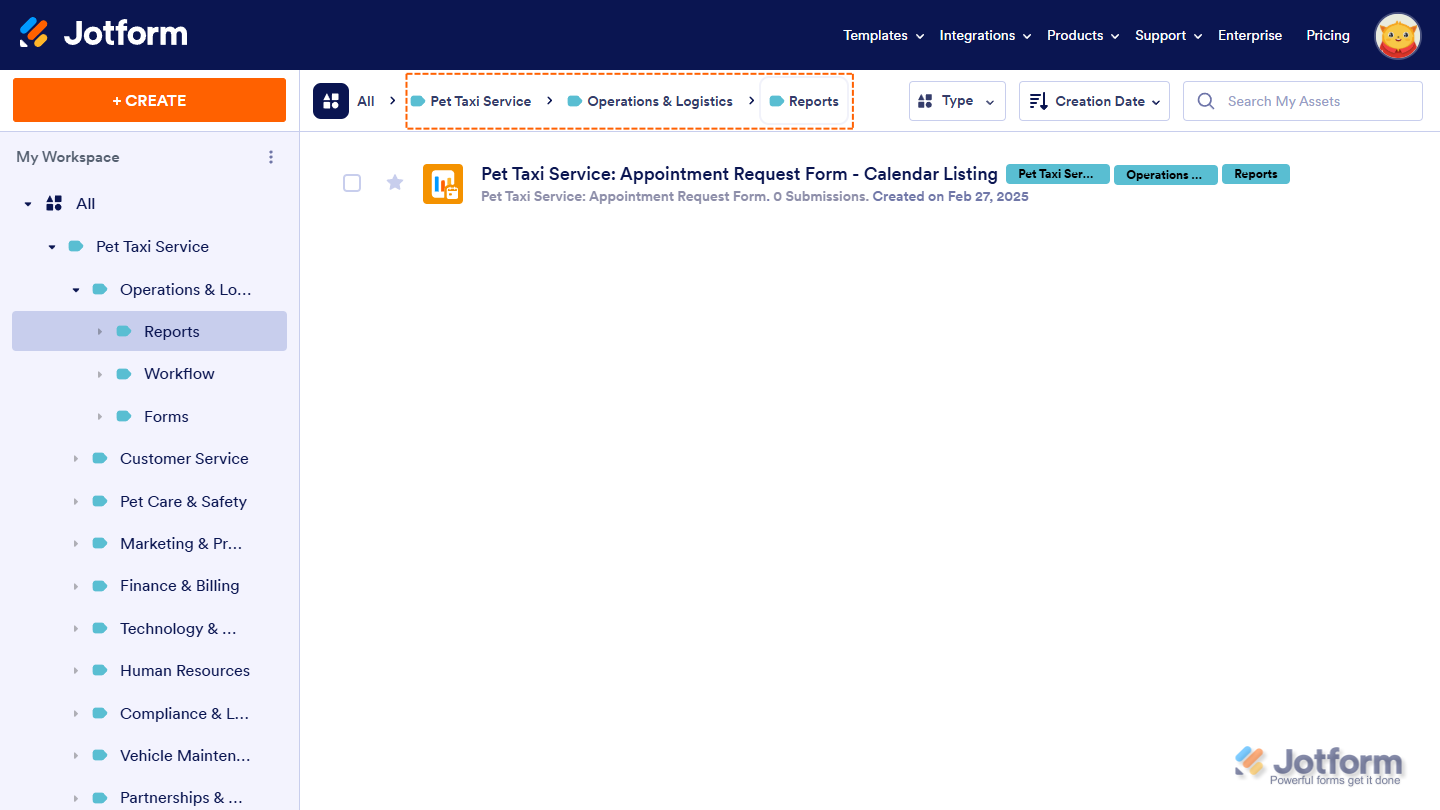
Once you’ve set up your labels and applied them to your assets, click on a label on the left side of your Workspace page to see the labeled assets on the right.
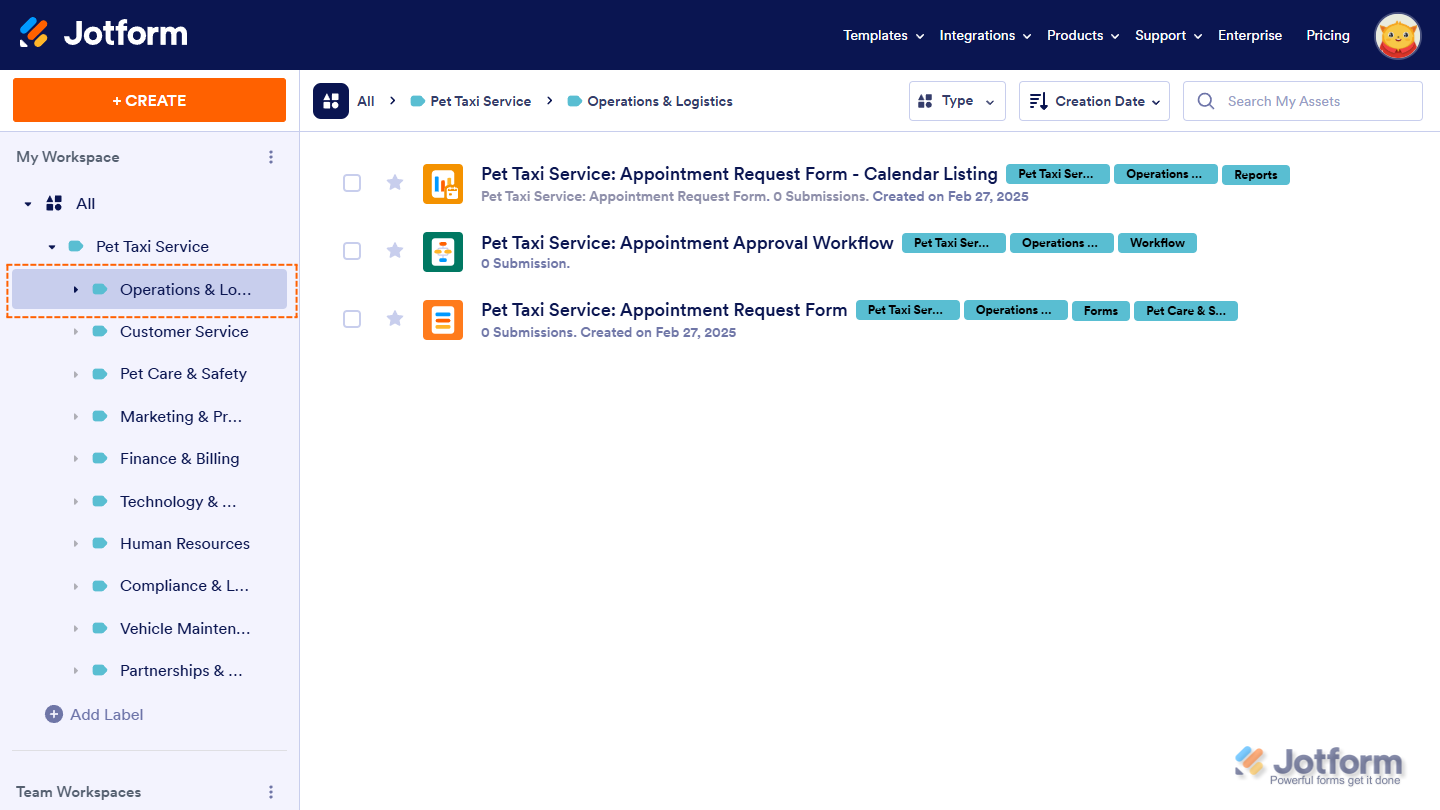
An enabled arrow next to a label means it has sublabels. Click on the arrow to expand or collapse the list.
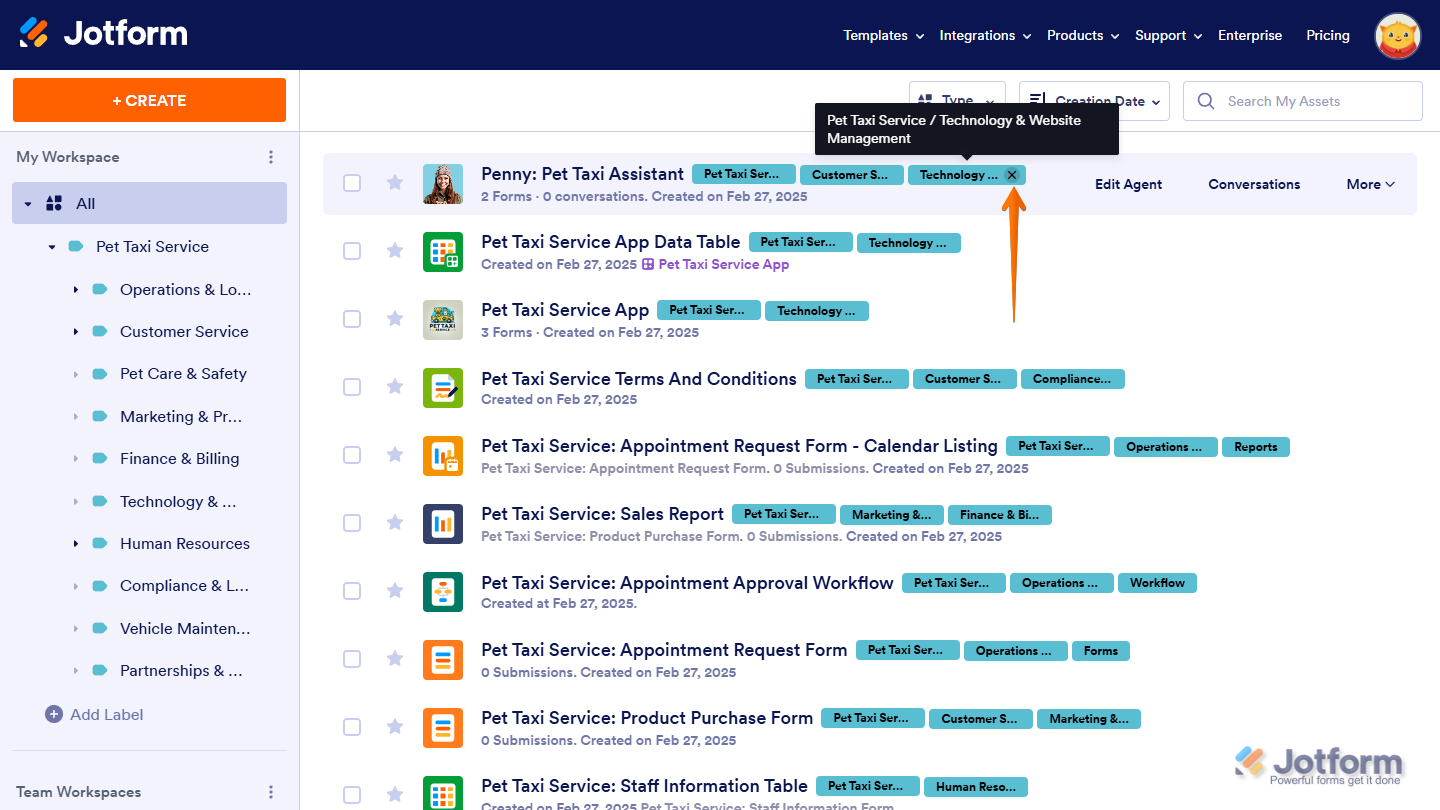
The Label Breadcrumb at the top of the page shows the level of the label applied to the assets you’re viewing. Click on a label in the breadcrumb to return to that label’s level.
Pro Tip
You can also drag and drop single or multiple selected assets to a label on the left side of your Workspace page to apply that label to those assets.
Labeling New Assets Automatically
You can apply labels to newly created assets automatically. Here’s how to do it:
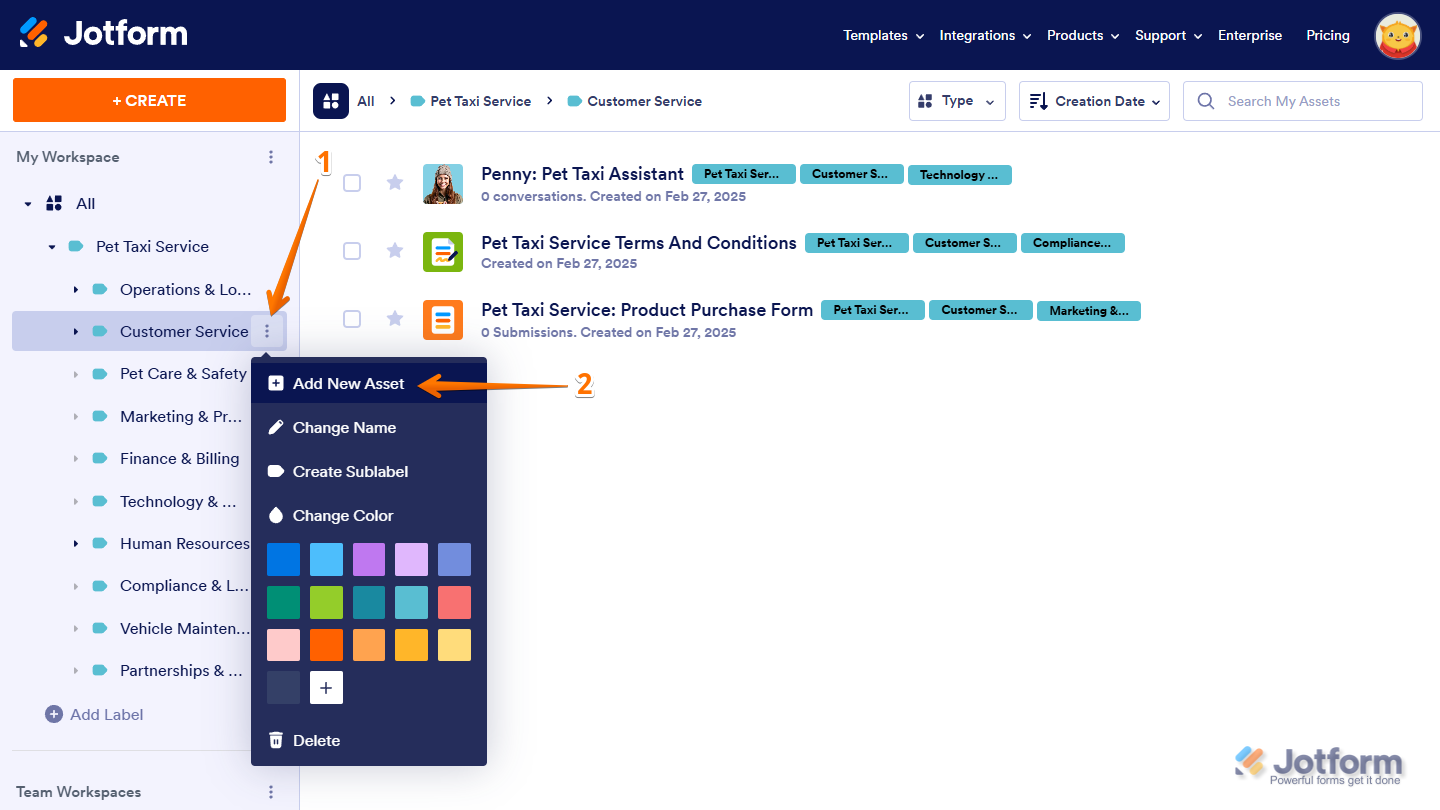
- On your Workspace page, hover your mouse over the right side of a label and click on the Three Dots icon.
- Now, in the menu that opens up, select Add New Asset.
- Then, click on the Asset you want to create.
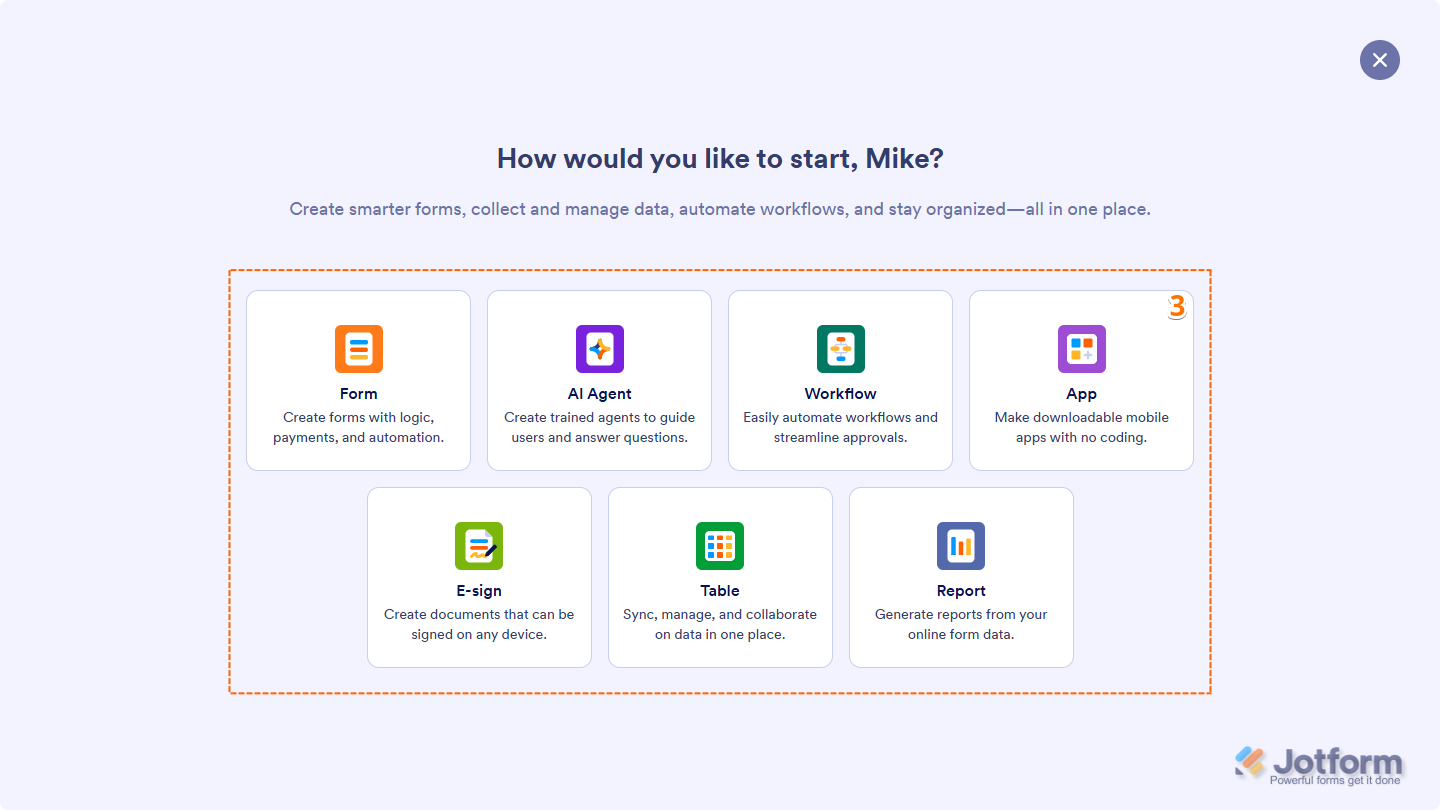
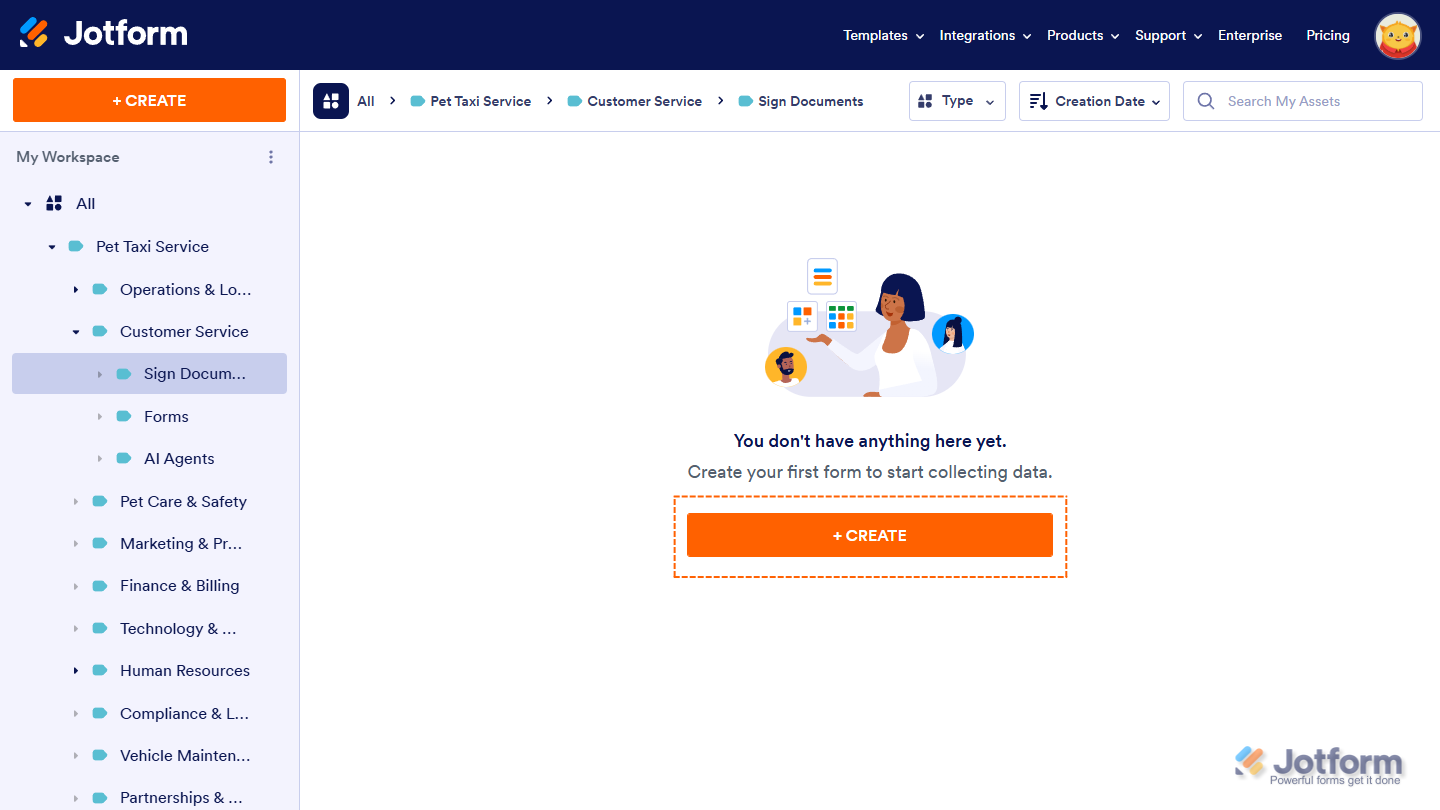
That’s it! This’ll redirect you to the builder for that asset, and you’ll see it, with the label it was created with, on your Workspace page.
Labels that haven’t been applied to any assets will have a Create button on your Workspace page. Use it to create an asset with the label applied to it automatically.
Removing Labels
You can remove labels from an asset just as easily as you can add them. This is useful when you want to reassign the asset to a different label or remove unnecessary labels that no longer apply. Here’s how:
- On your Workspace page, select the asset or assets that you want to remove a label from.
- Then, click on Label As in the menu at the top of the page.
- Now, in the Dropdown menu, uncheck the boxes next to the labels you’d like to remove from your assets, and then click on Apply.
Alternatively, each label has an X button that appears on its right side when you hover your mouse over it. Just click on it to remove a label from an asset.
Customizing Labels
As you add more labels to your workspace, you can easily identify them using clear label names and unique colors.
Changing the Label Name
You can rename your labels anytime to keep them consistent and easy to identify. Here’s how to do it:
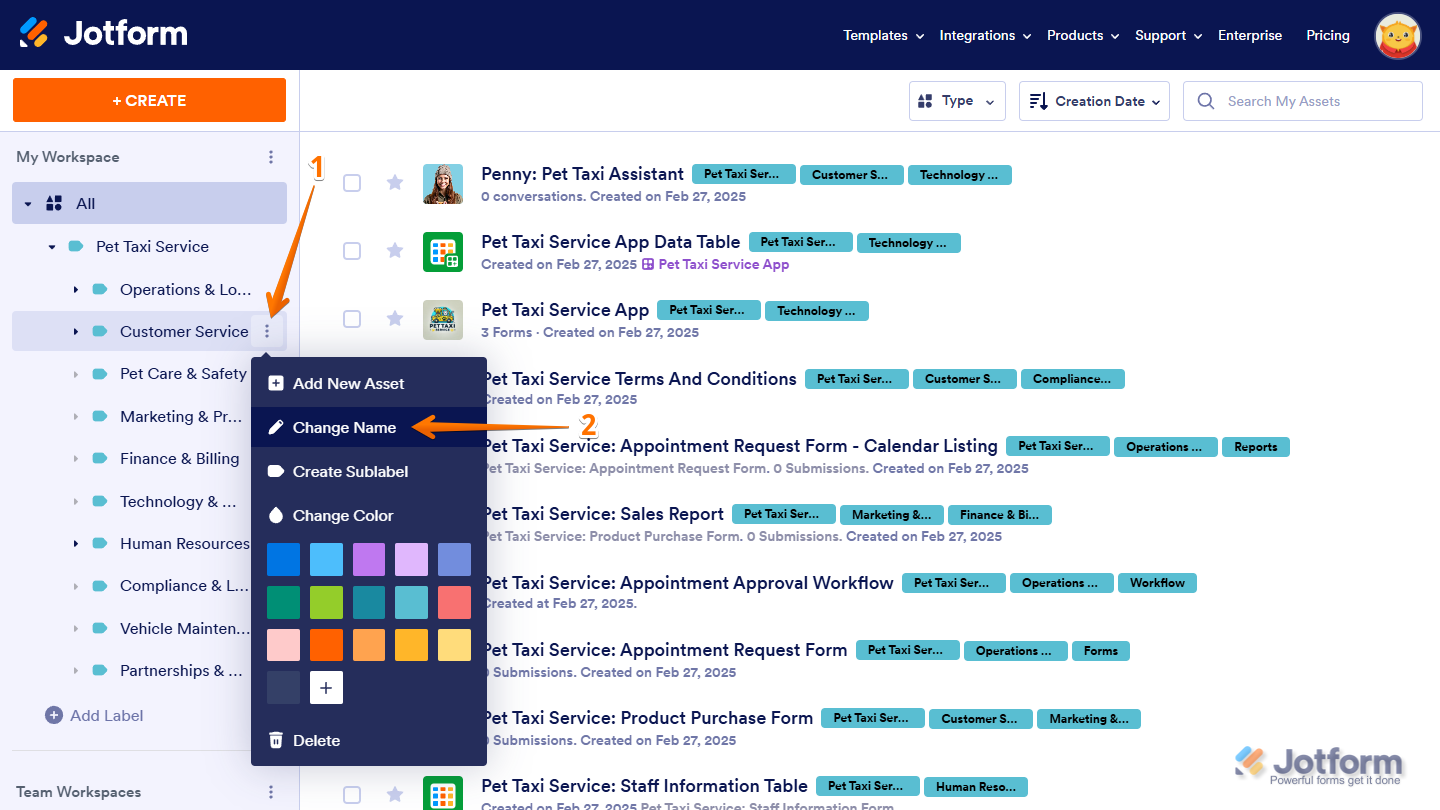
- On your Workspace page, hover your mouse over the right side of a label and click on the Three Dots icon.
- Now, in the menu that opens, select Change Name.
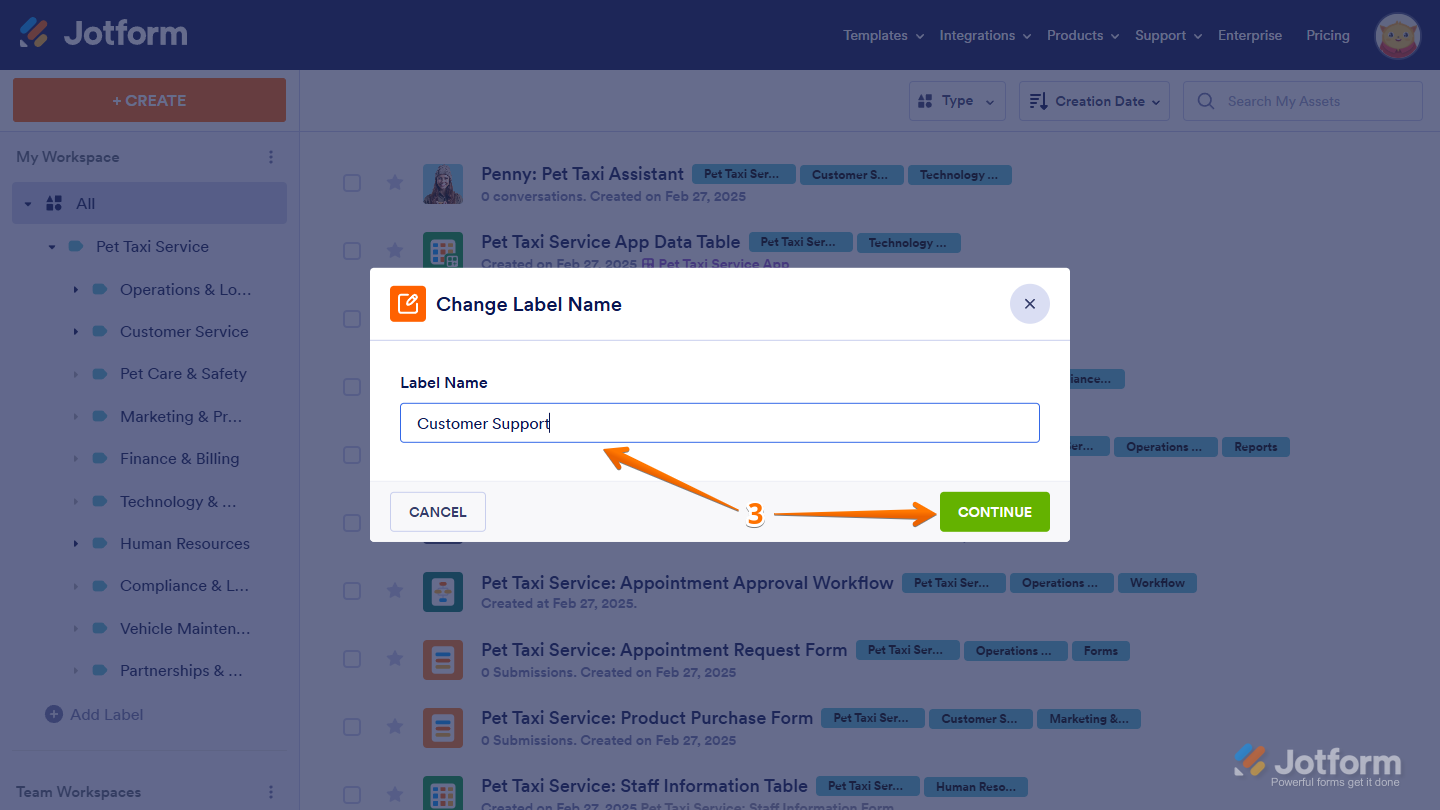
- Then, in the Add Label window that comes up, enter a new Label Name and then click on Continue.
Changing the Label Color
When you create a label, it’s assigned a random color by default, while a new sublabel takes the color of the label it’s nested under automatically. You can change their color anytime. Here’s how to do it:
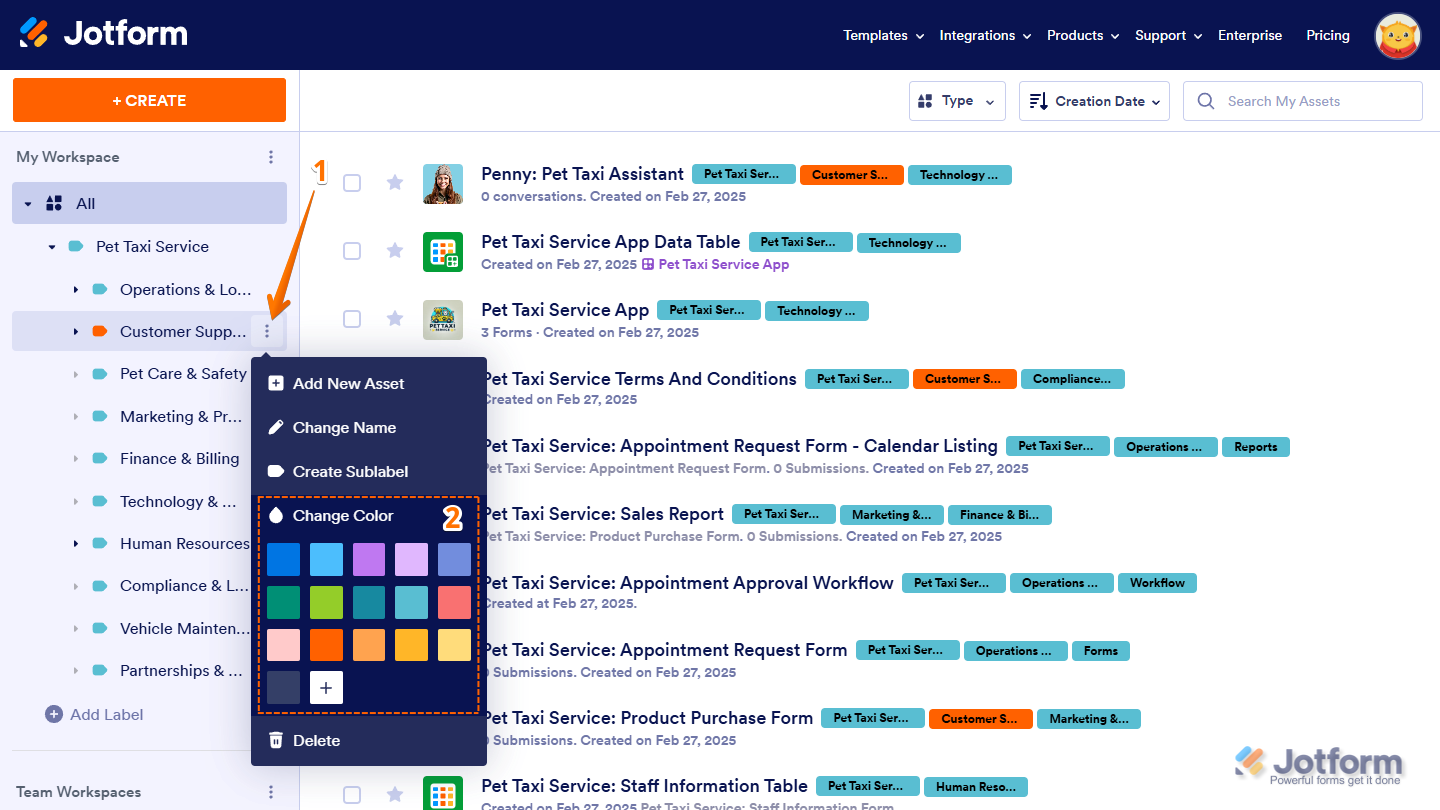
- On your Workspace page, hover your mouse over the right side of a label or sublabel, and click on the Three Dots icon.
- Now, in the menu that opens, choose a color or click on the Plus icon to set or pick a different one in the popup that opens.
Note
Labels can have the same name and color.
Sorting Labels
You can drag and drop a label to move it manually out of or under another label on the left side of your Workspace page. Or, you can sort them alphabetically to make them easy to find. Here’s how to do it:
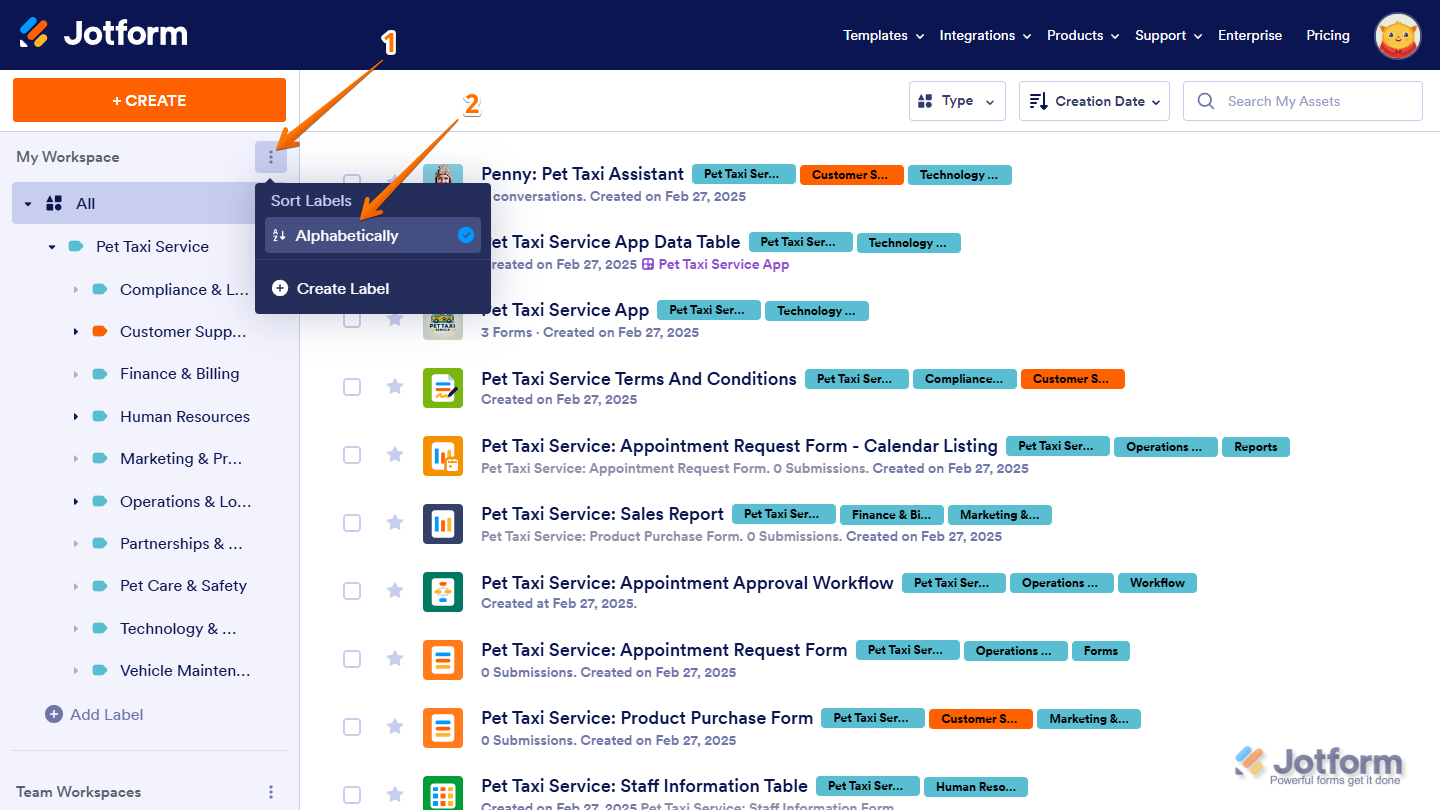
- On your Workspace page, click on the Three Dots icon at the top of the panel on the left.
- Now, in the menu that opens up, click on Alphabetically.
Note
- Sorting your labels alphabetically also automatically sorts any labels nested under them, as well as newly created labels.
- When you move a label manually, its sublabels move with it, and this also disables automatic alphabetical sorting.
Deleting Labels
You can delete labels you no longer need, to declutter your workspace and keep things organized. Here’s how to do it:
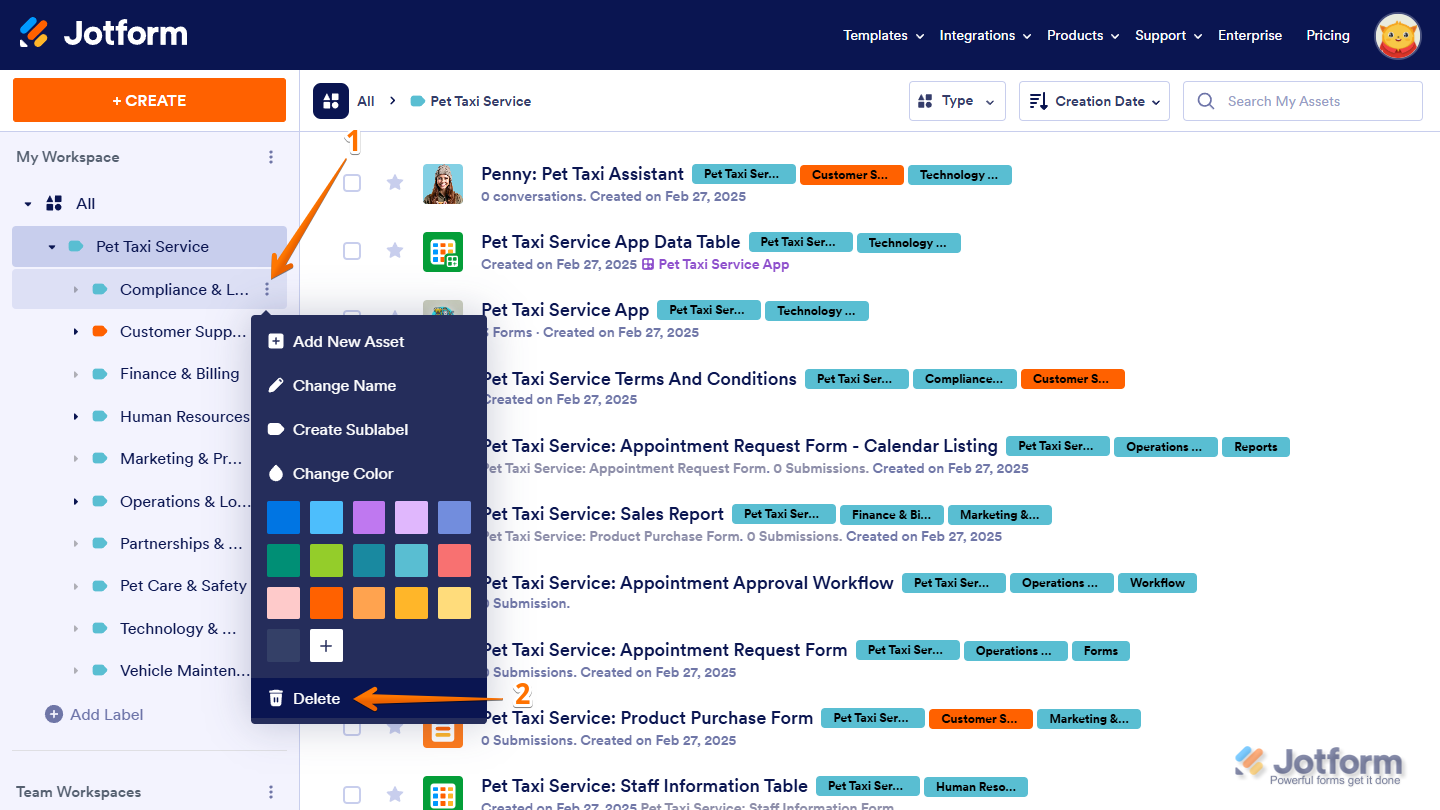
- On your Workspace page, hover your mouse over the right side of a label and click on the Three Dots icon.
- Now, in the menu that opens up, select Delete.
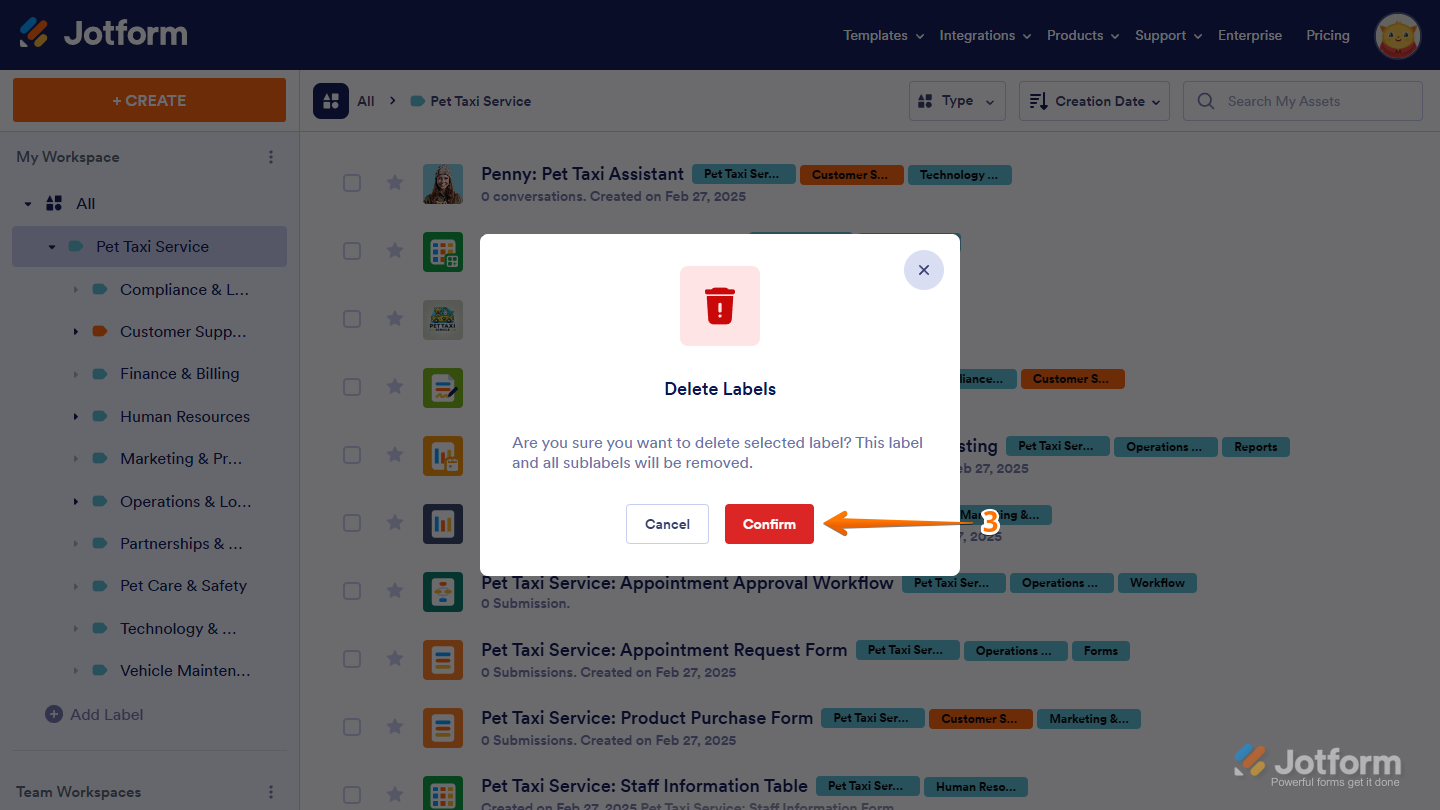
- Then, click on Confirm in the Confirmation window that comes up.
Note
Deleting your label also deletes its sublabels, but your assets remain. The label is simply removed from them.

Send Comment: