Once you successfully configure your SAML SSO application and define the appropriate attributes and claims, you can enable and customize the SSO Prefill functionality on your Enterprise server. This allows for seamless user authentication, improved security, and efficient attribute mapping, ensuring a streamlined login experience across your organization.

Setting up the SSO Prefill
Setting up the SSO Prefill is a straightforward process. Let’s do it!
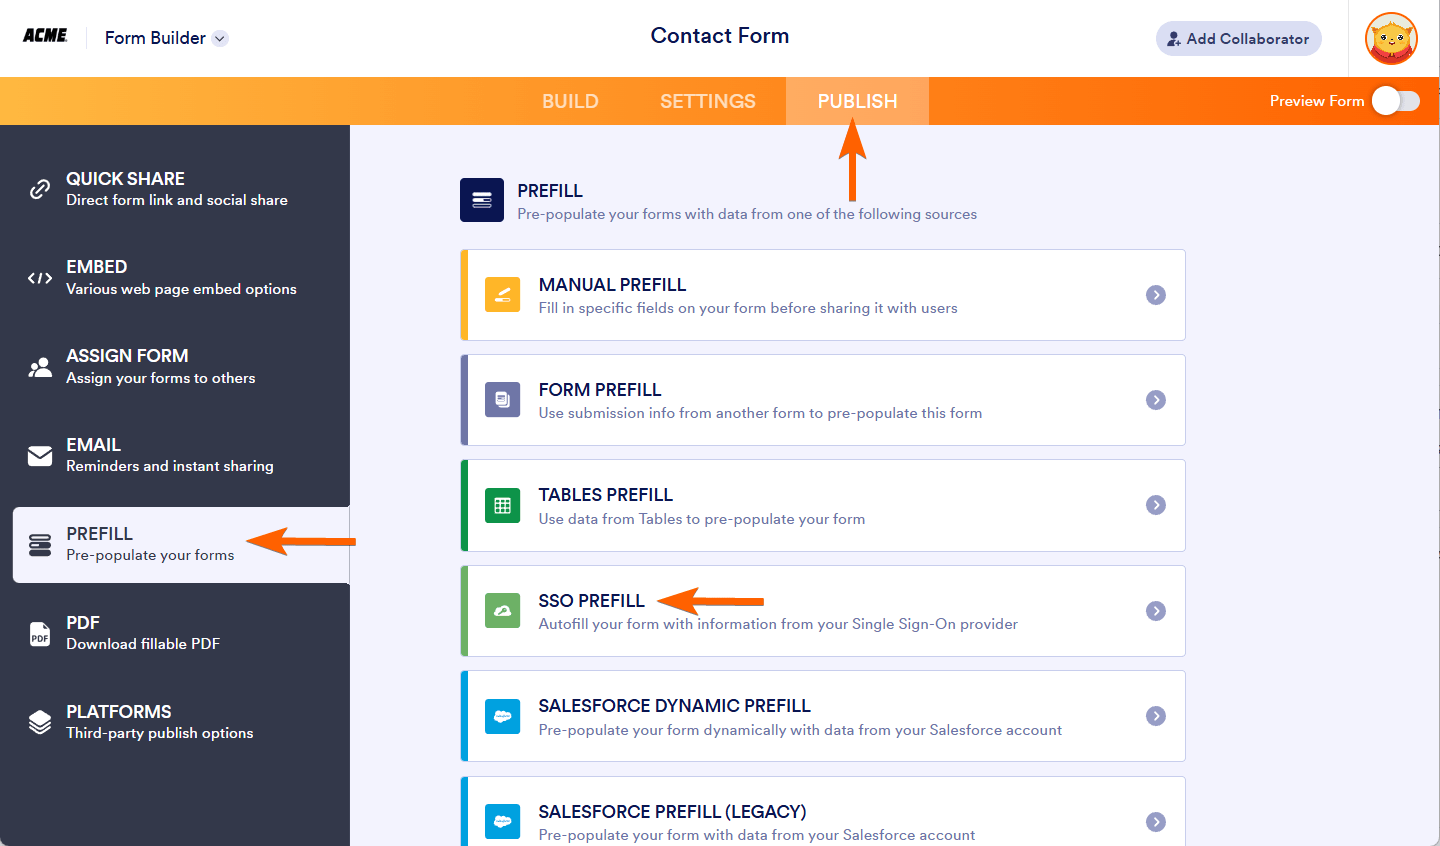
- In the Enterprise Form Builder, go to the Publish tab.
- Select Prefill on the left panel.
- Choose SSO Prefill from the list.
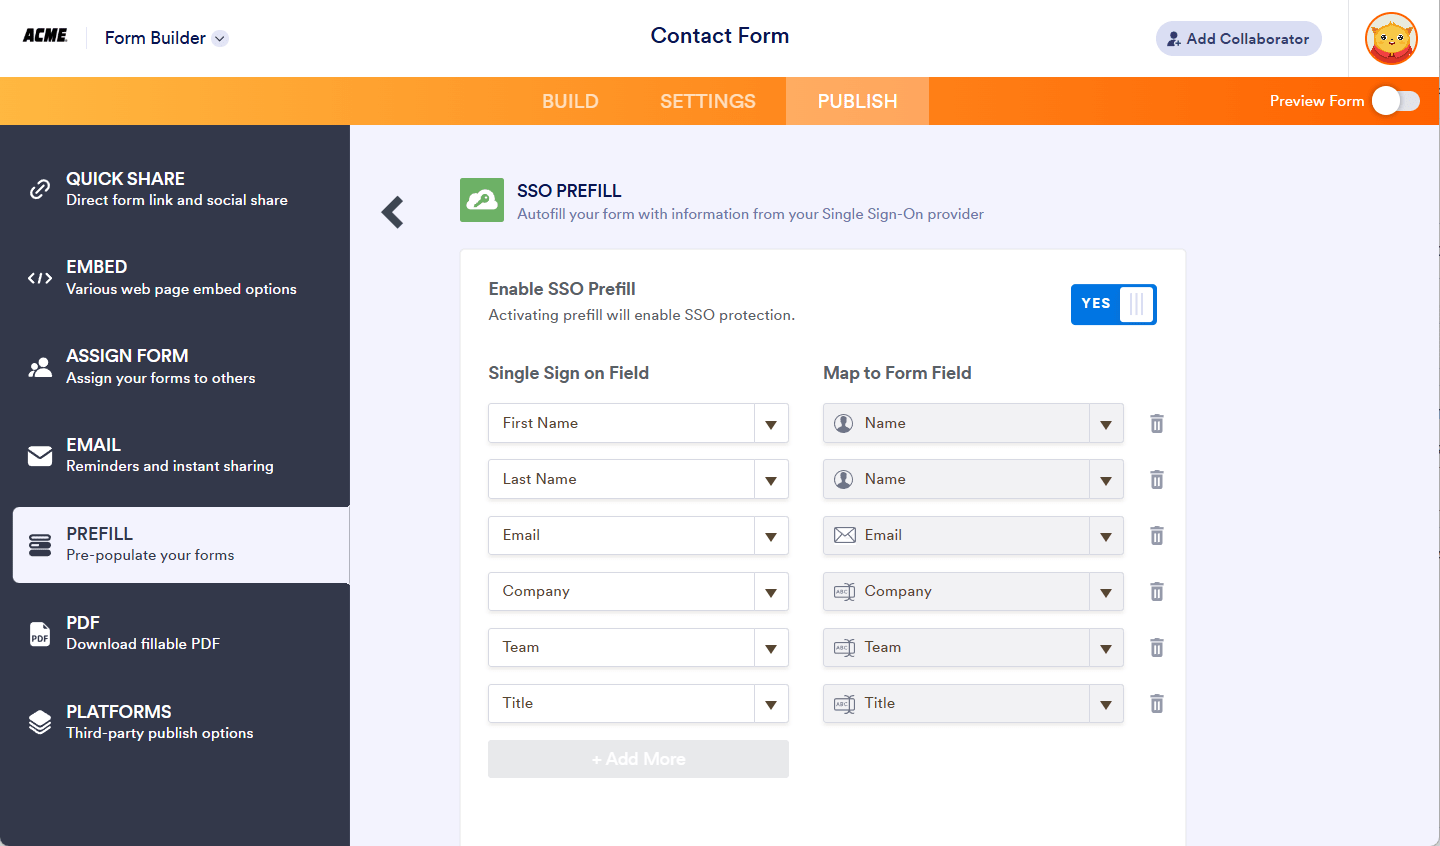
- Toggle the Enable SSO Prefill to Yes.
- Choose which attributes to prefill and map to your form fields when someone opens your form. The attributes will be automatically pulled from the user’s profile stored on your SSO server.
Configuring SAML Attributes With SSO Application
To use the SSO Prefill feature with your Jotform Enterprise forms, you must configure sending attributes within your SSO app. You can check for platform-specific instructions from the list below:


Send Comment: