Steps to create a quiz in Google Forms
- Open Google Forms and create a new form.
- Click on Settings.
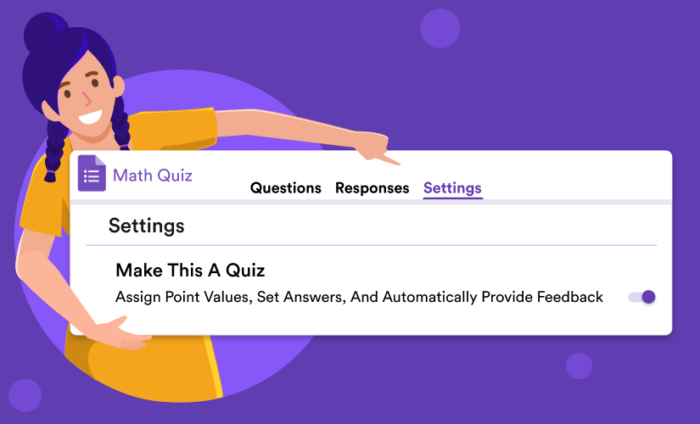
- Toggle to Make this a quiz.
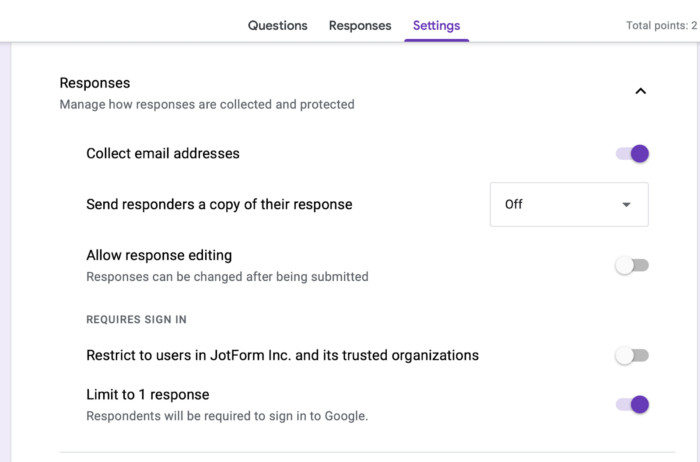
- Toggle to Collect email addresses and Limit to one response.
- Click on the Questions tab to add your questions.
- Click on Answer Key to add in answers and point values.
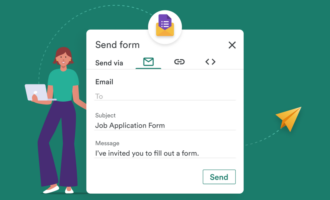
- Click Send to share your quiz.
Interactive step-by-step tutorial
If you need to make quizzes for your students, you probably already know that Google Forms is a great way to do that. Most people already have a Google account, so it’s easy to get started. And, like most of Google’s basic tools, it’s free.
Upload a file and create quizzes with Jotform’s AI Quiz Generator
On top of that, Google has a few special features to make grading quizzes easier.
This article will show you everything you need to know to create a quiz in Google Forms, as well as one or two tricks you might not have picked up on yourself.

Looking for the best alternative to Google Forms?
Jotform’s full-featured form-building solution is mobile-friendly and has the most integrations in the industry. Use it to collect payments, automate workflows, gather leads, and more.
Creating the quiz
Getting started is easy. First, go to forms.google.com. Under Start a new form, click the big + button to open a blank form.
You should now be looking at a new, untitled form. First, let’s make sure that Google Forms knows that this is a quiz and not a generic form.
Click on the Settings tab, then toggle the Make this a quiz button to the on position.
Next, enable the Collect email addresses option and set your quiz to Limit to 1 response. Enabling those two settings will reduce the possibility of cheating.
From the Settings tab, you can enable automatic grading to show your students their score immediately. Or you can disable that option if, for example, you’re grading on a curve.
The Settings section also gives you other options for what the respondent can see — such as the point value of each question. Again, you can disable any of these if you don’t think they’re relevant.
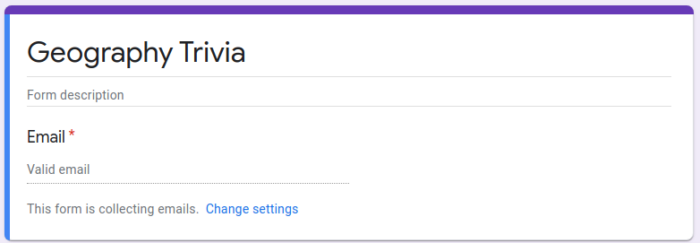
Now that you’ve configured your quiz, click back to the Questions tab. You’ll see an Untitled Form field with an email collection field. Click on the form title and enter the name of your quiz.
You can also add a description of the quiz under the title. The email field is for your students to fill out.
Adding questions
Start the quiz by asking for the student’s name. Their email may be enough to identify them, but you might as well save yourself the headache of having to cross-reference everyone’s names and email addresses. Add a new question by clicking the circled + in the side menu.
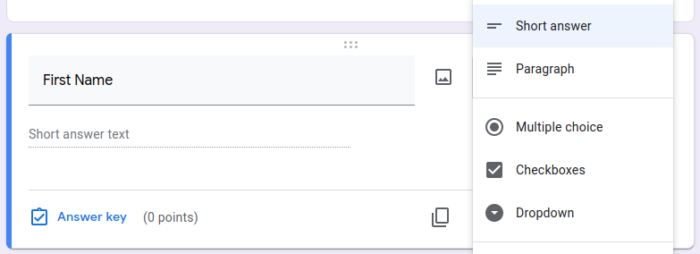
Now use the dropdown menu in the new question to change the question type to Short answer, then change the question text to First Name. Make sure that you set this field to Required.
To add a field for the student’s last name, the easiest method is to duplicate the First Name field. (If you just click the add button again, you’ll have to repeat the same steps because Google Forms defaults to a multiple-choice format for new questions.)
You can duplicate the question by clicking on the icon at the bottom of the question box.
Everything in the new question should be exactly the same. All you have to do is change the question text from First Name to Last Name.
Now you can start adding quiz questions. There should already be an untitled multiple-choice question in your form. If not, click the Add question button and choose Multiple choice from the dropdown menu. Then enter your question.
Next, click on Option 1 and enter your first answer choice. When you’re done, hit Enter to add another answer.
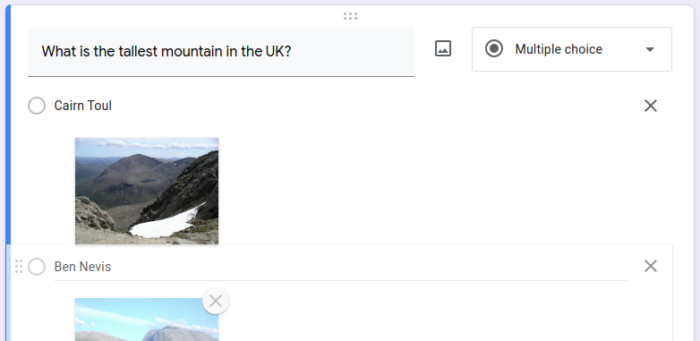
You can even add an image by clicking the photo icon to the right of the answer field. For the following example, the images are from the Google Image Search tab.
When you’re done adding your answer choices, you can rearrange them by dragging and dropping them using the six-dot icon on the left. You can remove questions and/or their images by clicking the X icons. You can also manually rearrange questions with the six-dot icon at the top of the question box.
You might want to use the Shuffle option order feature as another way to prevent cheating. To select this option, click the three dot icon in the bottom right of the question box.
When you’ve set up your question, you can duplicate it or click Add question to add a new one. You can further customize the form by adding brand colors, branding materials like logos and icons, or choose one of the preset themes.
Weighting and grading
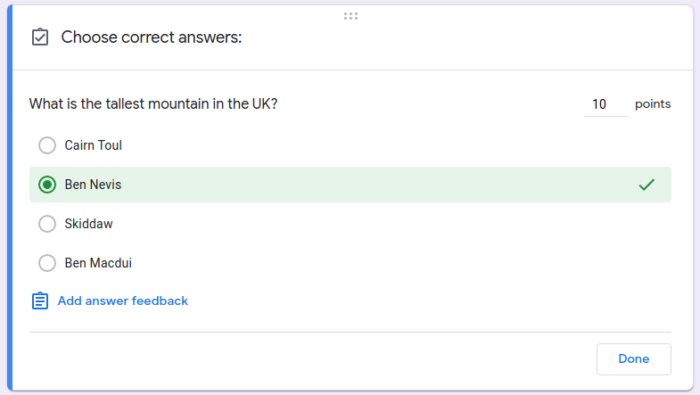
Now, let’s teach Google Forms which answer is right and how to score the quiz. Start by clicking the Answer key link on the bottom of a question.
From here, you can set the correct answer and assign a point value to each question. You don’t have to assign all your questions the same point value. You can give harder questions more weight by making them worth more points.
The Add answer feedback button at the bottom lets you interact with your students as they take the quiz. You can add different responses for correct and incorrect answers. For example, you can give them a word of encouragement for correct answers and a link to more information or a video for incorrect ones to reinforce the lesson.
After you’ve added all of the answers to your questions, you can preview your quiz to make sure everything looks right by clicking the eye icon in the upper-right corner. You can also take your own quiz to give you some sample data.
When you’re done filling out your quiz in the preview tab, click back to the form builder tab. Now select the Responses tab at the top of the form.
There are three sub-tabs in the Responses tab. The Summary tab will give you an analysis of the overall quiz results.
The Question tab will show you how your students answered each question. It will help you see which, if any, subjects your students are struggling with. The Individual tab will let you drill down to see how each student did.
In the upper-right corner of the page, there’s a green spreadsheet icon next to the three-dot icon. That button will let you export all of your data to a Google Sheets spreadsheet. You can use the spreadsheet to calculate a grading curve using your quiz data or otherwise manage your data.
Google Forms is a useful tool for quiz creation. But before you commit to using it exclusively, it’s important to understand that it has a few drawbacks that might interfere with your ability to create exactly the types of quizzes you need. Below are some of the “cons” associated with using Google Forms.
The cons of making a quiz in Google Forms
If you need to create an online quiz for work or school, Google Forms may not offer you all the functionality you require.
The drawbacks of using Google Forms to create a quiz are related to its limitations:
- Google Forms has a limited number of question types. Unfortunately, Google Forms doesn’t offer a lot of question type options for quizzes, so you’ll mostly be limited to multiple choice, dropdown, short answer, or grid questions. If you need to use any other kind of question type, such as rating, re-ordering, or something else, you won’t be able to do that in Google Forms.
- Google Forms only lets you set answer values as whole numbers. In Google Forms, you can only assign whole numbers as point values for correct answers. This may be an issue if you want to assign a point value of 0.5 or 0.25 to an answer.
- Google Forms doesn’t enable any advanced mathematical calculations. If you need to create quizzes that include complex mathematical formulas, such as for math or science classes, you may be out of luck. The grading system in Google Forms can’t support advanced mathematical calculations.
- Google Forms doesn’t allow you to customize the completion, thank-you, or success pages. Once a student completes a quiz and Google automatically grades it, they’re shown a completion page. While you can customize the messaging on this page, you can’t customize it according to the grade the student receives. This means you can’t provide additional learning materials for certain students who could use extra help or send congratulatory messages to students who did well.
A alternative for making a quiz: Jotform
While Google Forms works well for simple quizzes, it doesn’t offer a lot of advanced functionality. A great alternative is Jotform, which is popular with teachers and educators of all kinds.
Jotform comes with several quiz templates that you can use as-is or customize with the drag-and-drop editor. Simply change the text, structure, layout, and design of the quiz to match your needs. You can choose from many different question types, include advanced calculations, and much more. Like Google Forms, Jotform lets you set up automatic grading for the quiz, saving you time and energy.
If you want to further analyze the quiz responses, you can track and manage them using Jotform Tables, a spreadsheet-powered database. You can instantly create customizable, visually appealing reports of quiz results in Jotform Report Builder. If you need to remind students to take the quiz, Jotform Workflows can send automated reminders.
Unlike Google Forms, Jotform also goes far beyond creating quizzes. It can support many other functions related to education — from enrollment to payment collection — thanks to its many templates, integrations, and features. Give Jotform a try today.










































Send Comment:
1 Comments:
More than a year ago
Thank you for assisting me through this Google form