-
infocdimiesFecha de consulta 20 de mayo de 2024, 15:34
-
Jerlan Jotform SupportFecha de respuesta 20 de mayo de 2024, 15:48
Hi infocdimies,
Thanks for reaching out to Jotform Support. To make sure that we are on the same page, are you trying to Prepopulate the Same Form with Data from a Previous Submission? or Do you have a 2nd form that you want to prefill using Data From Another Form?
Once we hear back from you, we'll be able to help you with this.
-
infocdimiesFecha de respuesta 20 de mayo de 2024, 15:51
Tengo un segundo formulario que deseo completar previamente utilizando datos de otro formulario
-
Jerlan Jotform SupportFecha de respuesta 20 de mayo de 2024, 15:56
Hi infocdimies,
Thanks for getting back to us. I’ll need a bit of time to look into this. I’ll get back to you as soon as I can.
Let us know if you have any other questions.
-
infocdimiesFecha de respuesta 20 de mayo de 2024, 15:57
Gracias, quedo atento
-
Jerlan Jotform SupportFecha de respuesta 20 de mayo de 2024, 16:45
Hi infocdimies,
Thanks for your patience, we appreciate it. Jotform Form’s Prefill allows you to prepopulate your form fields with data from another form in your account. It selects the main submission table of your form as the source where you can map the fields accordingly. Let me show you how:
- Open your form in Form Builder (the form that you would like to prefill), and in the orange navigation bar at the top of the screen, click on Publish.
- On the left panel, click on Prefill.
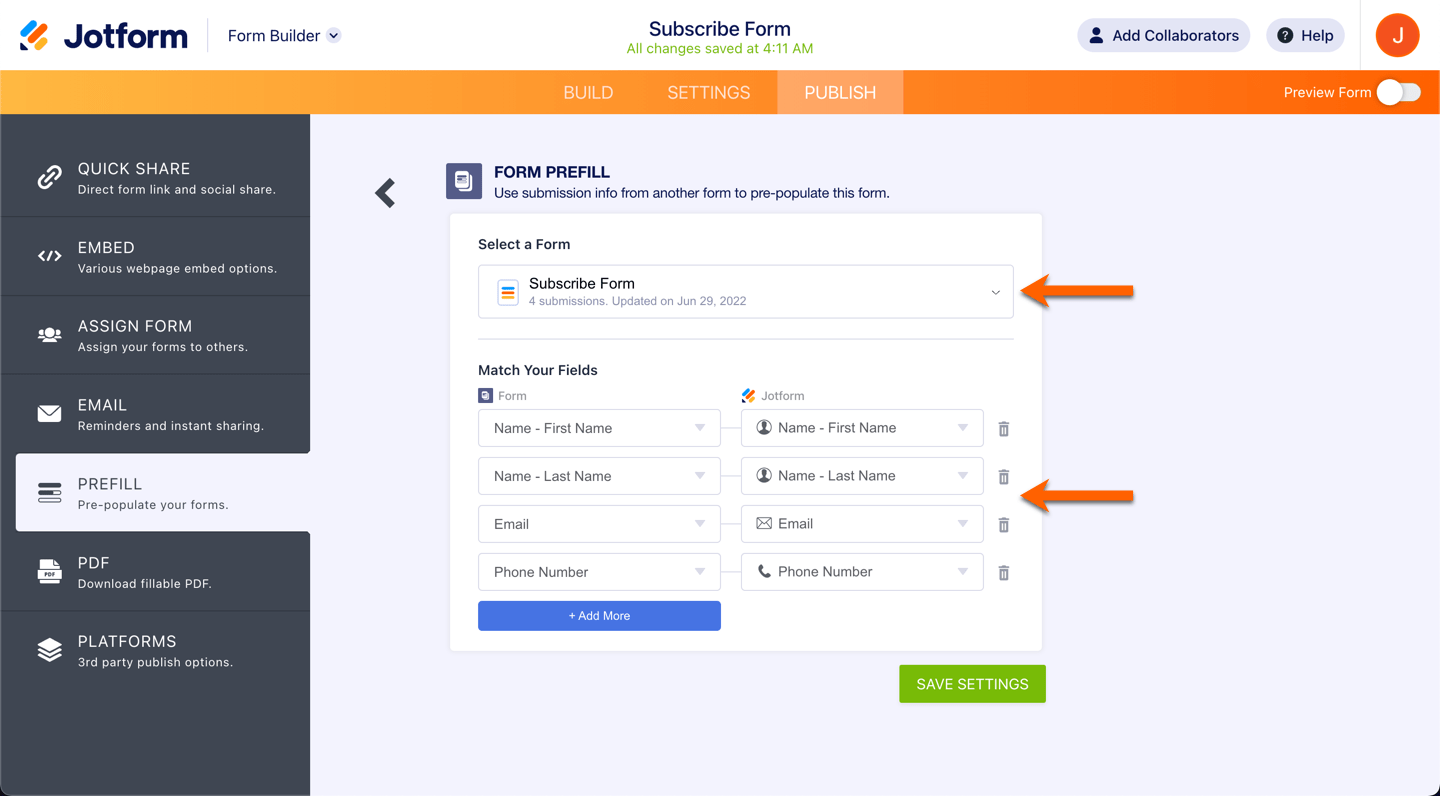
- Under Prefill, select Form Prefill.

- Under Form Prefill, select a form (source form).

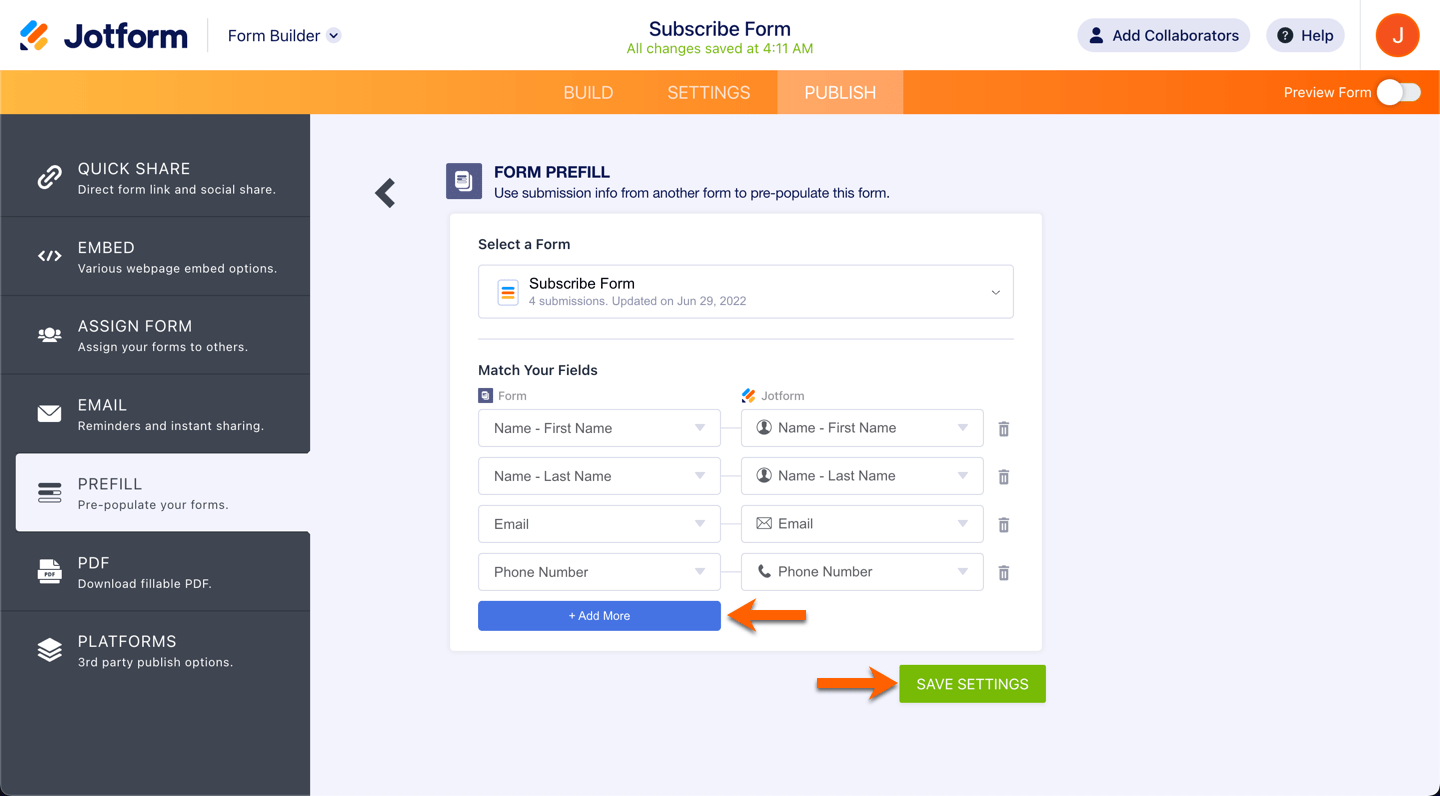
- Map the fields from the selected form which you wish to prefill to your current form.

- Click on the Add More button if you wish to map more fields. Click on the Save button if you are done to save the mapping.

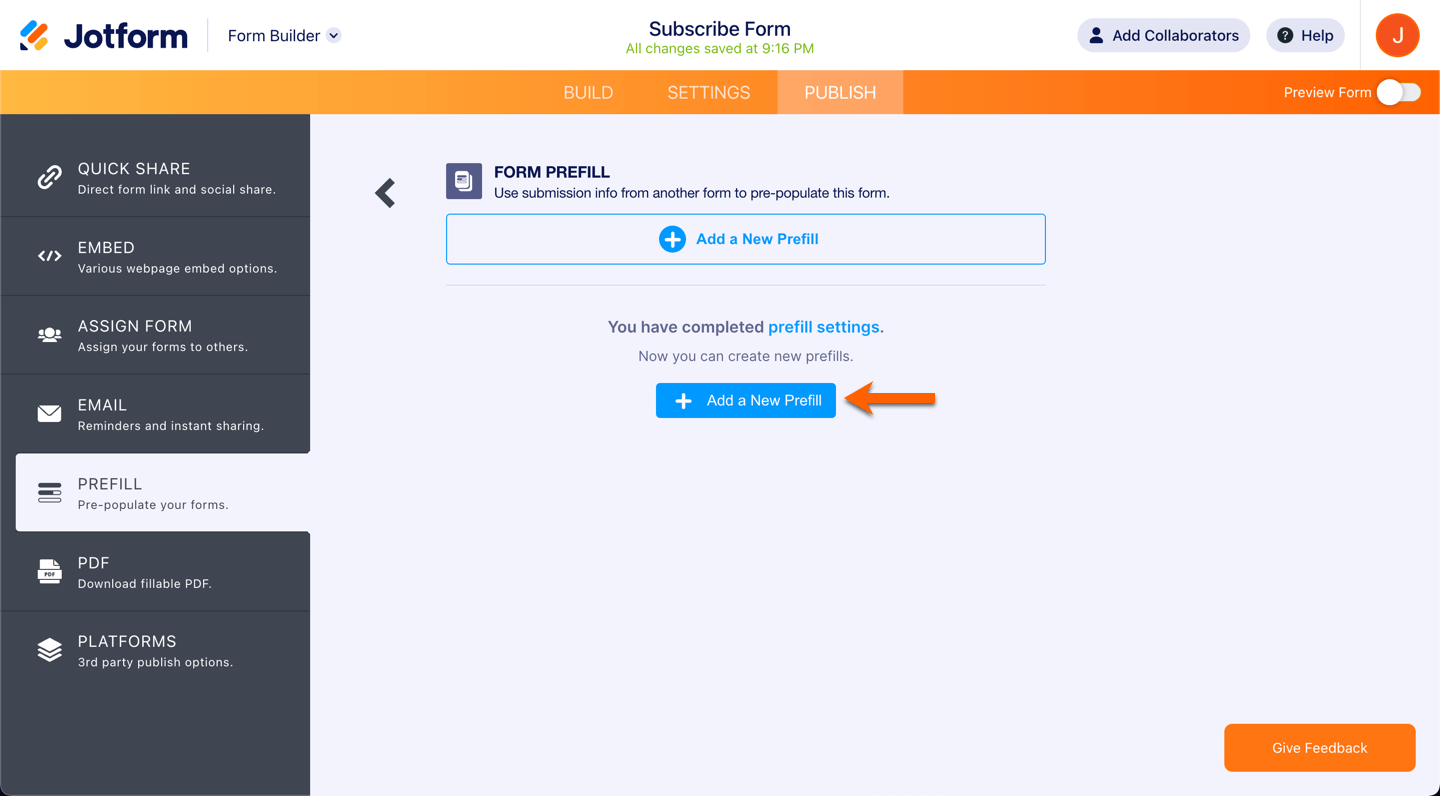
- Once fields are mapped, click on the Add a New Prefill button. This will open the selected form’s table.

- From the table, you can select the individual submission or select all. The checkbox is available on the left side of each entry. Assuming that you’ve already selected the submissions, click on the Create button. You can only create 20 Prefilled URLs at a time.

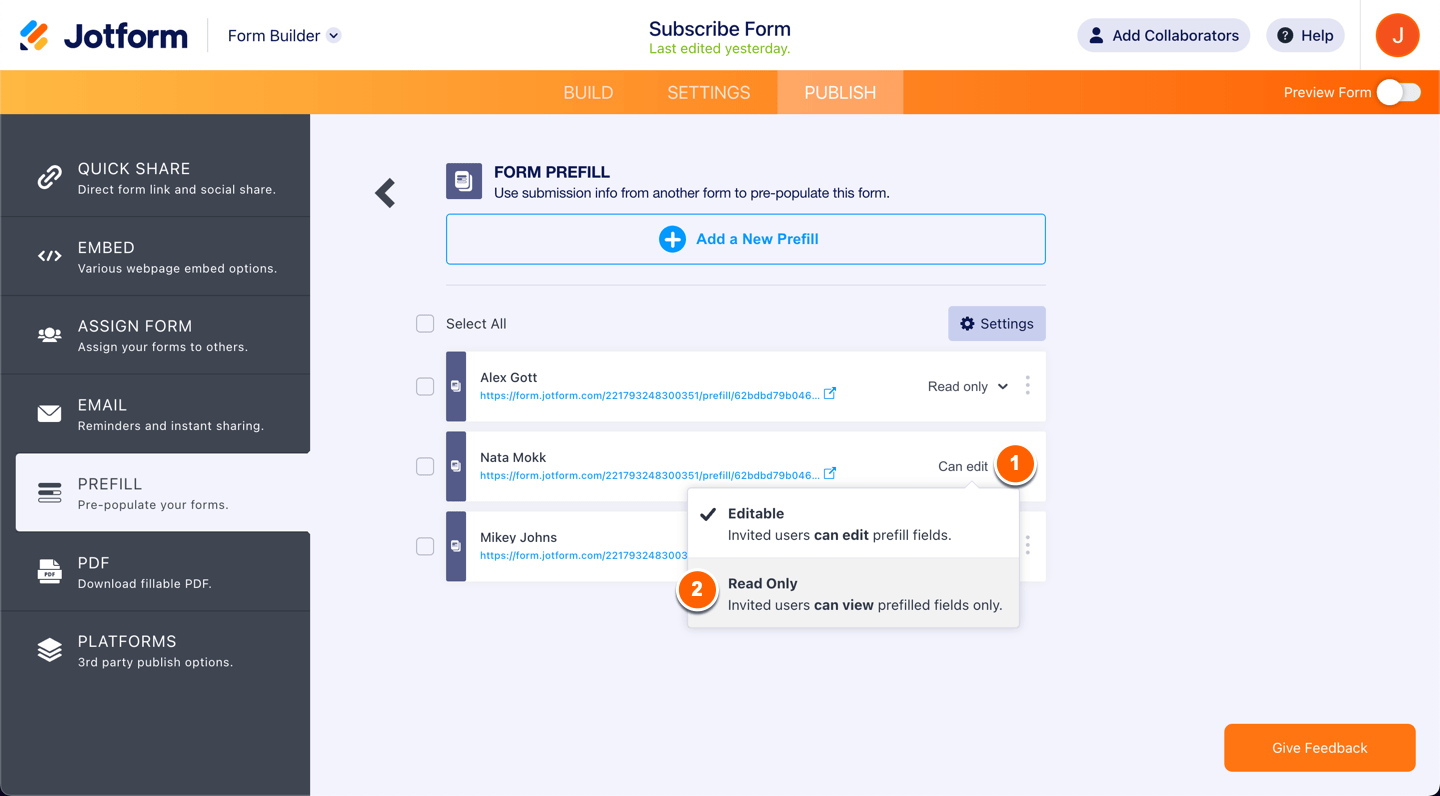
- The Prefilled URLs are now created. Each of the Prefilled URLs is labeled based on the user’s name from the selected table.

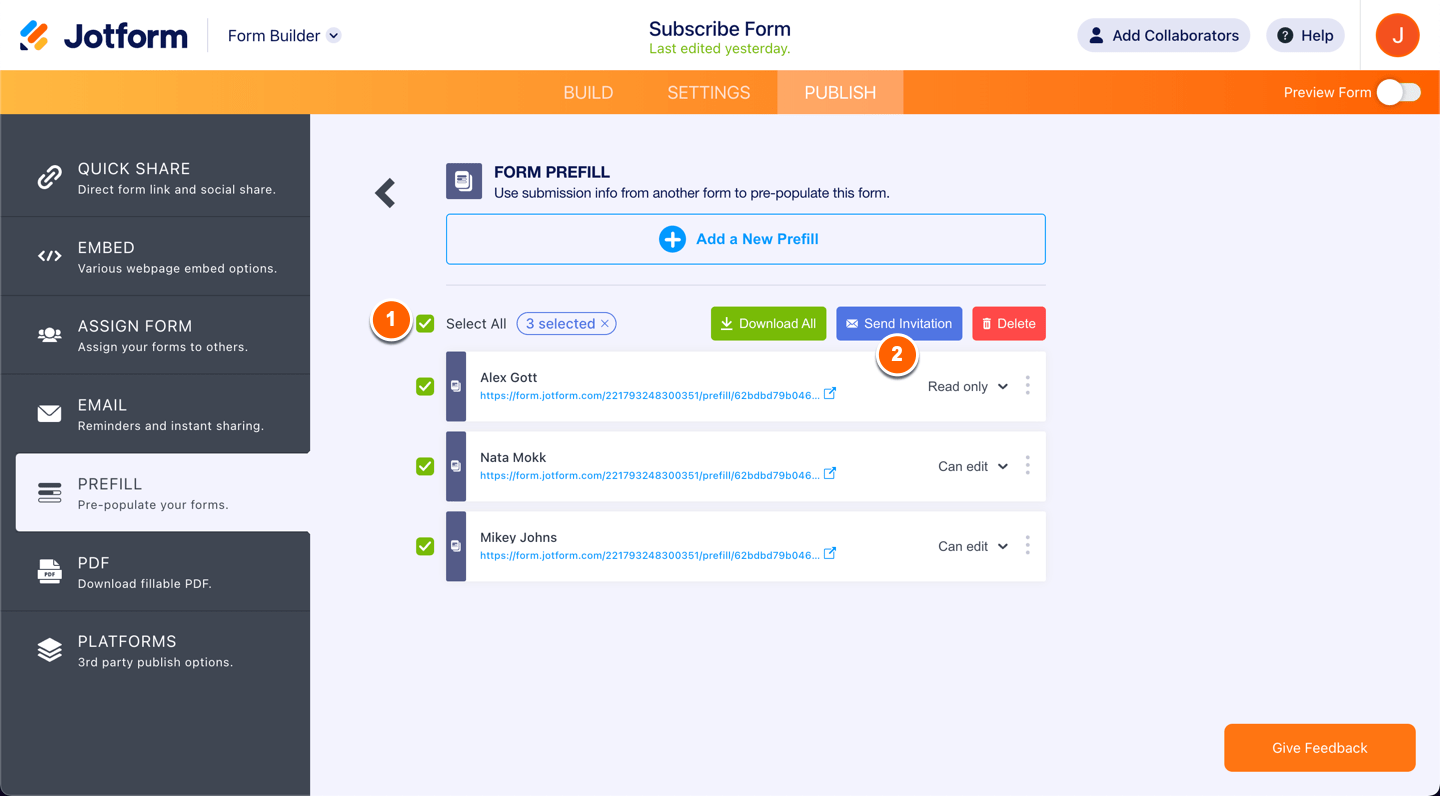
- The users can edit the prefilled data. If you do not want users to edit the data, change the permission from Editable to Read Only.

- You can select all Prefilled URLs and send or delete them at once. Click the Select All and click Send Invitation to send or click the Delete button to delete.

- Clicking on the Send Invitation will open the popup. The recipient’s email address is automatically filled with the user’s email address from the selected form. You can add a message to let users know of the prefilled URL. Click on the Send Invitation button to send.

You can select all Prefilled URLs, but note you can only send an invitation to up to five (5) people at a time. Selecting more than this number will display an error message, and the button to send the invitation is grayed out.
If the above option, won't work for you, you can use another prefill like a Table prefill.
Give it a try and let us know if you need any help.


