3,319 words ~ 11 min read
The Form Builder
Now that you understand the fundamental steps in creating your first form, let’s explore the building blocks that bring your form to life.
The possibilities can seem endless, as you’ll have a full suite of form features to help you collect any kind of data you need. But don’t fret; the Form Builder’s user interface is also exceptionally simple.
Form elements
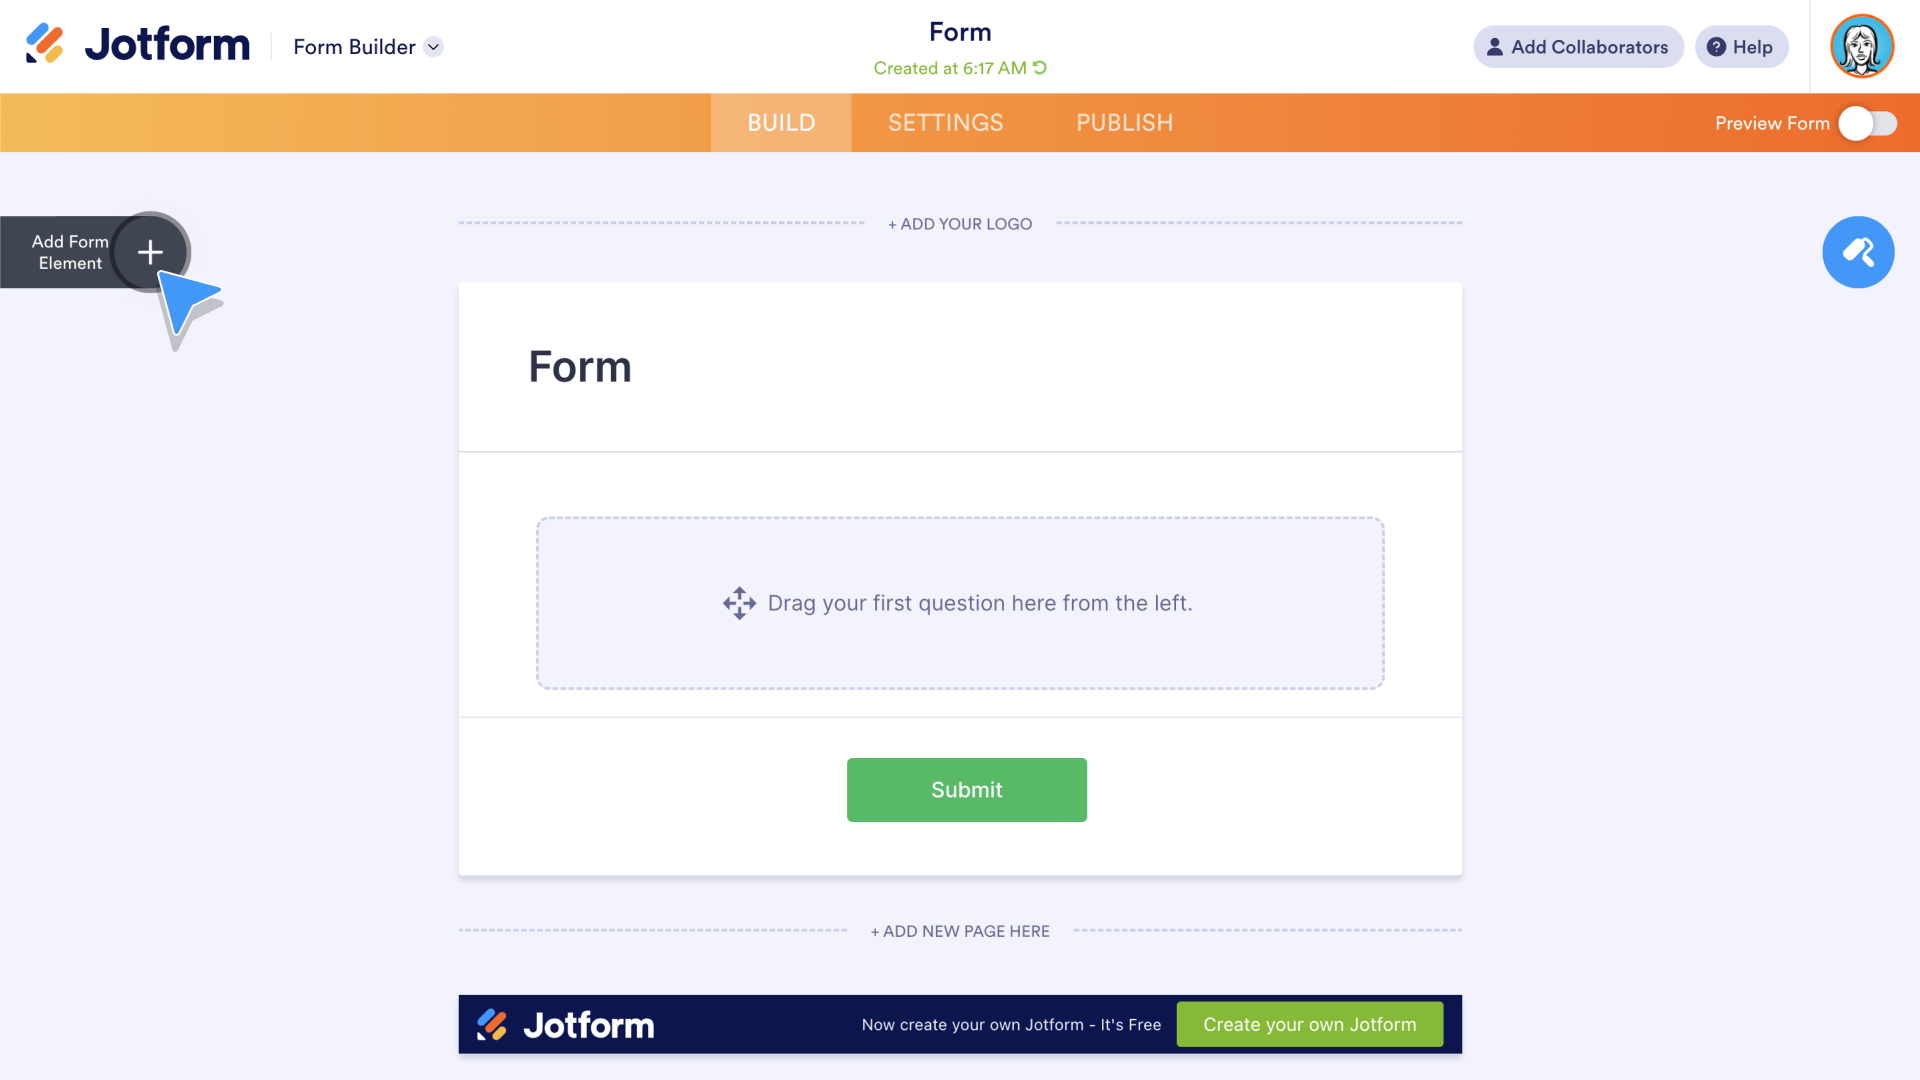
While building your form, click the Add Form Element button on the left side of the Form Builder. The Form Elements menu will appear on the page.
Pro Tip:
If you’re using a Card Form and switch to a Classic Form, some form elements, widgets in particular, will be removed to match the overall look and feel of the layout. Read more about when to use Classic or Card Forms.
The drag-and-drop elements are divided into three columns: Basic, Payments, and Widgets. Let’s take a closer look at these categories.
Basic
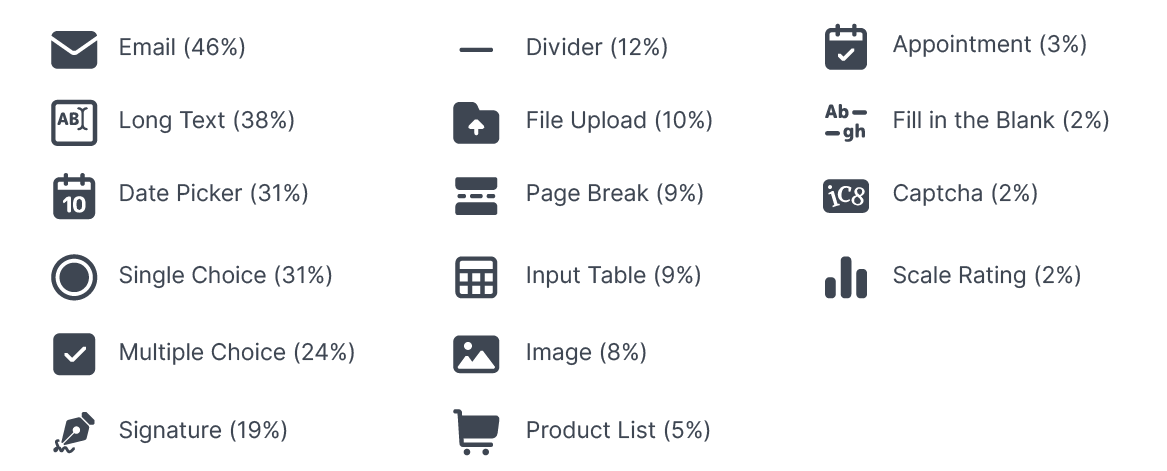
Basic elements comprise the practical fields you’ll use in your forms or surveys, not only for automating the kind of information you gather but for formatting as well.
The most used basic elements are listed below (along with a percentage showing how often they appear in all forms:
Let’s dig into two of these elements, Signature and File Upload, to spotlight their benefits.
Signature
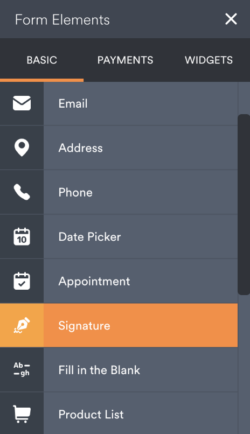
The Signature element is so heavily used because of the many kinds of forms that require a sign-off.
The good news? Just drag and drop to enable your forms to capture e-signatures from form fillers.
Did you know?
On average, nearly 5 million forms with the Signature element are submitted by users each month. The popularity of signature forms led Jotform to create Jotform Sign, which combines a robust standalone e-signature platform with Jotform's Suite of automation tools.
File Upload
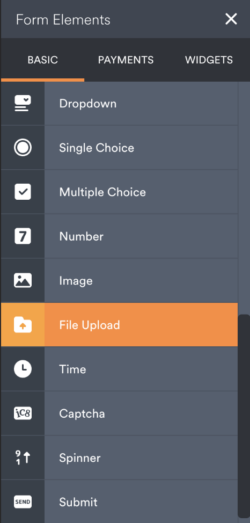
Like e-signatures, file uploads are extremely useful in online applications, booking forms, evaluation forms, and more. The File Upload element allows respondents to upload many different types of files directly to your form, including
- DOCX
- XLSX
- CSV
- TXT
- RTF
- HTML
- ZIP
- MP3
- WMA
- FLV
- AVI
- JPG
- JPEG
- PNG
- GIF
- MP4
- And more
In the Element Settings, you can indicate which types of files you’ll accept. To accept all file types, enter an asterisk (*). You can indicate how many files your form will accept, set the file size limits, and set the method for importing your files to third-party solutions like Google Drive.
Payments
Jotform’s Payment elements enable you to collect just about any payment type securely and easily via your online forms. You can choose from more than 30 payment gateways, including PayPal, Apple Pay and Google Pay, Square, and Stripe. ACH payment processing is available as well.
To enable online payments in your form, drag and drop your chosen payment element to your form and authorize your payment provider account via the Form Builder.
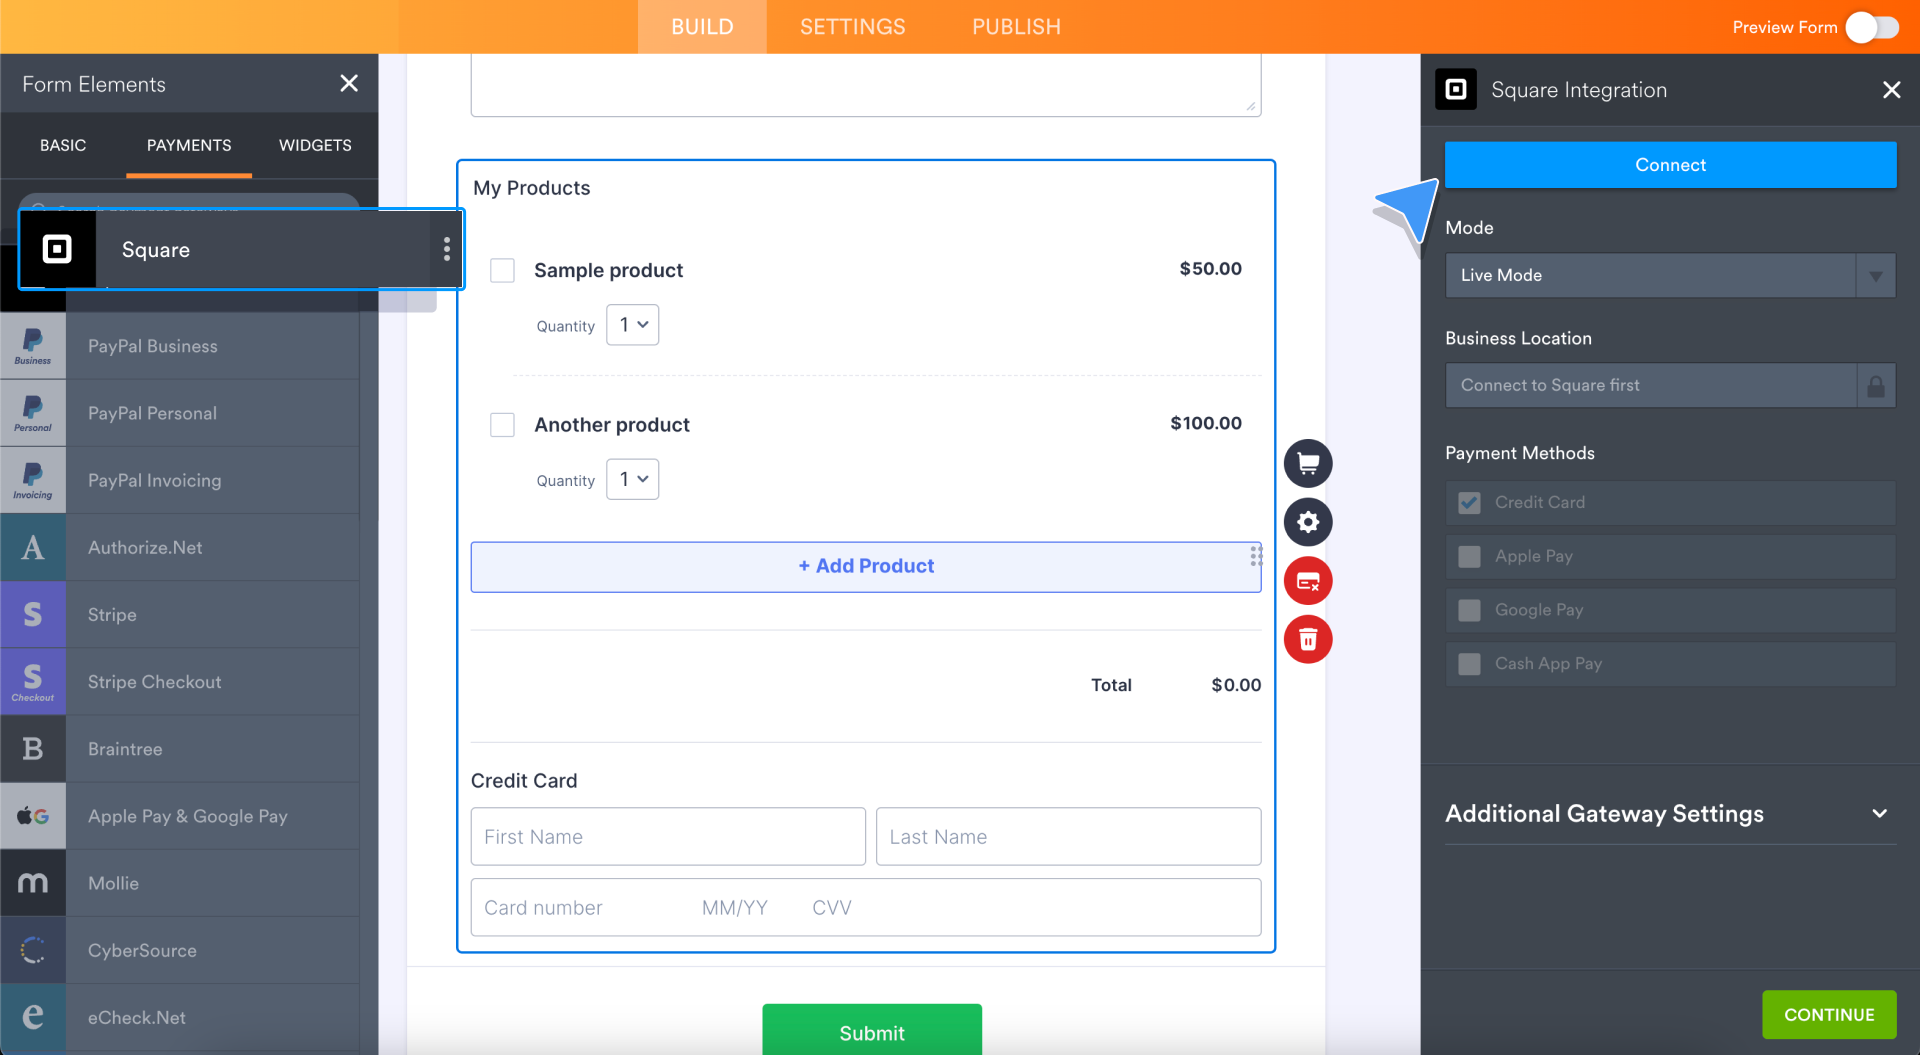
Multiple studies suggest that the more payment options respondents have, the higher the conversion rate, and Jotform gives you plenty of options.
For even more flexibility, you can embed payment forms into your website or create a mobile store with the Jotform Store Builder.
Widgets
The third column of Form Elements contains Jotform’s widgets, which add functionality — like video, social media, or maps — to your form. Widgets extend your form’s capabilities, and there are hundreds to choose from.
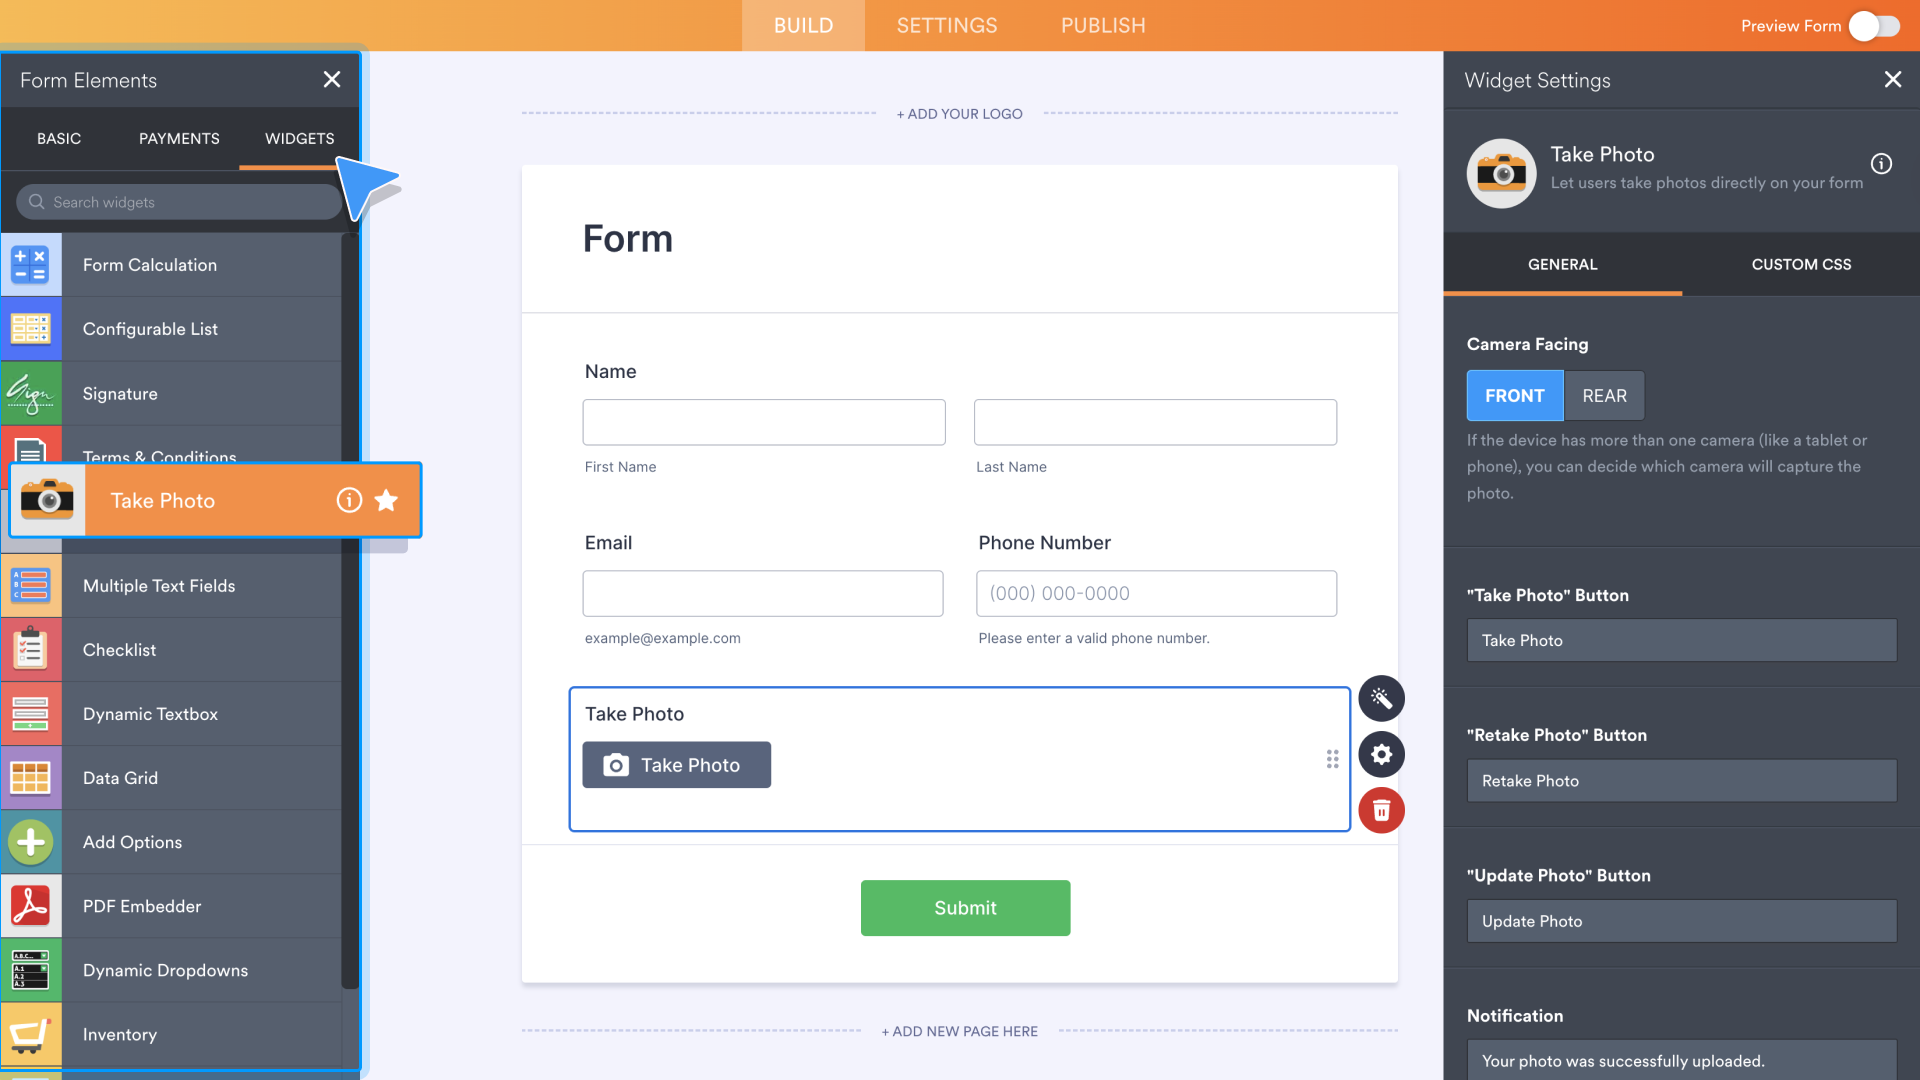
Some often-used widgets include the Take Photo widget, which allows form fillers to take photos directly from your form, the Spreadsheet to Form widget, and the Image Gallery widget.
Did you know?
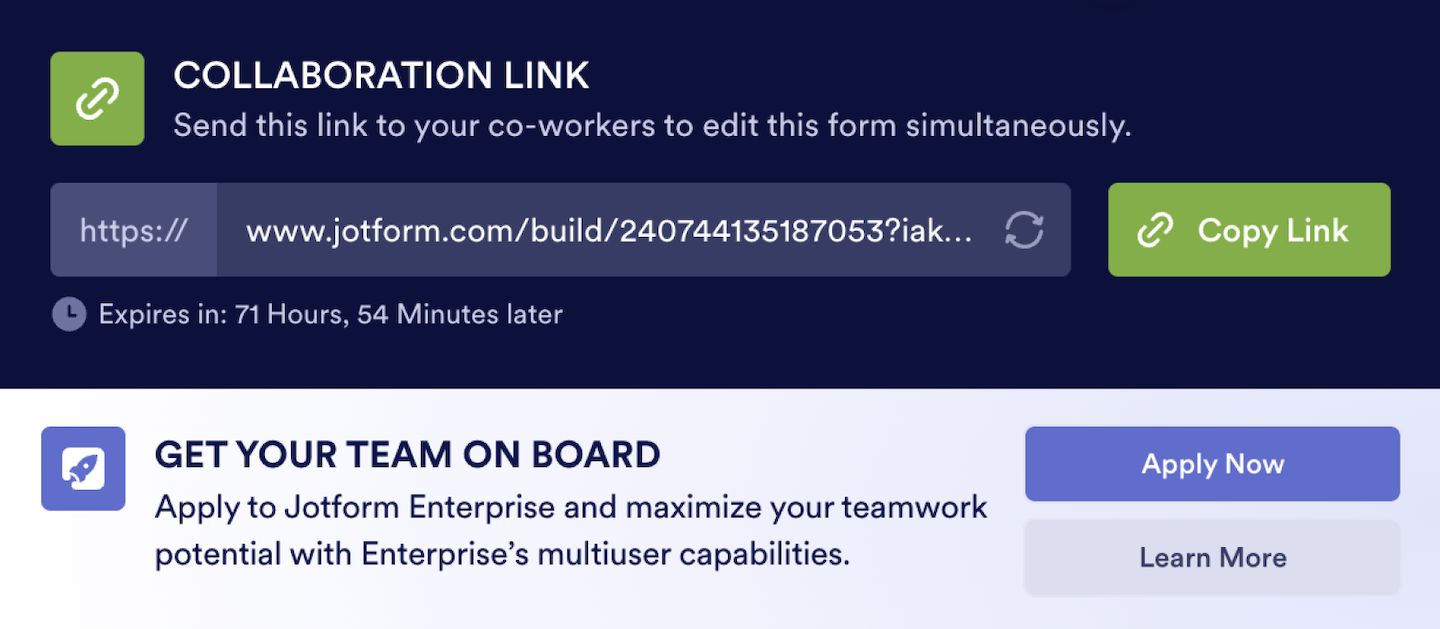
You can share a link to your form with collaborators so all of you can work simultaneously on the form. Collaborators don’t need to have a Jotform account, but Publish tab functions are disabled for guest collaborators. Each collaboration session will have a unique, shareable session URL that’s available for 72 hours.
Customize your form to match your brand
With Jotform, you have the added benefit of tailoring your forms to match the look and feel of your brand.
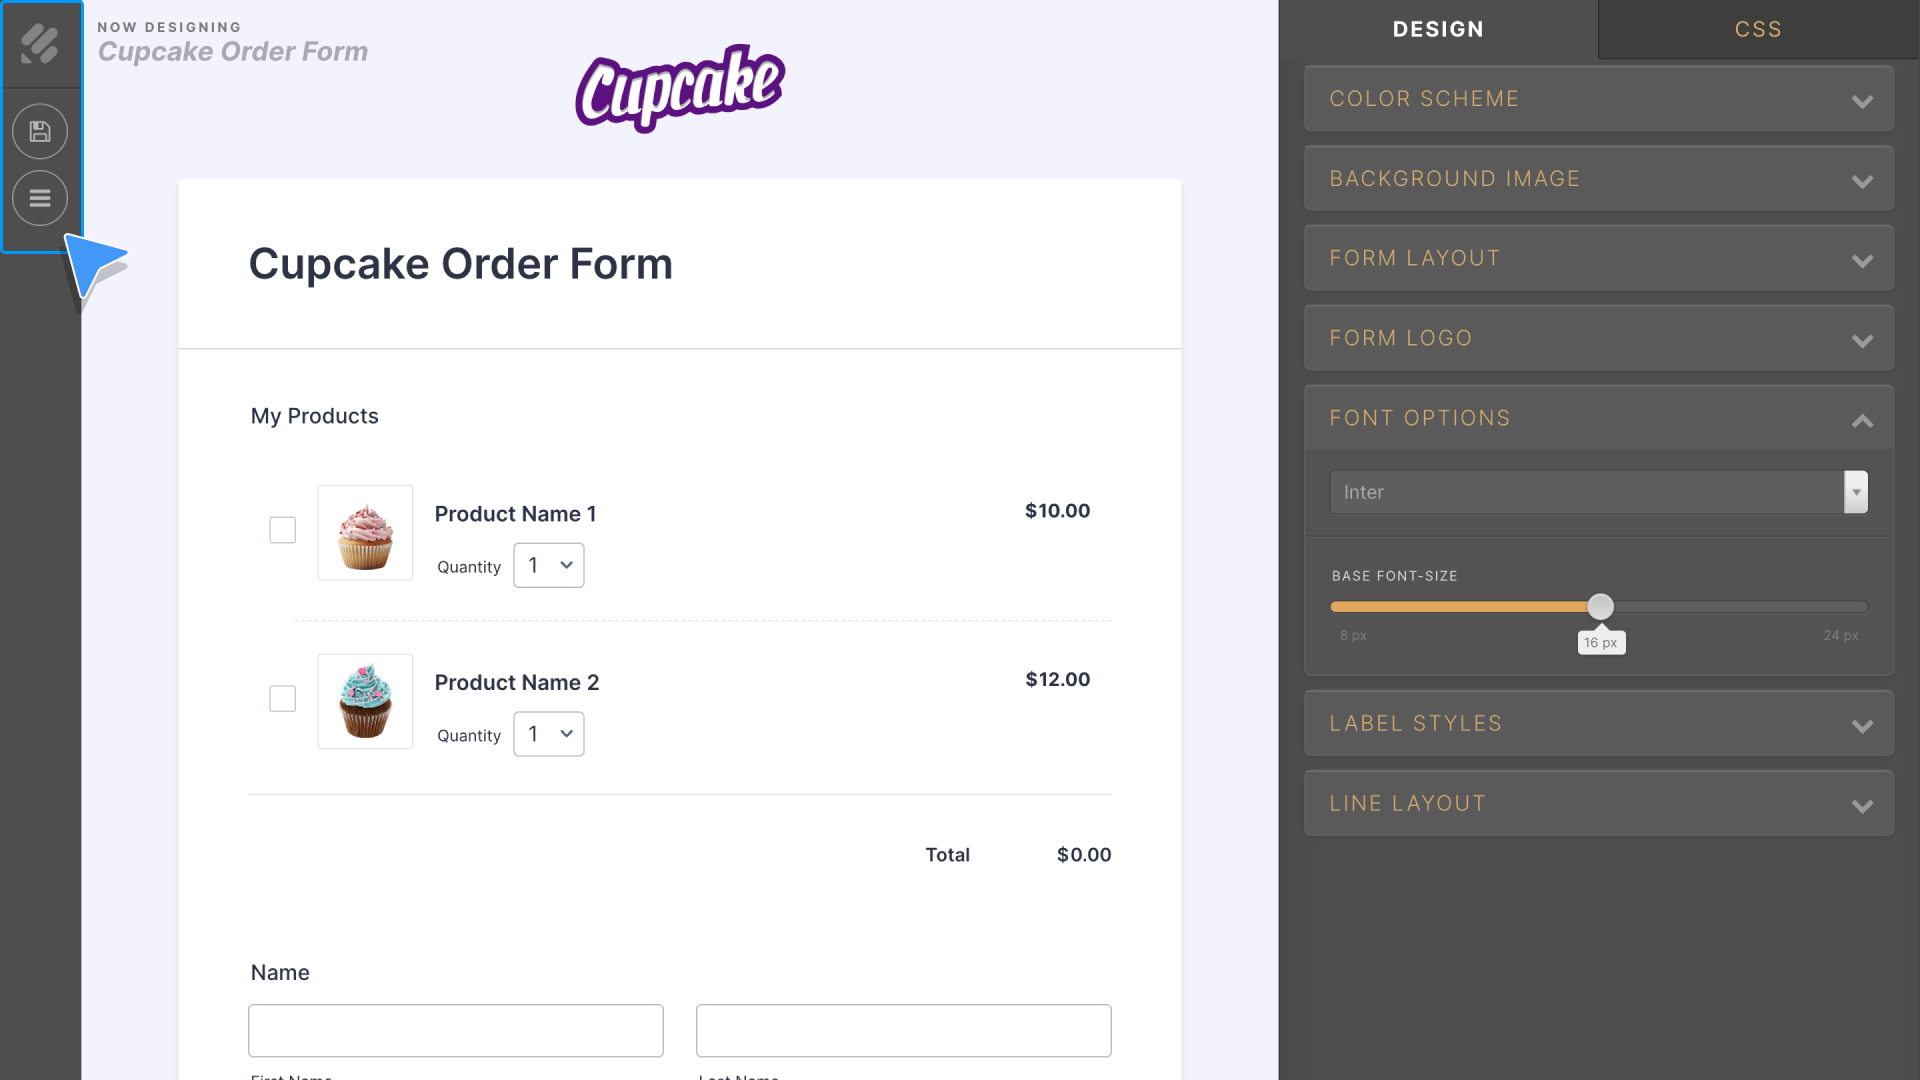
Click on the paint roller icon on the right side of the Form Builder to open the Form Designer. Once in the Form Designer, you can choose from a variety of preset color schemes, styles, and themes. Those who have a specific vision of how they want their form to look can personalize it with their own hex color codes, custom spacing, and even CSS.
Let’s explore all the ways you can customize your forms via the Form Designer.
Colors
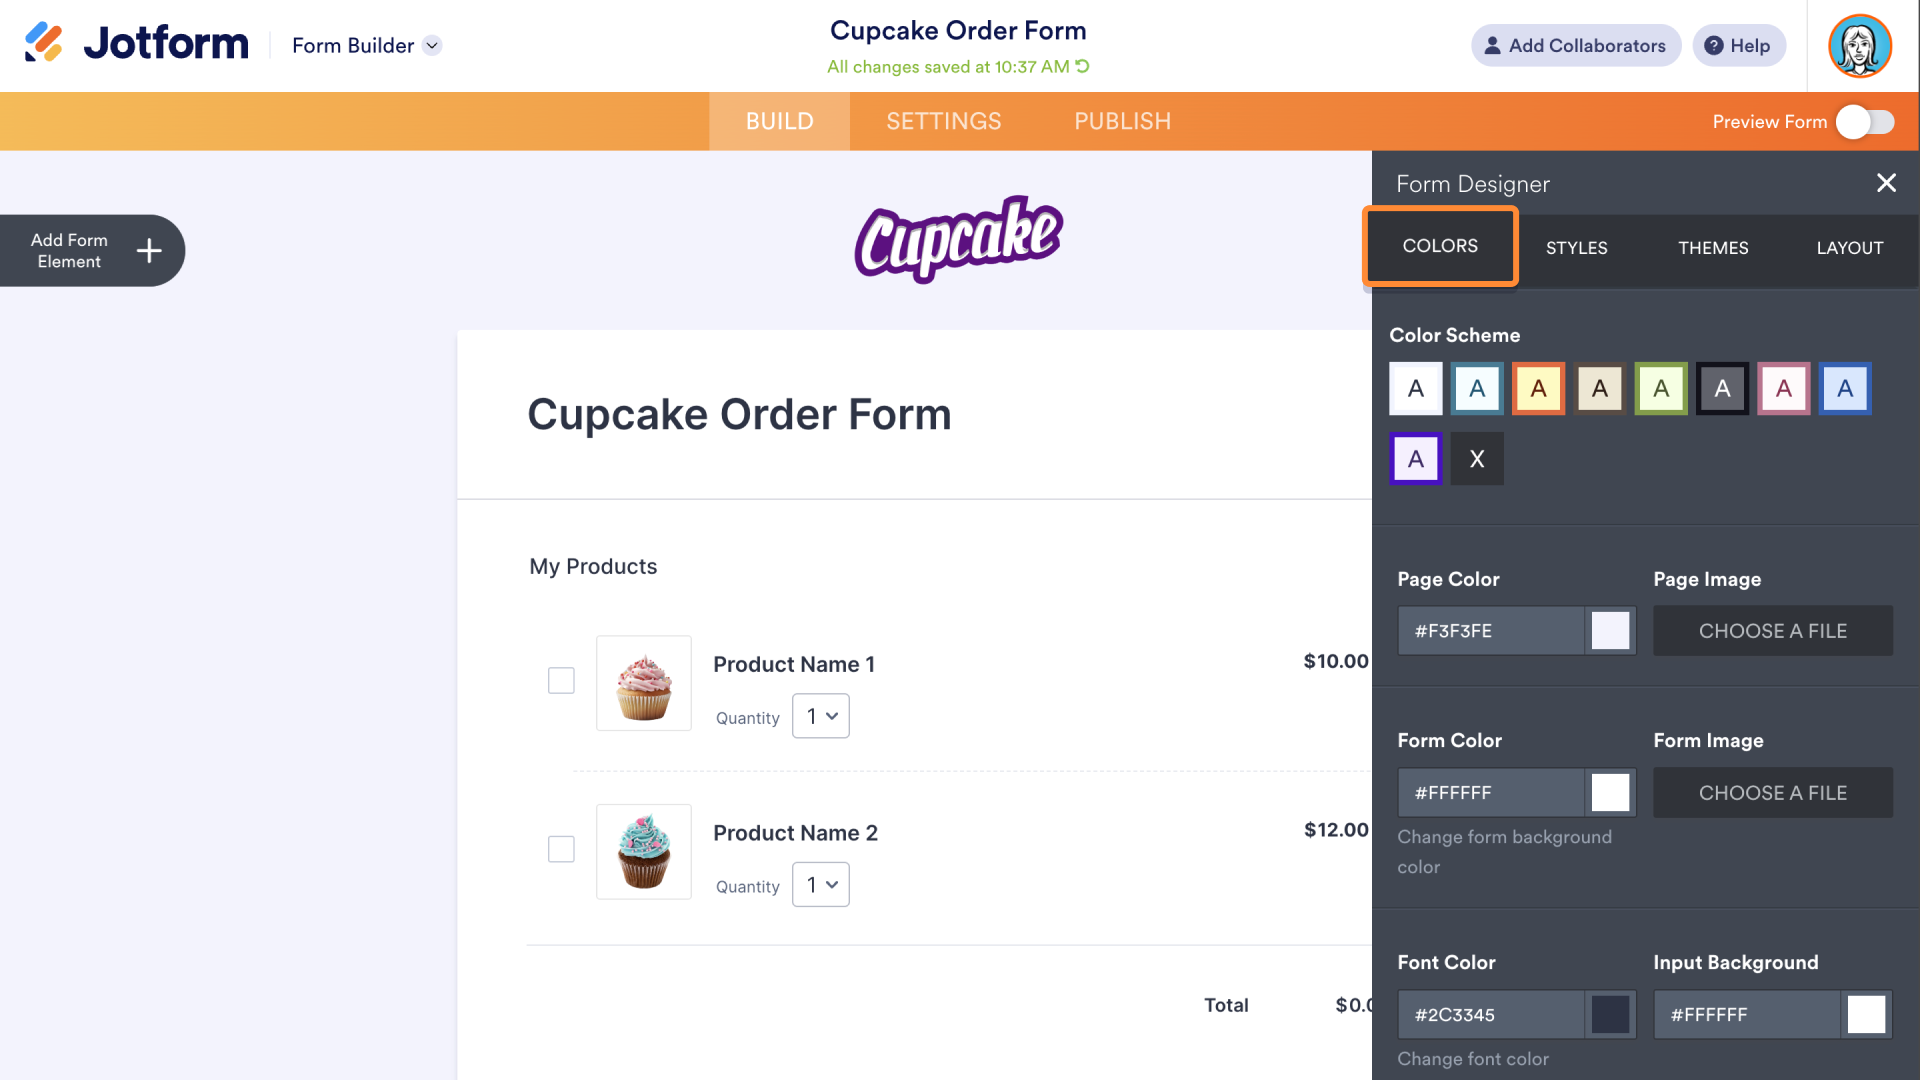
In the Colors tab, you can make customizations that are as simple or intricate as you like. Running the gamut from “princess pink” to “earthy green,” Jotform’s preset color schemes will fit in nicely with any organization’s brand. If preset color schemes aren’t your jam, all you have to do is copy and paste a hex color code into the page, form, and/or font color fields.
Form backgrounds aren’t limited to color schemes. If you’d like to use an image as your form’s background, you can do so by uploading files to the Page Image and Form Image fields from your computer, or by entering a URL.
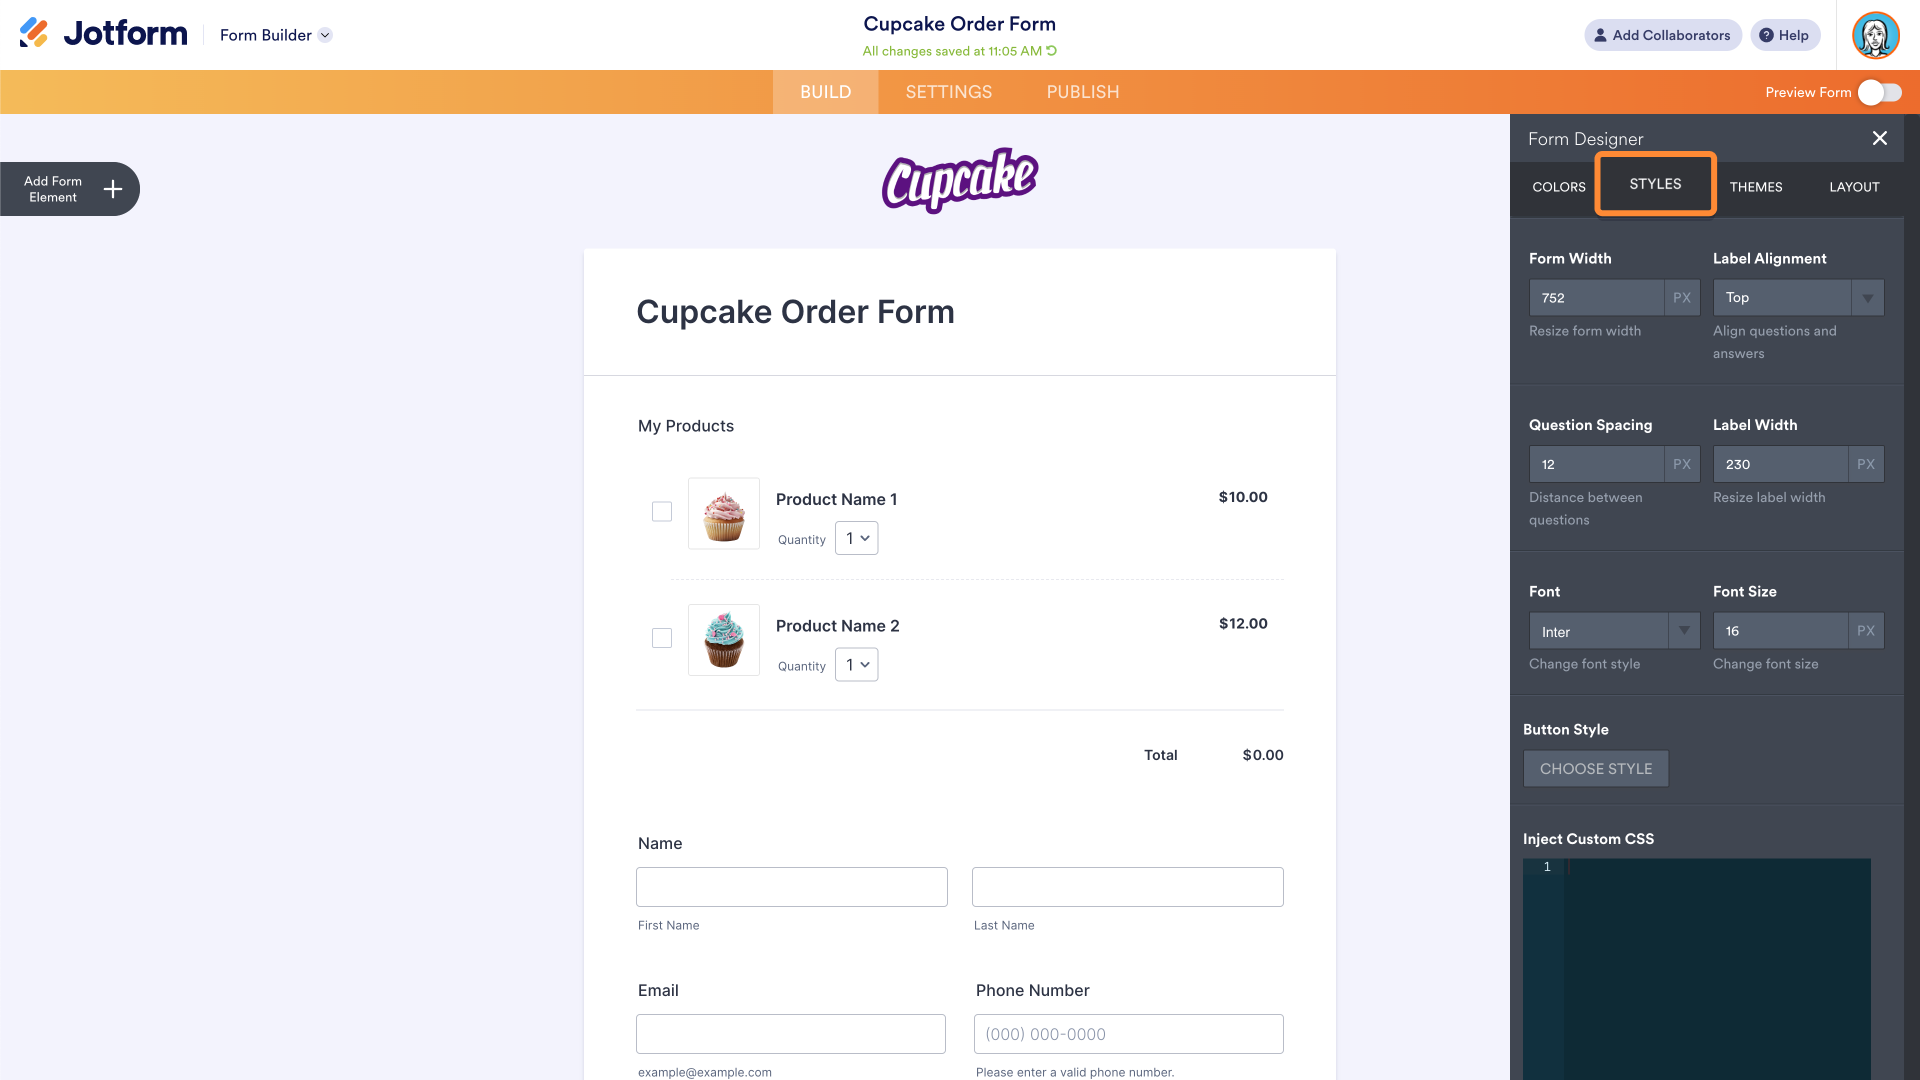
Styles
In the Styles tab, you can resize your form. You can also customize the font and font size, and change the style of your Submit button. According to HubSpot, red CTA buttons outperform green ones consistently. But when it comes to matching your brand’s look and feel, even scientific results should be taken with a grain of salt.
To adjust the style of your form, use the dropdown menus and arrow keys to manipulate the styles to your exact specifications.
You can inject custom CSS into your form using the Inject Custom CSS field at the bottom of the Styles menu. Also available is the Advanced Designer button, which we’ll get to in a moment.
Themes
You may not always have the time to personalize your form, but at minimum you want it to look professional. No worries! We have a library of preset themes for you to choose from. To instantly personalize your form, just click on the theme you want to use, and it will show up in the Form Builder.
In addition to a variety of free and paid themes, you have the option to save your favorite and previously used themes, so you can always come back to them.
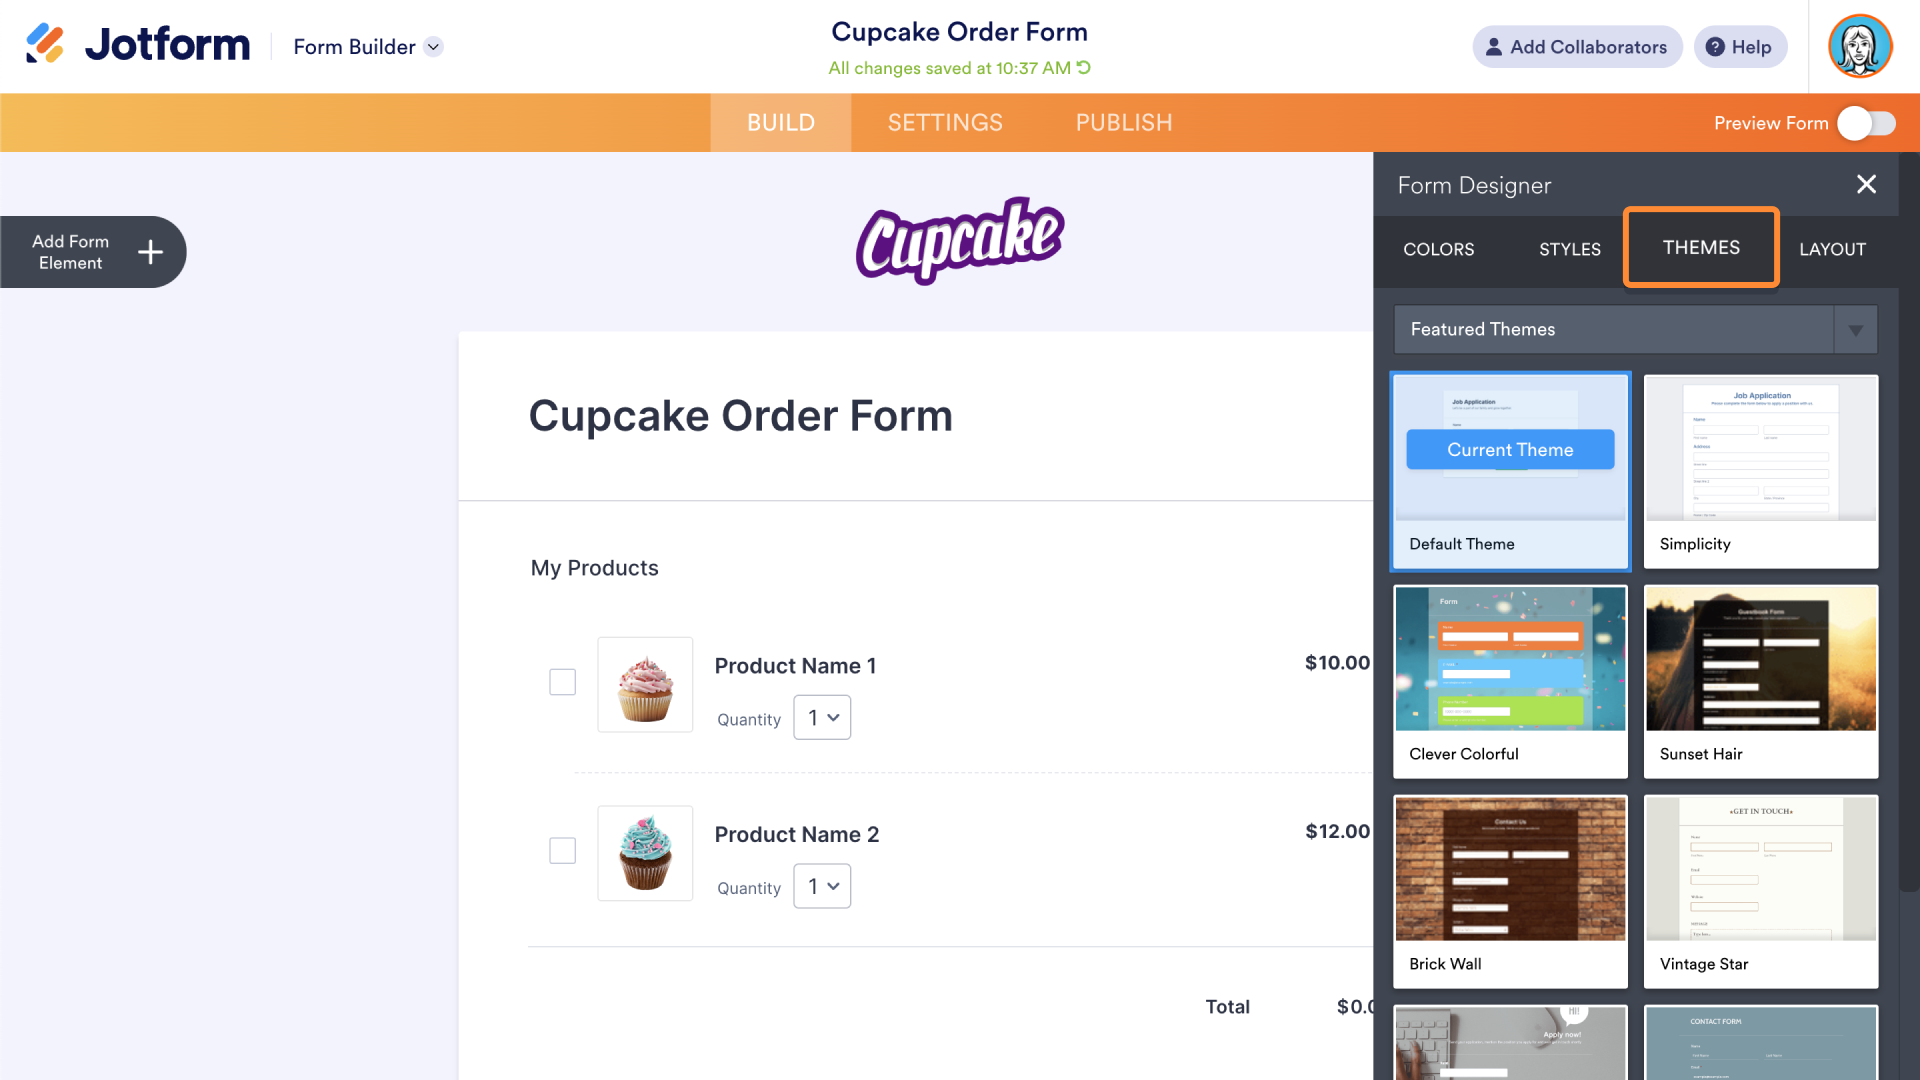
Featured themes are preloaded into the Form Designer. If you don’t see a theme that fits your game plan, there are more to choose from in the Form Themes Store.
Layout
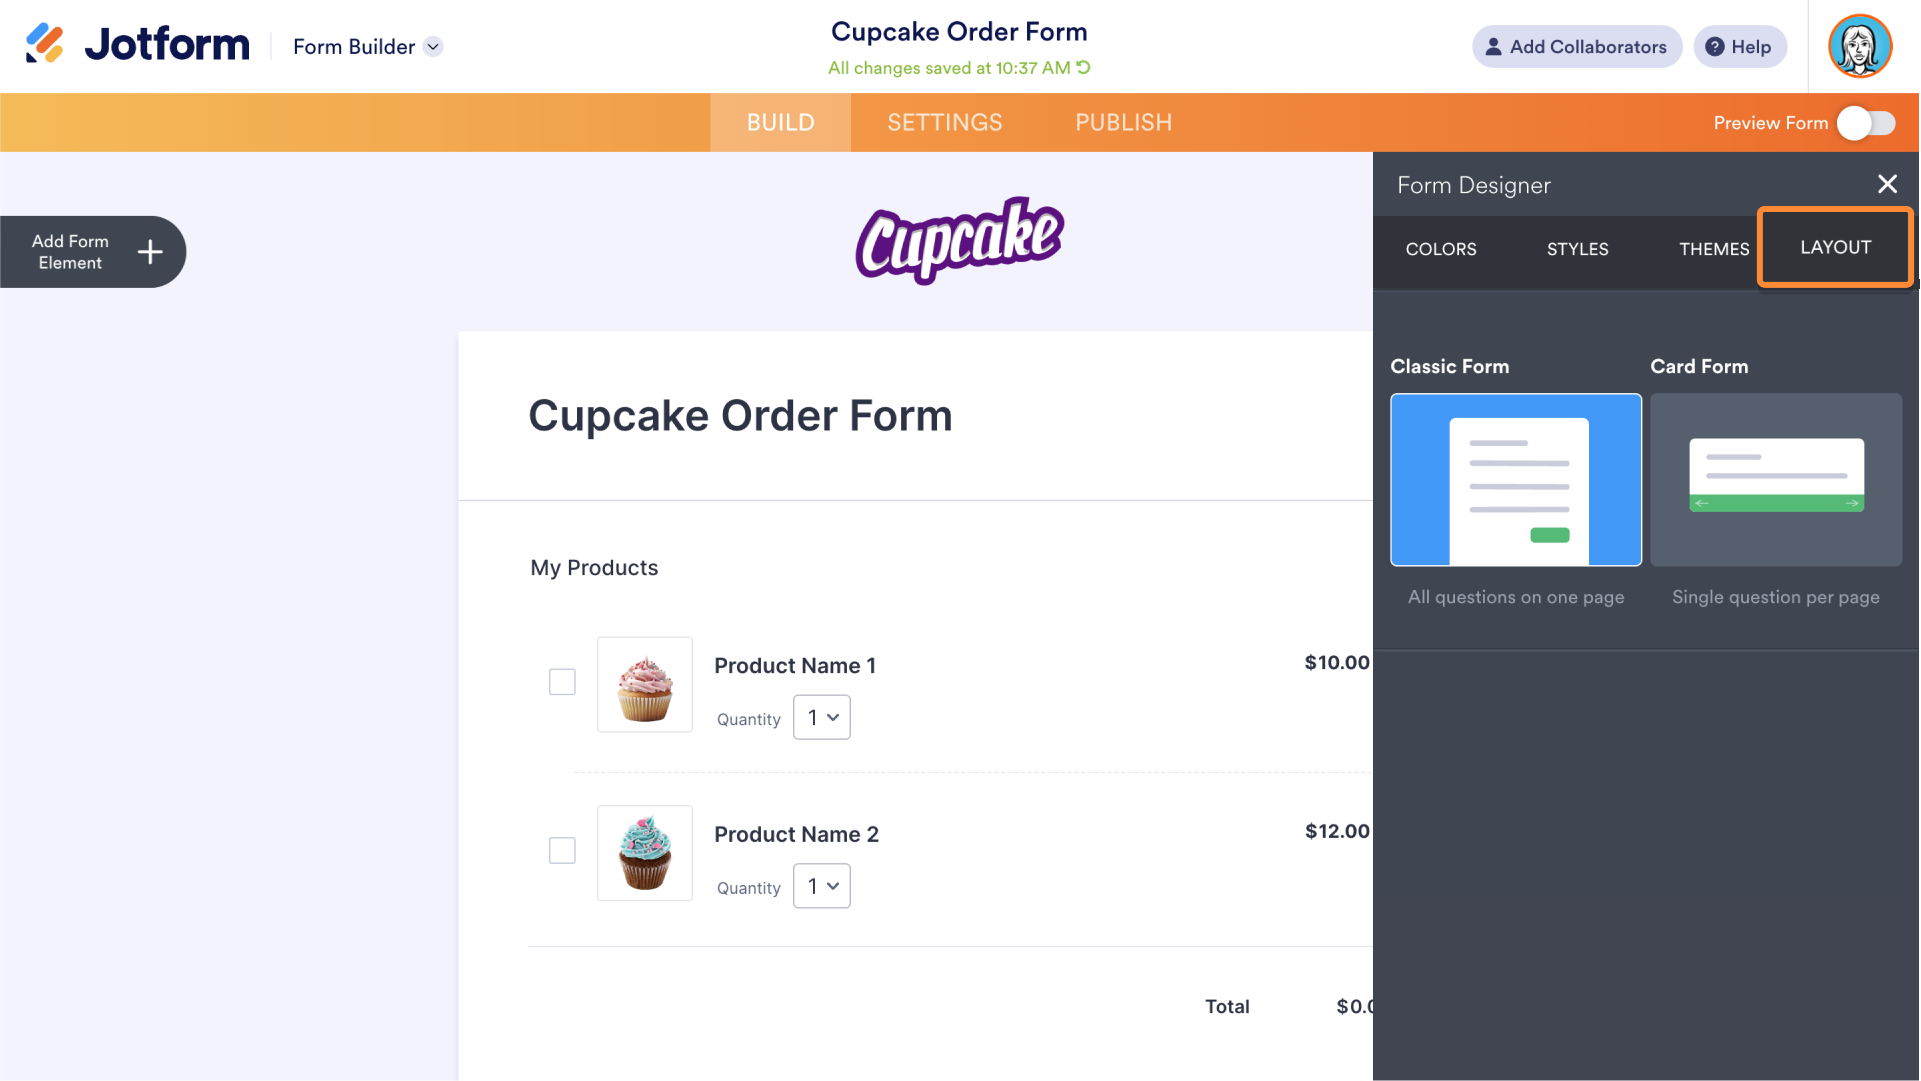
The Layout tab allows you to change the layout of your form. This is incredibly helpful when you’re unsure which layout is best for the kind of form or survey you’re sending.
Feel free to switch between Classic and Card Form layouts to see which one works for you.
Advanced Designer
In both the Colors and Styles tab is the Advanced Designer button. This tool allows you to customize your form down to the tiniest detail, including the way the lines look.
In the Color Scheme menu, you can customize your form’s colors with a unique background, a frame, and text. In the Form Layout menu, you can customize the layout down to the corners. But please note that the Advanced Designer will only work with the Classic Form layout, not the Card Form layout.
The Advanced Designer also allows you to add a cover page, change the label styles, and change the line layout.
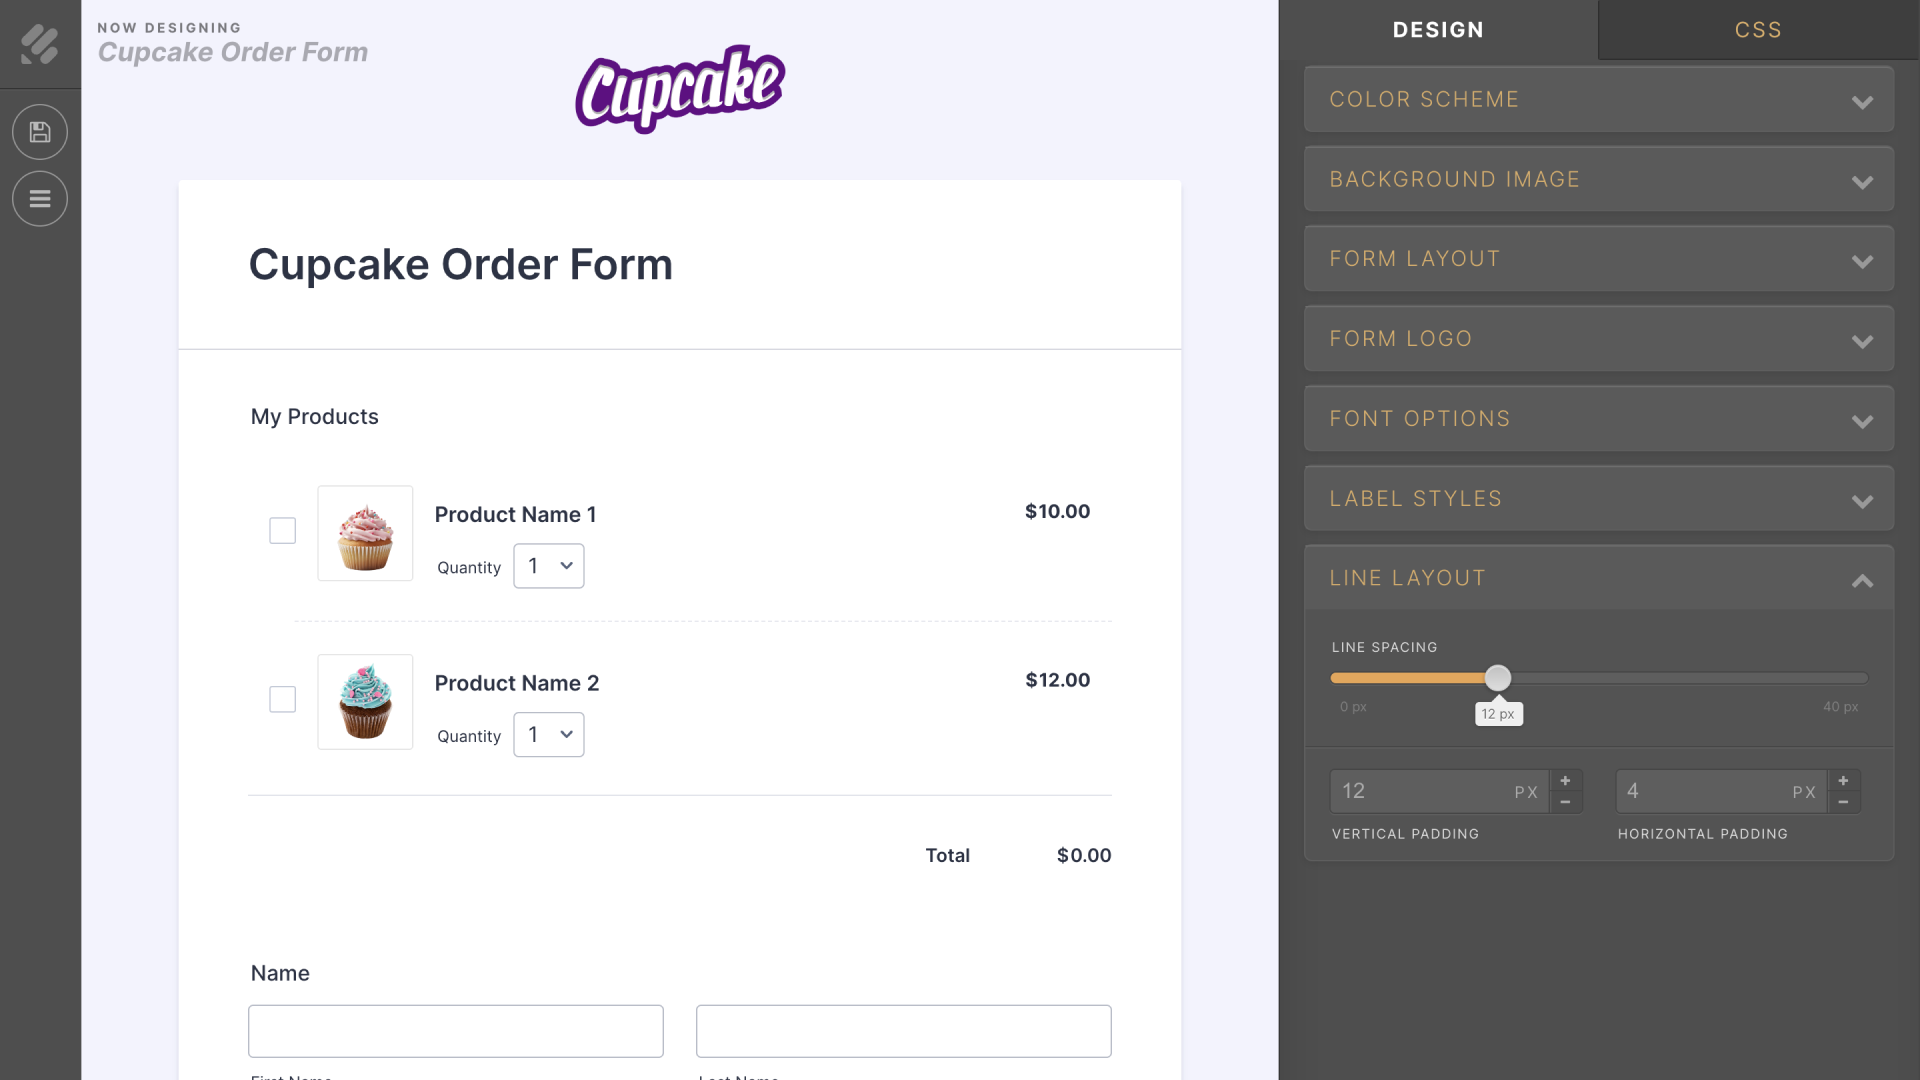
For those who need a bit more design flexibility, you can use CSS (the upper right tab) to code exactly how you’d like your document to be styled.
After you make changes to your design, click the floppy disk icon on the top left side of the page to save your progress. When your changes are saved, the button will change to an eye icon and act as a preview button. This makes it easy to see when your changes are saved.
Click the icon below the floppy disk icon to edit any of your other forms in the Advanced Designer. To return to the Form Builder, click the Jotform logo icon at the top.
Settings
Once you’ve built your form, you can explore all of the options in Jotform’s Form Settings.
The Settings menu allows you to manage many aspects of your form, such as
- Security
- The type, look, and frequency of notification emails
- The ability to hide and present questions (and pages) based on form answers
- Approval flows that trigger when your form is submitted
- E-signature automation for your form
- And more
Click on the Settings tab at the top of the page. On the left you’ll notice the different form options.

The Form Settings tab lets you customize everything from the name of your form to the security of responses. Initially, you’ll see the Title box (to create a custom form name), the Form Status field (which allows you to enable or disable your form), and a toggle to encrypt your form data.
Click the button labeled Show More Options to open a menu containing additional form settings. Some notable options include changing the language of your form, adding password protection, enabling translation capability, and allowing form fillers to edit their submissions or continue a form later.
If you’re a Jotform Enterprise user, you can also limit access to your form by enabling the single sign-on (SSO) login setting.
Pro Tip:
Toggle on the Preview Form button at the top right of your screen to see what your form will look like to your respondent. You can view your form in smartphone, tablet, and desktop orientation. Simply toggle the switch back to return to the Form Builder.
Emails
The Emails tab sets the stage for how you’ll manage communications related to your form submissions.
By default, you (and others, if you choose) will automatically receive a notification email when someone fills out your form. Likewise, your respondent will receive an automatic response when they submit their answers to the form (provided you asked for their email address on the form).
Your email communications are fully customizable, so you can change how they look as well as indicate how and when you want to send them.
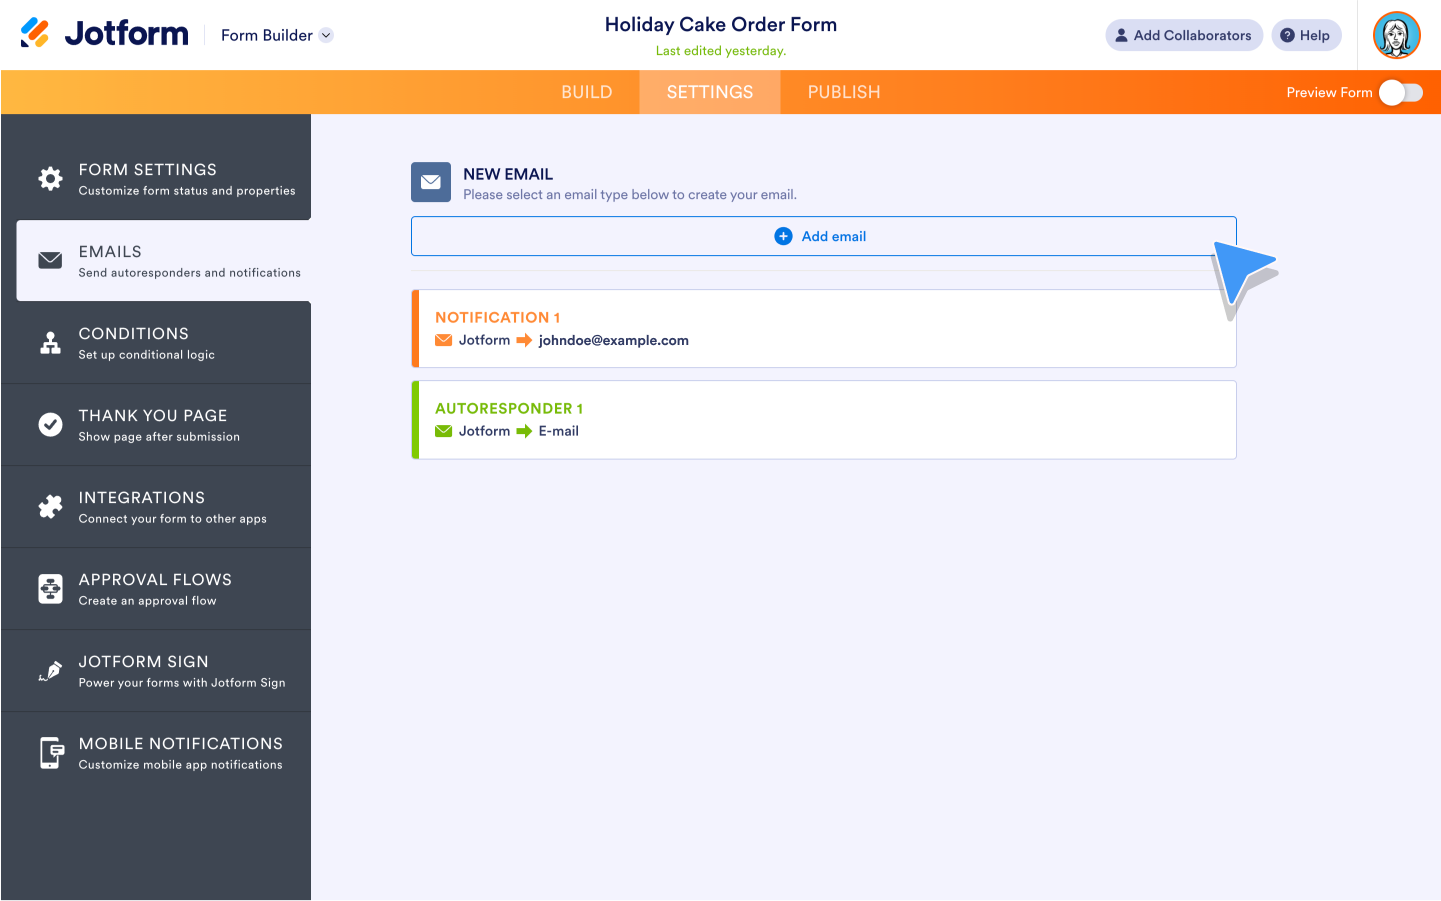
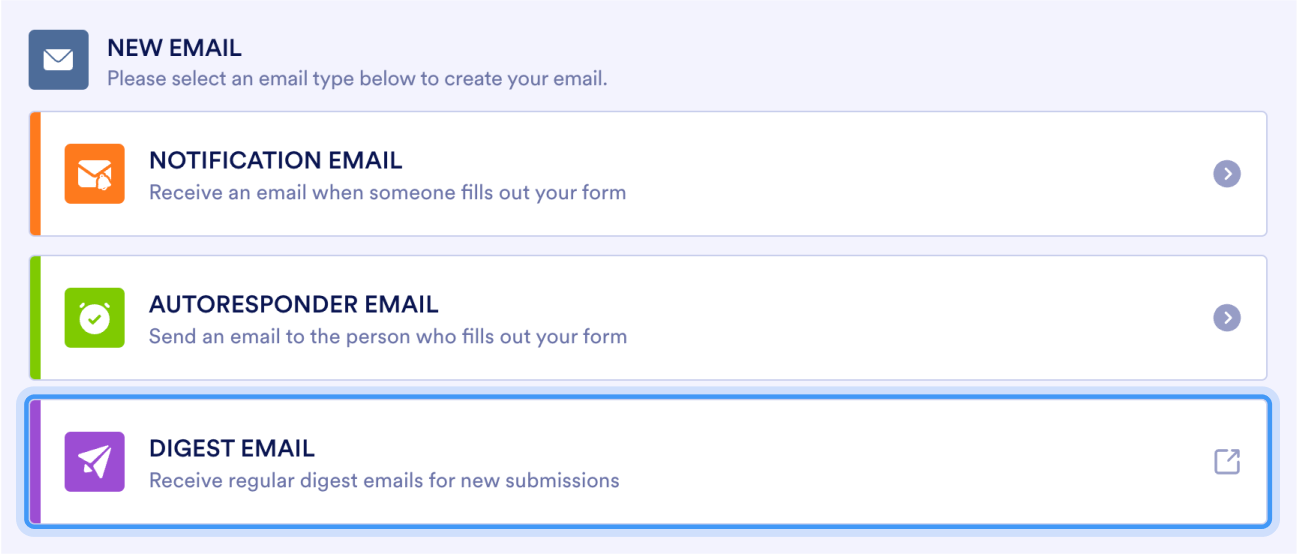
You can also add more emails, or delete some, for your form. For instance, you can create a Digest Email, which will send you summarized information covering all of your submissions at whatever interval works best for you.
Conditions
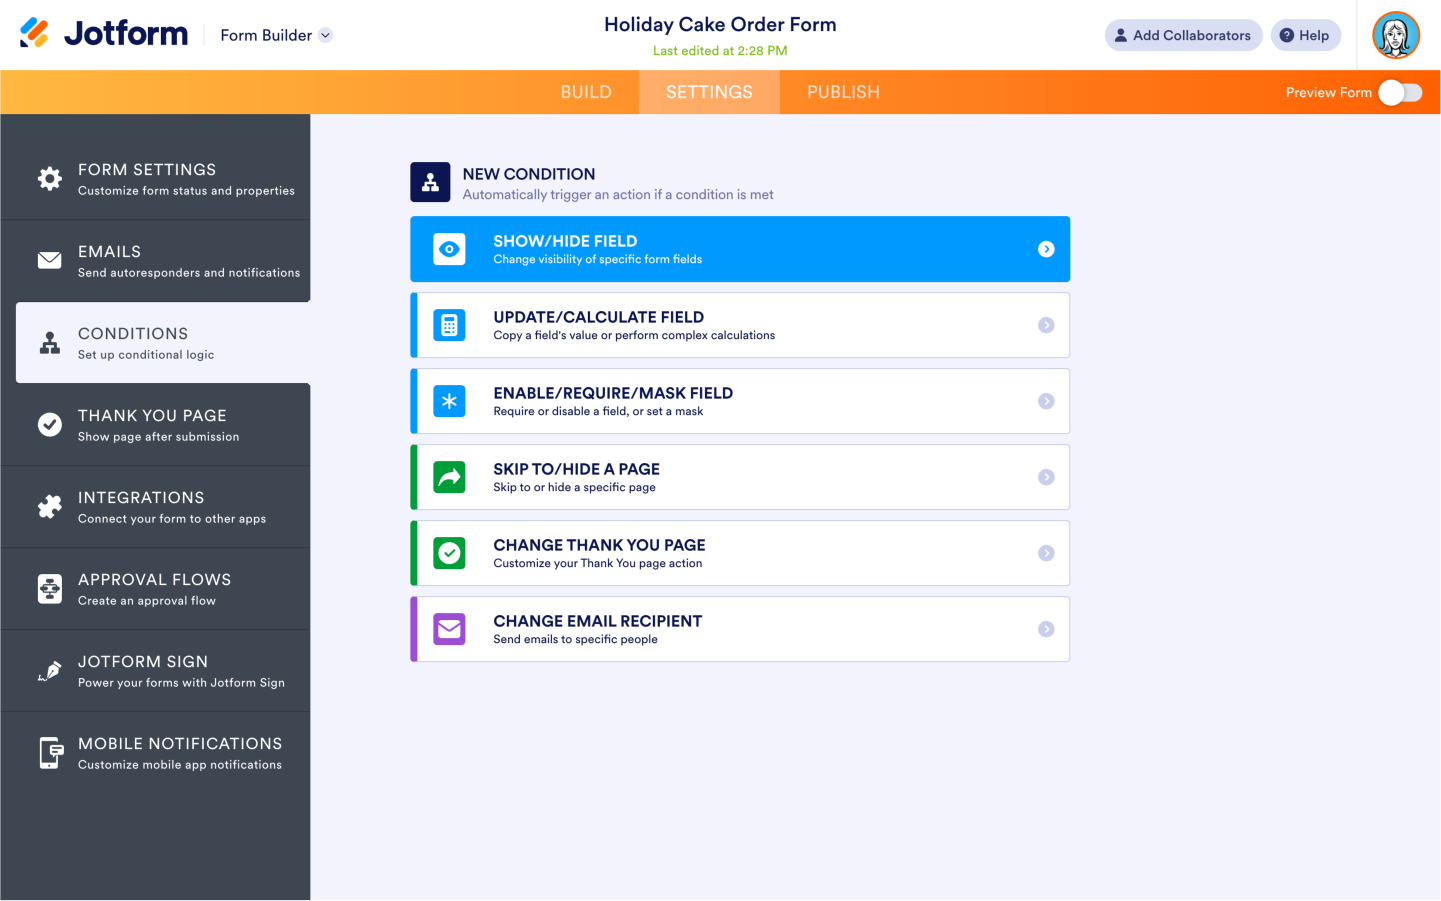
Conditions are a collection of different if/then logic options that will automatically trigger an action based on the answers of your form filler (in other words, if a certain form condition is met).
For example, let’s say you have a cake order form with a checkbox for additional decoration options. If a customer checks the box, the Show/Hide field condition will show fields such as topping, fondant, painting, etc. If a customer doesn’t check it, the fields won’t appear.
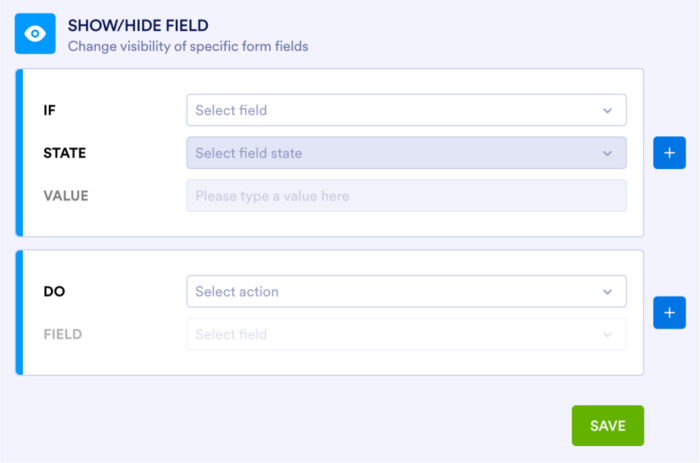
Really robust conditional logic is a must-have for form owners who require more nimble question-and-answer workflows. At Jotform we pride ourselves on a full featured and user-friendly set of conditions. Your form will be more dynamic because it smartly handles certain responses with specific rules based on your needs.
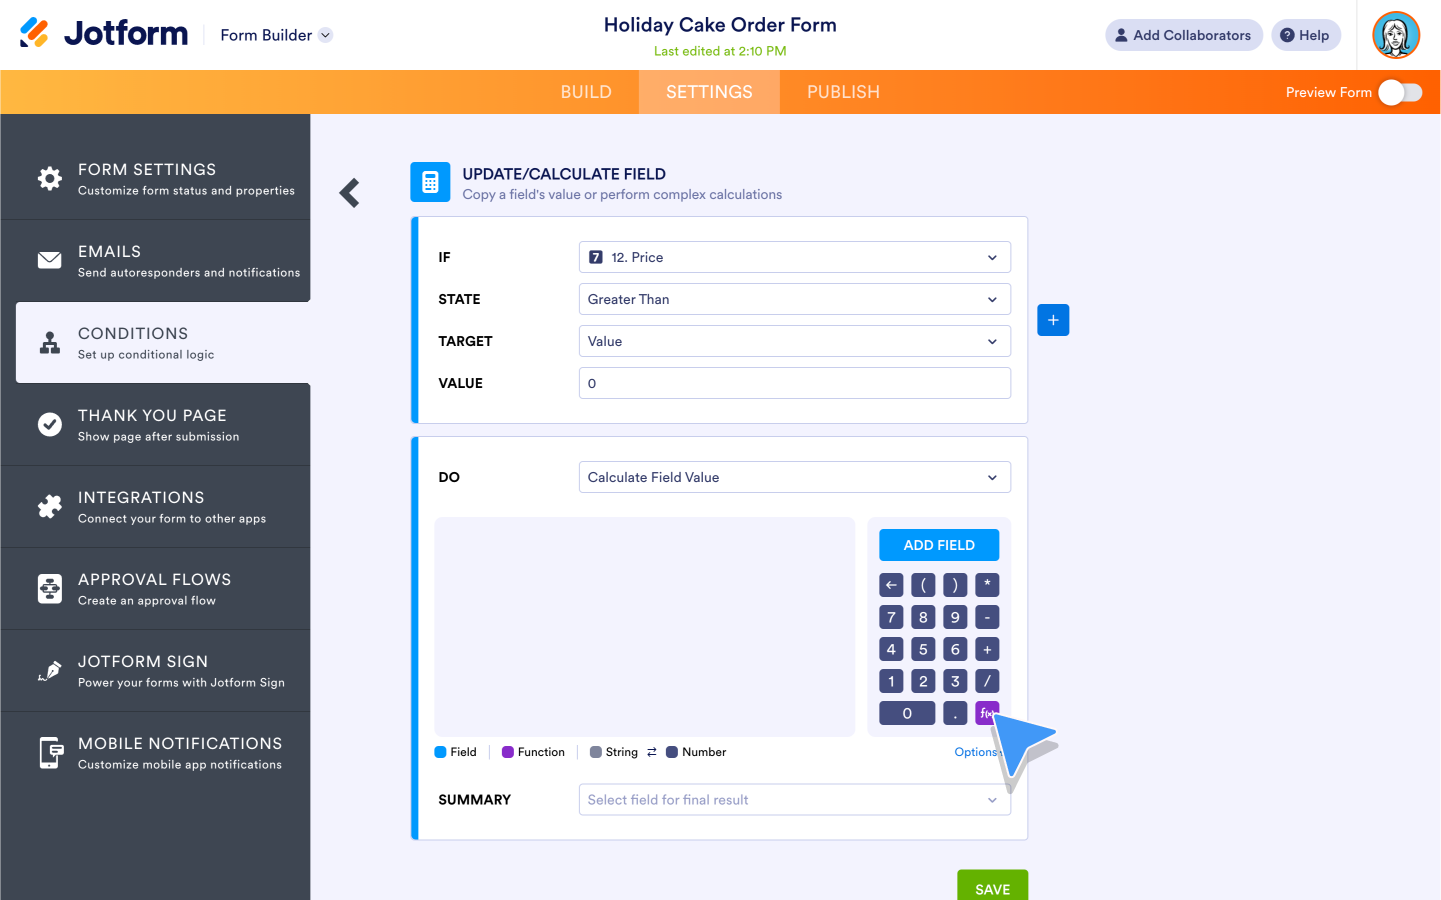
We focus on making our conditional logic user interface intuitive so you can quickly identify the fields and functions you need to get the job done.
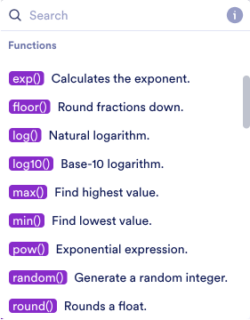
For example, take the Update/Calculate field condition that’s used to perform complex calculations. You can select a dedicated button for mathematical formulas, making it easy to locate the particular type of function or math properties you’re looking for.
Thank You Page
It may not seem like it, but your form’s Thank You page is important for two big reasons:
- It allows you to thank your recipients for the time they’ve spent giving you the information you’re asking for (especially if you want them to do it again in the future).
- Including follow-up information in your Thank You page gives you another opportunity to build trust and further engage your users.
To add a Thank You page to your form, click on the Thank You Page tab in the left menu.
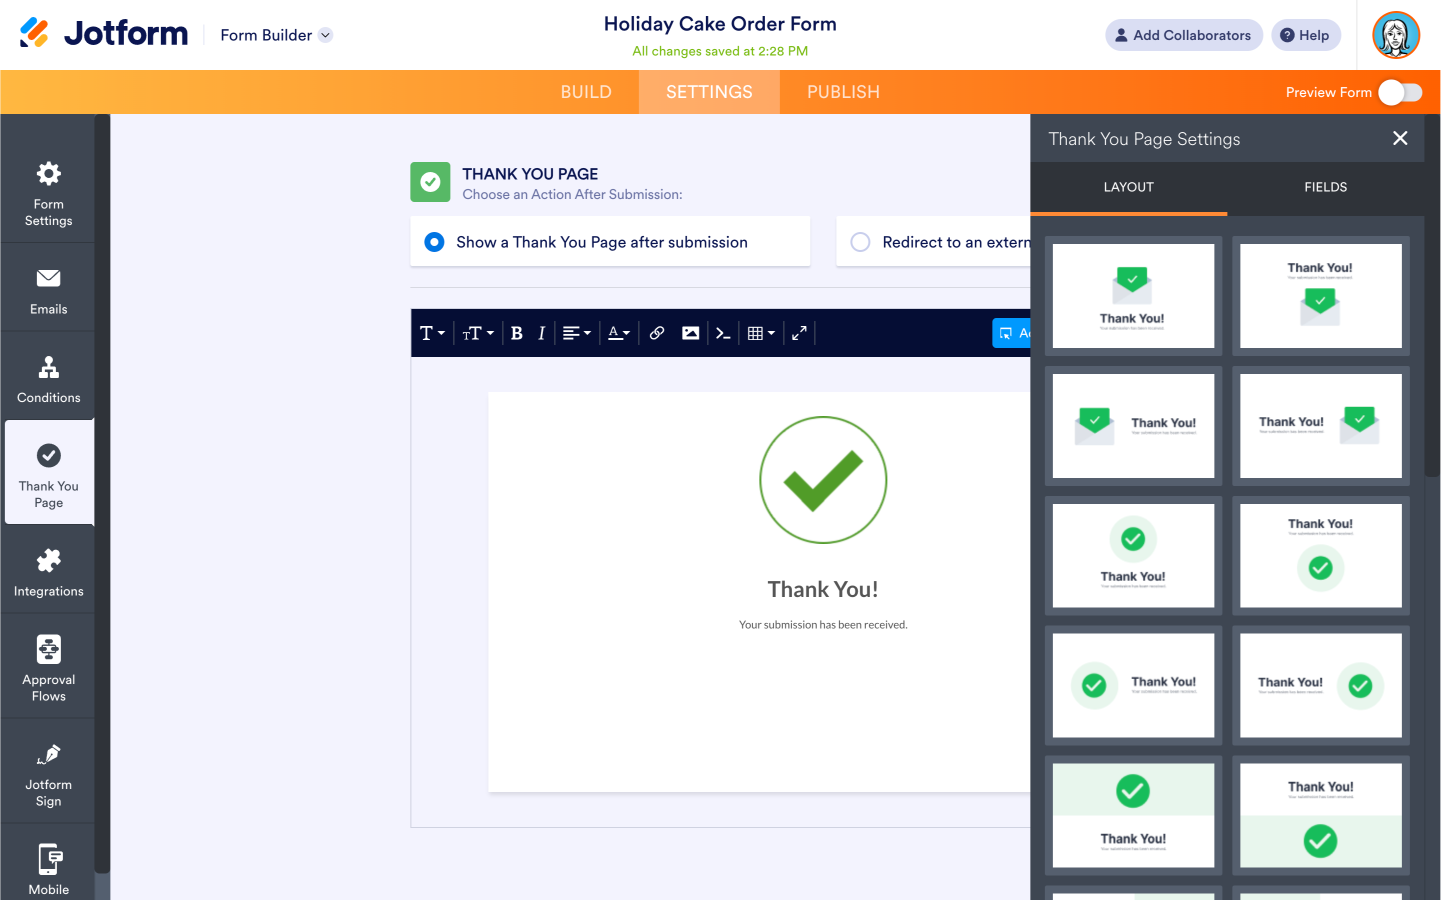
You can choose from several different layouts to find a design that matches your brand’s aesthetic.
You can also show any fields that appear in the form on the Thank You page, which is helpful for the respondent’s reference, or in conjunction with an action you’d like them to take (such as filling out a related form or downloading a PDF).
The Thank You Page tab helps you create a page that will engage your respondents by giving them even more information about your brand.
Integrations
We’ve learned from extensive user interviews and case studies that the ability to connect to a range of third-party solutions is often the deciding factor for folks choosing a form solution.
You’ll be happy to know that Jotform offers best-in-class software connectivity with more than 100 integrations.
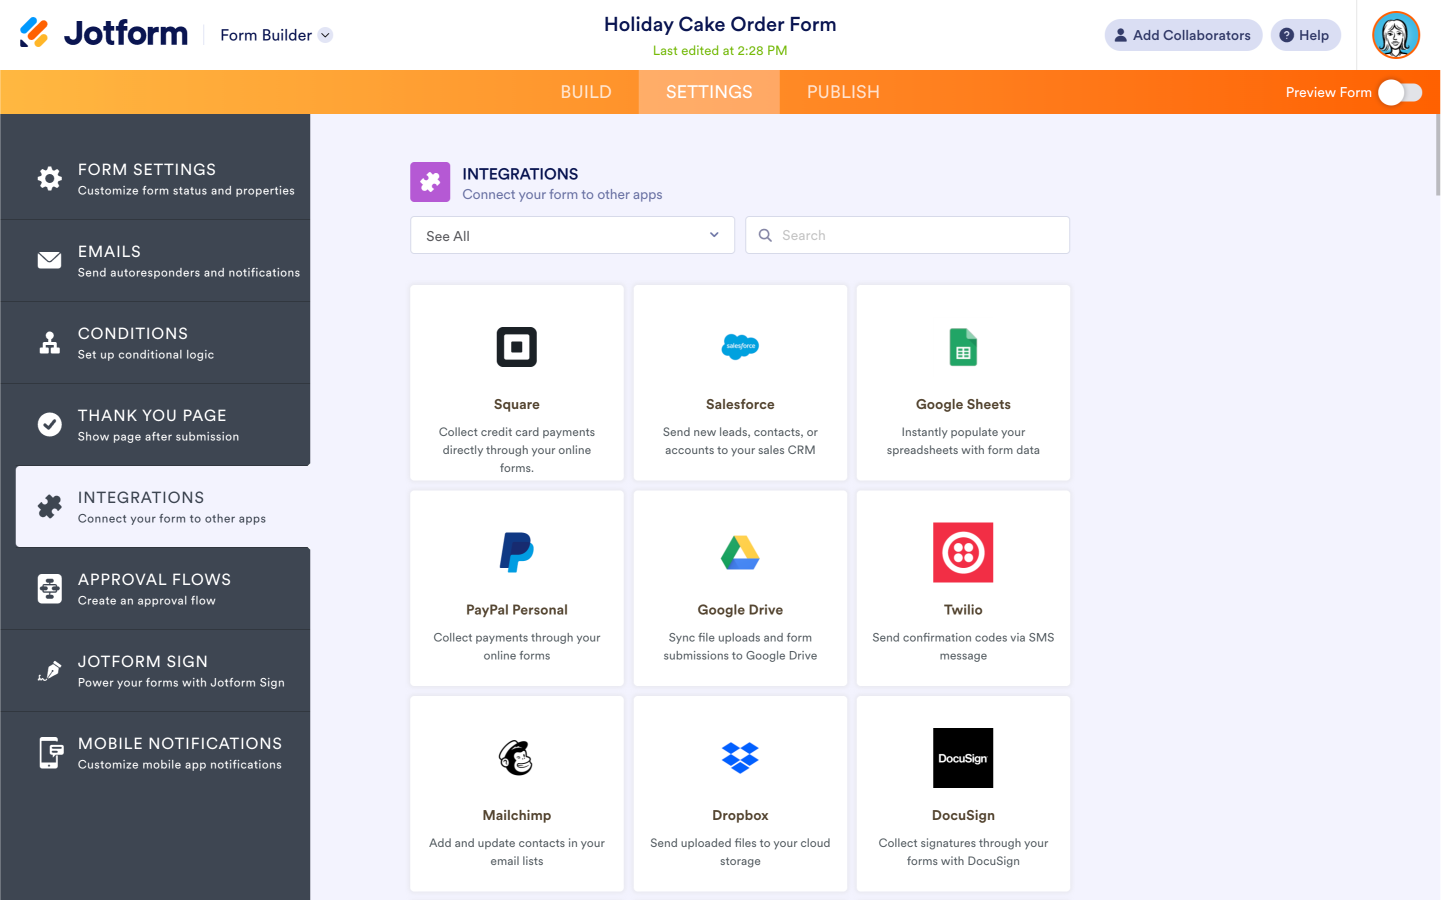
Simply click on the Integrations tab to see your options. You can narrow your choices by category: be it payment, CRM, document sharing, or more. You can also search for an integration.
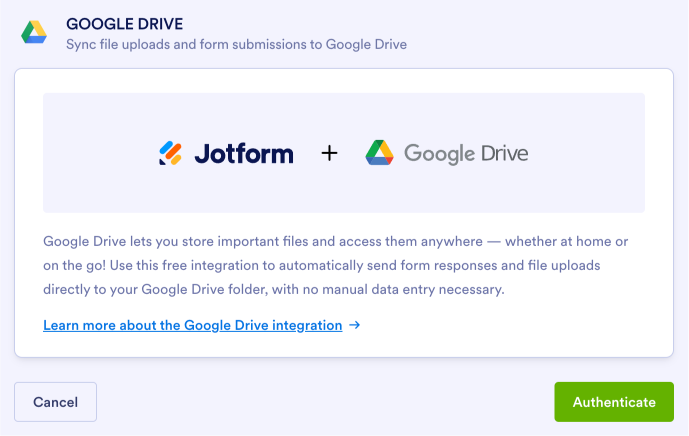
When you find the integration you need, click on the tile and follow the steps to authenticate your account. Your form will then be connected, and each submission will automatically port to the specified solution.
Approval Flows
Creating an Approval workflow for your online form makes the process of gaining digital confirmations and sign-offs easy. All your collaborators have to do is click a mouse.
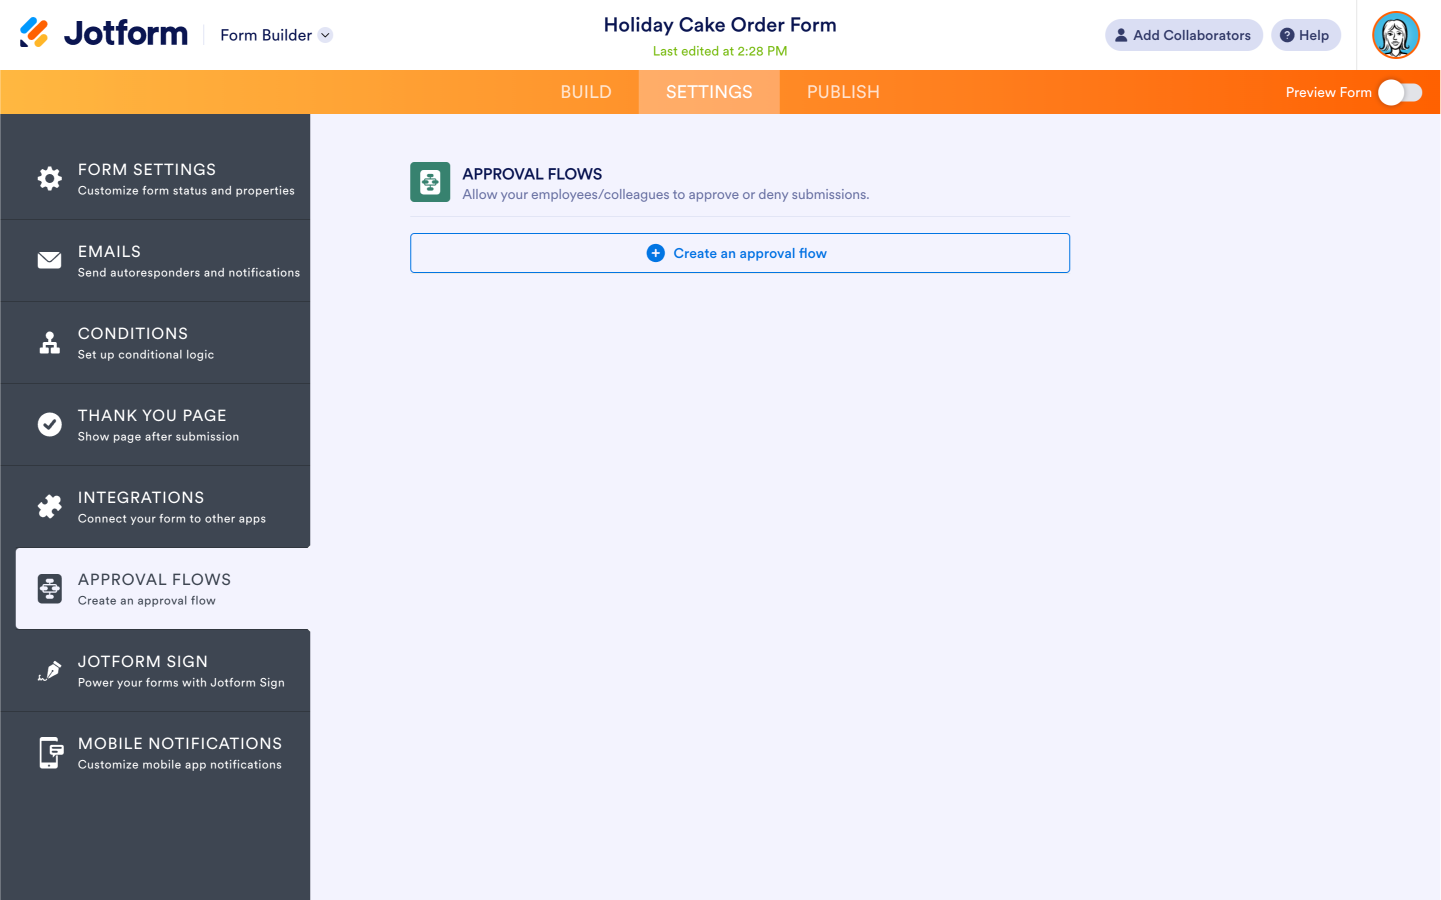
To start your flow, click the Create an approval flow button. A new Jotform Approvals window will open, allowing you to create a tailored workflow based on your needs. Whether that means having multiple or group approvals, creating conditional rules for approval or denial, or including signatures along the way, you’ll have what you need to get the job done.
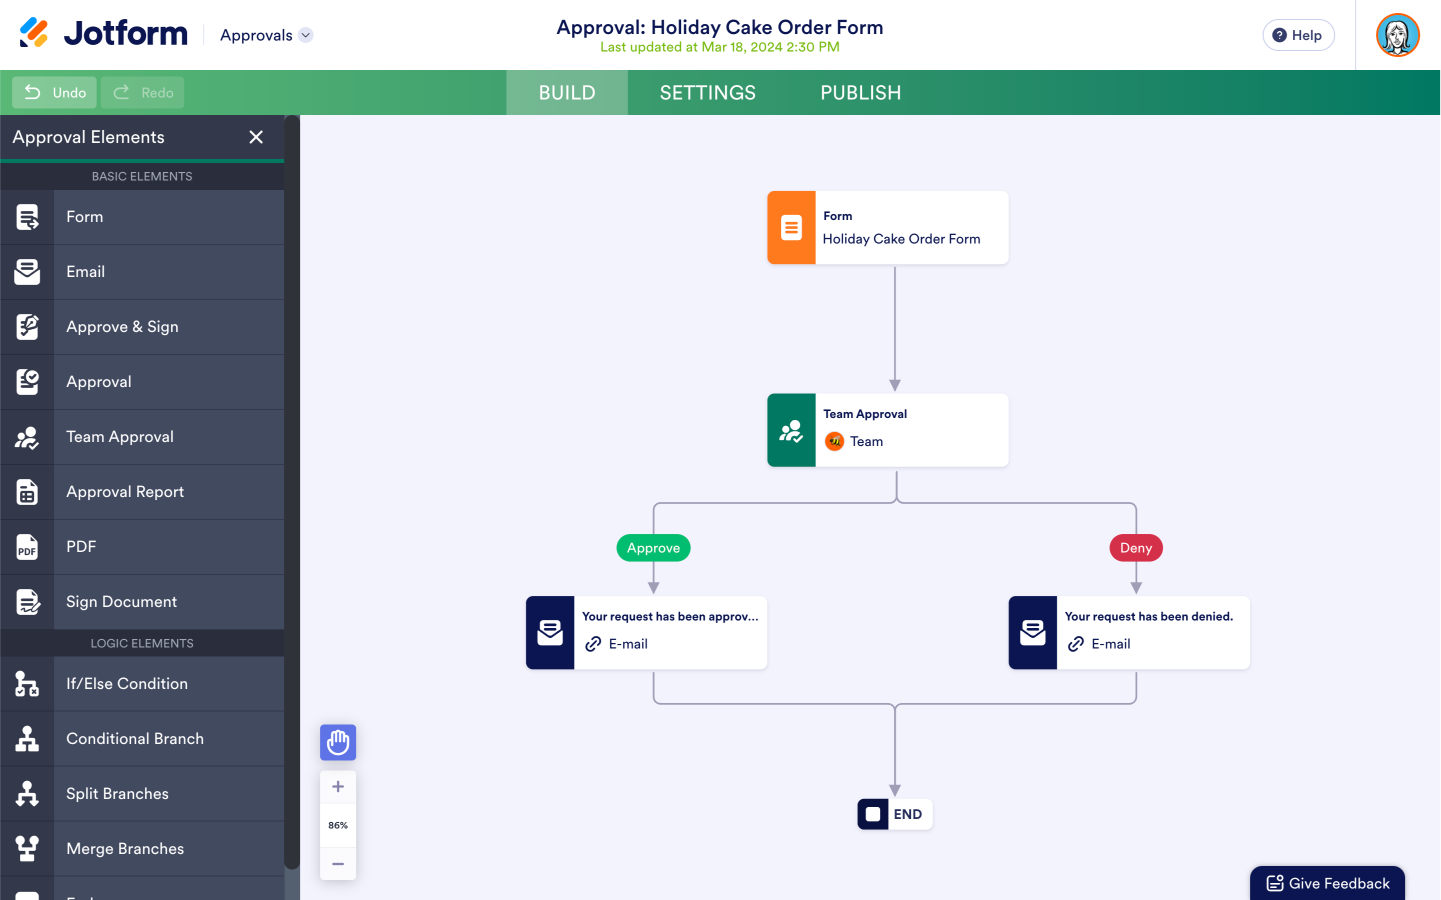
You can also start approval flows from scratch for a truly customized experience. Or you can use one of Jotform’s 100-plus approval templates. One is bound to fit your current process.
Approval templates come with an associated form template, so you don’t have to worry about building the form or the approval flow.
Jotform Sign
If your form needs an e-signature field, look no further than Jotform Sign, an easy-to-use e-signature solution that lets you create documents and collect signatures for them. With Jotform Sign, you can digitize your paper-based signature processes — saving time and money. Just add the Signature element to your form and enable Jotform Sign automation.
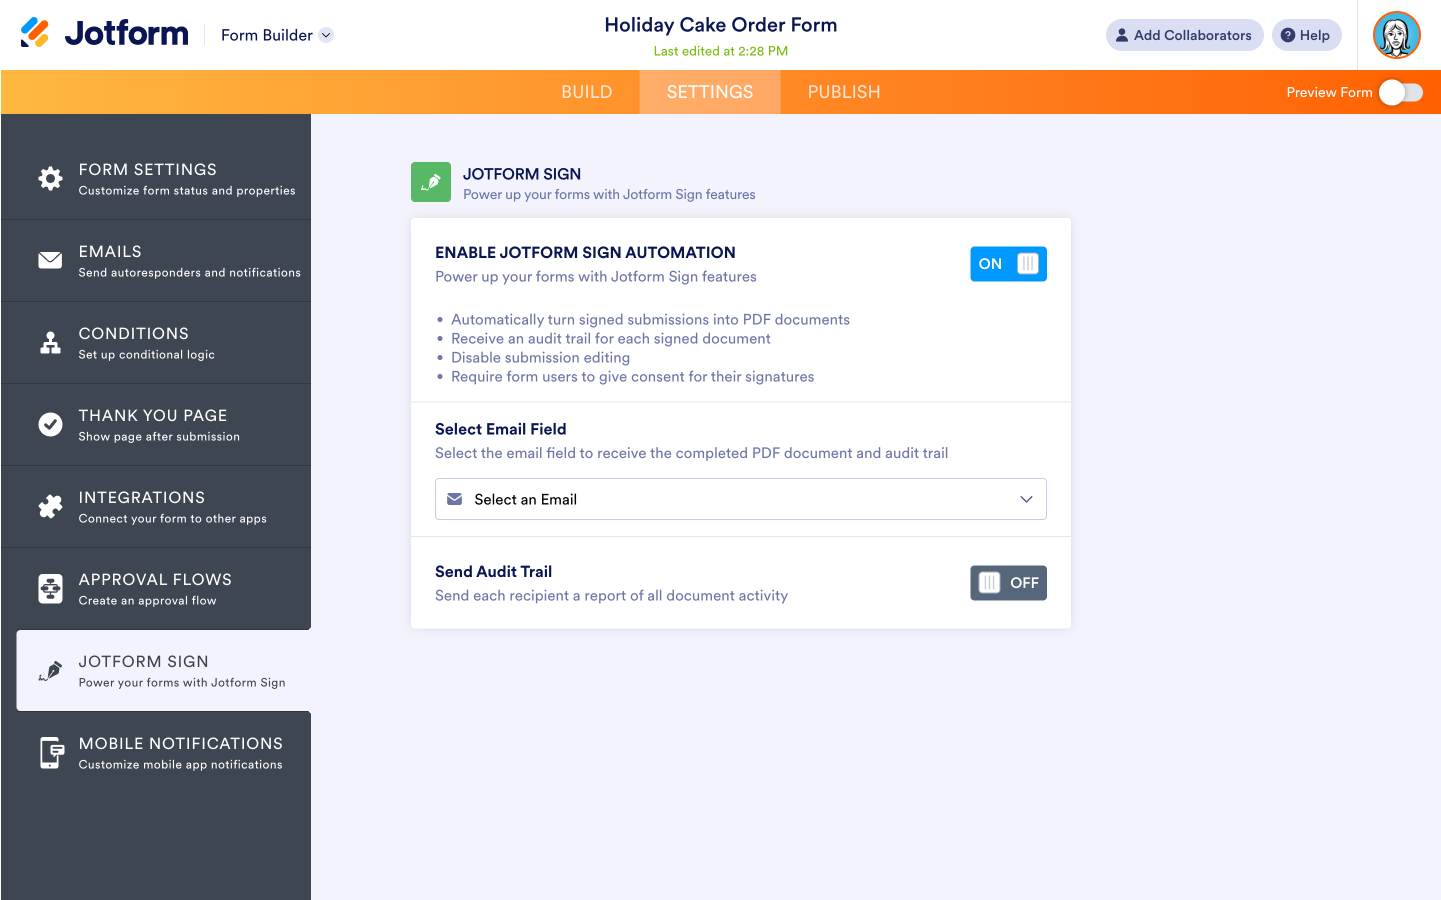
Jotform Sign automation automatically converts your submitted forms into PDF documents.
You’ll also have access to a digital audit trail for each signed document, and you’ll rest easy knowing every form user has to give consent for their signatures.
Mobile Notifications
Need to stay up to speed with your forms on the go? Just download the Jotform Mobile Forms app, and you can get notified on your smartphone whenever there’s a new form submission.
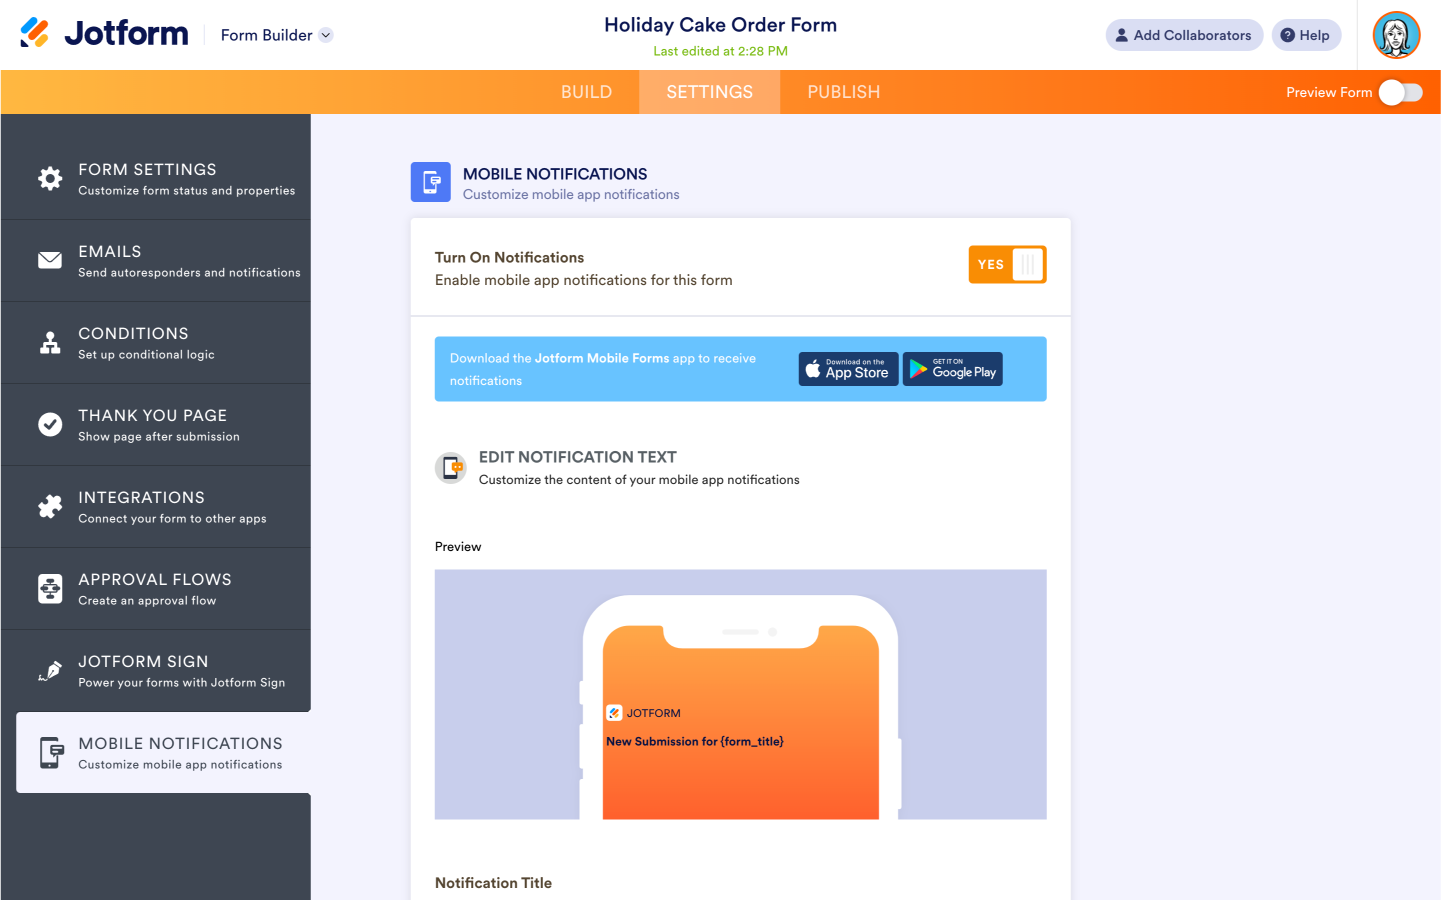
For your convenience, you can customize the form field content you want to include in the body of your notification as well.
Jotform: Your Mobile Form Builder
Not only can users fill out your forms on their mobile devices, but you can access the Form Builder on your smartphone when you download the Jotform Mobile Forms app.
The same Form Builder you work with on your desktop can be accessed from the convenience of your phone. You can edit your existing forms within the Build, Settings, and Publish tabs.
Plus, you can create new forms, view form submissions, and set up kiosk mode, which locks your form onto the screen of your phone or tablet, turning your mobile device into a public survey or registration station.

The automations above are just a sample of the form actions you can take within the Settings section of the Form Builder.
For a deeper dive into the functionality of each of your form settings, including tips and tricks for maximizing your productivity, be sure to check out "Jotform for Beginners, Vol. 1 & 2".
Publish
When you’re ready to start sending your form to recipients, you’ll enjoy the flexibility you have in Jotform’s Publish tab.
Whether you’re sharing your form with a link or QR code, embedding it into a site with an iFrame, or publishing it through WordPress, you’re covered.
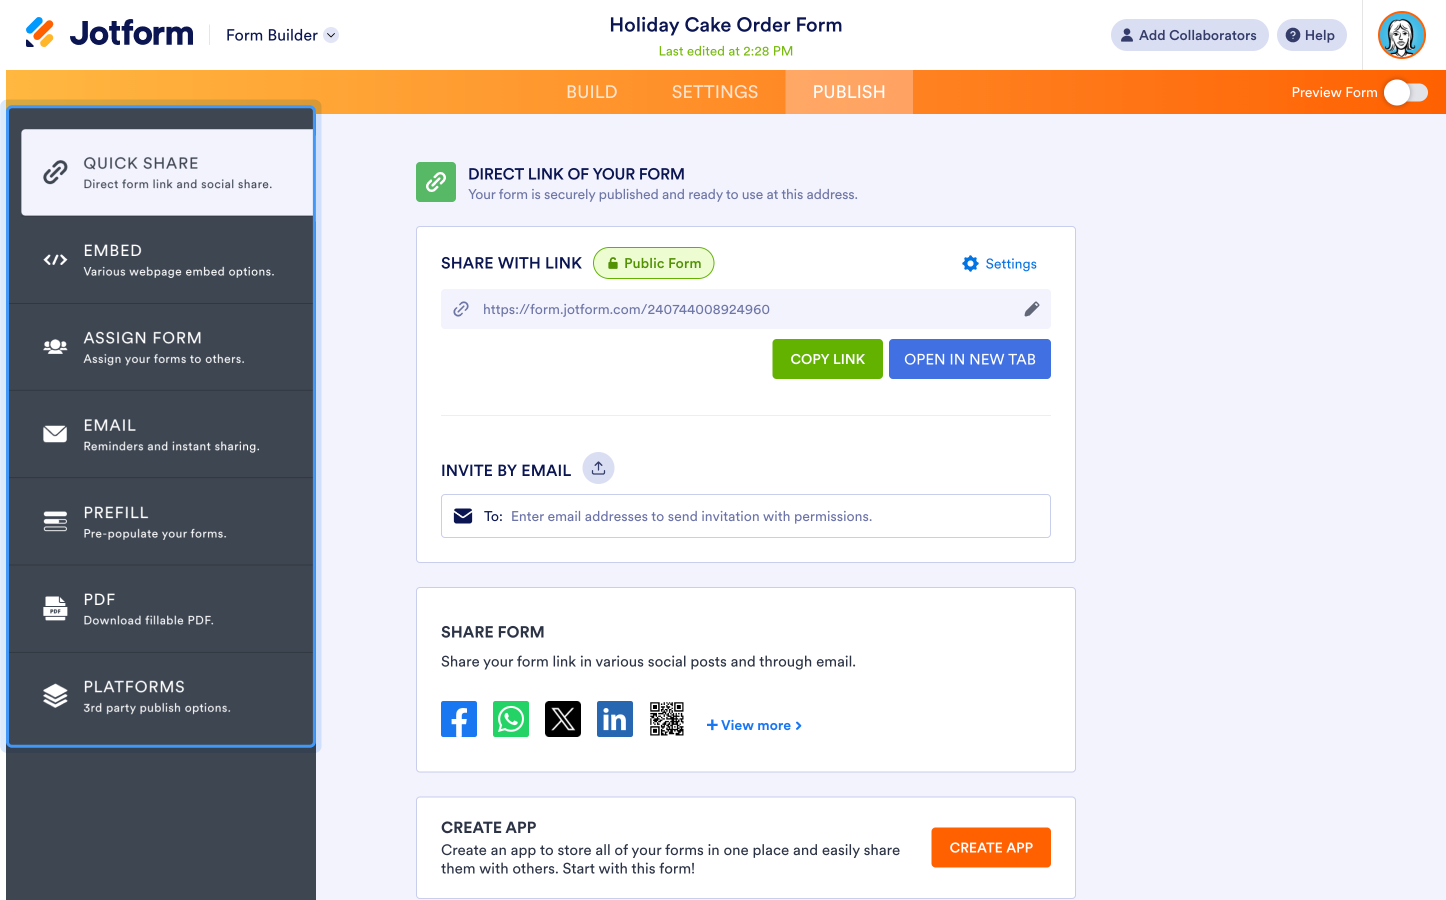
In the Publish tab, you can also increase your form conversion rates by creating a prefilled version of your form so your recipients don’t have to enter redundant information.
To get started, click on the Publish tab at the top of the page. Your options appear in the left navigation.
The default screen in the Publish tab lists your Quick Share options. You can quickly copy and paste your form’s link, send it to someone via email, or share your form on social media.
You can also create your own no-code app in a matter of minutes. The app can house one or all of your forms, which you can then share for anyone on their mobile device to fill out.
Did you know?
In 2023, almost 331,000 people used Jotform Apps to create their own app. That’s roughly half of the 667,000 total users that have created no-code apps since Jotform Apps became available to the public.
Creating an app is free.
Embed
If what you really need is a contact or order form that’s native to your website, you can make that happen in the Embed tab. Or if you want a registration form that’s presented in a lightbox when someone first visits your website, you can also do that in the Embed tab.
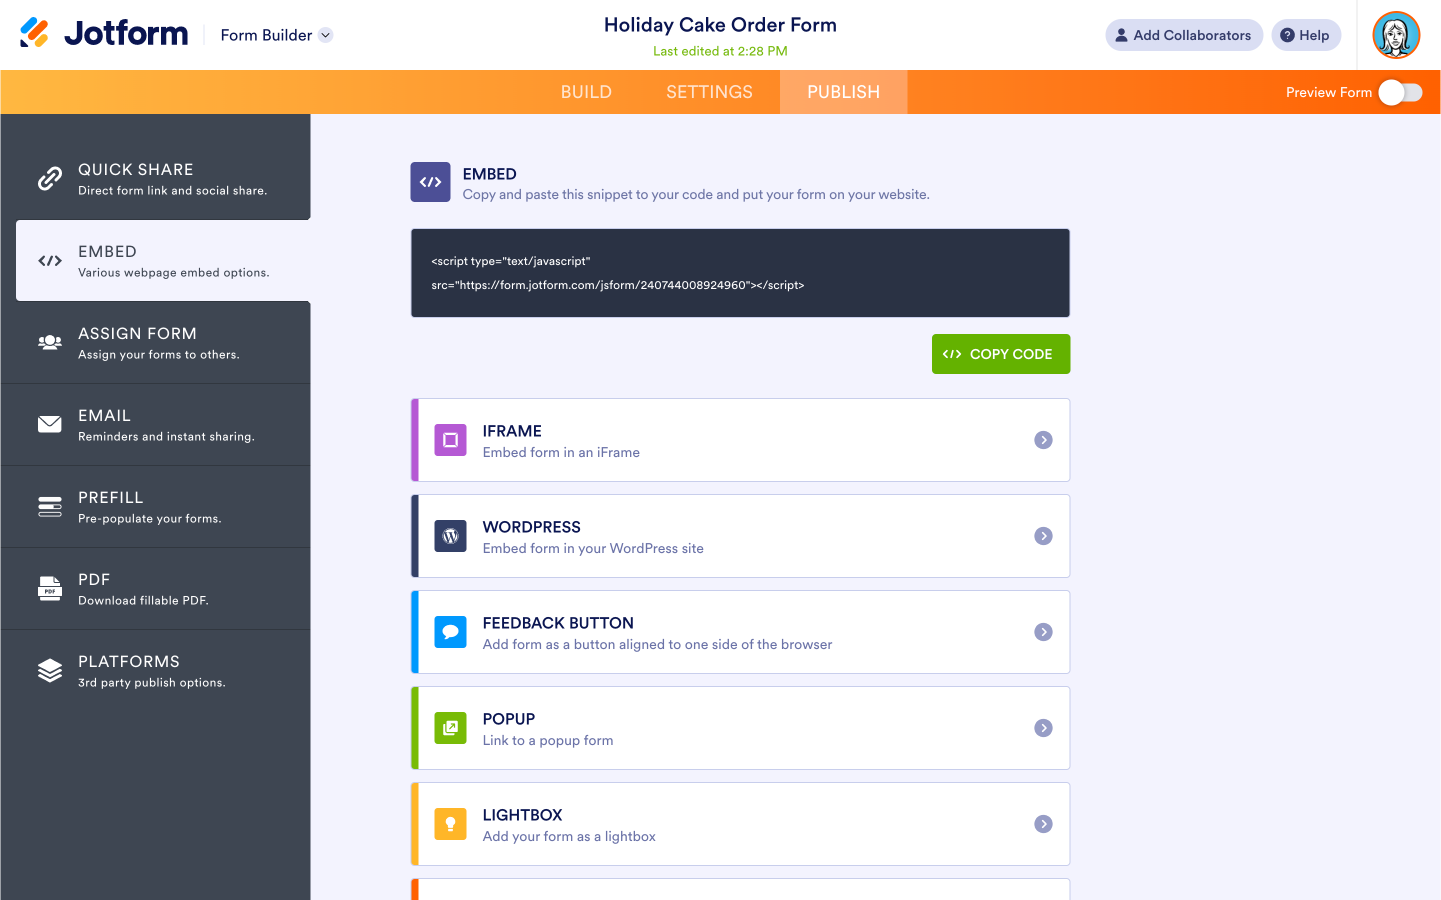
From the simplicity of copying and pasting HTML code, to adding a feedback option that scrolls along with your user, the customization options you need to successfully embed your form live here.
The best part? We generate the code for you, so it’s easy peasy.
Assign Form
Sometimes it’s harder than it should be to get the information you need. But by assigning a form to your recipients — or to stakeholders who can then distribute the form to collect data from others — you eliminate the back and forth.
The Assign by Email feature lets you use individual email addresses or a CSV upload to assign your form at scale. You can also create a shareable link and customize it with an expiration date.
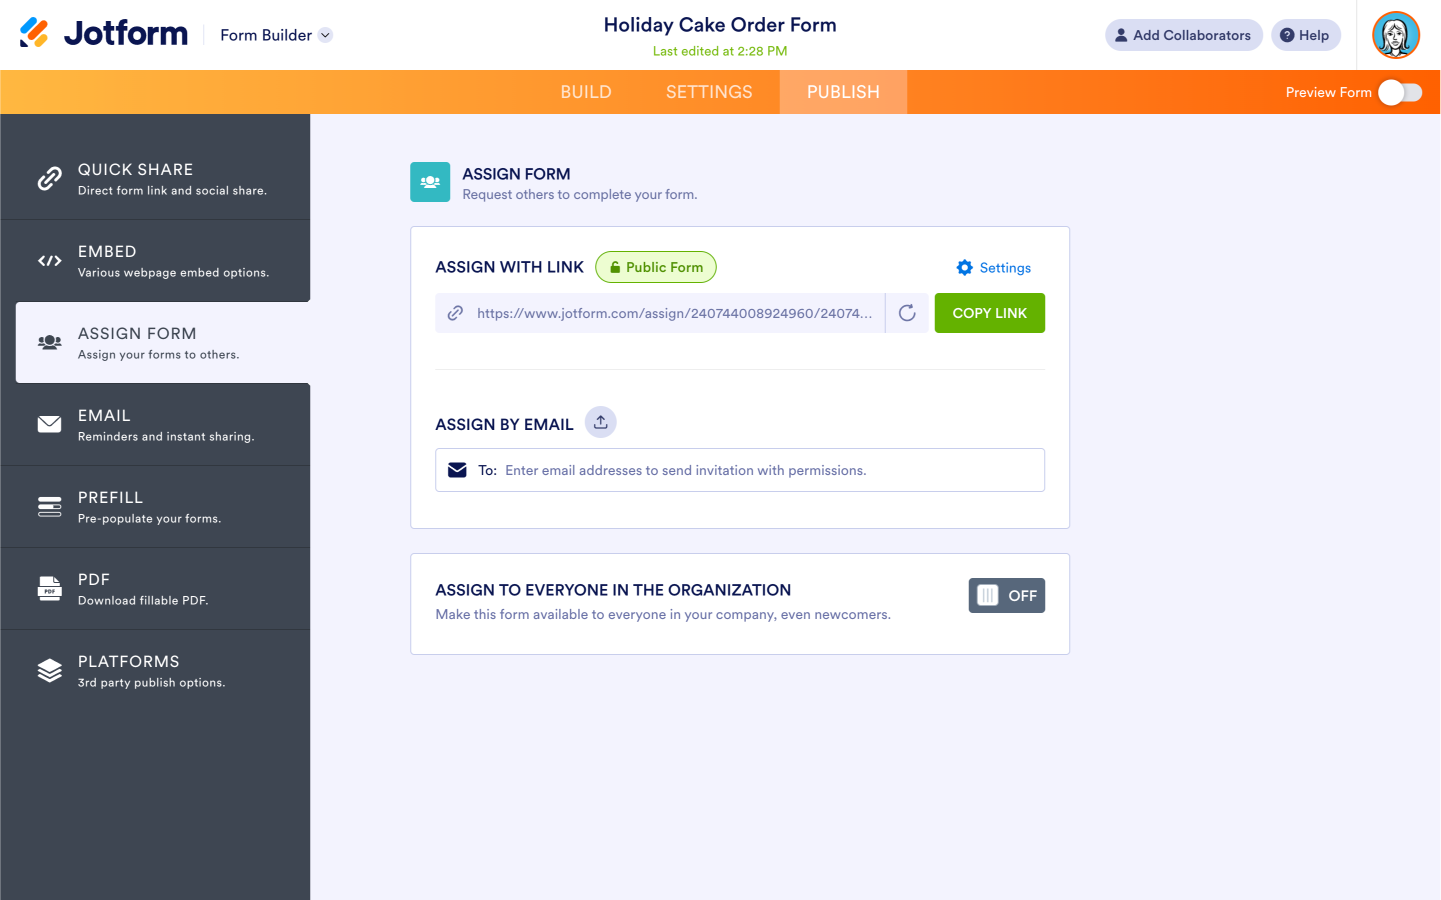
In the event you need to assign your form to your entire organization (release forms, work policies, etc.), toggle on the Assign to Everyone in the Organization switch. Note that this functionality is available to Enterprise accounts only.

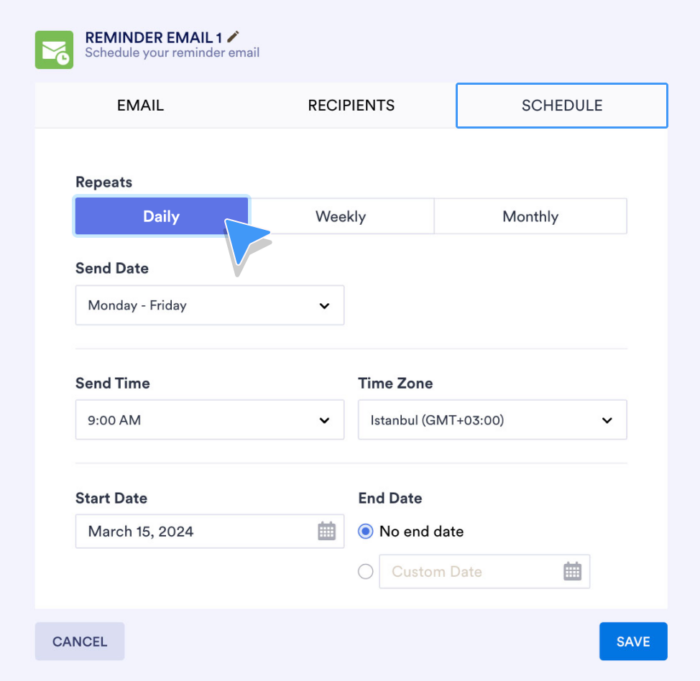
The Email tab is perfect if you need to send a link to your form directly within an email. But where it gets really handy is when you need to set up an automated reminder email that sends on the cadence of your choice.

Your reminder email’s content is totally customizable, as is your send schedule, with options including daily, weekly, monthly, and more.
Pro Tip:
You can add multiple email recipients per invitation email. However, please note that the Starter plan has a limit of 10 invitations per form via email invitation.
Prefill
You can send your forms prefilled with your respondents’ information (such as name, email, address, etc.). This saves your respondents’ time, and by doing so, improves your chances of having more forms completed.
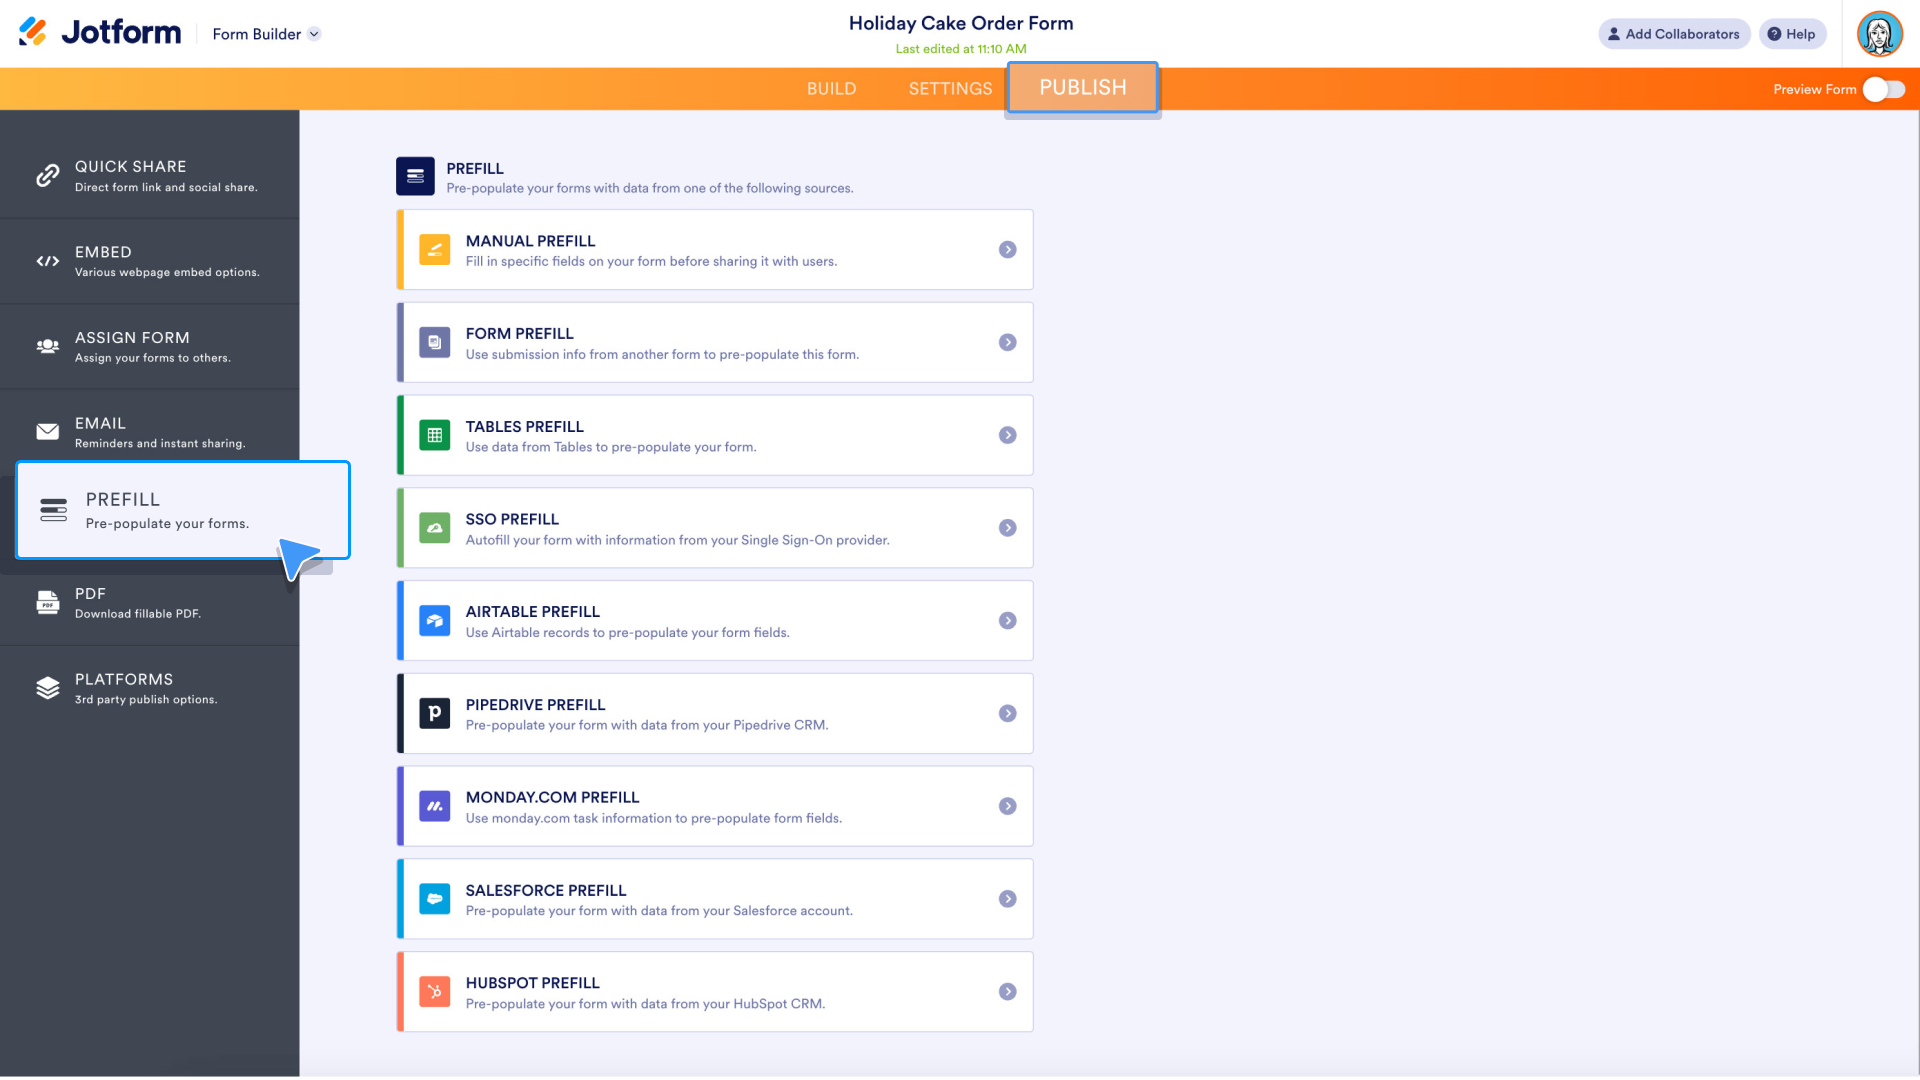
Use our Prefill tab to pre-populate your forms with respondent data that’s already stored in CRMs like Salesforce, Airtable, and HubSpot; internal management databases; Jotform Tables; SSO servers; and your other forms.
For third-party solutions, just authenticate your account and select the database from which you’d like to pull. For Jotform solutions, simply select the table or form you want to get data from.
Increasing your productivity with online forms is in our DNA, so naturally we created a way to convert your form into a fillable PDF.

Simply click the Download button in the PDF tab. A window will open, allowing you to create a fillable PDF from your form.
Note: Any design changes you make in a Fillable PDF form will affect your actual web form.
Platforms
In the Platforms tab, you can publish your form to over 30 different third-party web hosting platforms with a simple snippet of code.
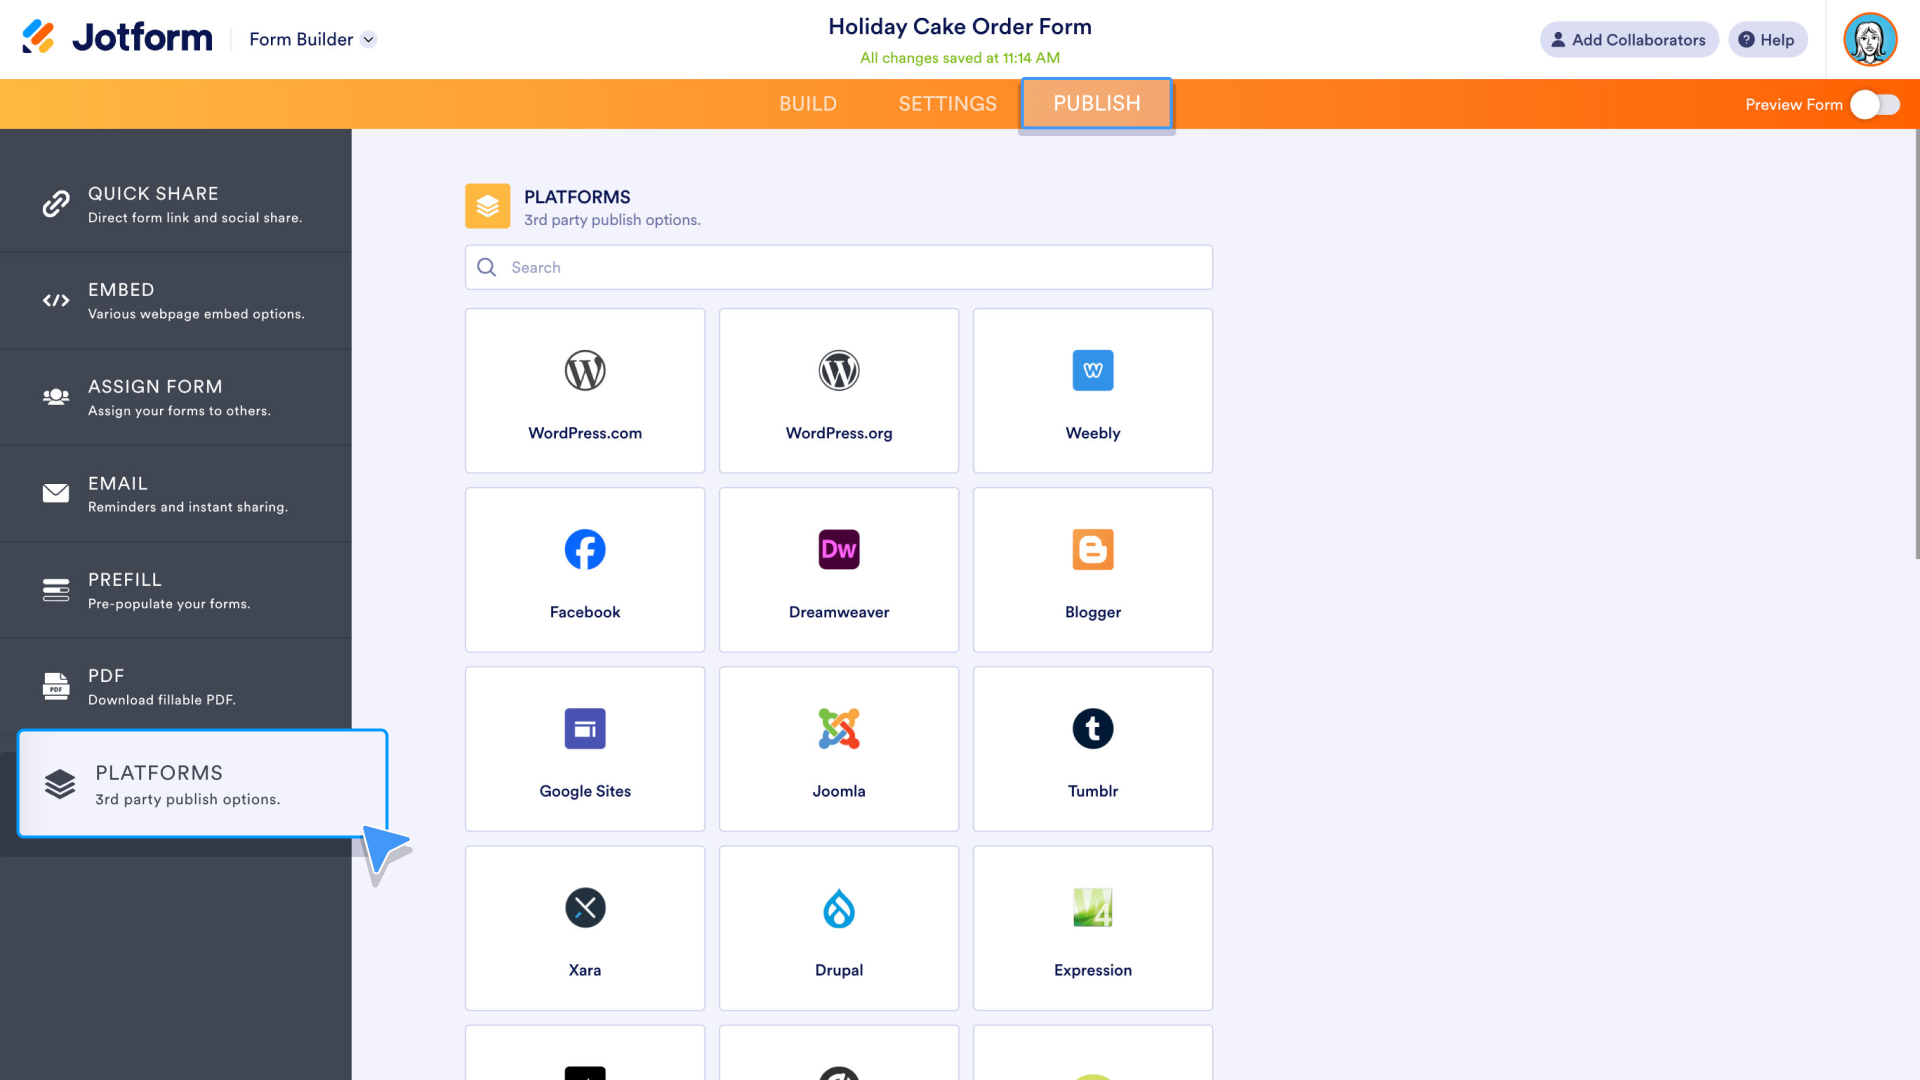
Select the platform you need. We’ll generate the code. It’s easy to copy and paste it into your blocks, or HTML, according to the instructions provided. Your form will be embedded in your site in seconds.
The automations above are just a taste of what you can do within the Publish section of the Form Builder.
For more information on each of our form publishing options, including tips and tricks for maximizing your productivity, be sure to check out "Jotform for Beginners, Vol. 1 & 2".