
4 steps to add choice eliminator to Google Forms
- In your Google Form, click the three vertical dots
- Select Add-ons
- Search for choice eliminator and choose Choice Eliminator Lite
- Click the Install button
When you use online forms to schedule appointments or sell products, you need to be sure customers aren’t choosing the same time slot or ordering a product that’s out of stock. Scheduling, inventory, and event signups can become messy and ineffective when people are still allowed to select options even after the available times or items are taken — leaving more work for you. That’s why using a reliable choice eliminator can be crucial to your form’s effectiveness.
A choice eliminator automatically removes an option from an online form once it’s been selected or a limit on that option has been reached. If Google Forms is your form builder of choice, you can use the Choice Eliminator add-on. Although it’s not as effective as other options — like Jotform’s appointment and inventory widgets — this add-on is free and easy to install.
Below, we cover how to add Choice Eliminator to Google Forms, how to use it, where the plug-in has problems, and how you can get more out of your forms with Jotform widgets.

Looking for the best alternative to Google Forms?
Jotform’s full-featured form-building solution is mobile-friendly and has the most integrations in the industry. Use it to collect payments, automate workflows, gather leads, and more.
What Choice Eliminator in Google Forms does and when you should use it
Choice Eliminator is an add-on application that you can use in Google Forms to limit the number of responses or the choices for responses based on a predetermined set of criteria. It’s not a native feature of Google Forms, but it’s free to use and easy to download and install.
Setting limits on form responses is useful in a variety of situations. It works best for dropdown questions, but you can also use it for other question formats such as multiple choice.
Let’s consider some common ways to use this application:
- Scheduling: If you use Google Forms for scheduling, such as for appointments, consultations, and meetings, you can use Choice Eliminator to automatically block certain dates or time slots when the limit is reached. For example, if you only want to book one meeting each day (or one for each hour of the workday), the option to book a meeting for that particular day or hour will become unavailable after one person has booked a meeting. This saves you from dealing with scheduling hiccups and overly full calendars.
- Event planning: If you use Google Forms to plan events with friends and family, Choice Eliminator can help you organize the dishes that everyone will bring to a potluck. Use a dropdown question with food choices as the options. When someone clicks on an option, Choice Eliminator will automatically remove it as an option so people don’t bring duplicate dishes. This way, you won’t end up with 10 salads and no dessert!
- Product sales: If you use Google Forms to sell products but only have a very limited inventory, you can eliminate products from the order list once someone has ordered one of them. This way, people will no longer have the option to select that product in the order form. This saves you from having to contact customers who ordered out-of-stock items and provide them with a refund.
How to add Choice Eliminator to Google Forms
Before you can use the Choice Eliminator add-on, you need to build a form. It’s important not to repeat answer options exactly, as Choice Eliminator can’t tell the difference between them. For example, building a signup form with two 1 p.m. time slots could lead to potential overbooking, so you could differentiate the options by adding the date as well as the time.
After you build your form, installing the Choice Eliminator plug-in is quick and easy:
After you build your form, installing the Choice Eliminator plug-in is quick and easy:
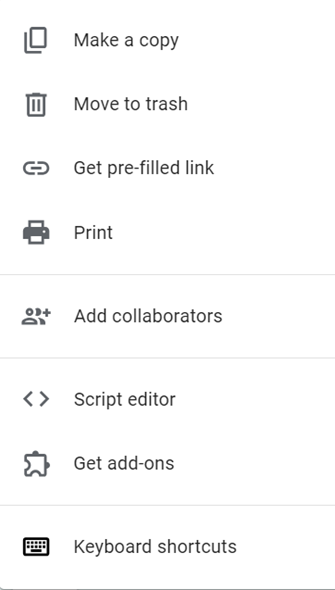
- In your Google Form, click the three vertical dots in the top-right corner.

- Select Get add-ons.
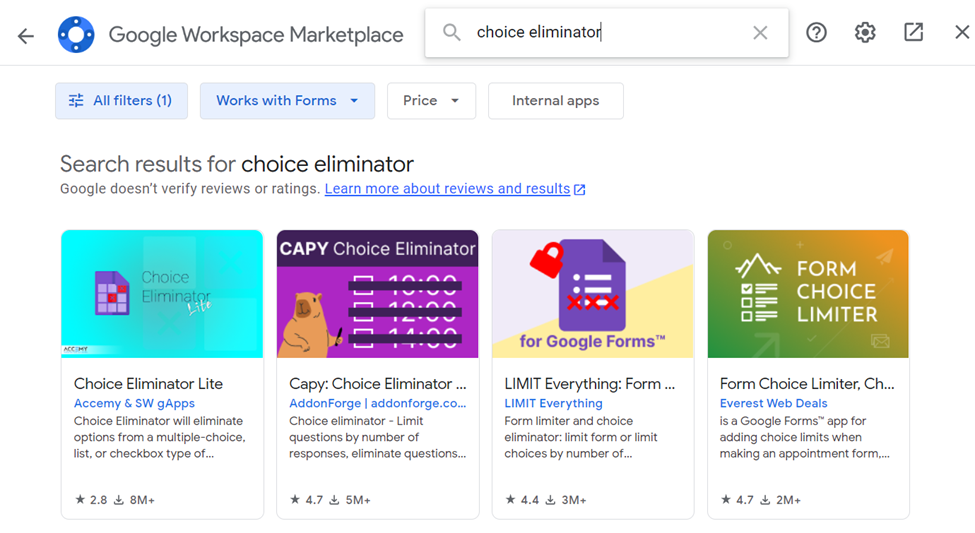
- Search for “choice eliminator” and choose Choice Eliminator Lite.
Create forms seamlessly in Google Workspace with Form Builder by Jotform. Discover more now!
- Click the Install button.
Once the add-on is installed, you can access it through the add-ons button (shaped like a puzzle piece) in the top menu.
How to use Choice Eliminator
Now that you’ve installed Choice Eliminator Lite, it’s time to add it to your questions. Choice Eliminator works best with dropdown questions.
- Click on the dropdown question you want to limit.
- Click the Add-ons button and select Choice Eliminator Lite, then click Configure.
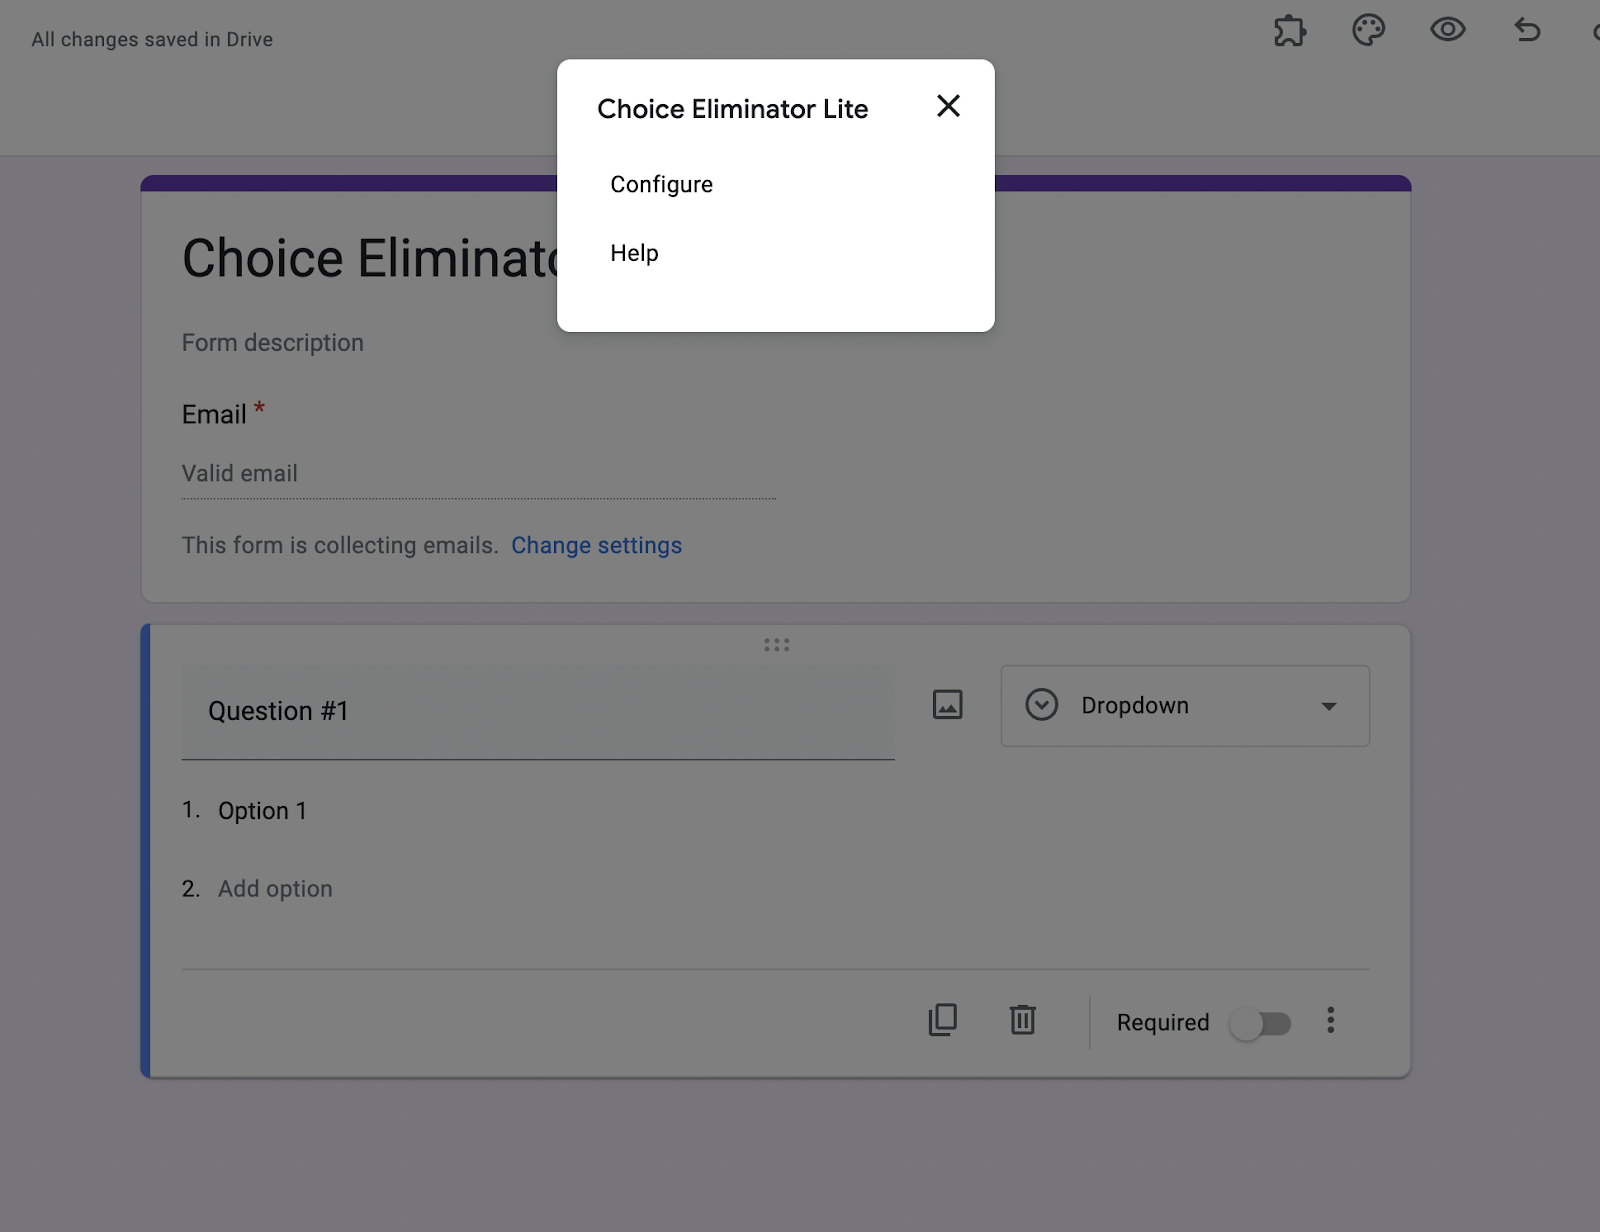
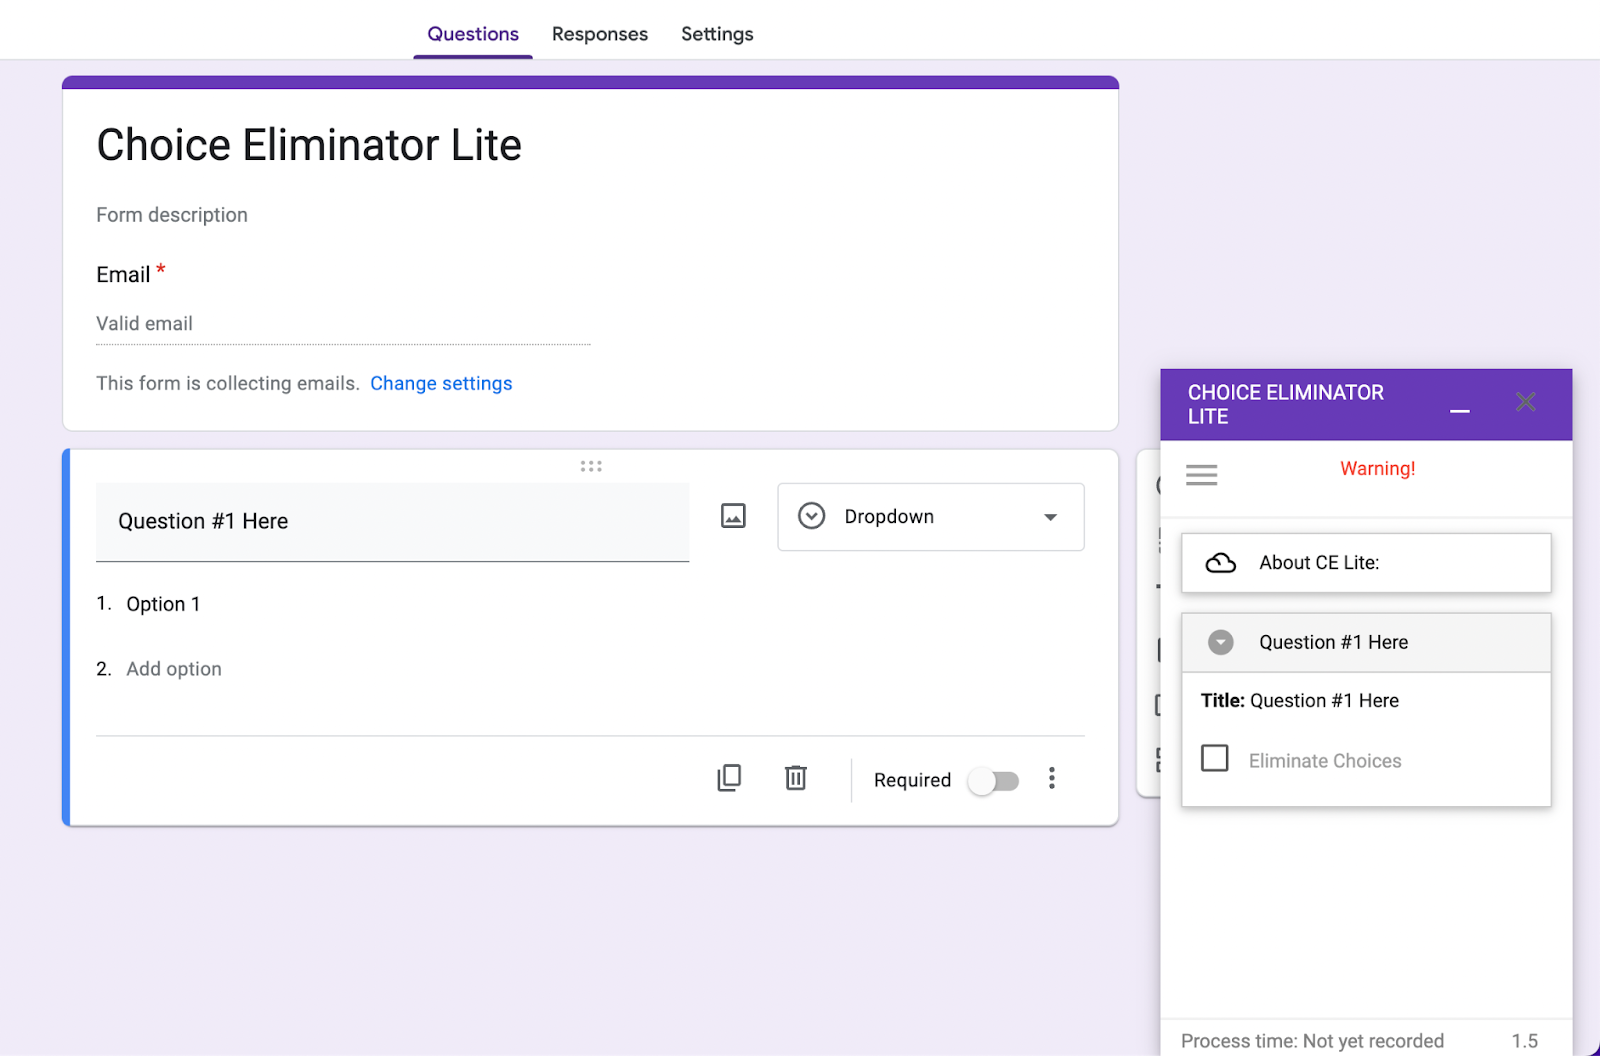
- A box will pop up for you to configure your option limits. Select the question you want to configure, then click Eliminate Options.
After you’ve added Choice Eliminator to any questions you’d like to place limits on, be sure to test it. Send yourself a link to make sure your form works before sending it to respondents.
Unfortunately, there isn’t an option to set numerical limits on options; Choice Eliminator Lite simply removes a choice after one person selects it.
Where Choice Eliminator falls short
Once you’ve learned how to add Choice Eliminator to Google Forms, why would you consider an alternative? The answer is simple: Choice Eliminator is glitchy and unreliable, with limited functionality. The add-on has had many different versions, and each has earned a lower rating than the last.
The current version, Choice Eliminator Lite, is only meant for a single user to access it at a time. The product description even describes the plug-in as “unreliable when multiple people are taking the form at the same time.” If multiple users can’t reliably use this functionality simultaneously, the add-on isn’t useful in most cases. This, coupled with a lack of updates, makes Choice Eliminator a sub-par option that may not accomplish what you need it to.
Why Choice Eliminator for Google Forms isn’t the best choice
While it only takes a few minutes to learn how to add Choice Eliminator to Google Forms, you may spend much longer correcting its mistakes. If you need a free choice elimination option for your form, consider using Jotform. Jotform’s advanced widgets save you time and headaches so you can be sure you’re getting accurate data in every form.
How Jotform’s appointment and inventory widgets make choice elimination easier
If you plan to use your forms to help run an event or a business, you can’t afford to have mistakes create problems for you — like people over-ordering or signing up for the same time slot. Since you can’t expect people to use your form one at a time, you may want to consider a more reliable option.
The Jotform Form Builder gives you the options you need — without requiring any added effort. You can build forms to schedule appointments with premade templates and the Appointment Slots widget. This widget will help you build an accurate schedule from your responses so you never double-book.
Using a form to sell a product or service? Jotform’s inventory widget helps you track available items so your customers can have the most accurate information possible. Just enter the quantity of a product or service you have, and Jotform will eliminate that option automatically at its limit. You can also use the widget to limit group signups by size or group number — it’s that simple. Give Jotform a try today.


")


Send Comment: